Quick Start Guide
Introduction
In this quick start guide, we will be learning some fundamentals on how to set up ZITADEL for user management and application security. Thereafter, we will secure a React-based Single Page Application (SPA) using ZITADEL.
The sample application allows users to securely log in to ZITADEL using the OIDC Proof Key for Code Exchange (PKCE) flow. This flow ensures that the authentication process is secure by using a code verifier and a code challenge, which are sent to ZITADEL to obtain an access token. The access token is then used by the app to access the userinfo endpoint to retrieve and display information about the logged-in user. The app also has a logout feature that allows users to end their session and clear their access token. Overall, the app provides a simple and secure way for users to authenticate and access protected resources within ZITADEL.
ZITADEL Terminology: Instances, Organizations, Projects, Users, Roles, Authorizations and Apps
In ZITADEL, instances, organizations, projects, users, roles, and apps are the main components that make up the platform.
The order of creation for the above components would typically be as follows:
- Instance: An instance is a top-level entity in ZITADEL that represents a deployment of ZITADEL for a registered account. An instance can have one or more organizations.
- Organization: An organization is a logical separation within an instance that represents a company/organization and can have one or more projects. The default organization is the one that is provided at the start of the account registration process. Typically, an instance would have one organization, but in B2B scenarios, an instance would have more than one.
- Project: A project is a logical separation within an organization and is a container for apps, roles and authorization policies for the resources it contains.
- Users: Users are created at the organizational level and are granted access to the resources within projects. They can be assigned different roles, which define the permissions and privileges they have within the project.
- Roles: Roles are the sets of permissions and privileges that are assigned to users within a project.
- Authorizations: Authorization policies in ZITADEL are defined at the project level, which means that they apply to all the resources within the project. These policies are based on the roles that are assigned to users, and they determine the actions that users are allowed to perform within the project.
- Apps: Apps are the applications that are developed and managed within a project. They can be client apps that use the resources within the project, or they can be backend apps that provide the resources for other apps to use. The apps can use the OIDC or SAML protocol to authenticate users to access protected resources.
The order of creation for the above components may vary depending on the specific needs and requirements of the organization.
Set Up and Manage ZITADEL for your Identity Projects
1. Sign up for the ZITADEL Cloud Customer Portal and Register your Organization
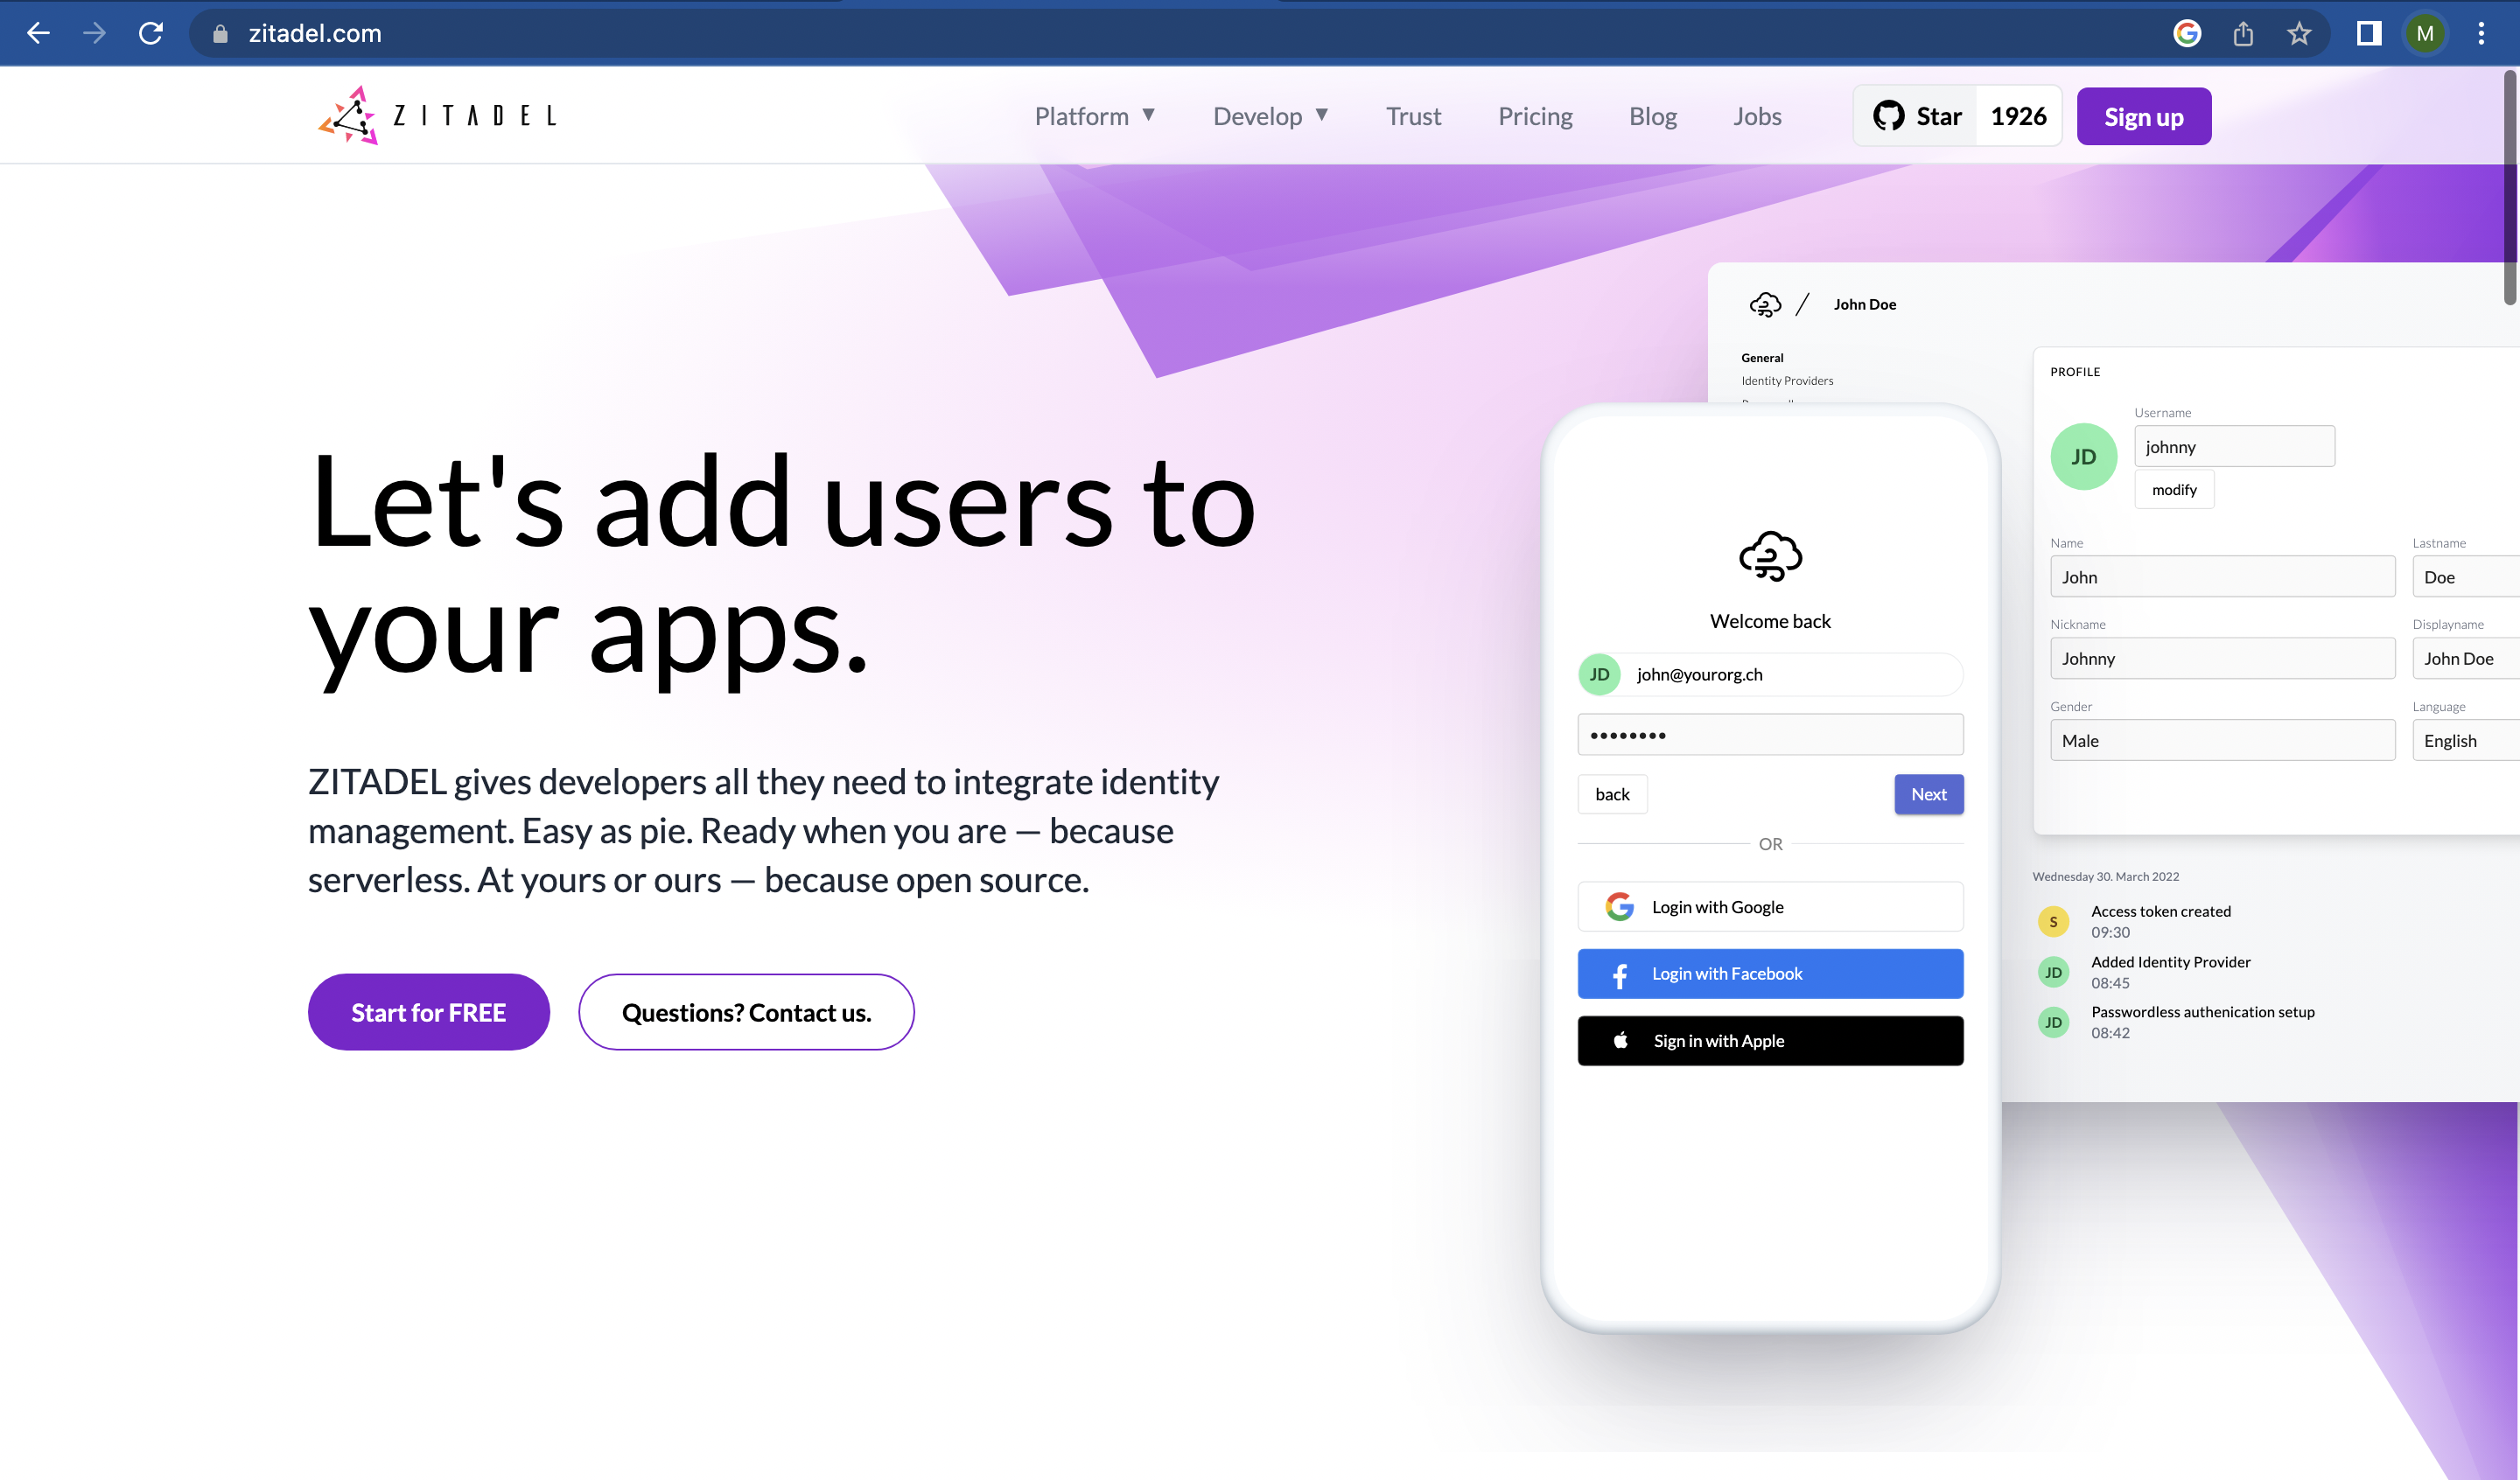
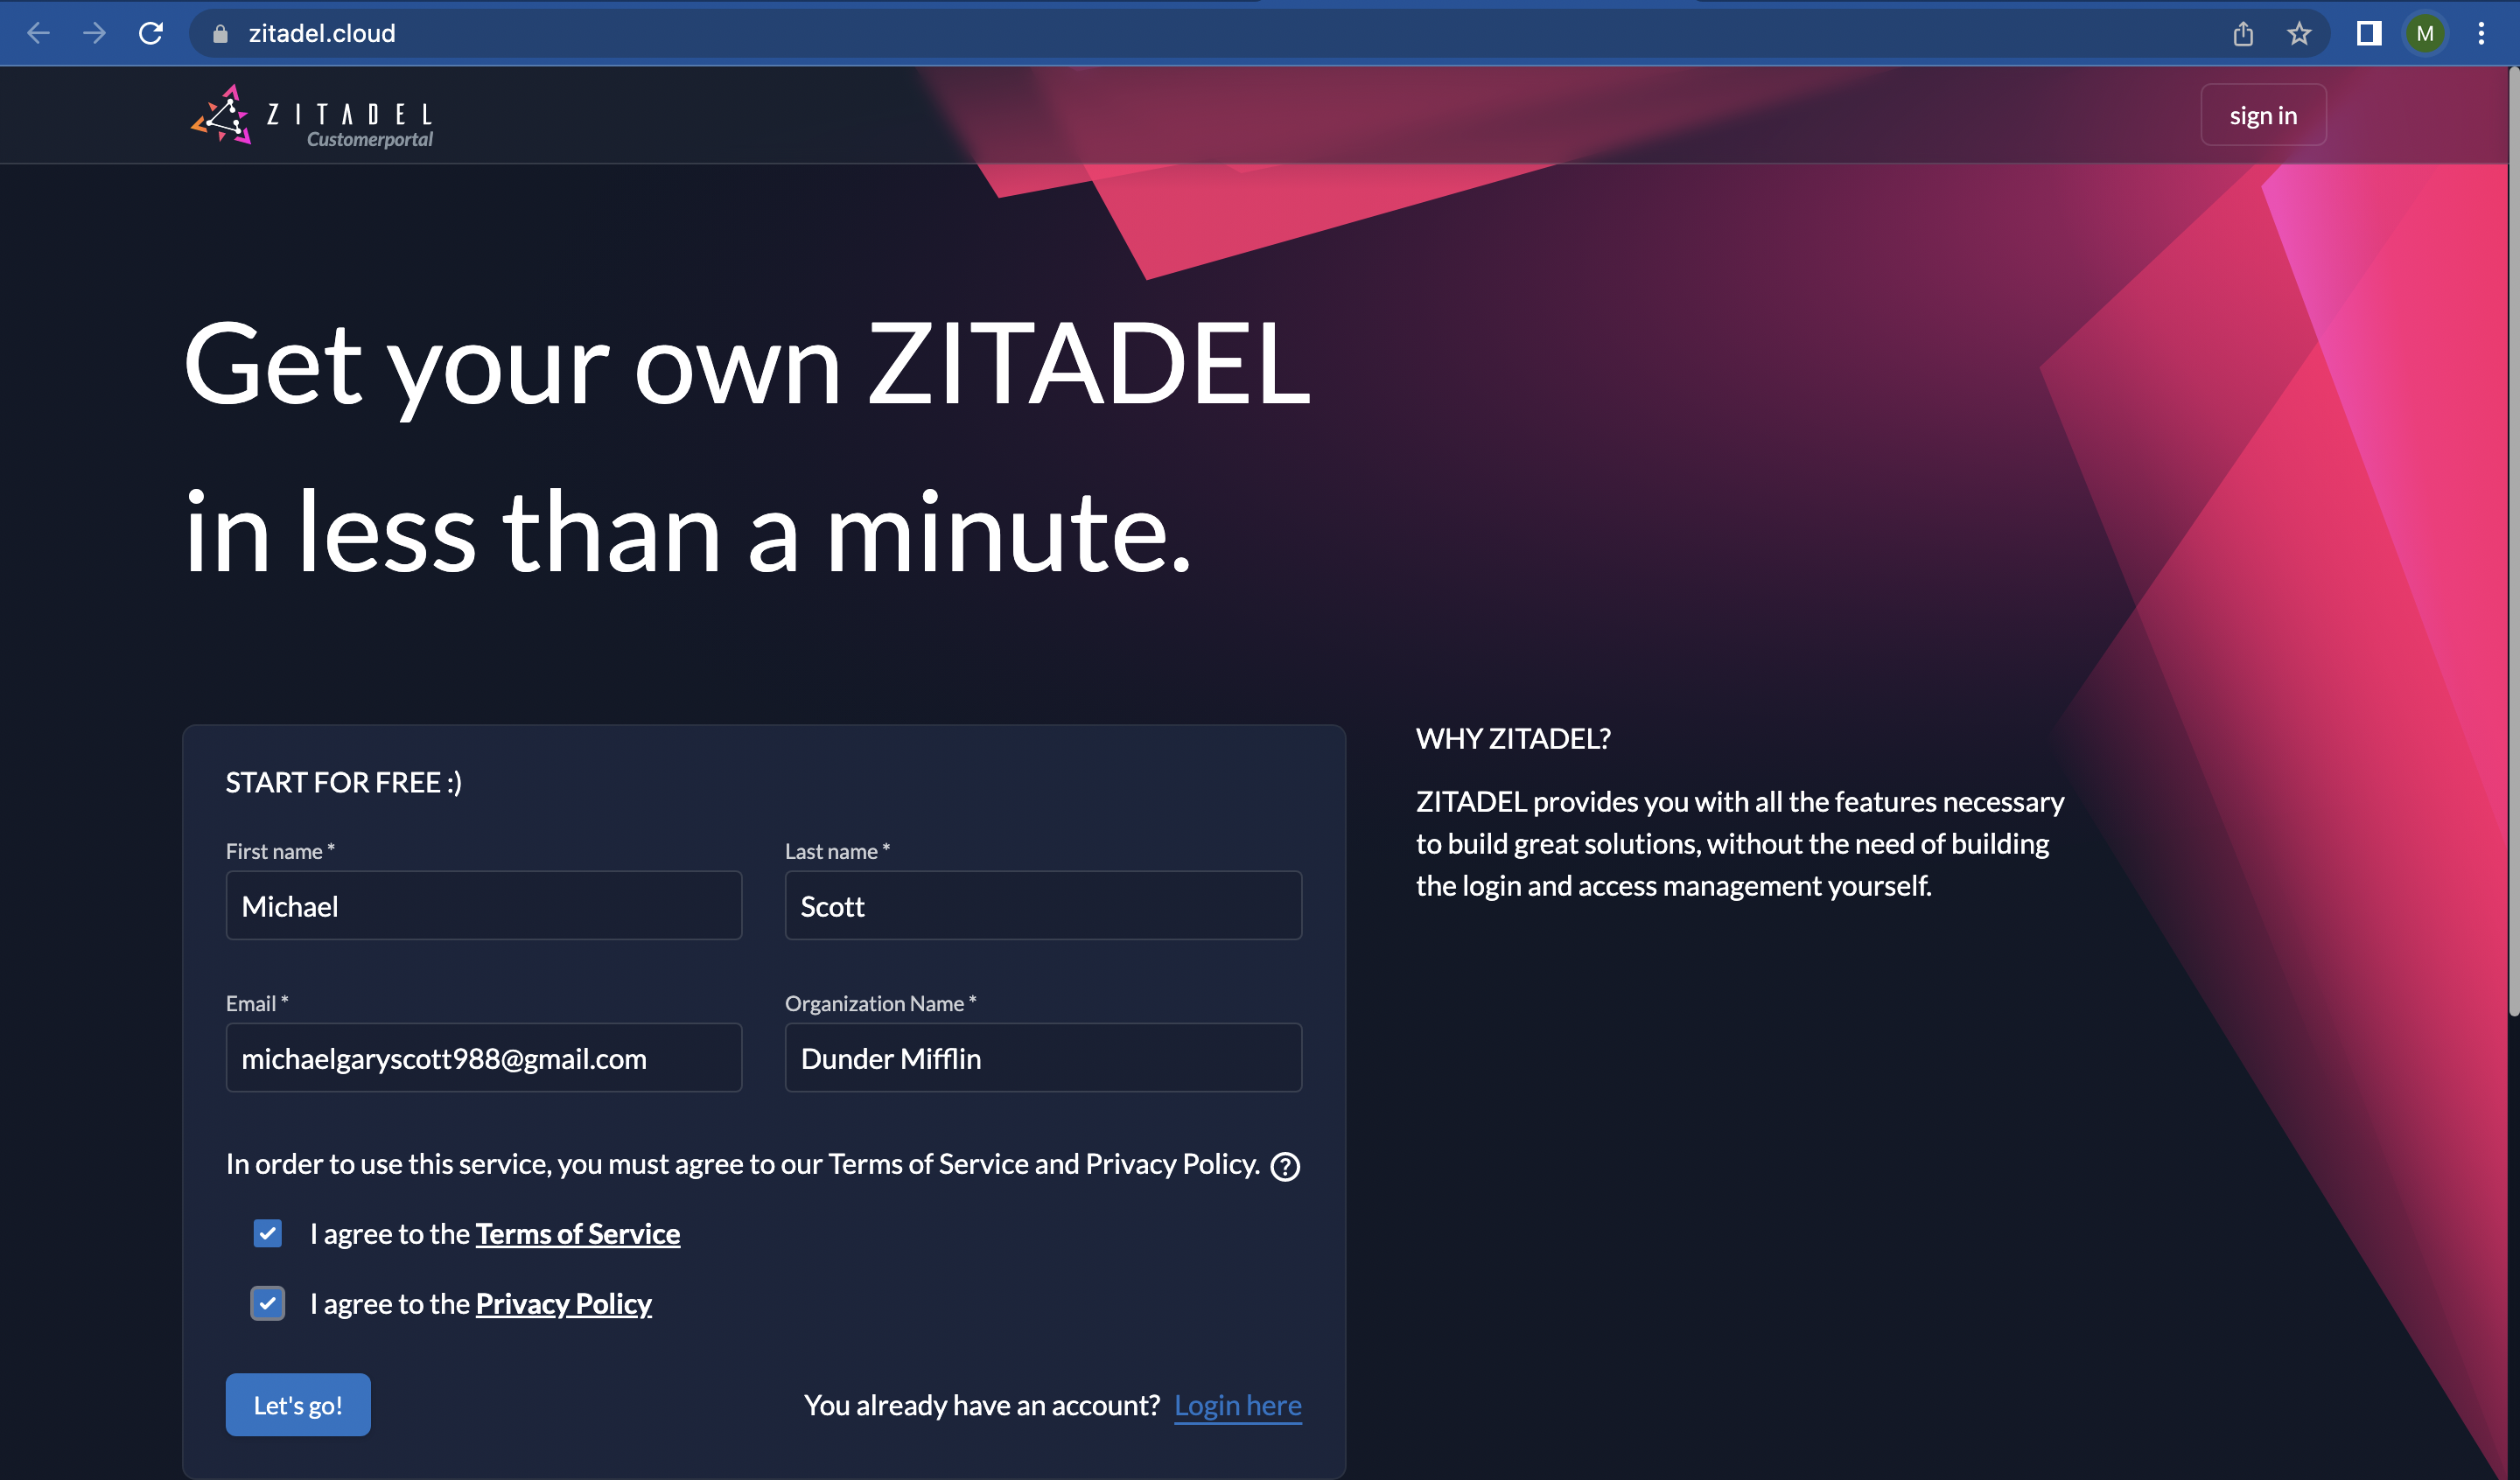
- Go to zitadel.com and click on “Start for FREE”.
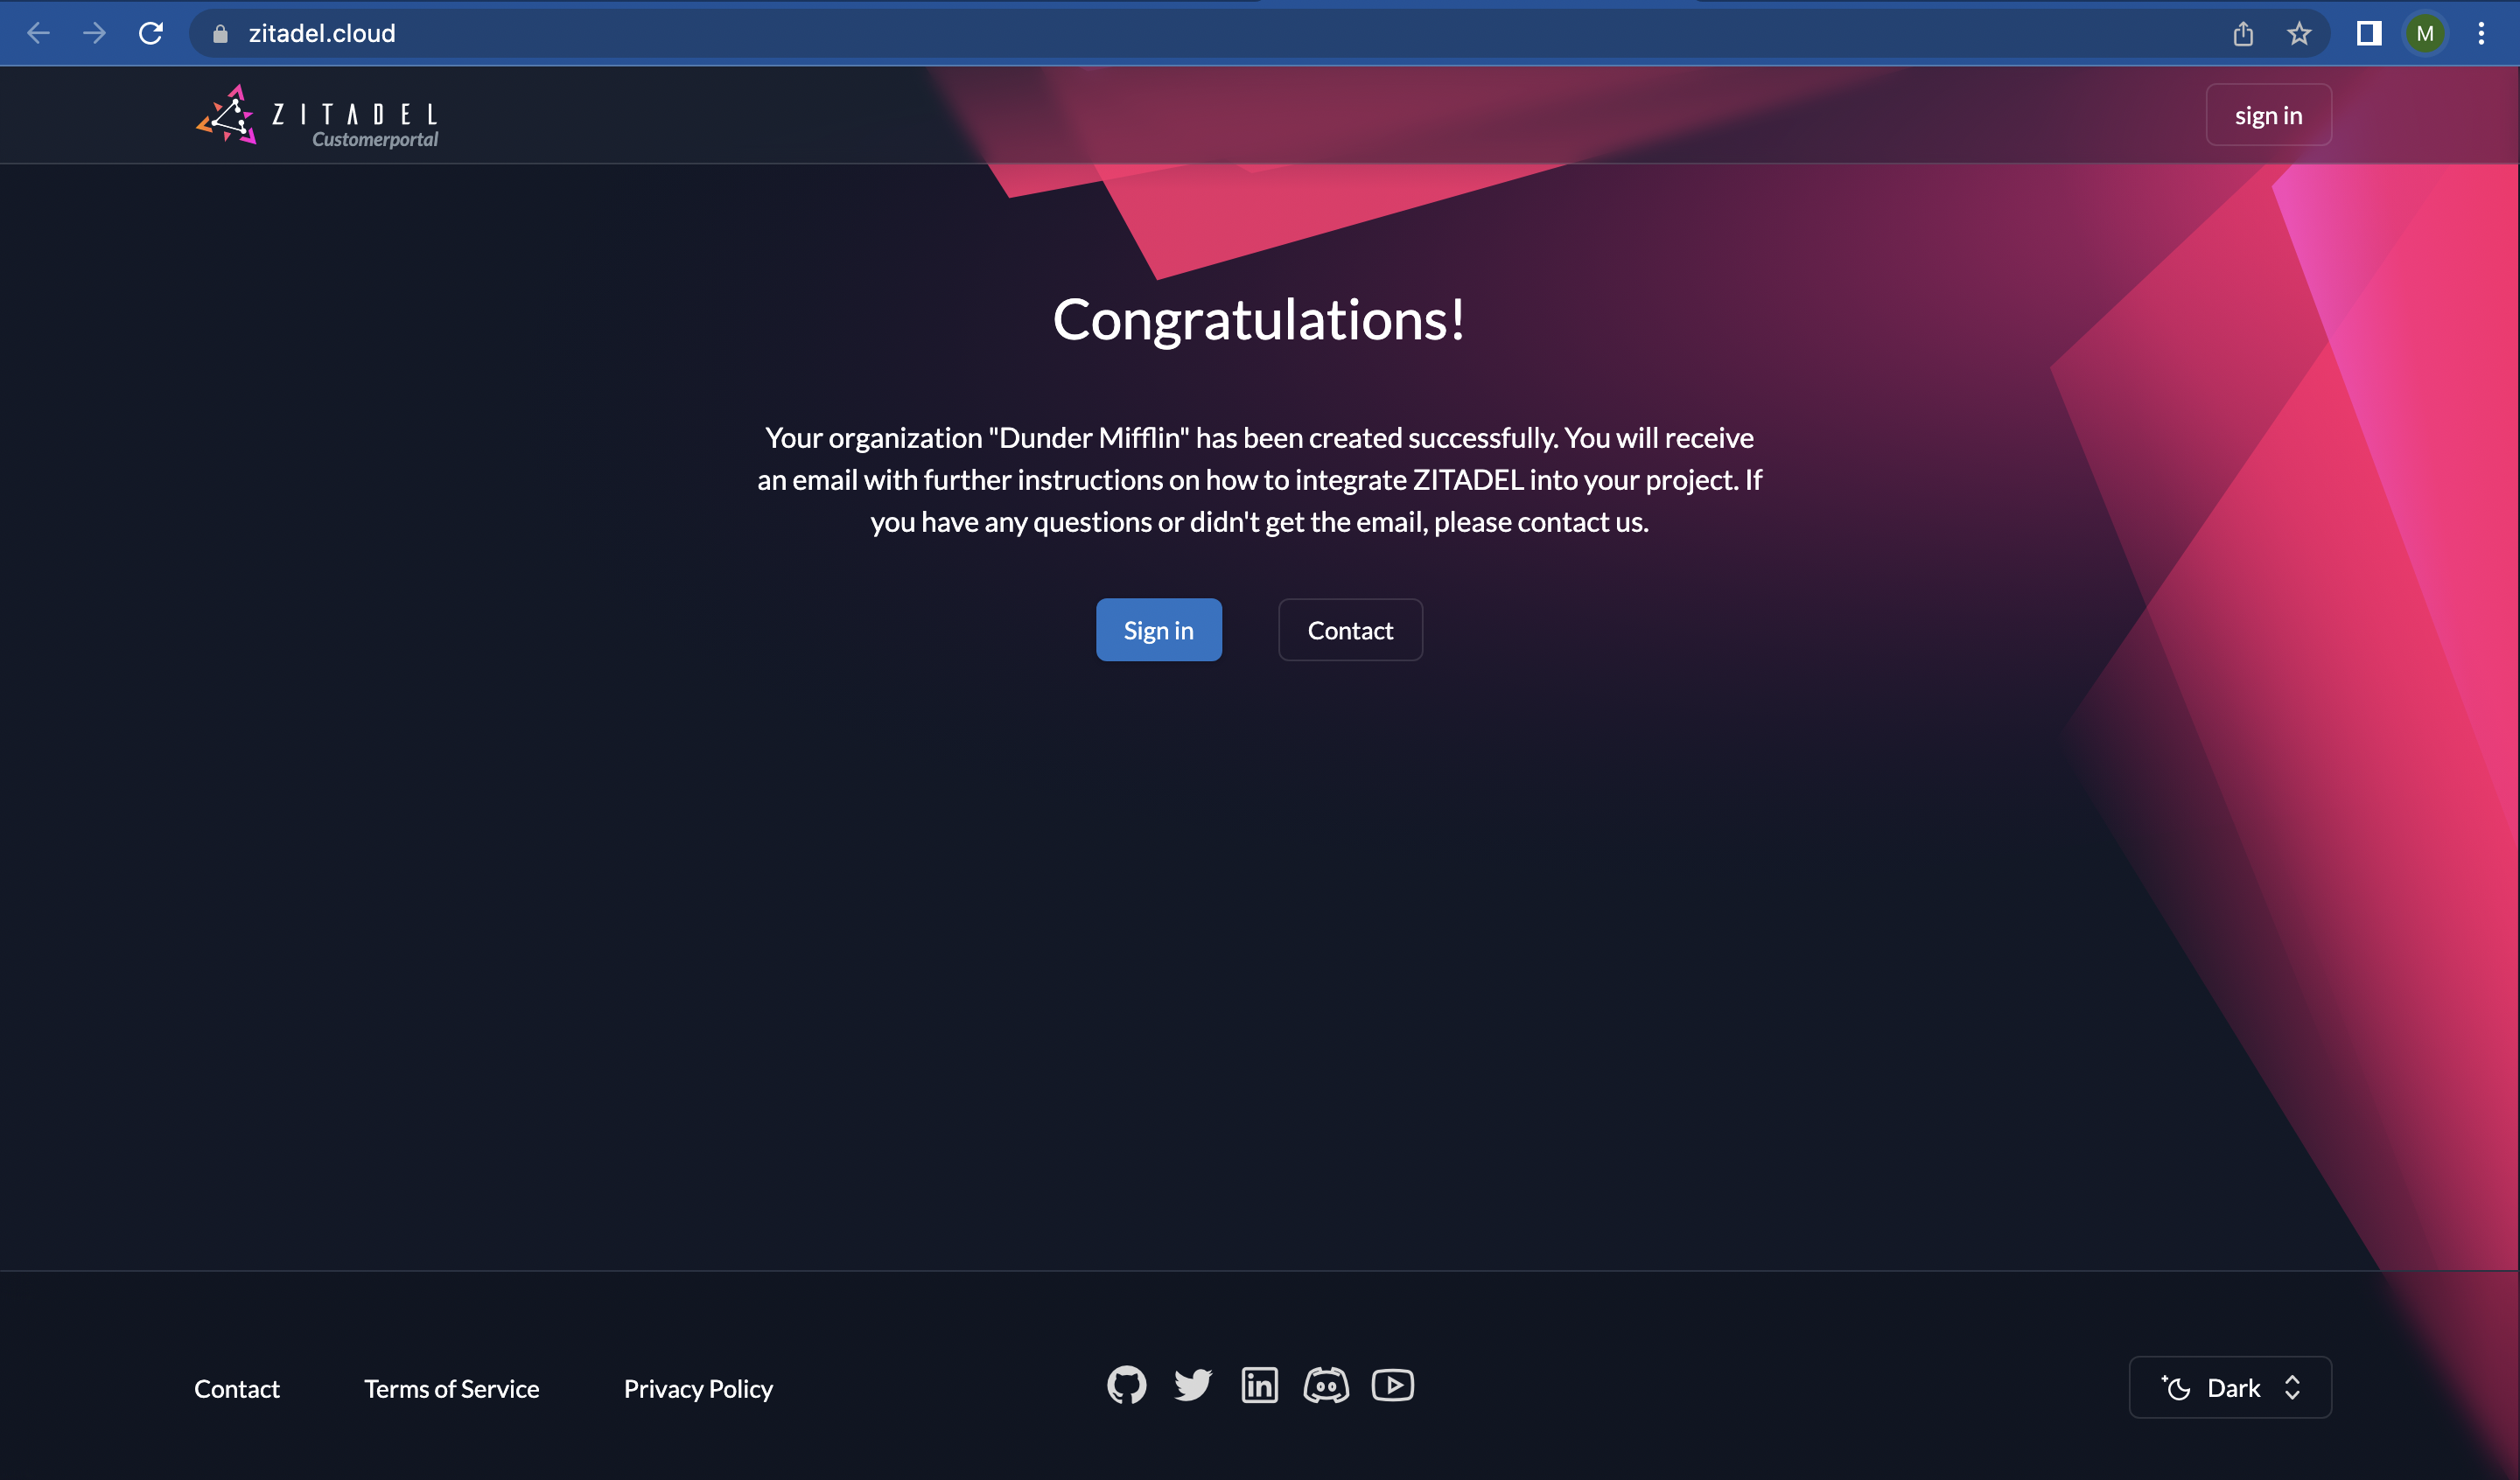
- Enter your details as shown below and click the "Let's go" button.
- You will receive a verification email to verify the user for the Customer Portal. Click the “Sign in” button.
- You will be prompted for a code, which has been emailed to you.
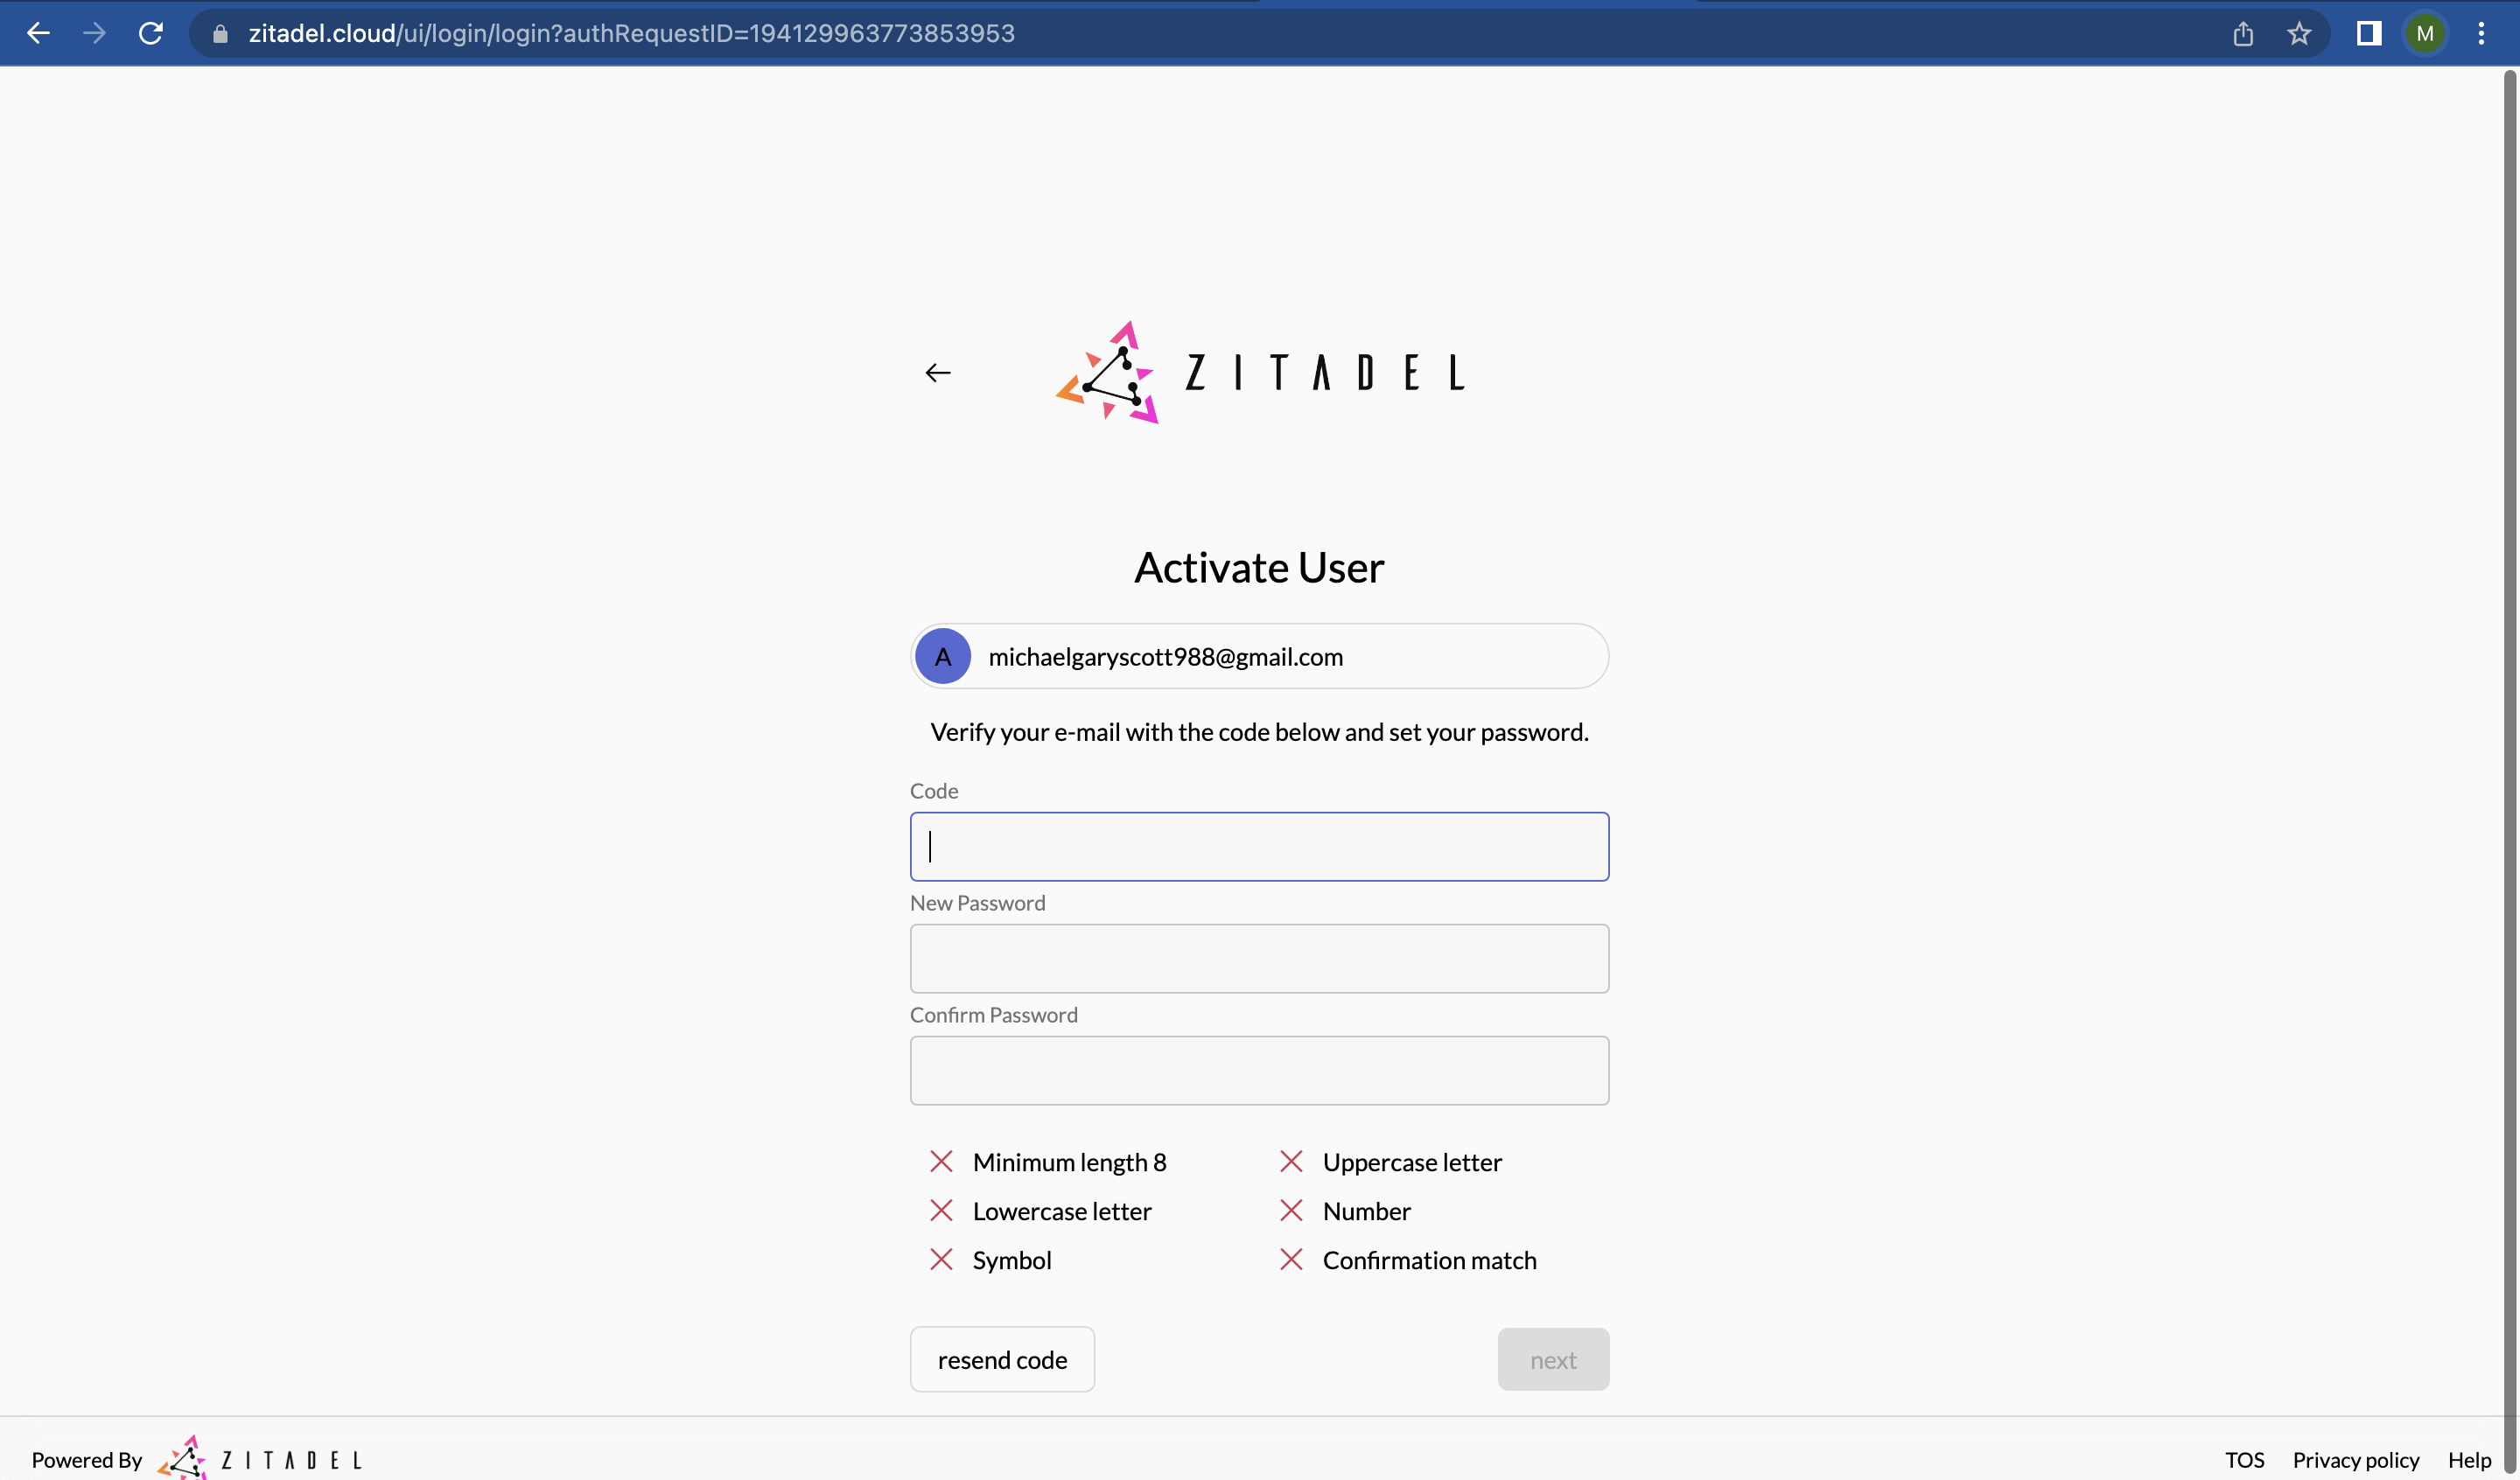
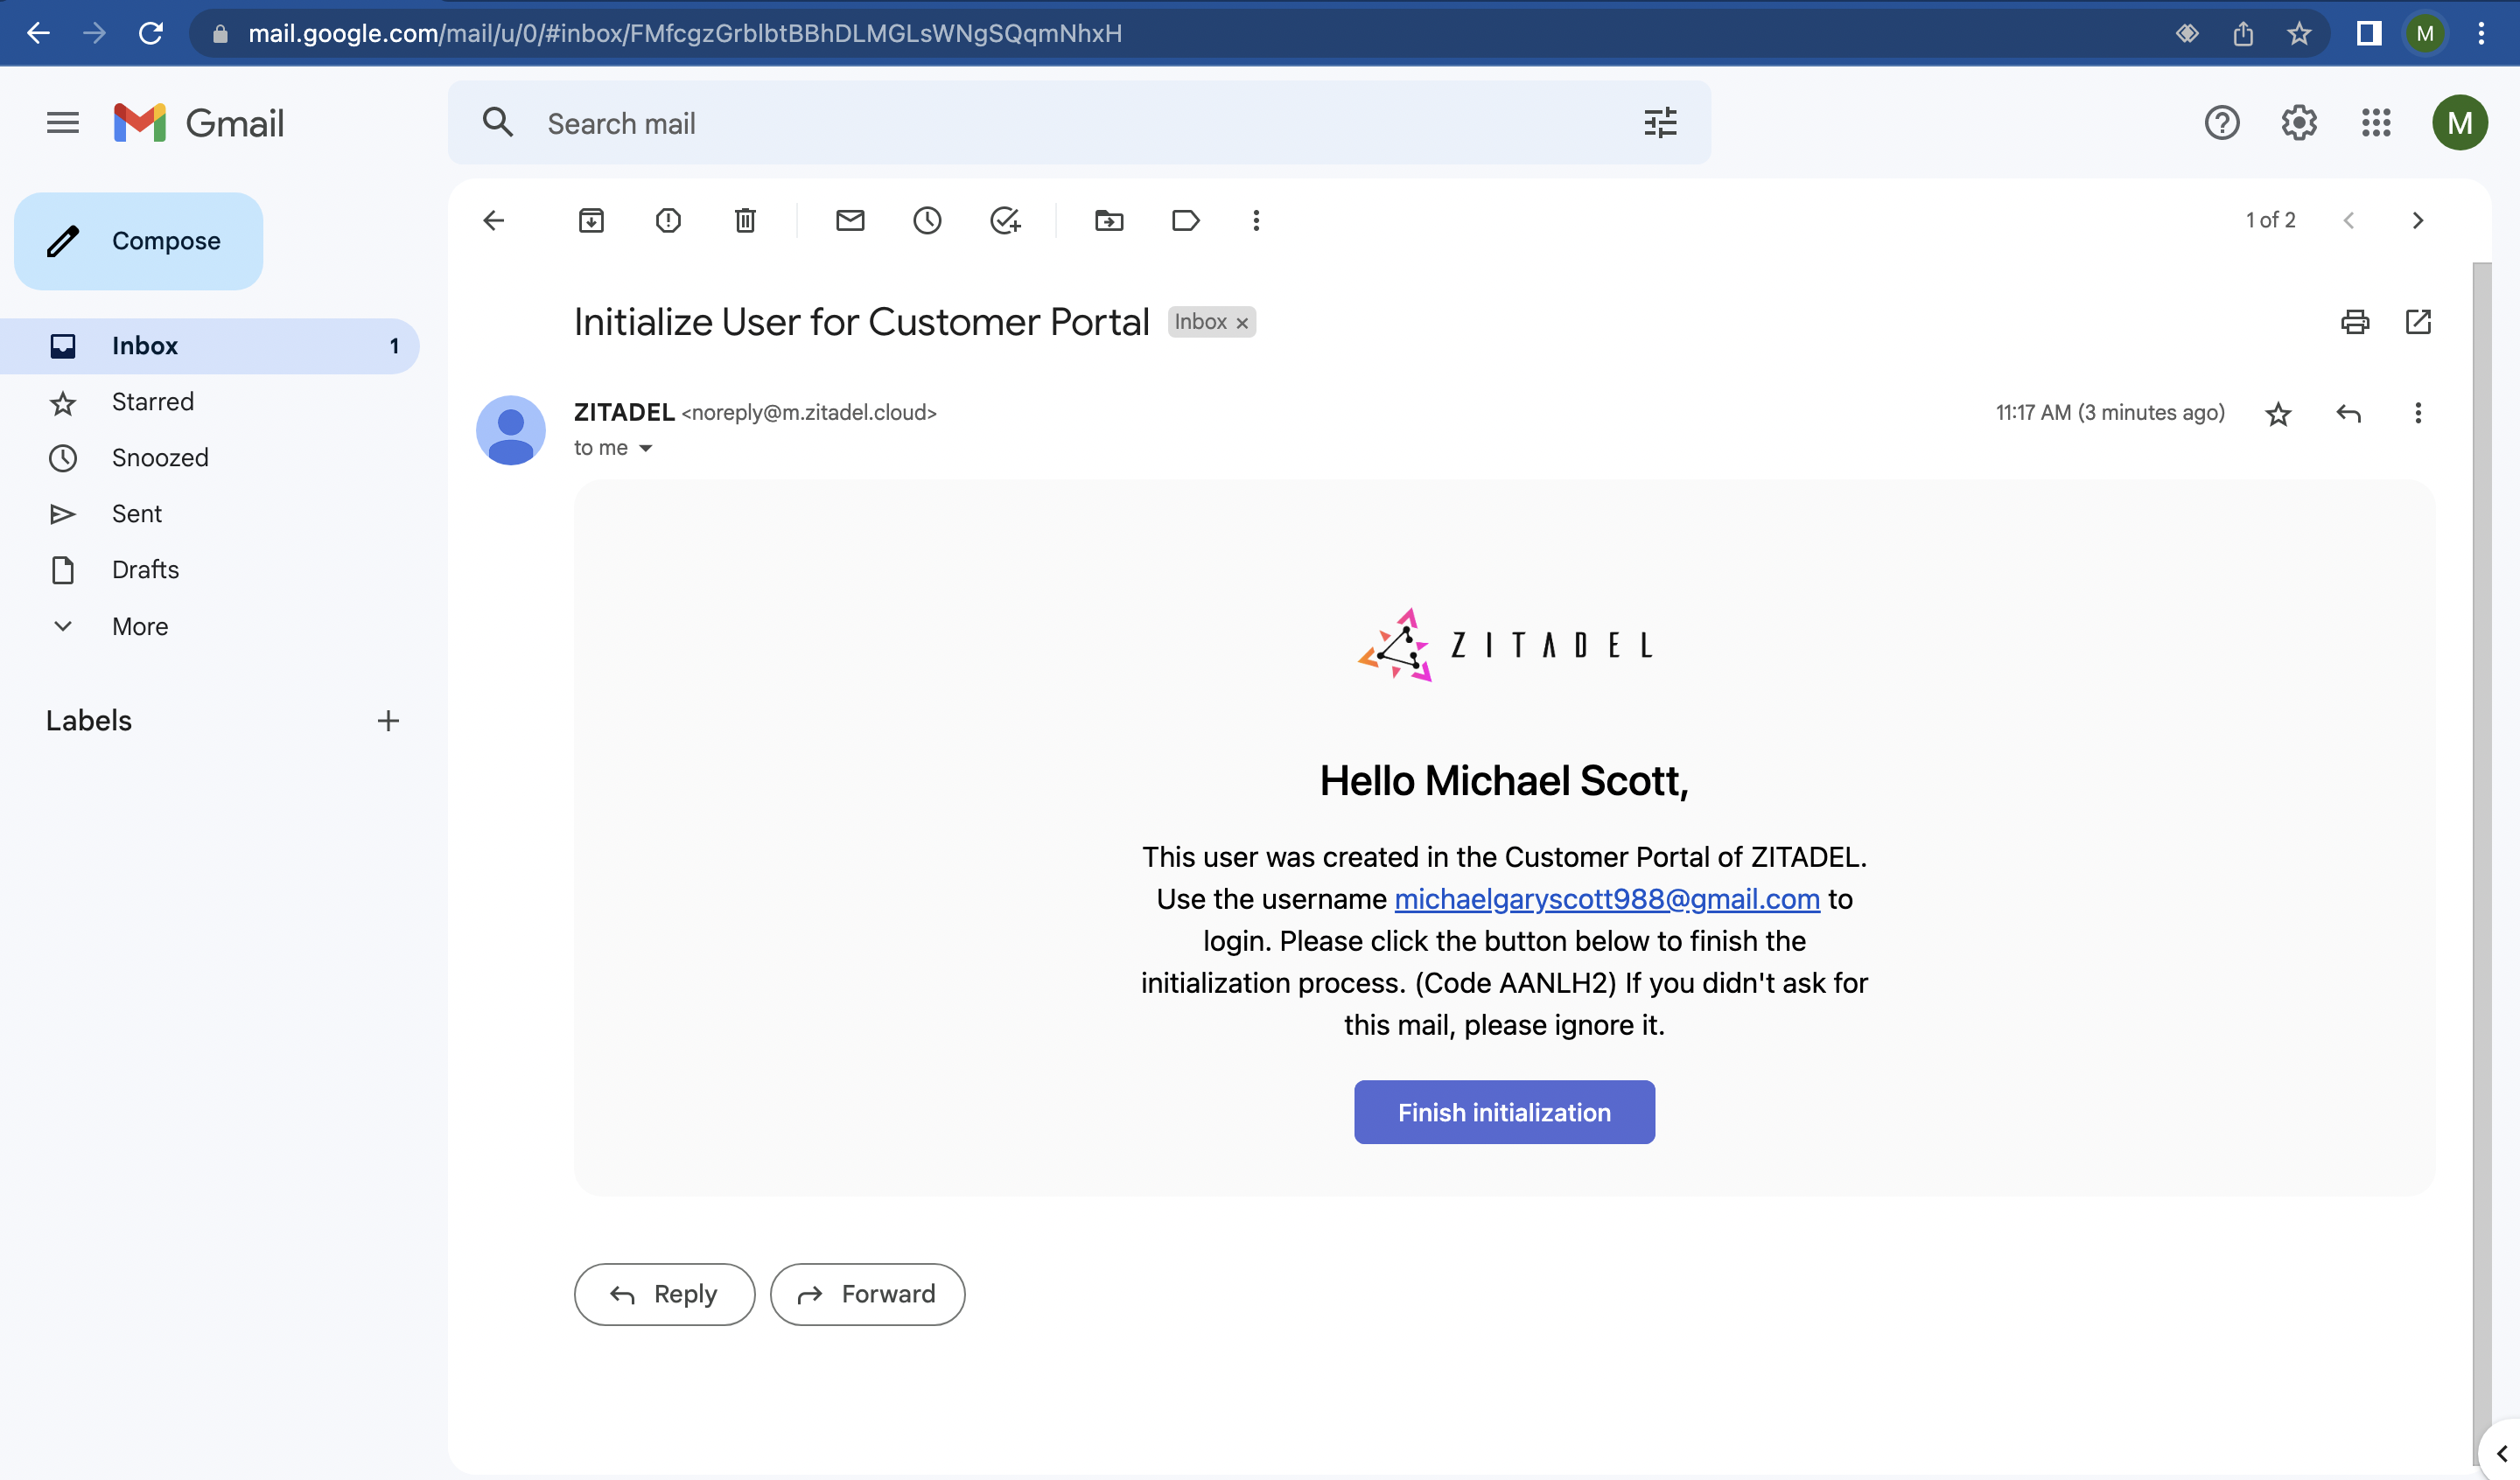
- Check your inbox for the code. You can either click the “Finish initialization” button in the email itself or copy the code and return to the previous page. In this guide, we will copy the code and then continue from where we left off.
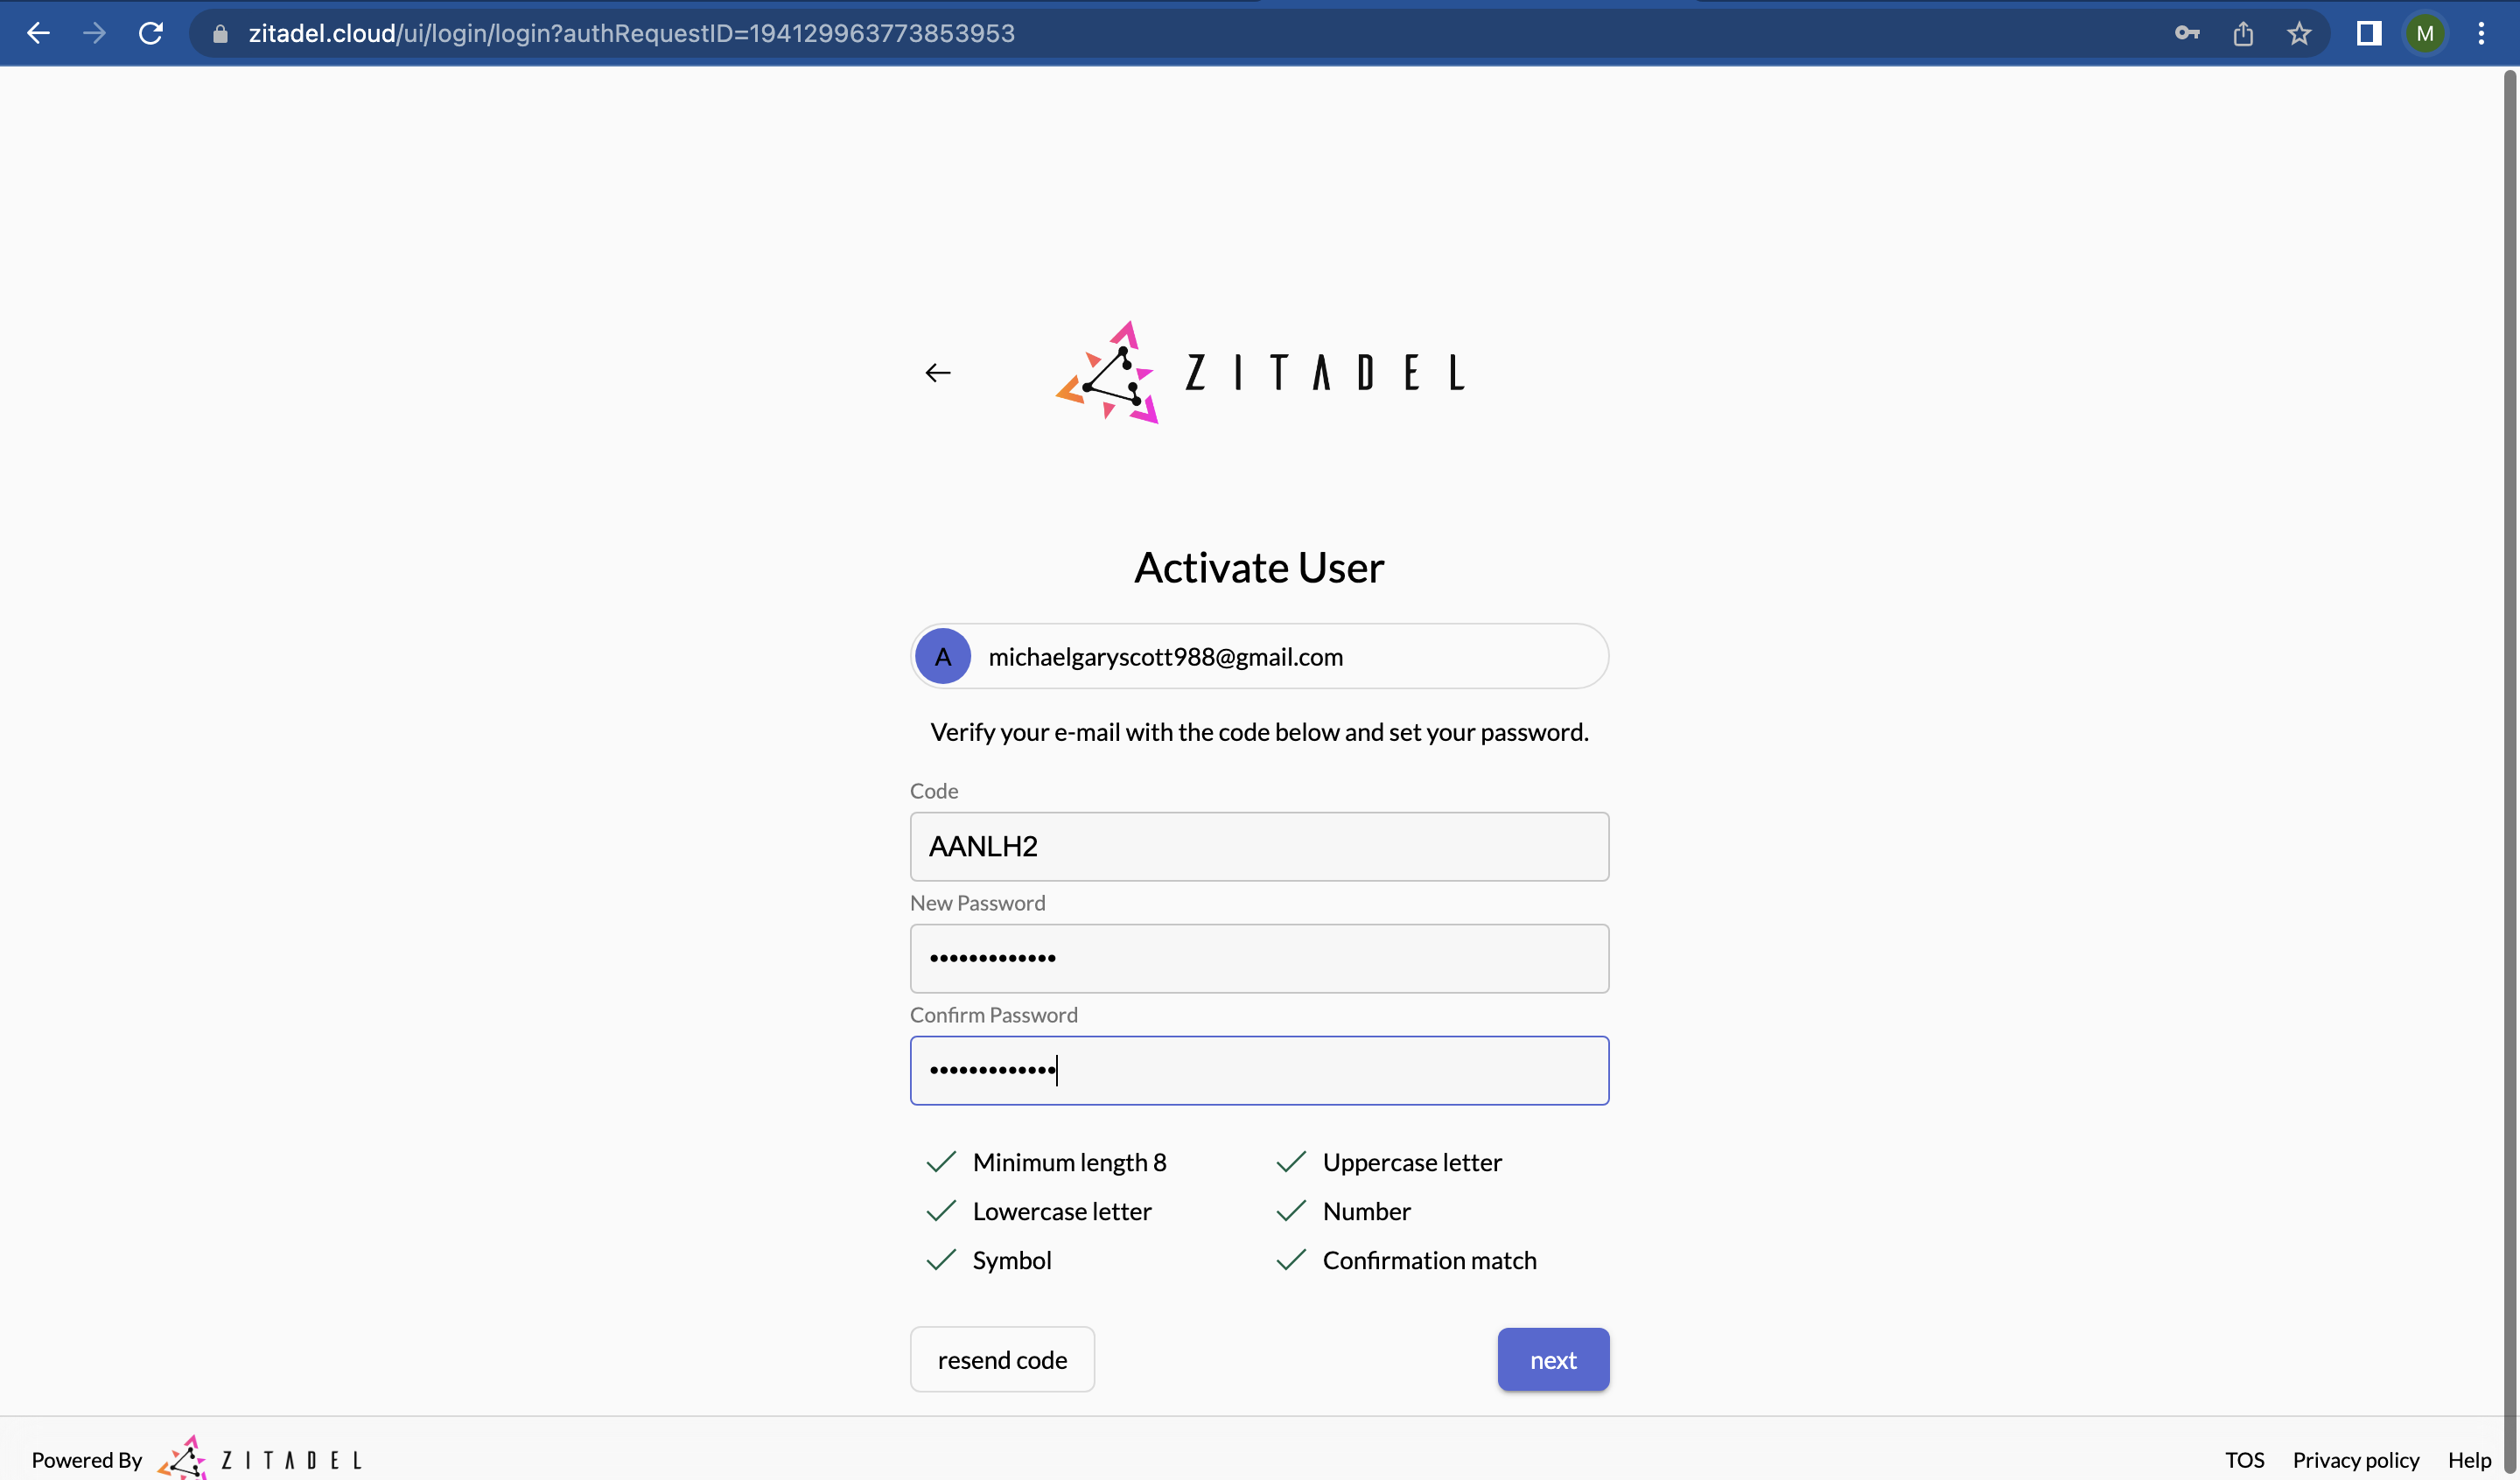
- Paste the code and add a password as shown below. Click on the “next” button.
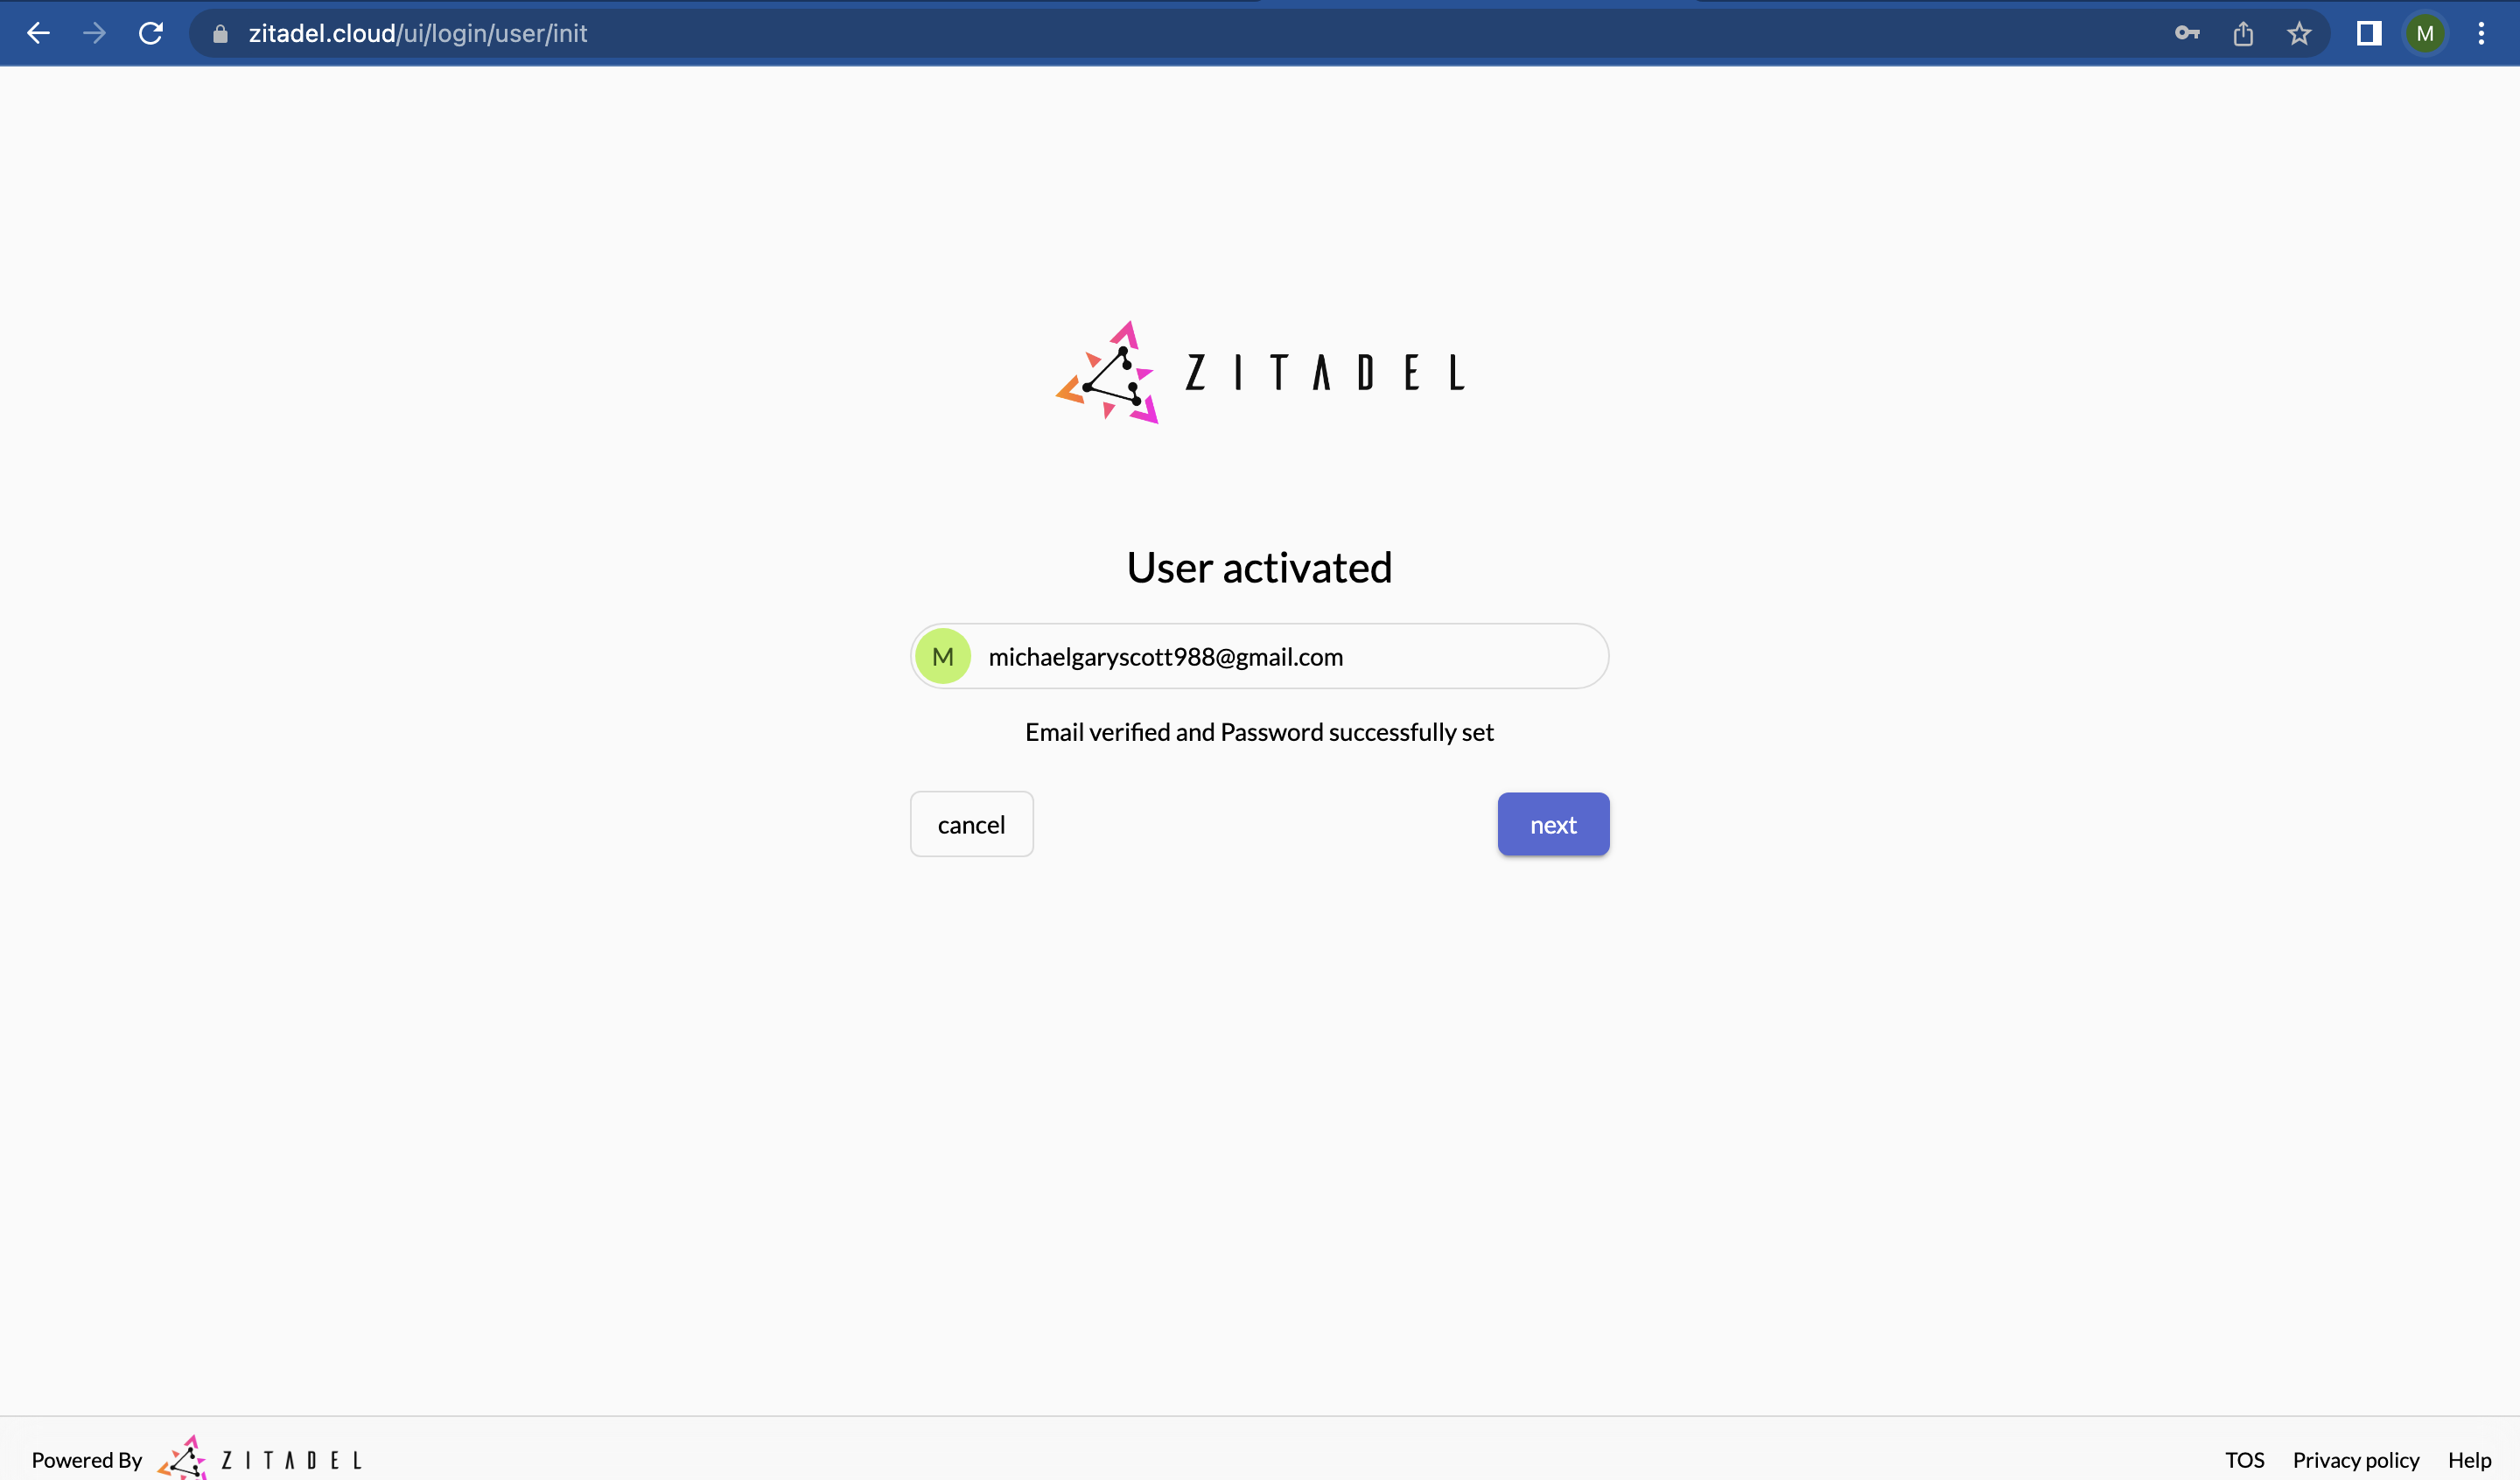
- The user is now activated. Click on “next” to log in.
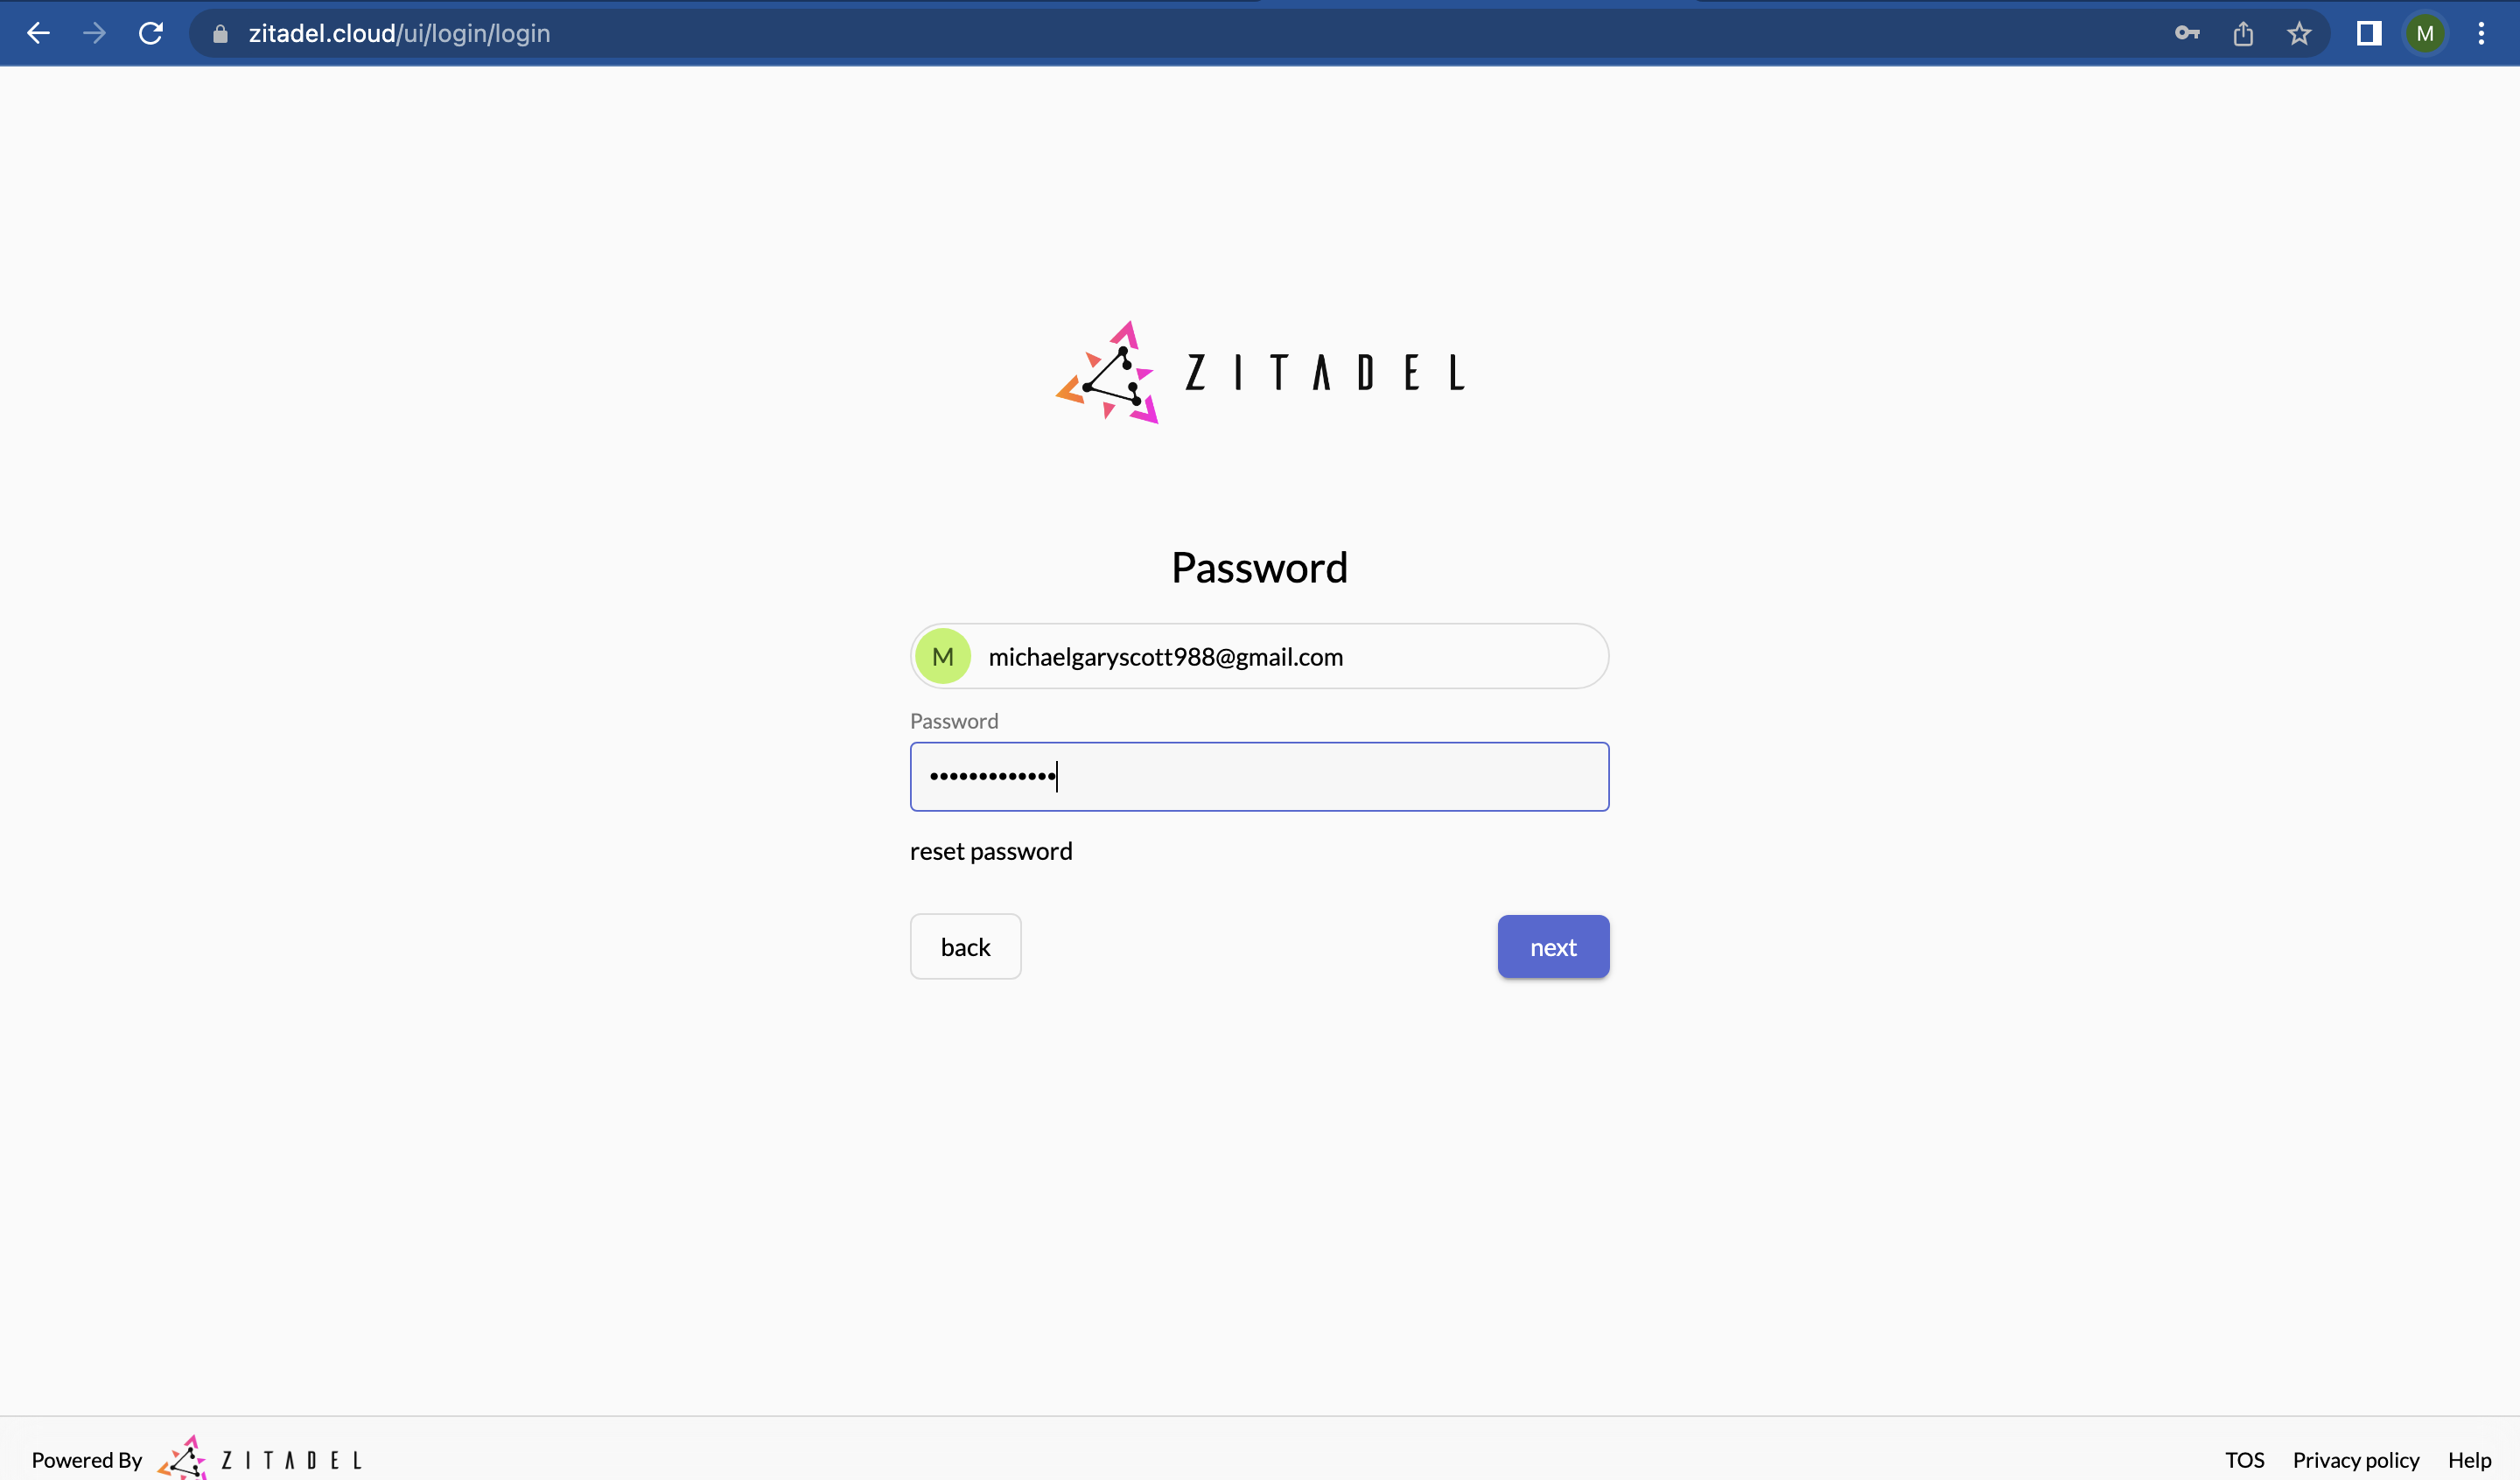
- Login with the username and password that you provided. Click “next”.
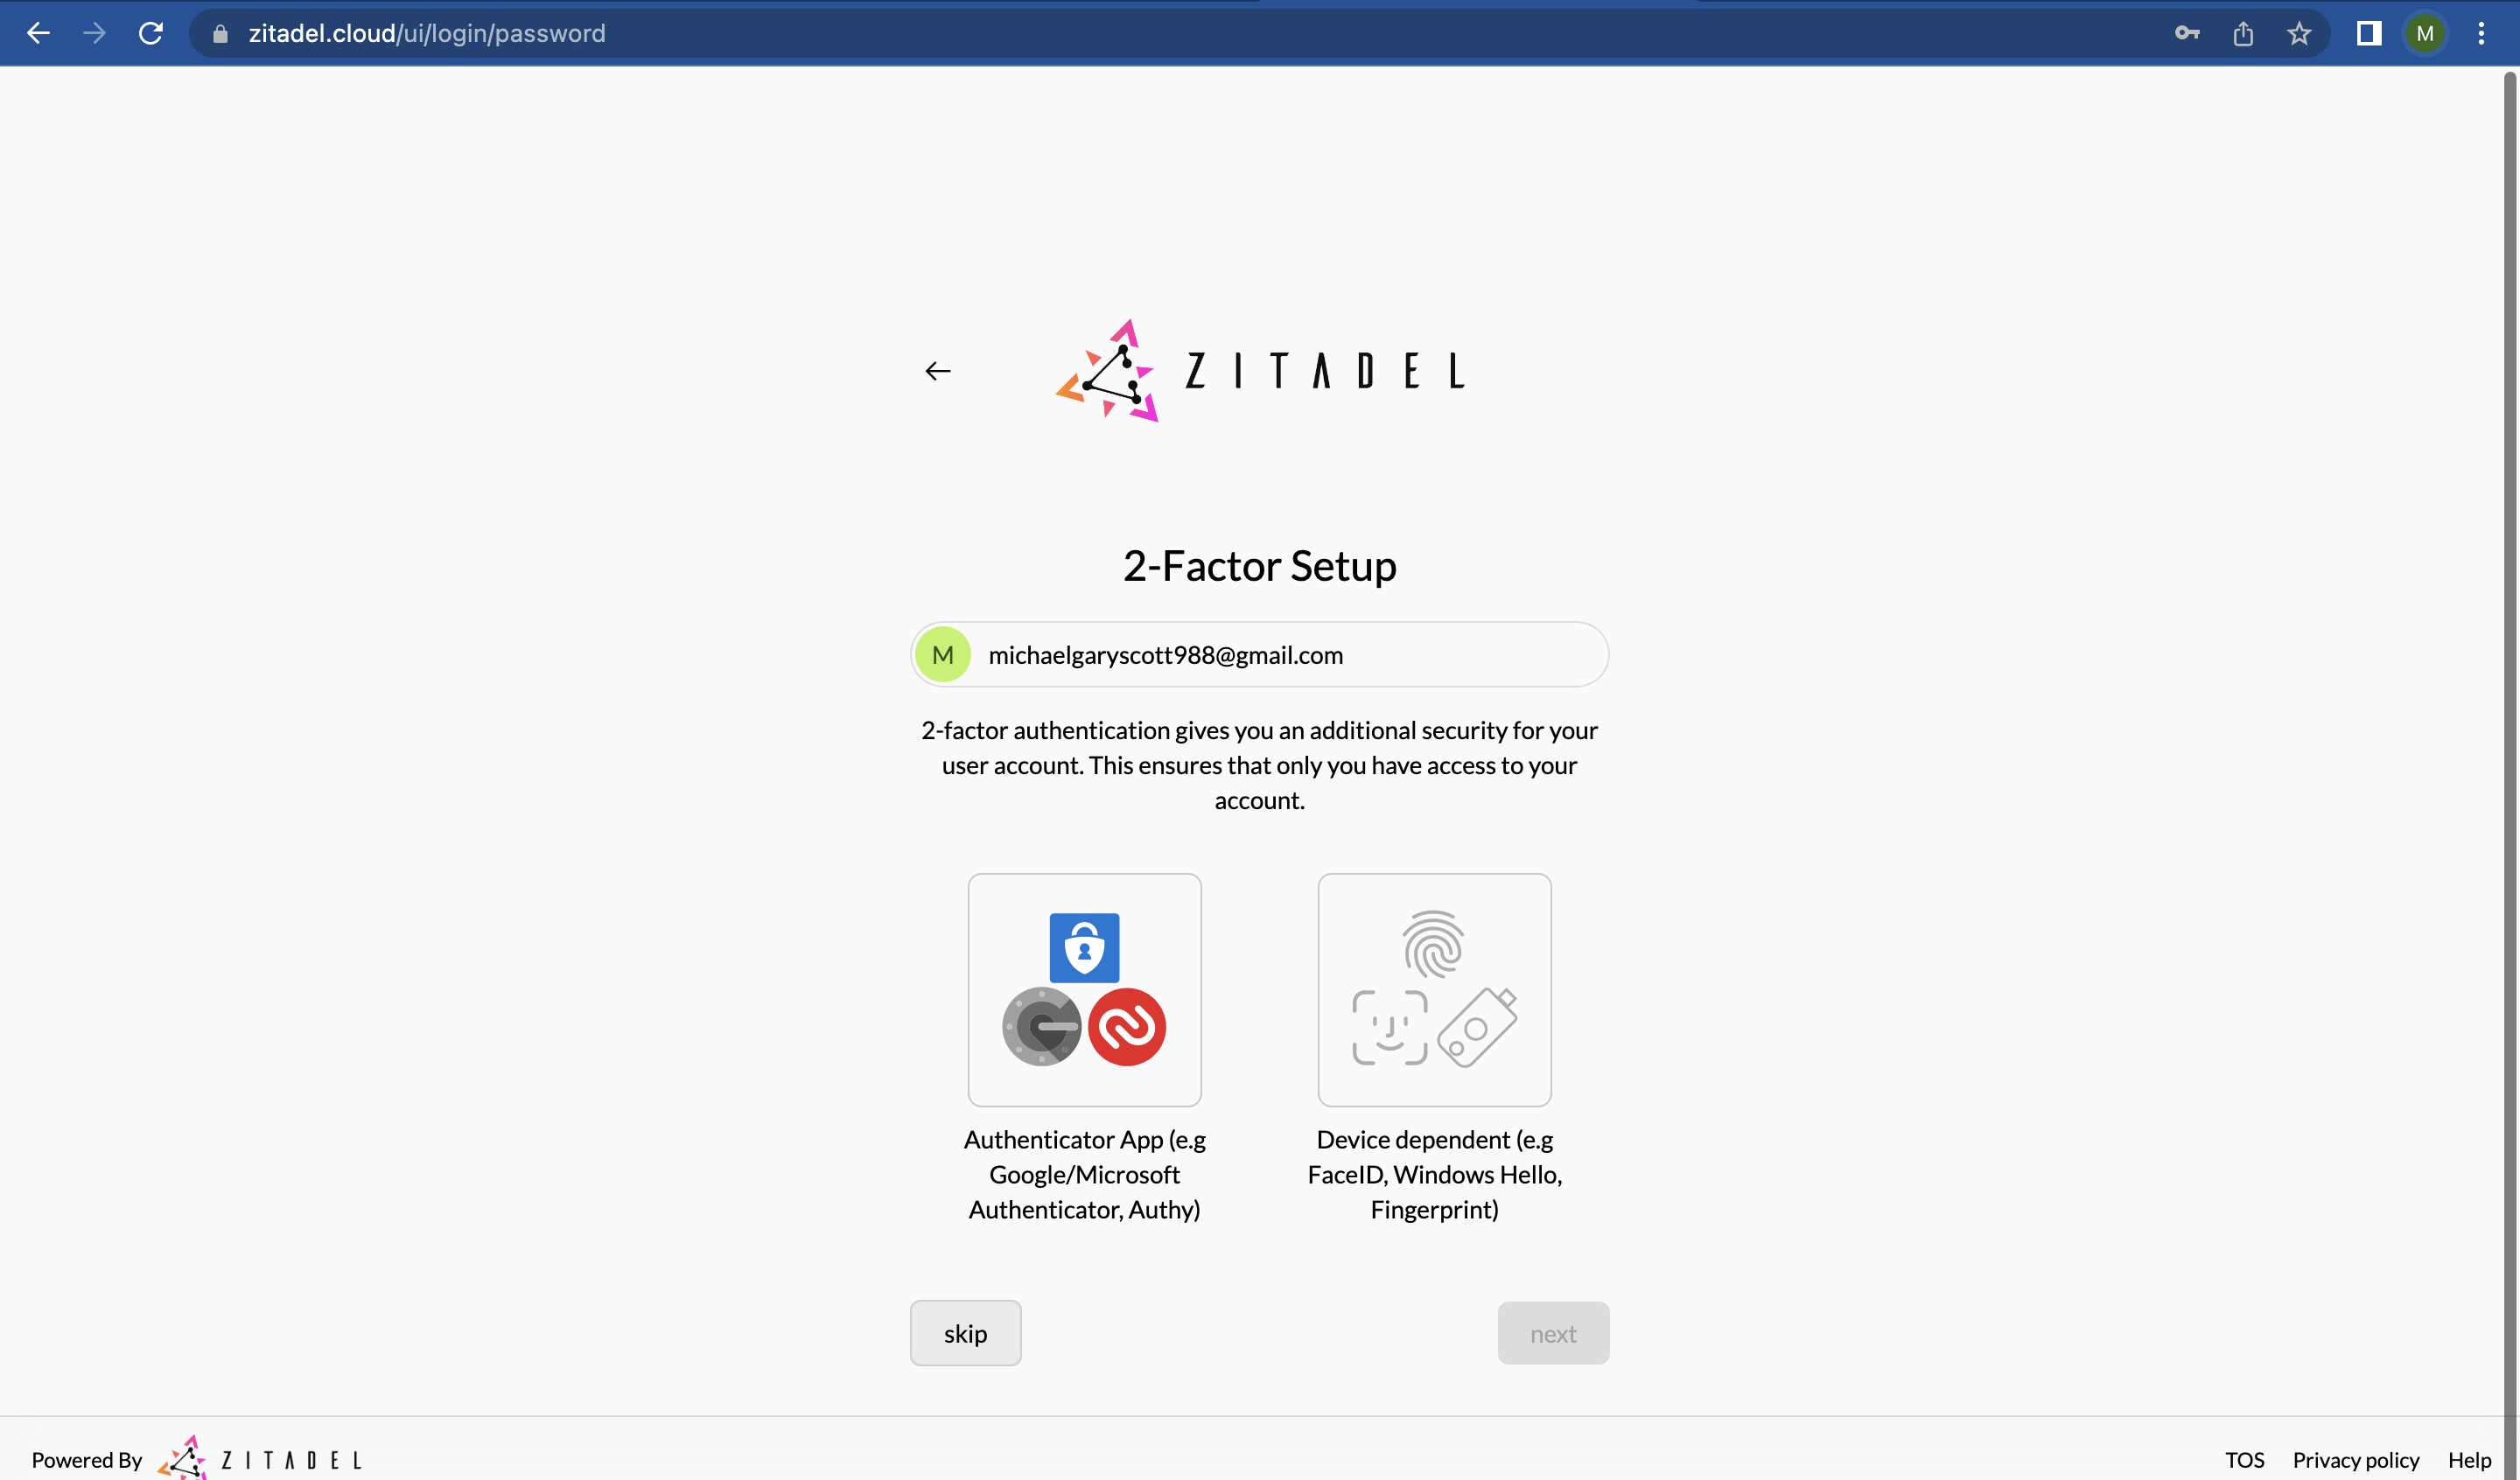
- You should set up 2-factor authentication. However, we will skip this step for now. Click on “skip”.
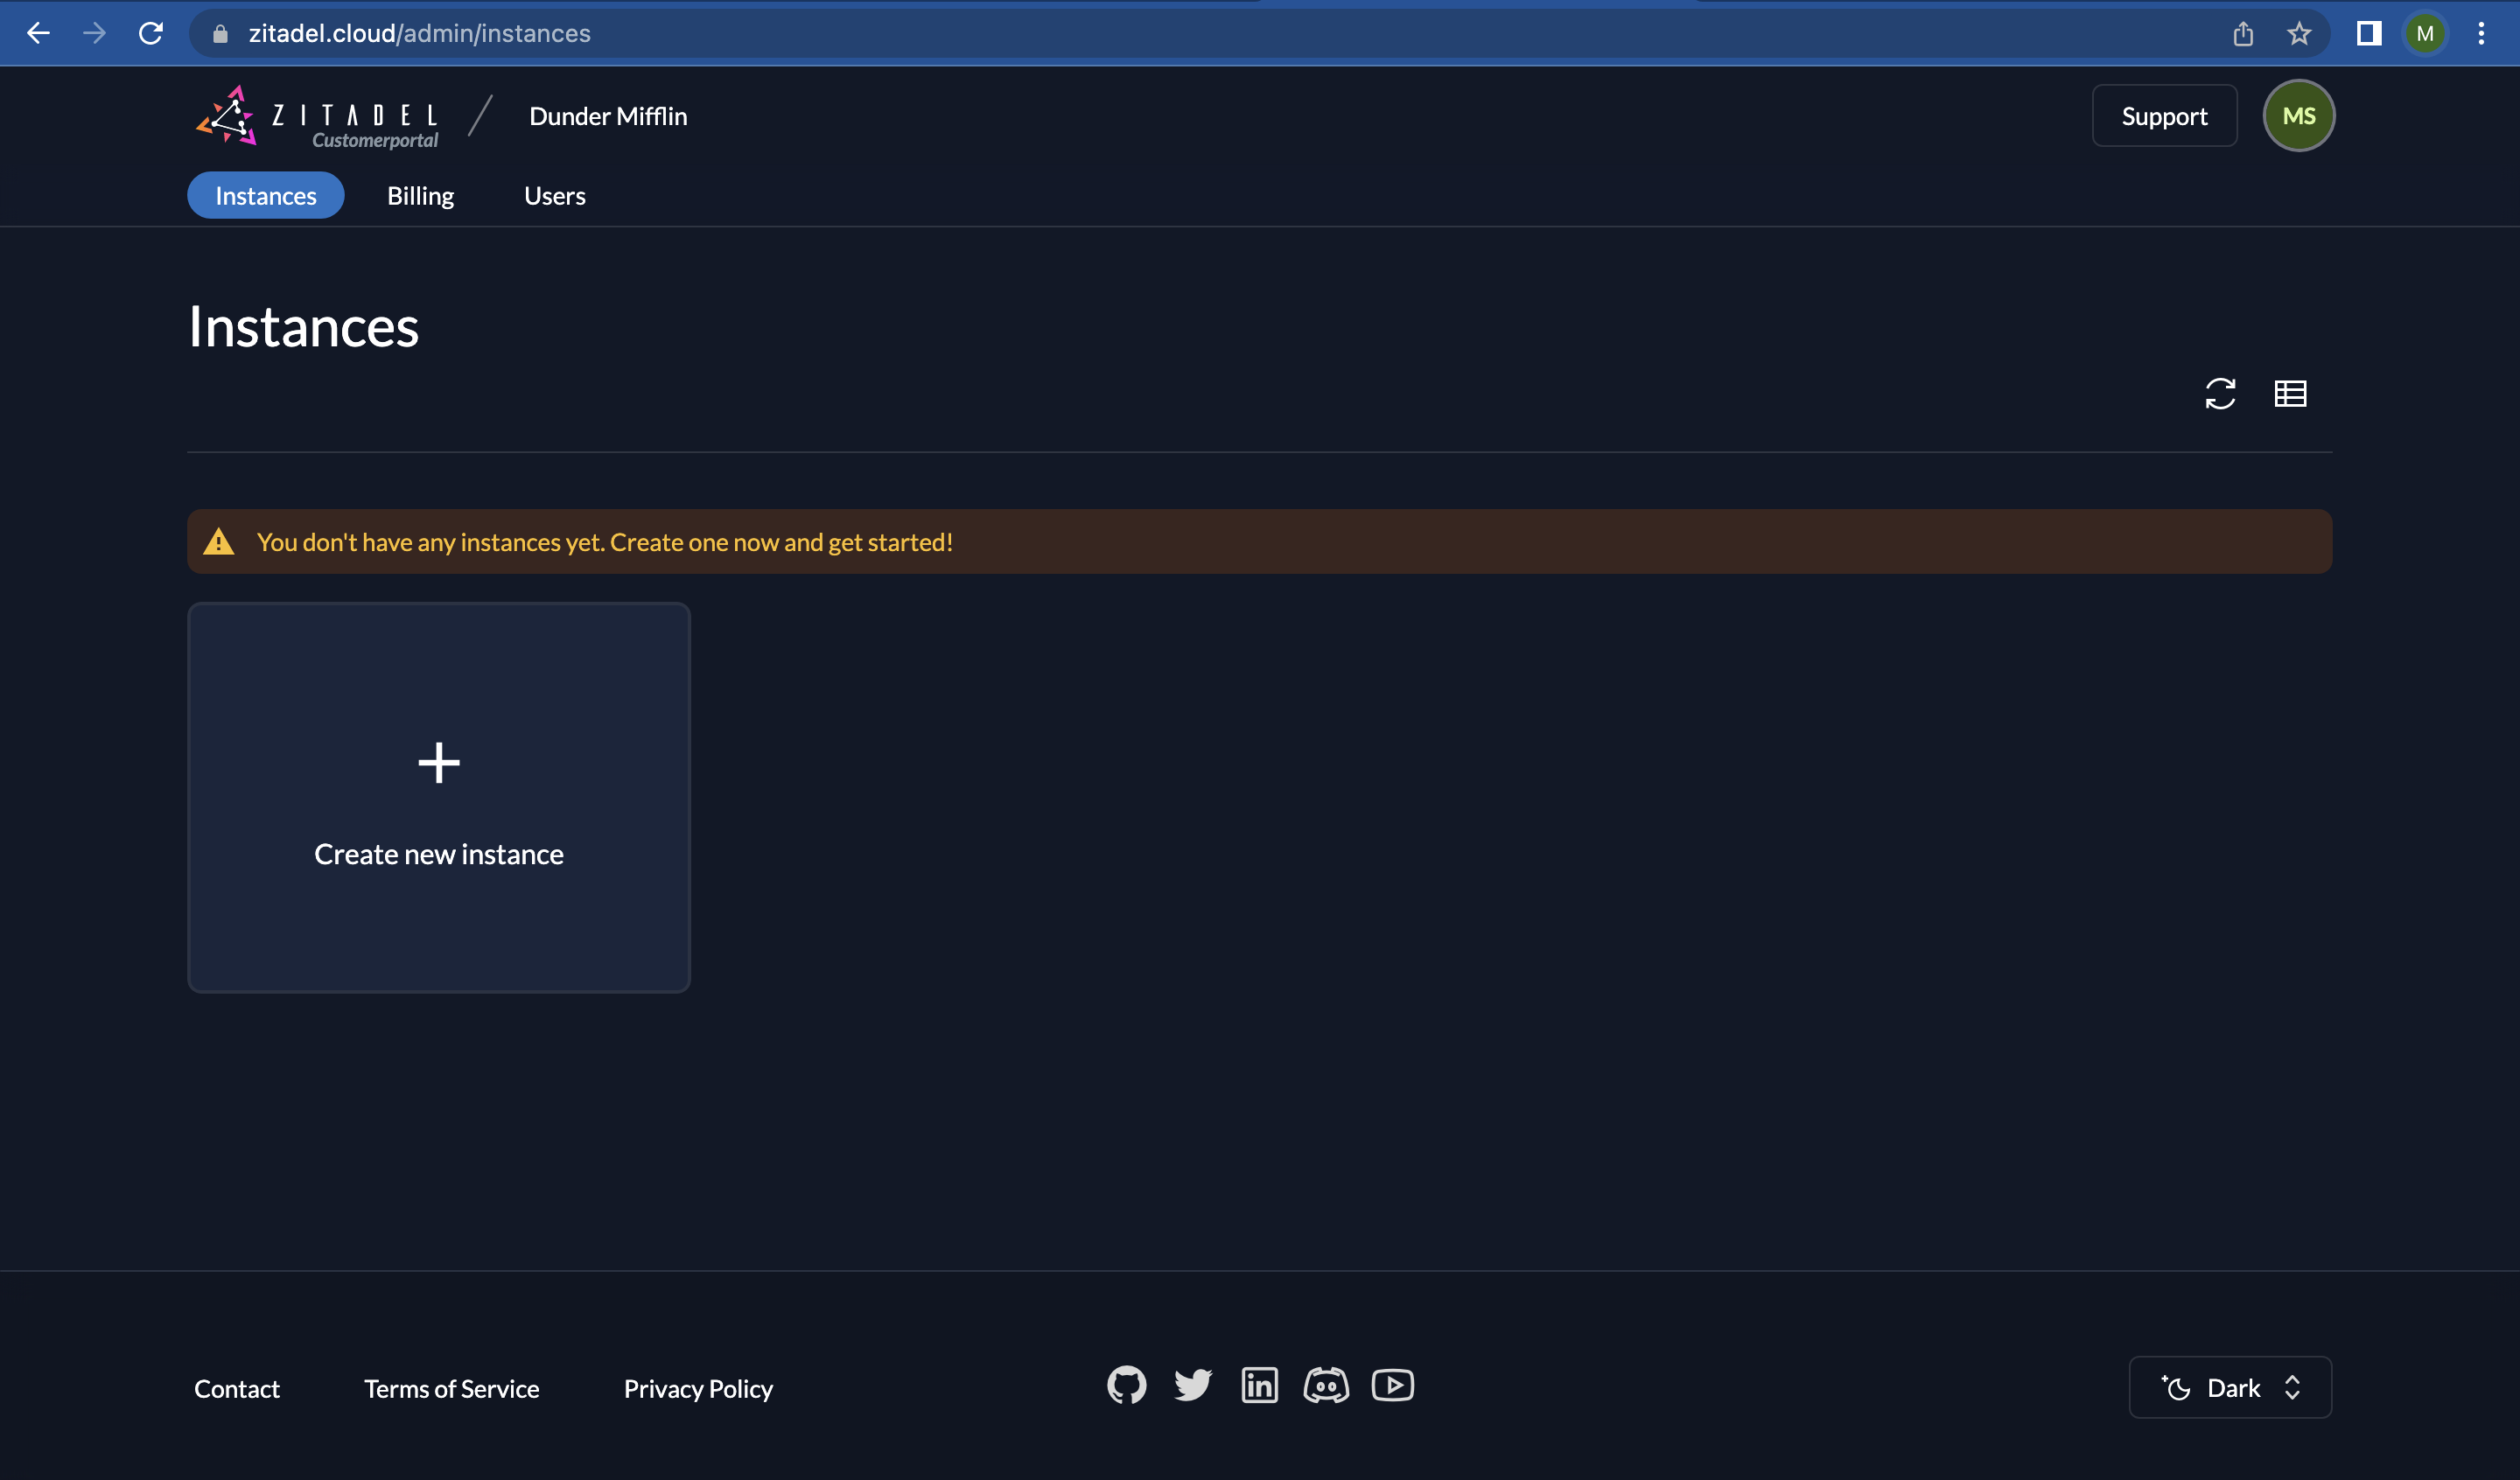
- You will now be asked to create an instance.
2. Create your First Instance
As a user of the ZITADEL Cloud Customer Portal, you now can create multiple instances to suit your specific needs. This includes instances for development, production, or user acceptance testing, as well as instances for different clients or applications. For example, you might create an instance for each product in a B2C scenario, or an instance for each tenant or customer in a B2B scenario. The possibilities are endless. You can create a pay-as-you-go instance for production purposes.
- Let’s create an instance. Click on “Create new instance”.
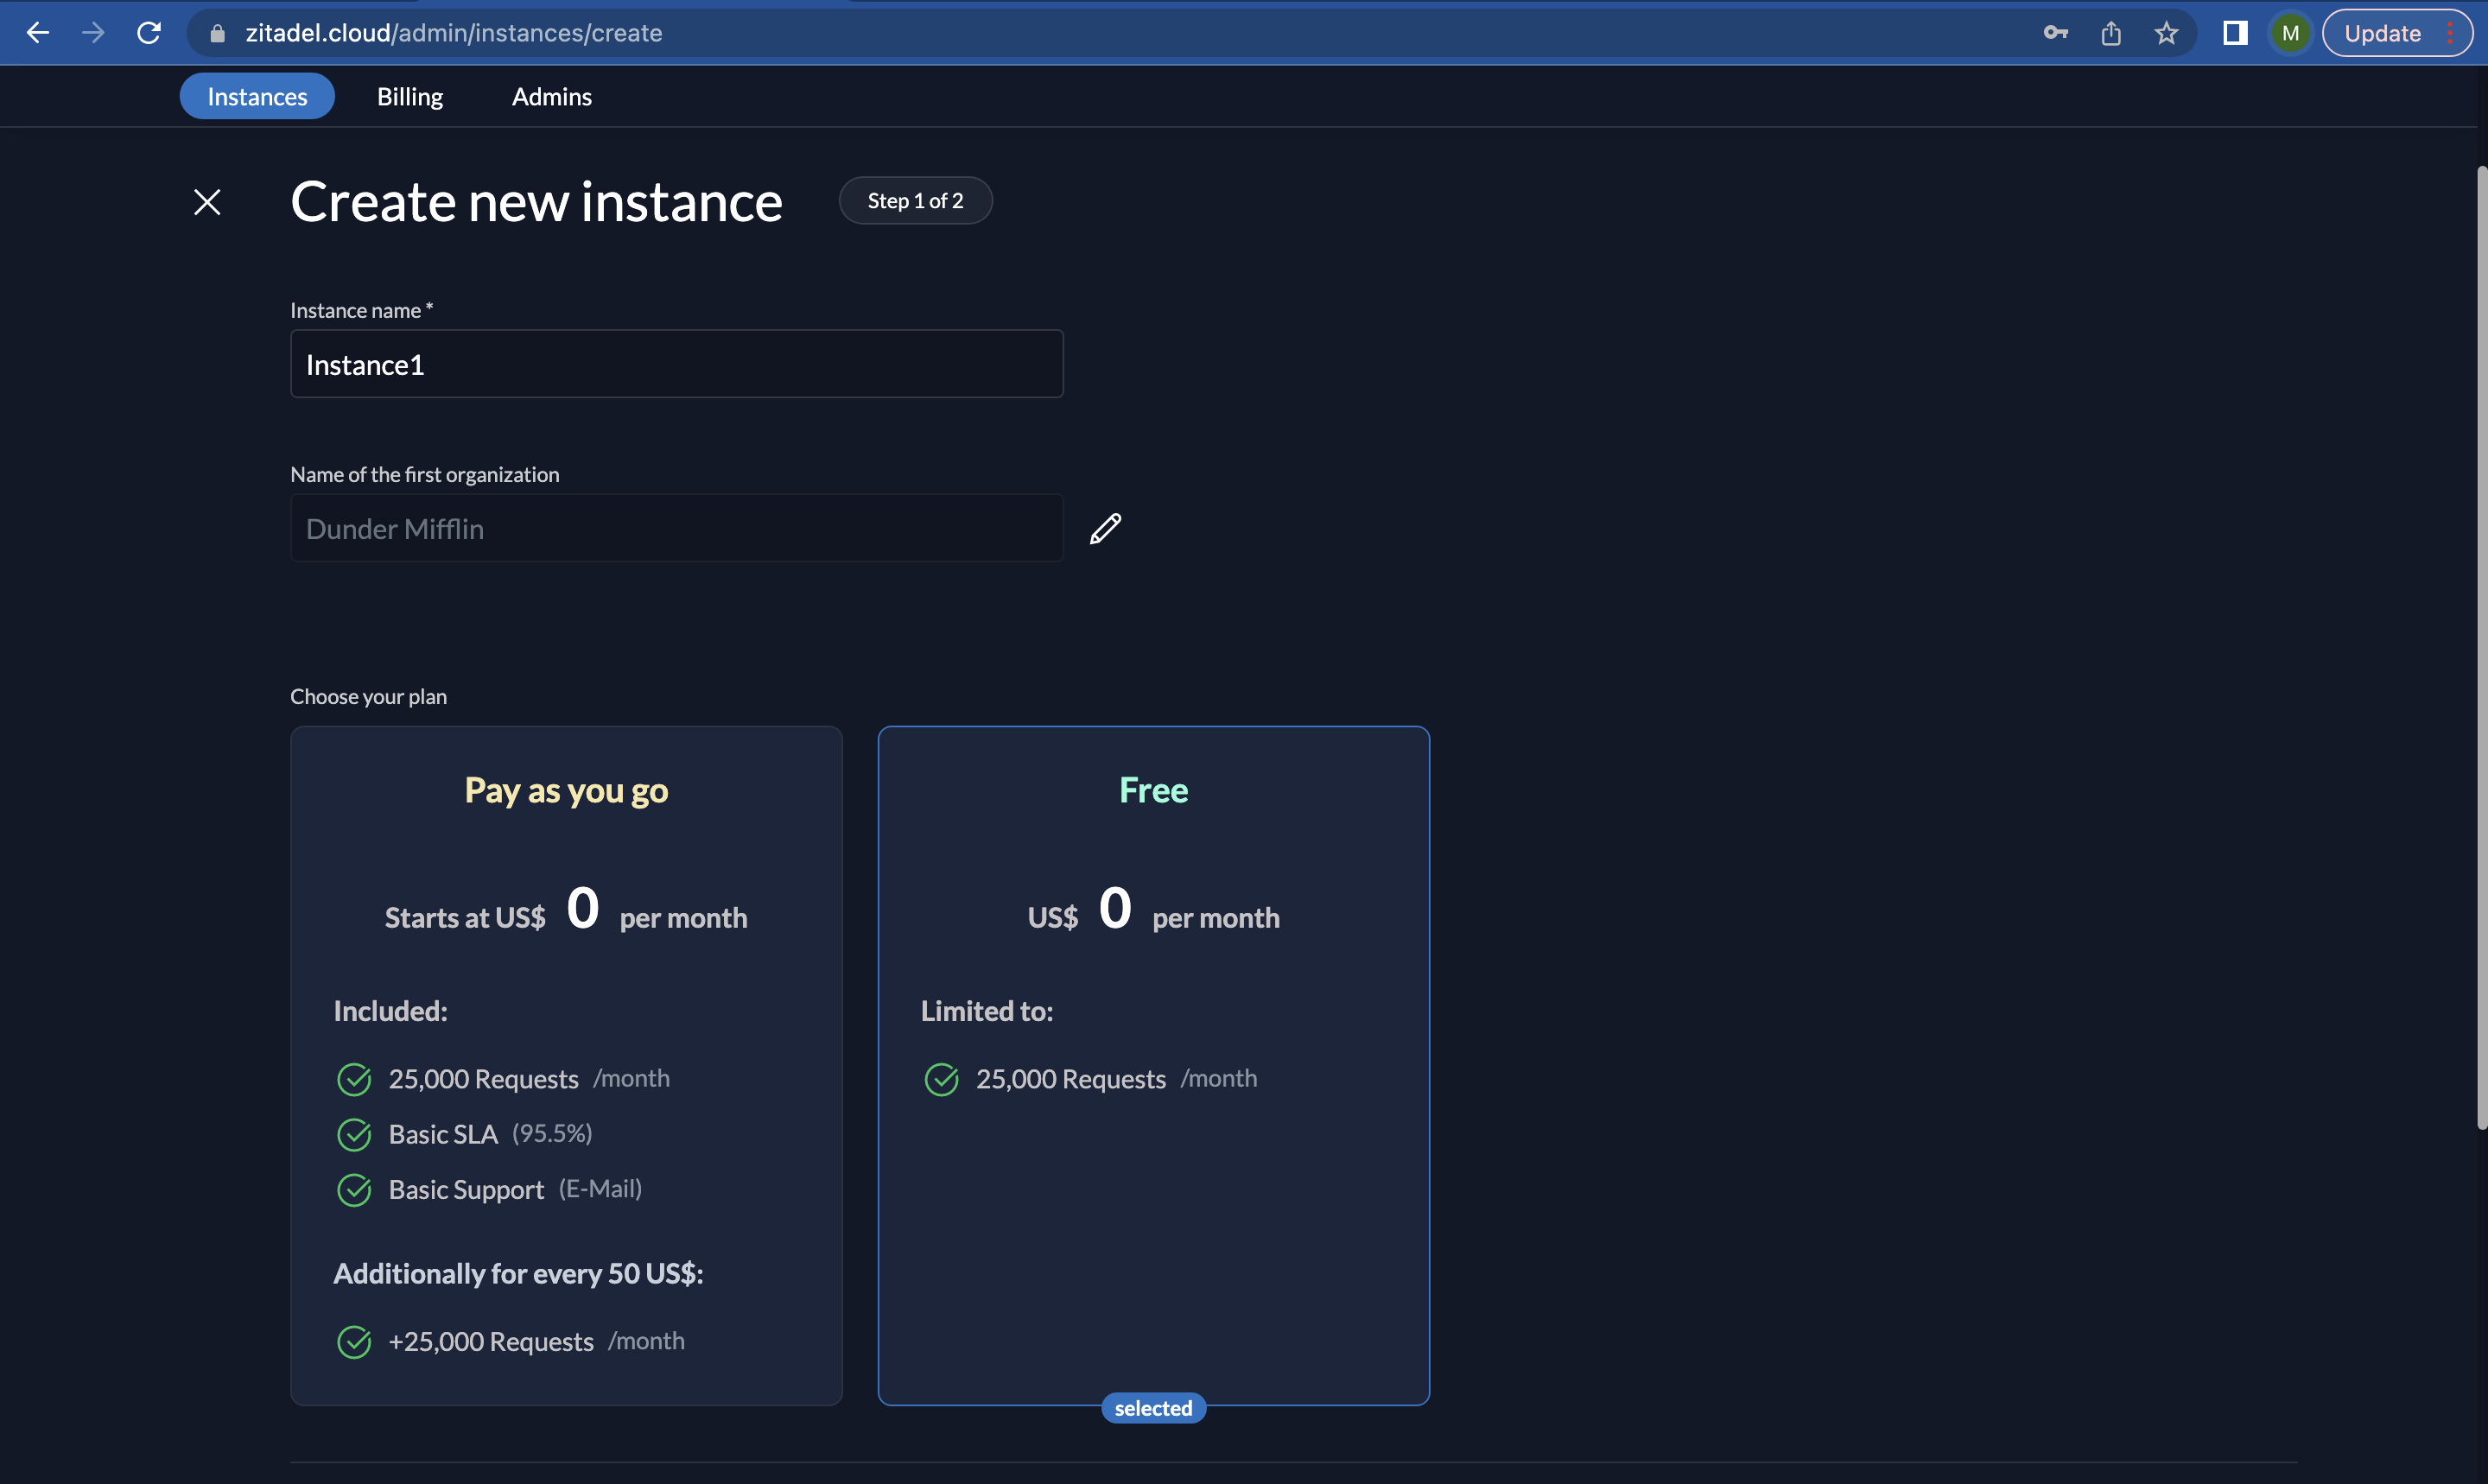
- Provide a name for your instance, select the “Free” plan and click on the “Continue” button at the bottom of this screen.
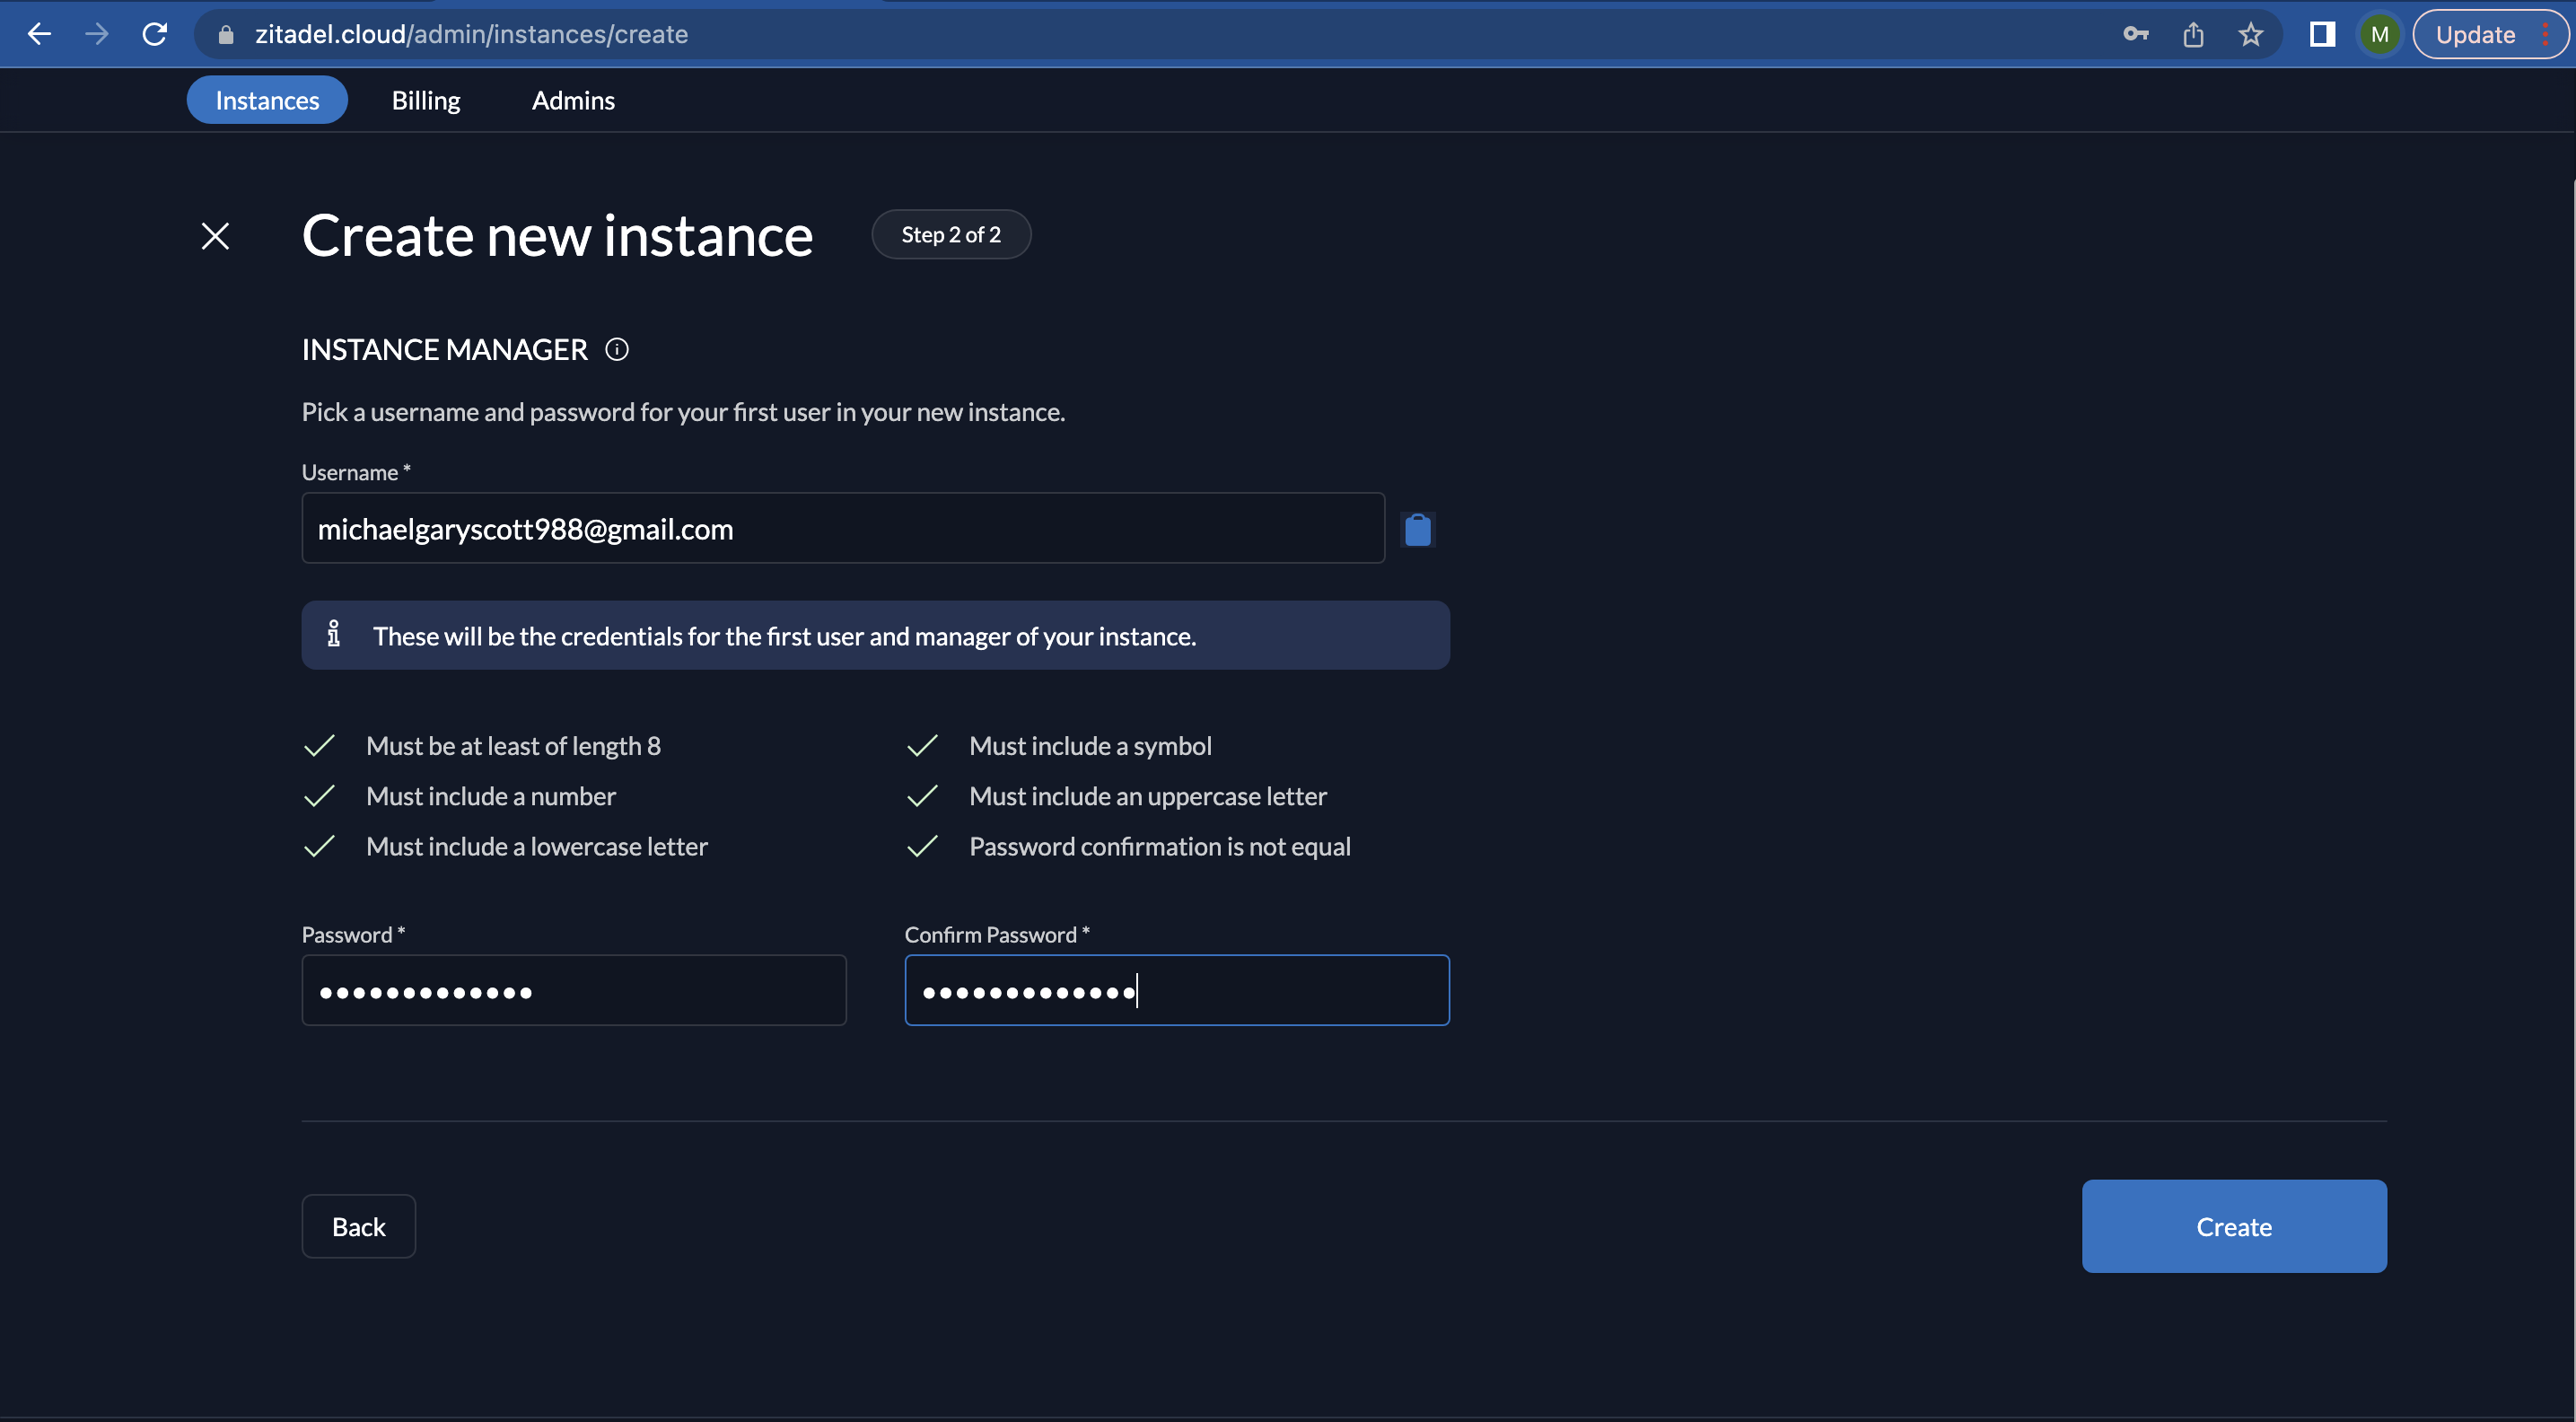
- Next, you should see the following screen. Add a username and password for the instance manager and click "Create".
- The instance creation process will take a few seconds.
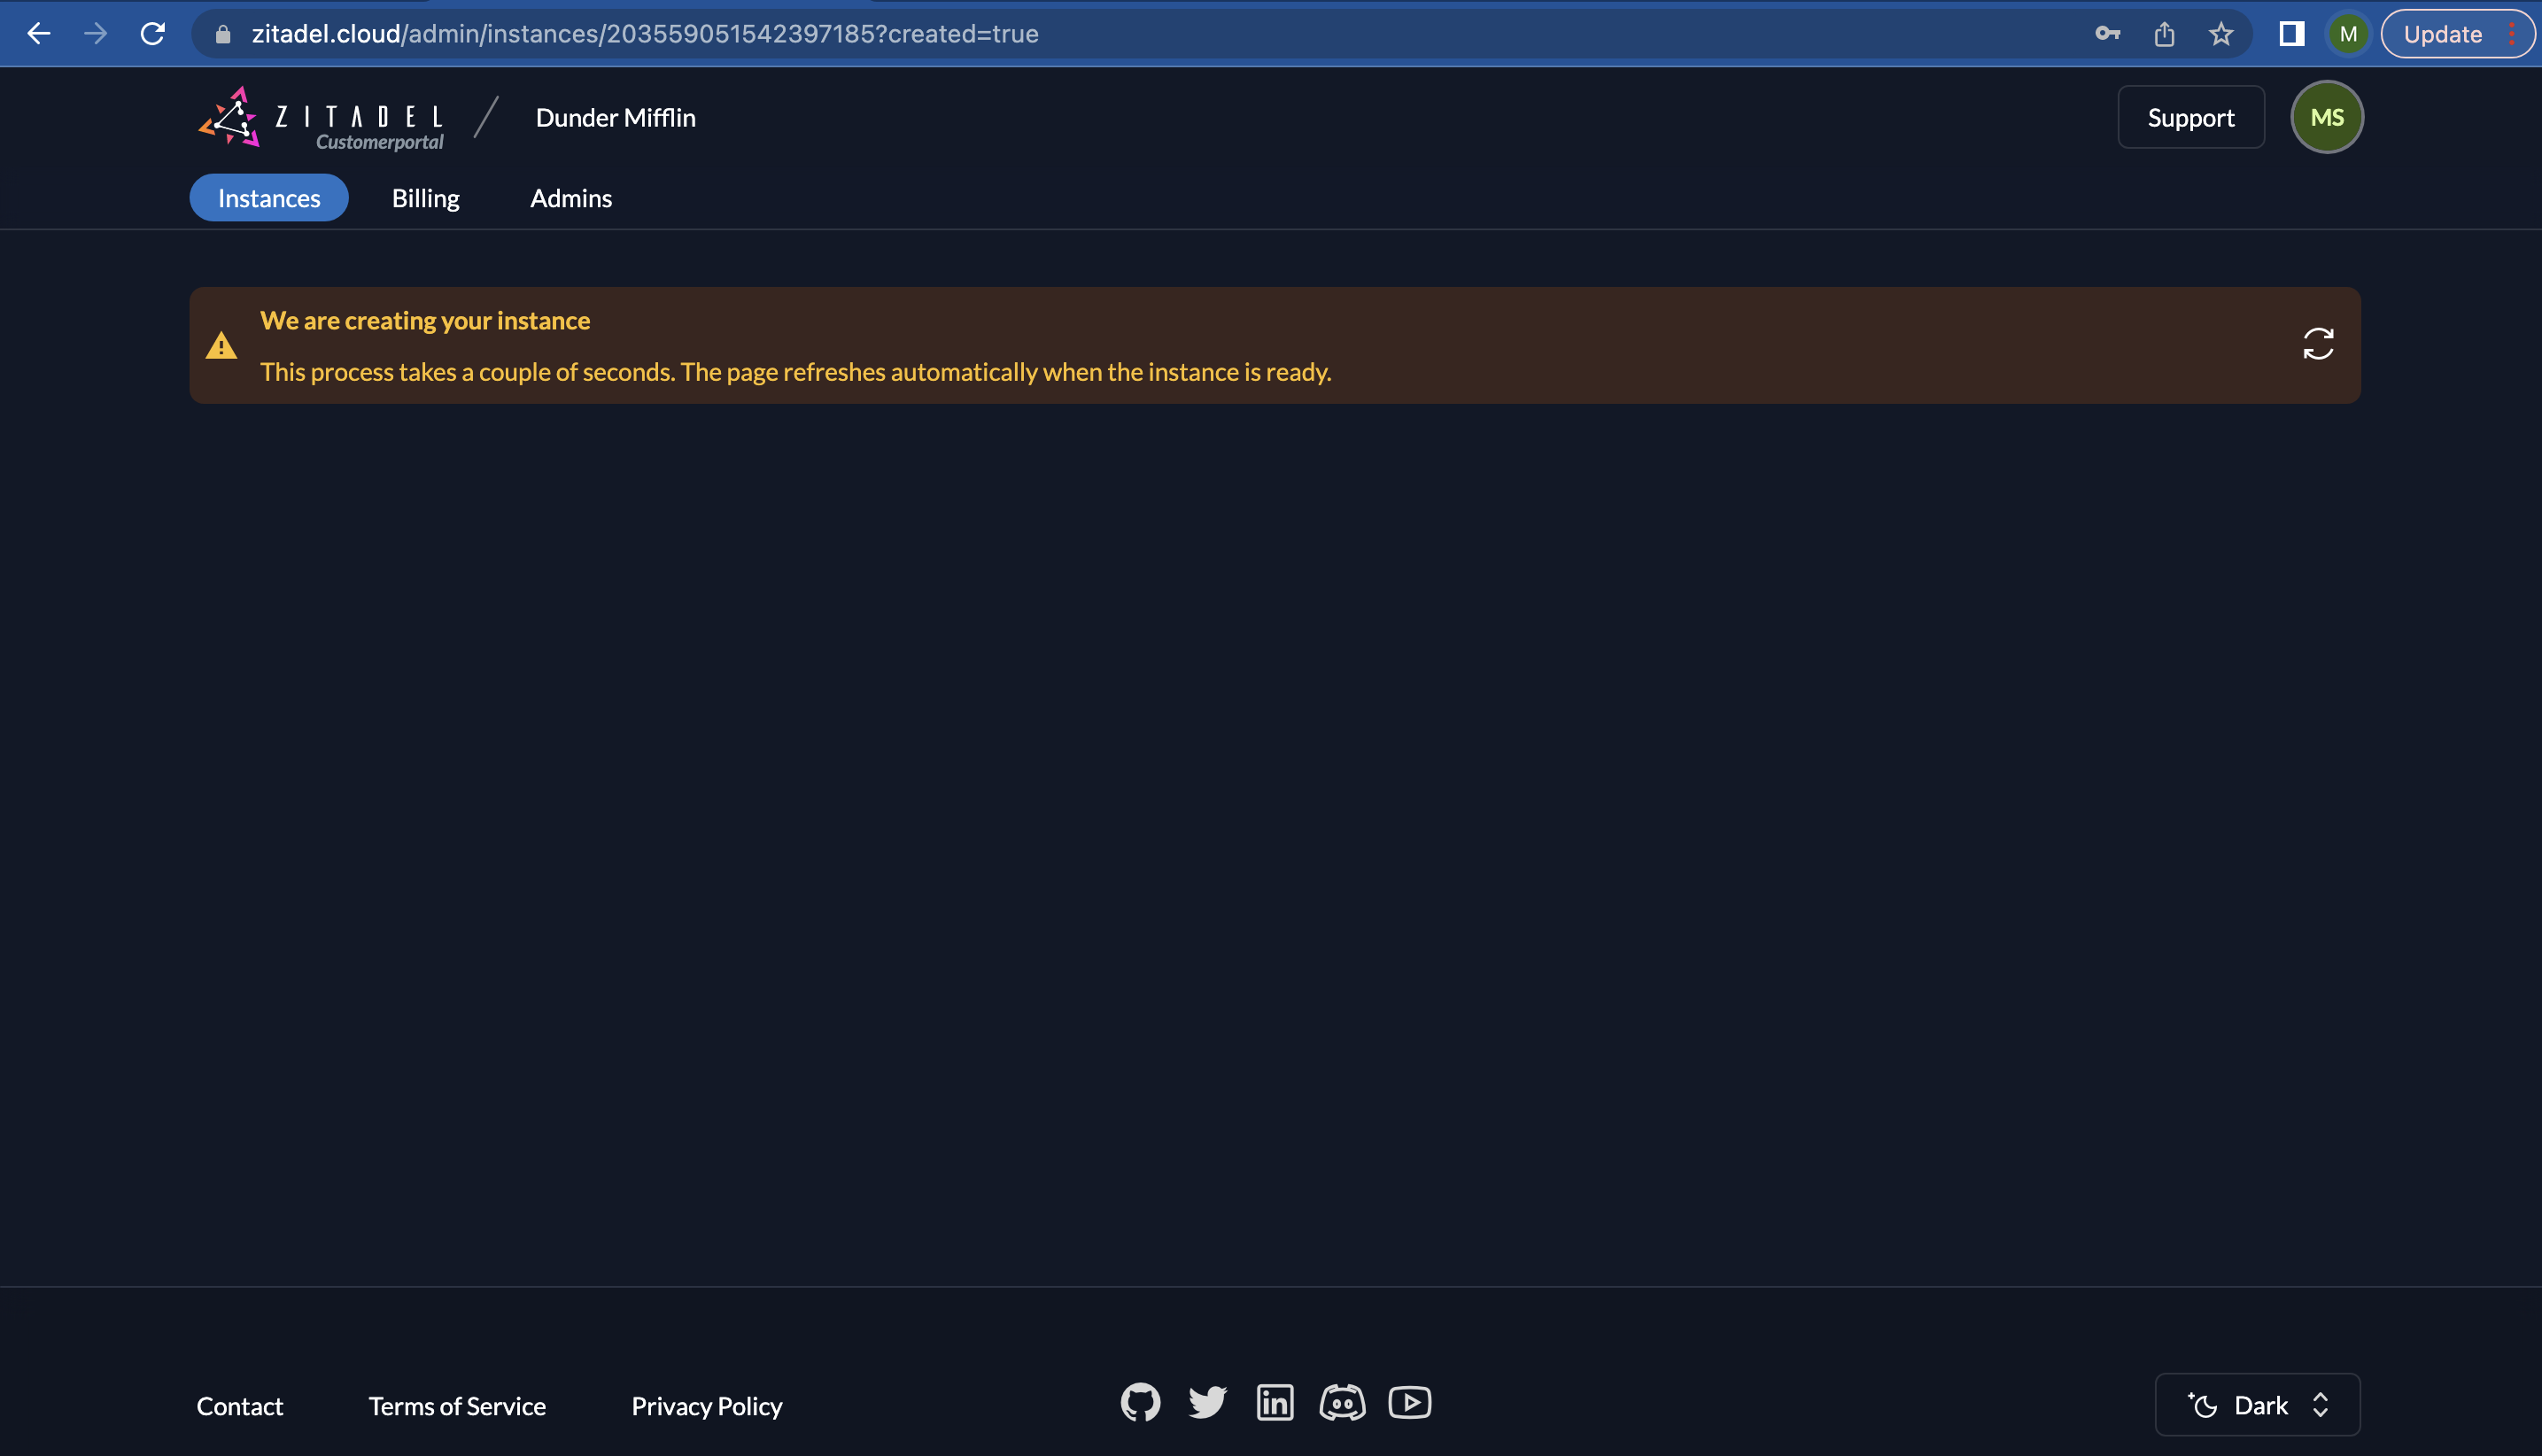
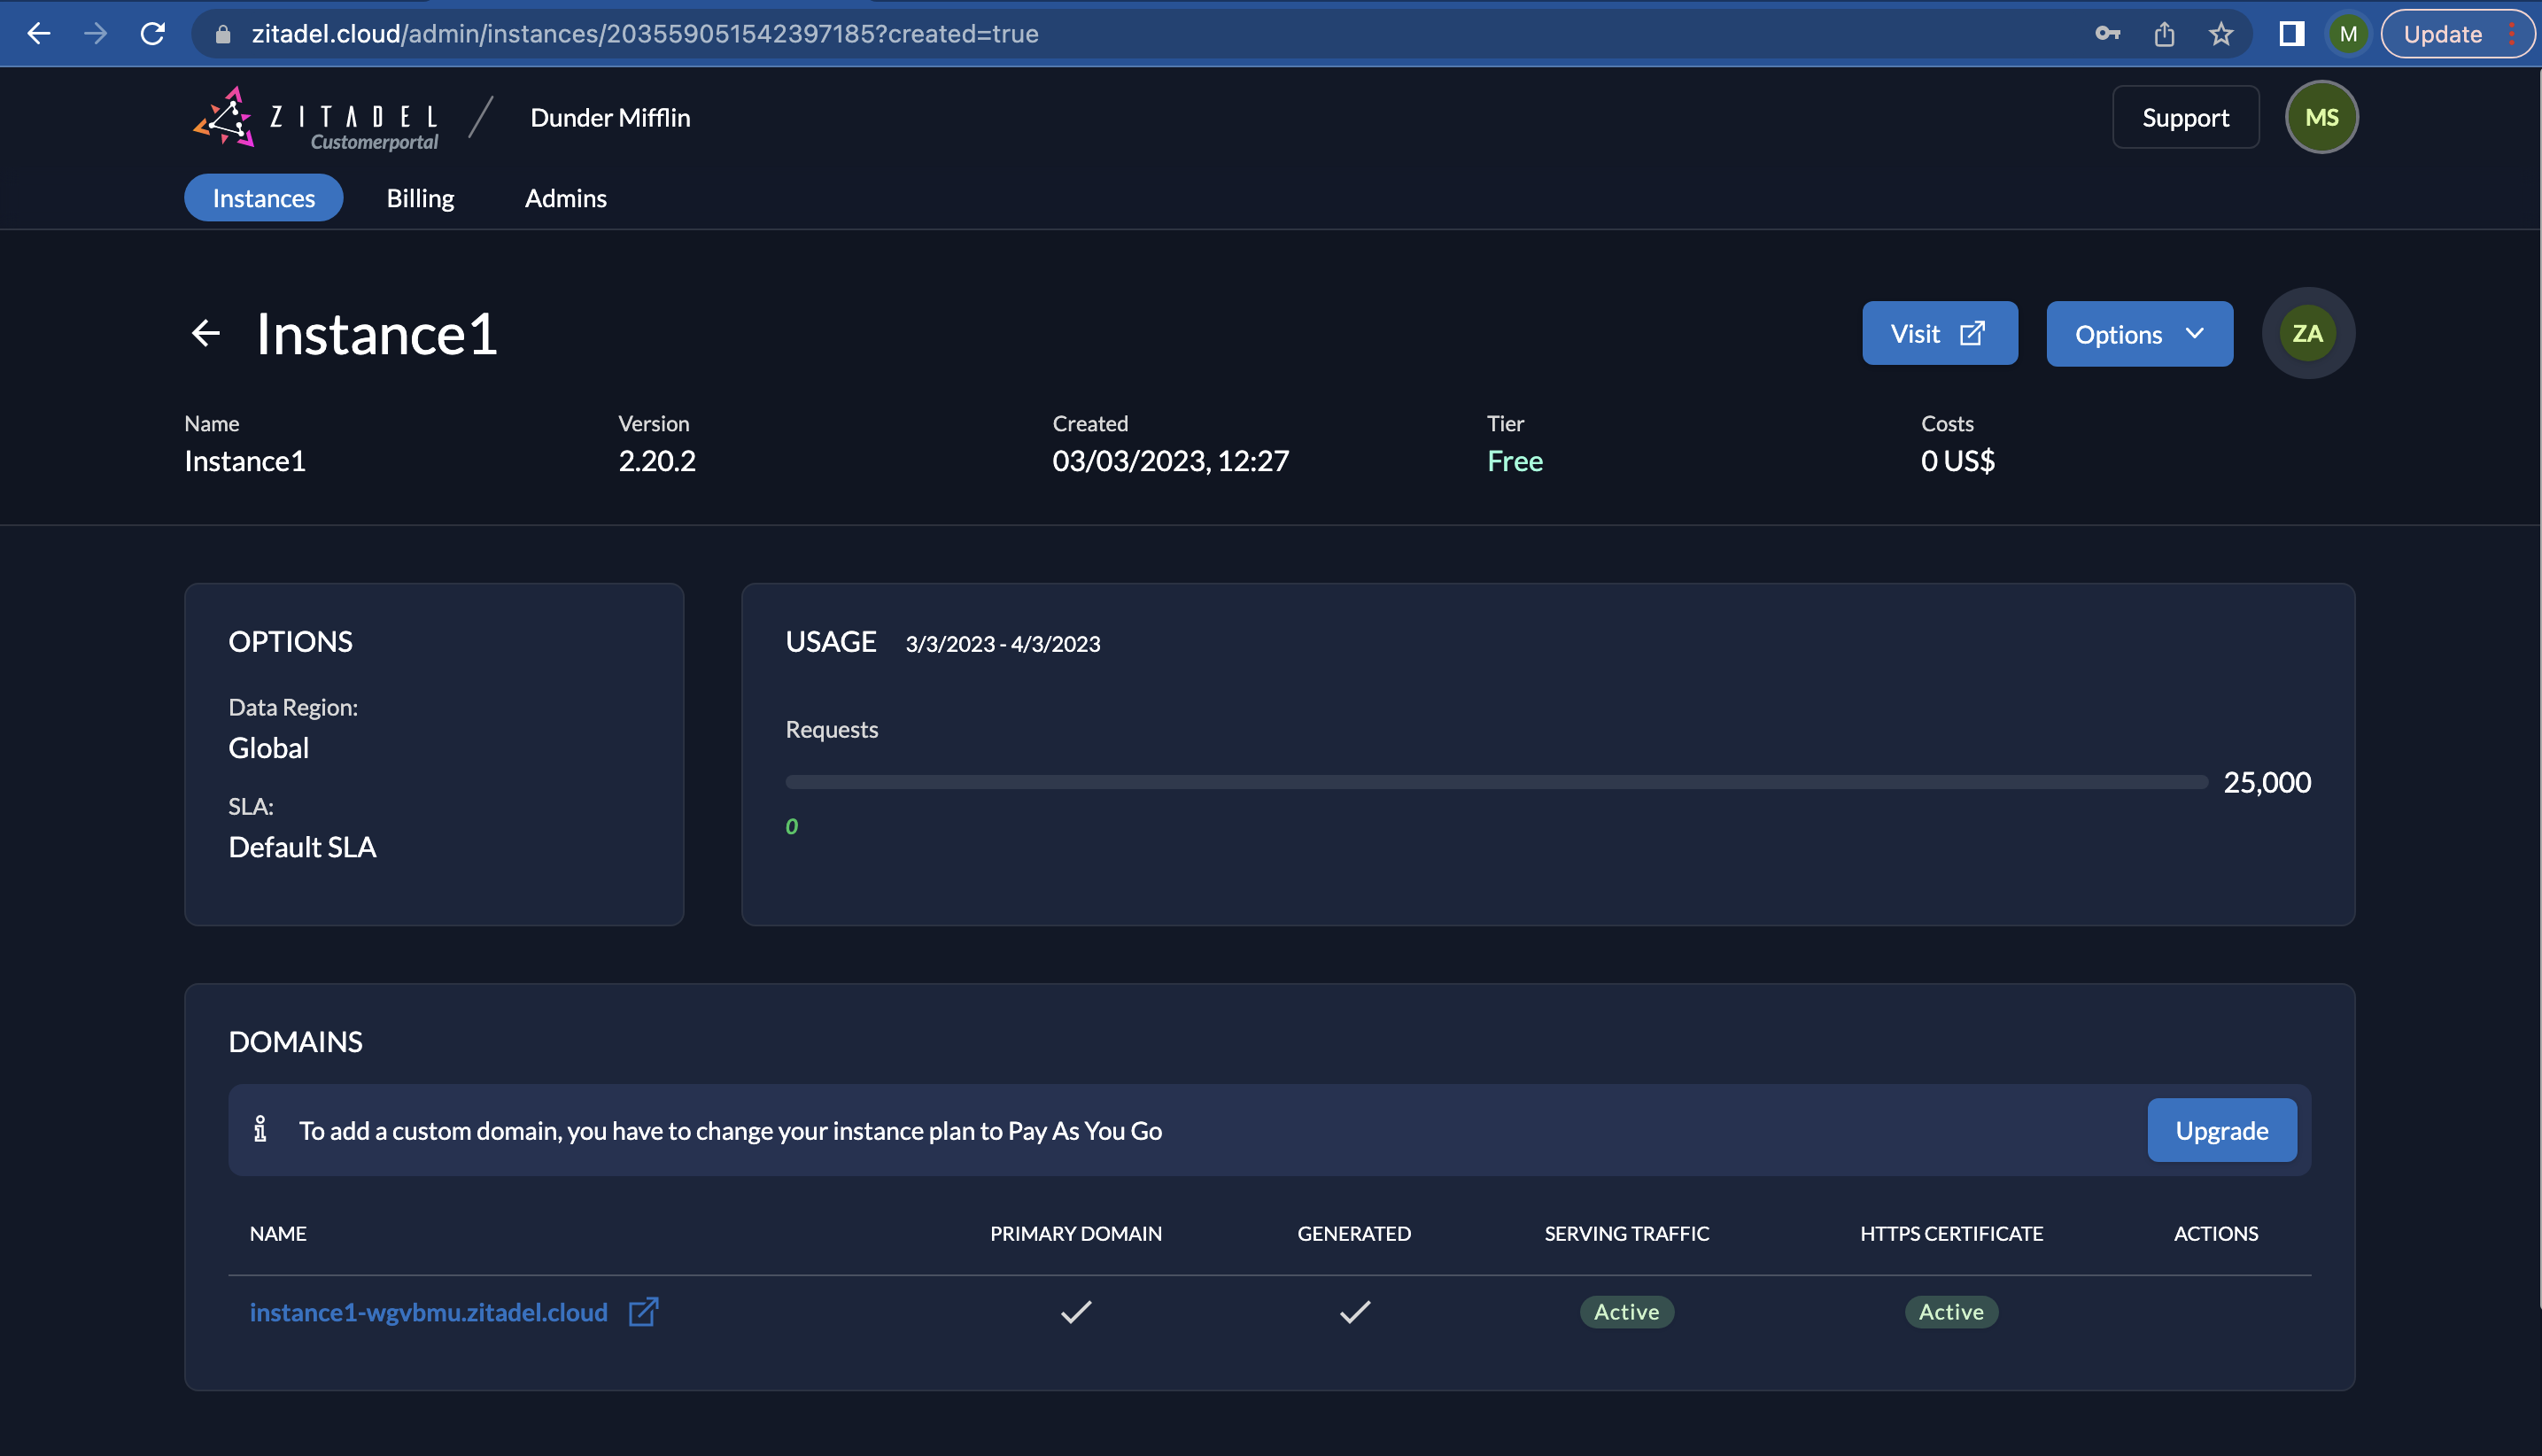
- Now you will see the details of your first instance. You can click on "Visit" at the top right to go to your instance.
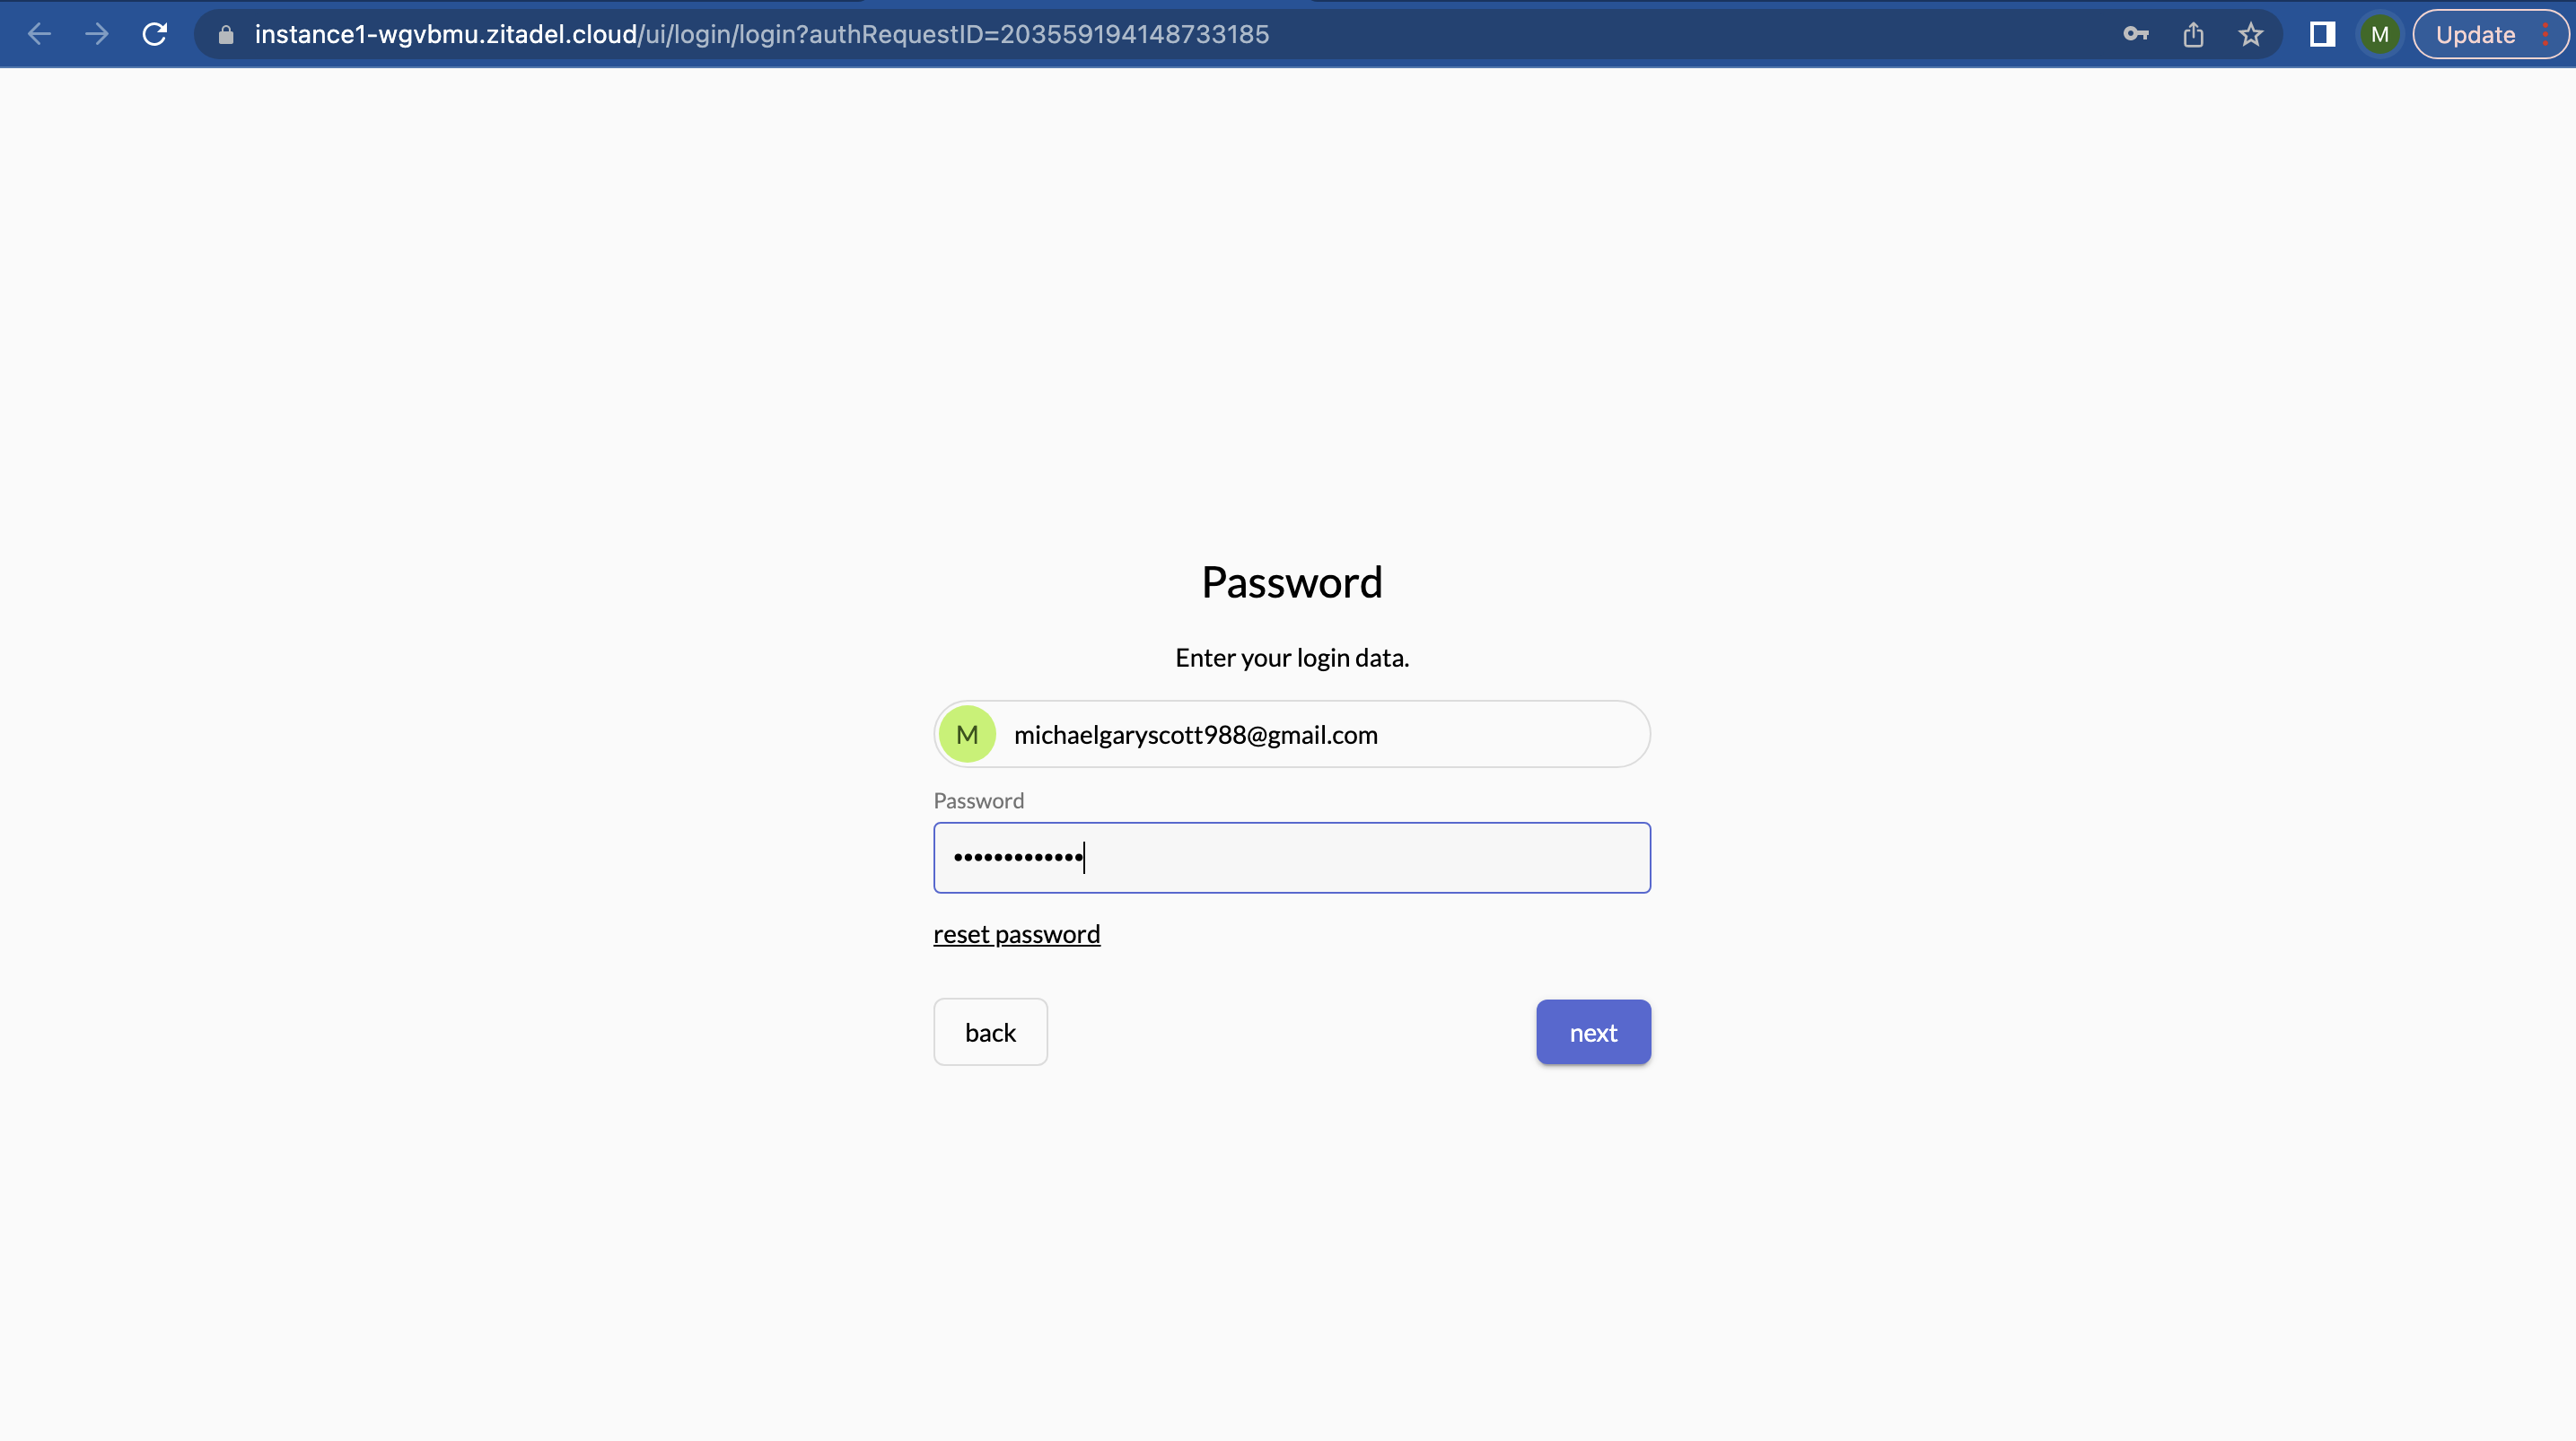
- To log in to your instance, provide the username and password, and click “next”.
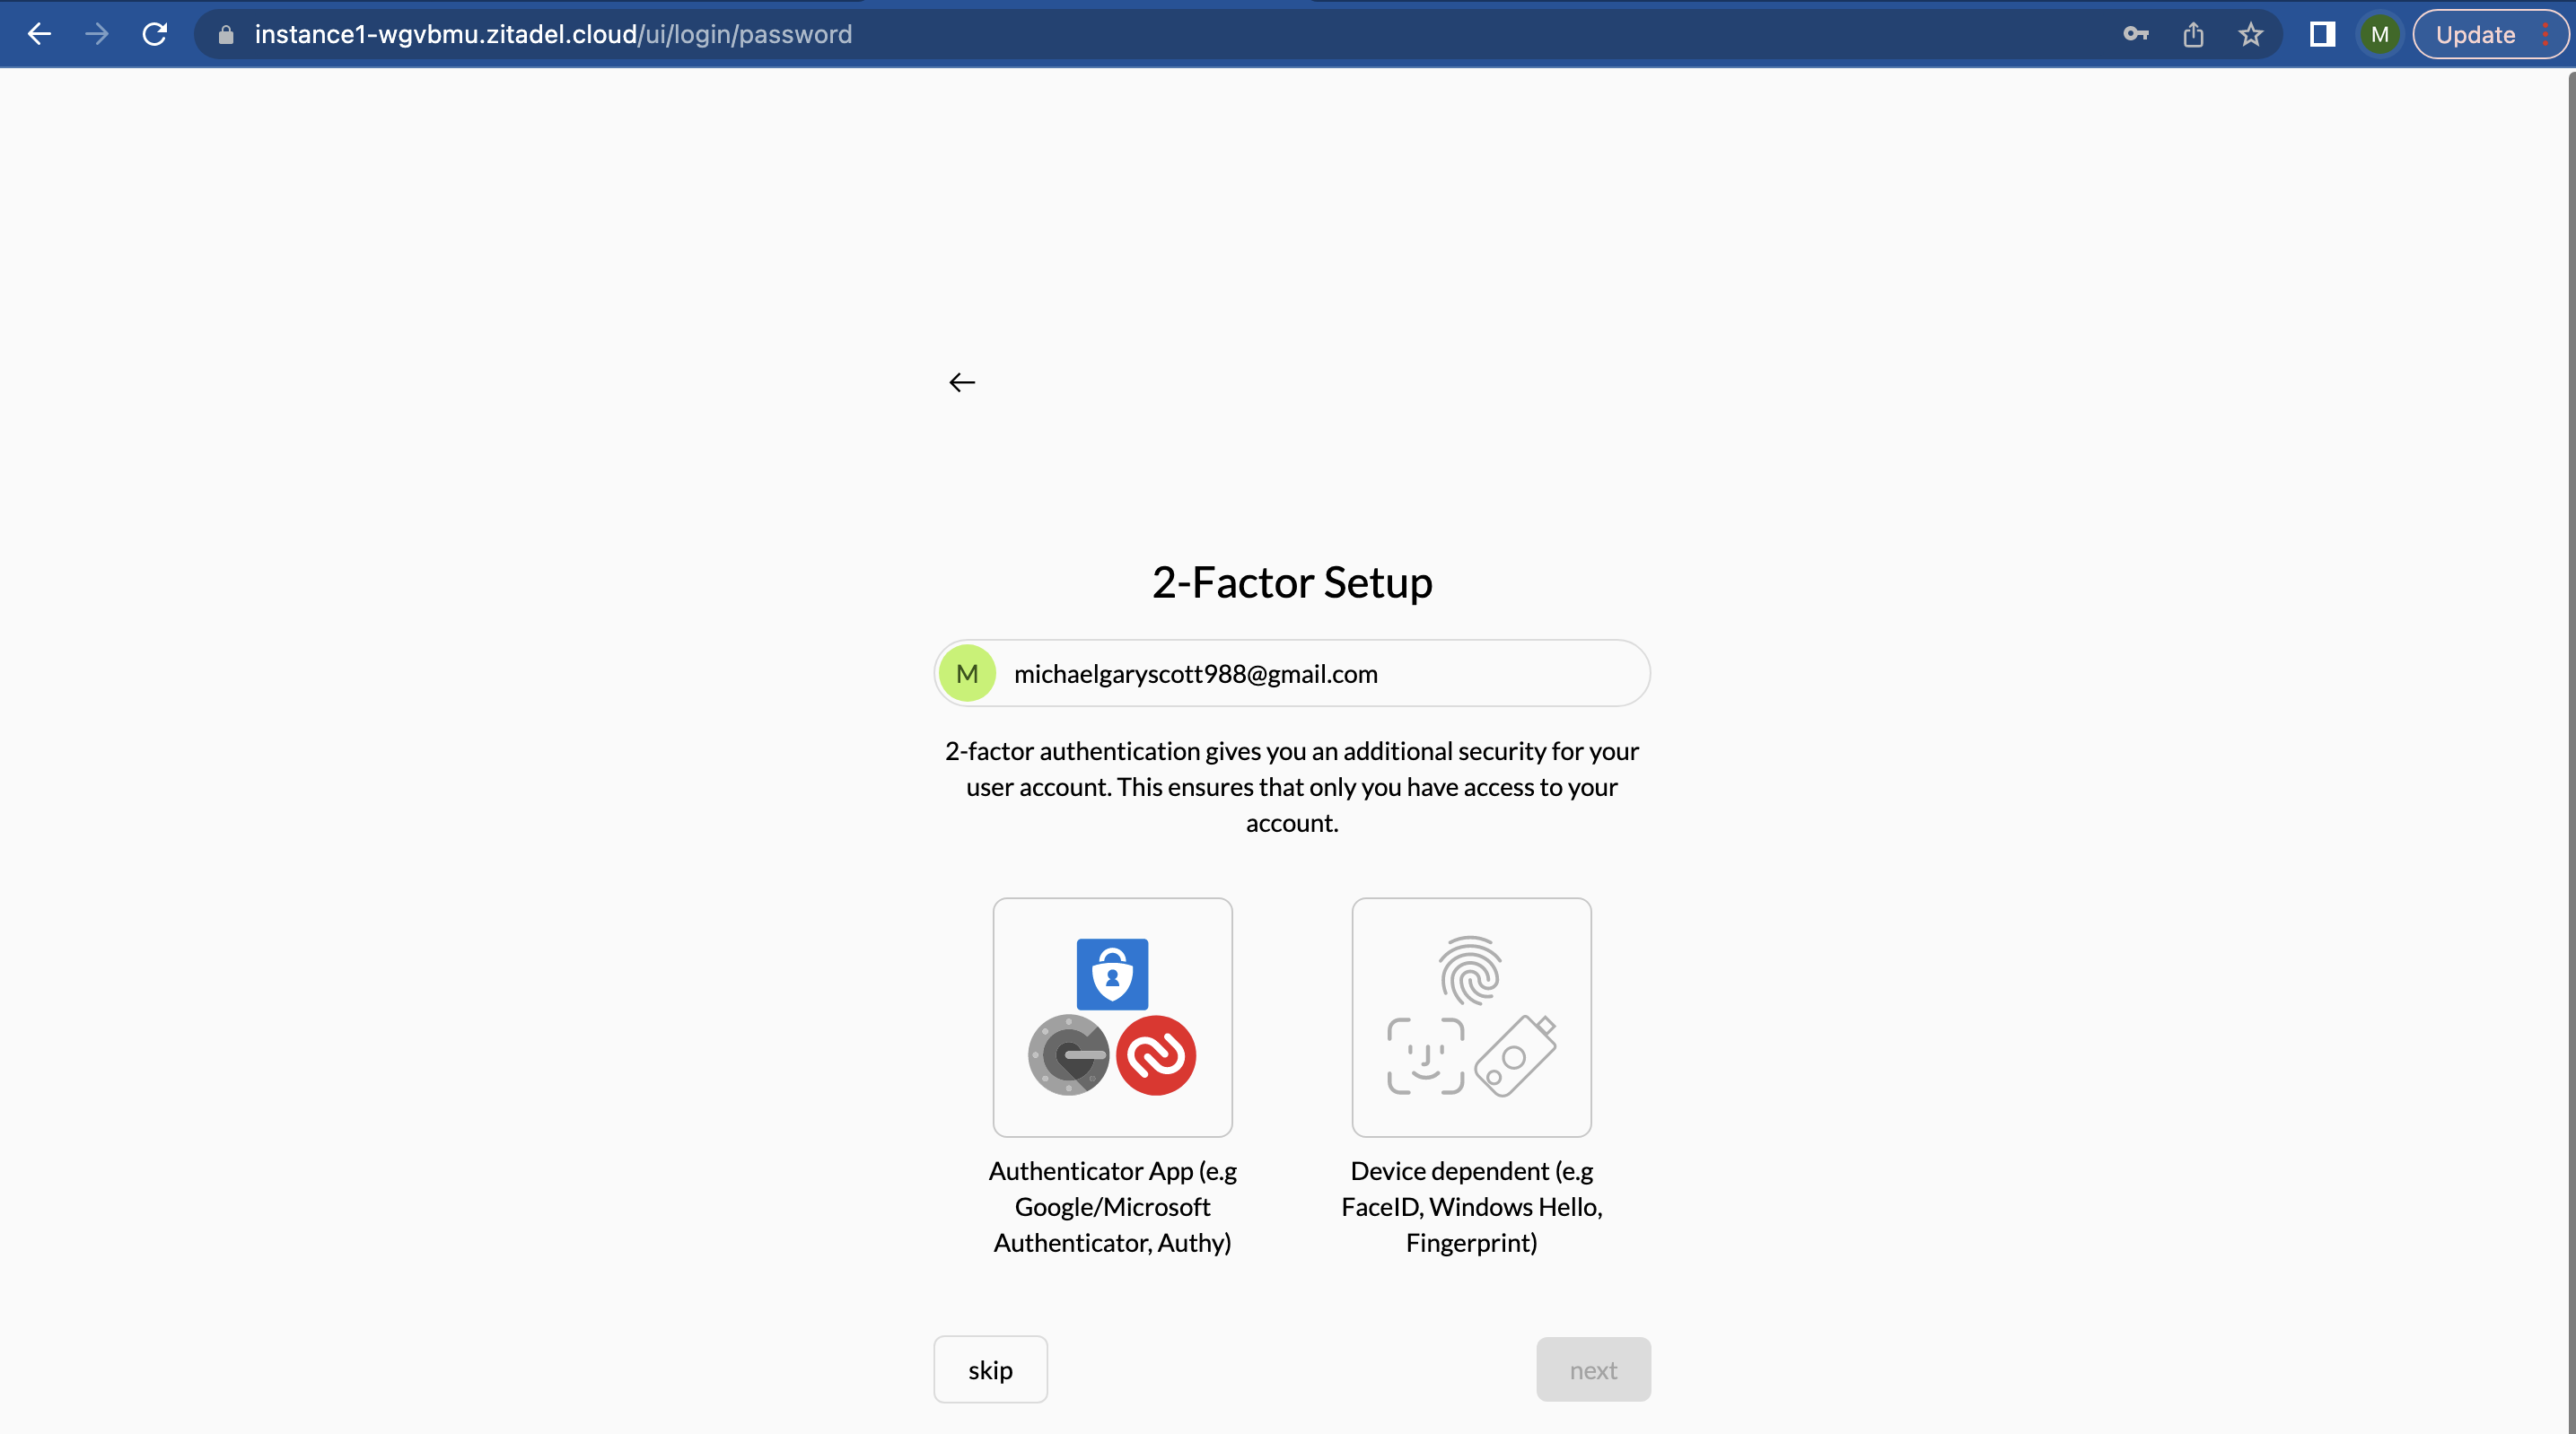
- Skip the 2-factor authentication for now by clicking “skip”.
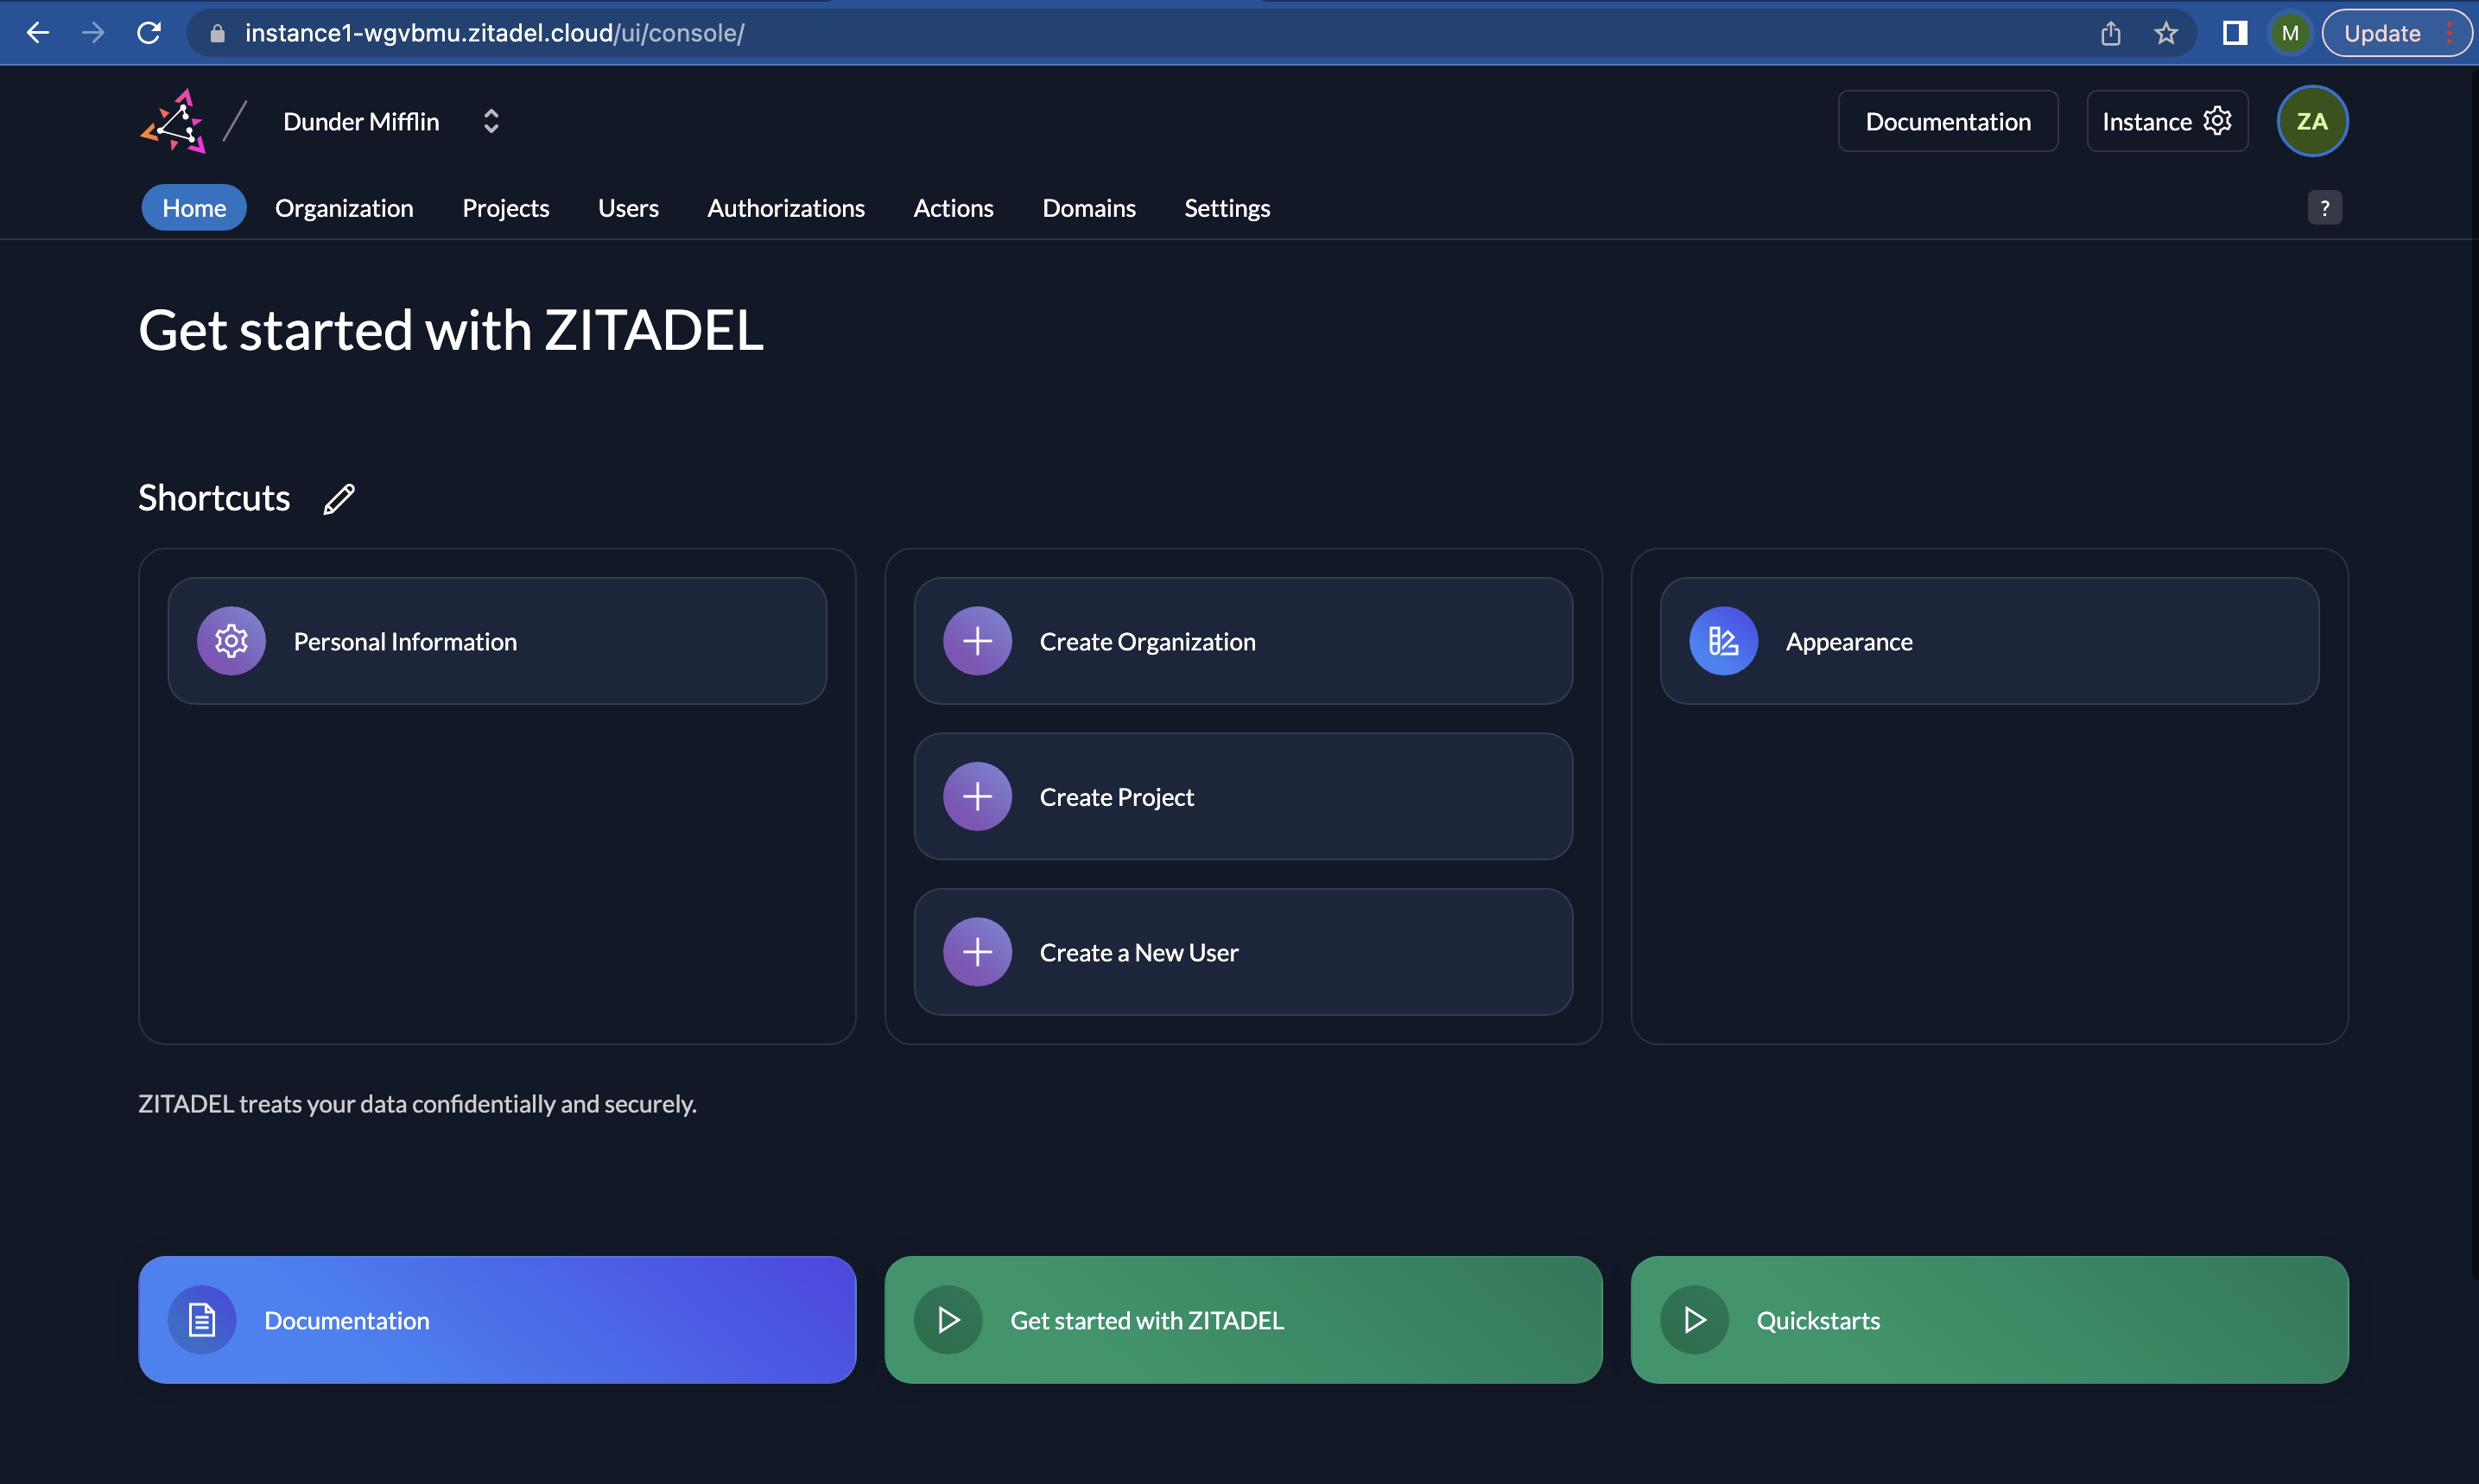
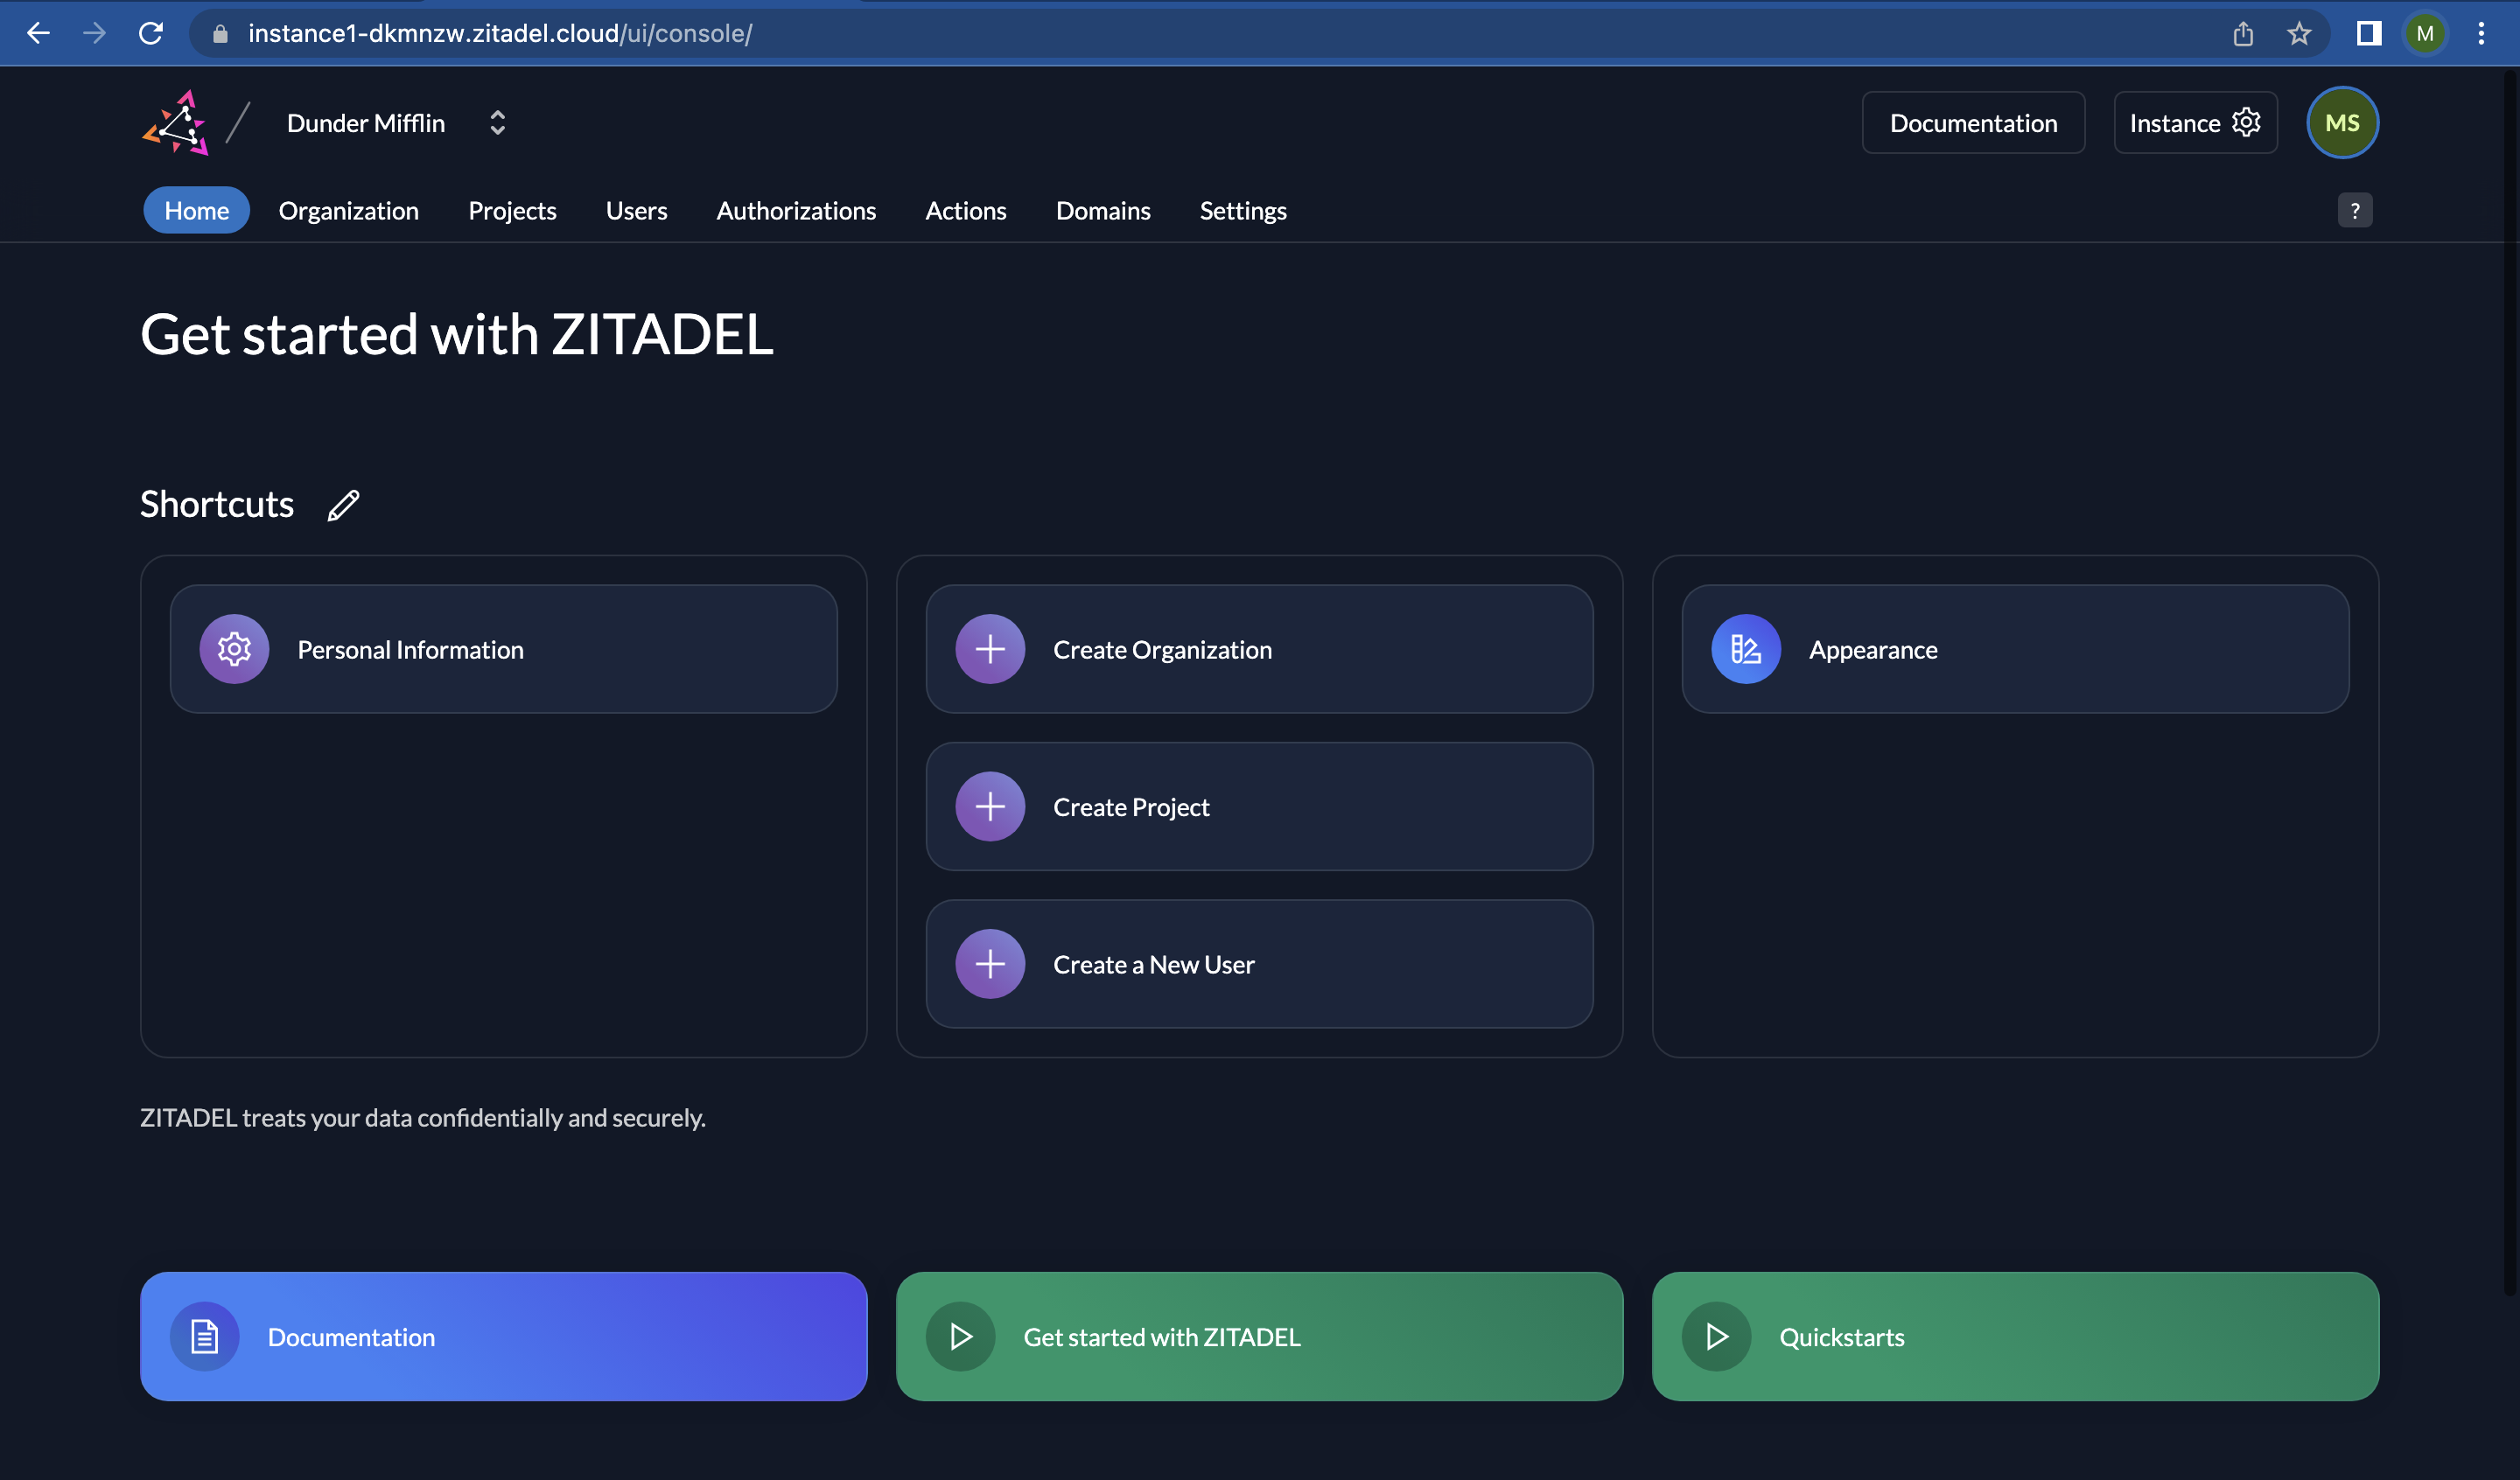
- And there you go! You now have access to your instance.
3. Create your First Project
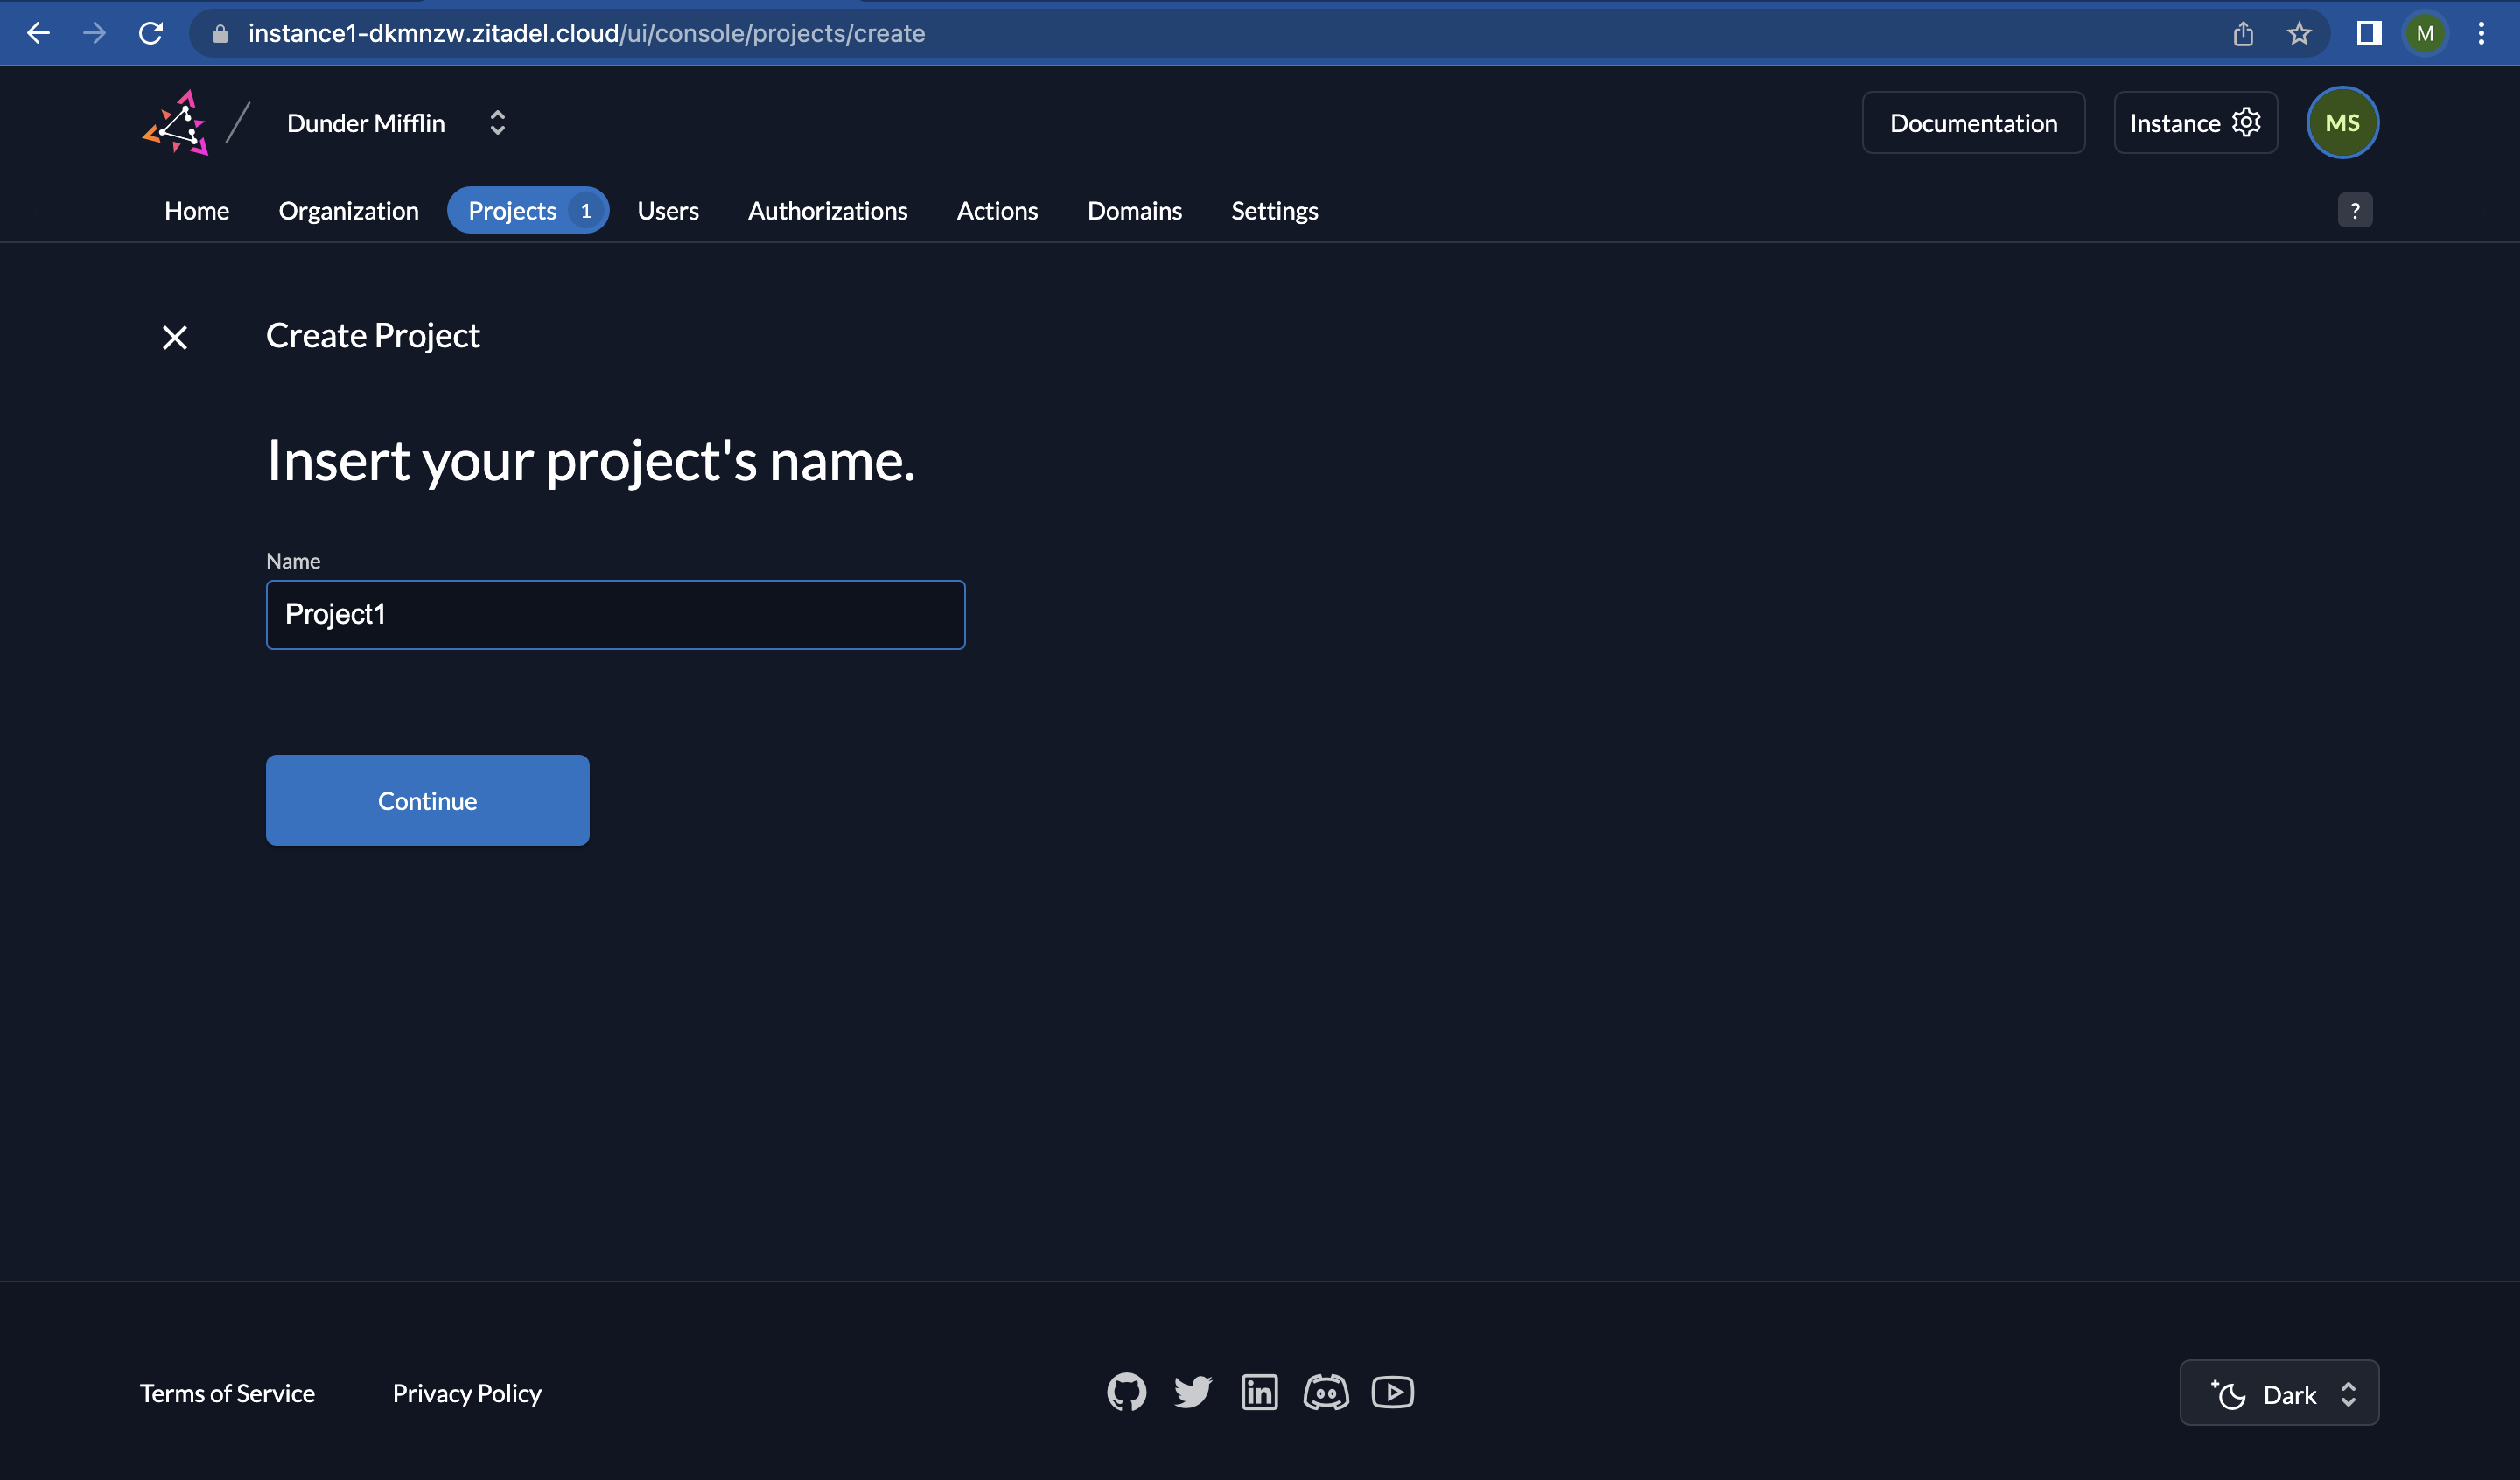
- To create a project in the instance you just created, click on “Create Project”.
- Insert “Project1” (or any name of your choice) as the project’s name and click the “Continue” button.
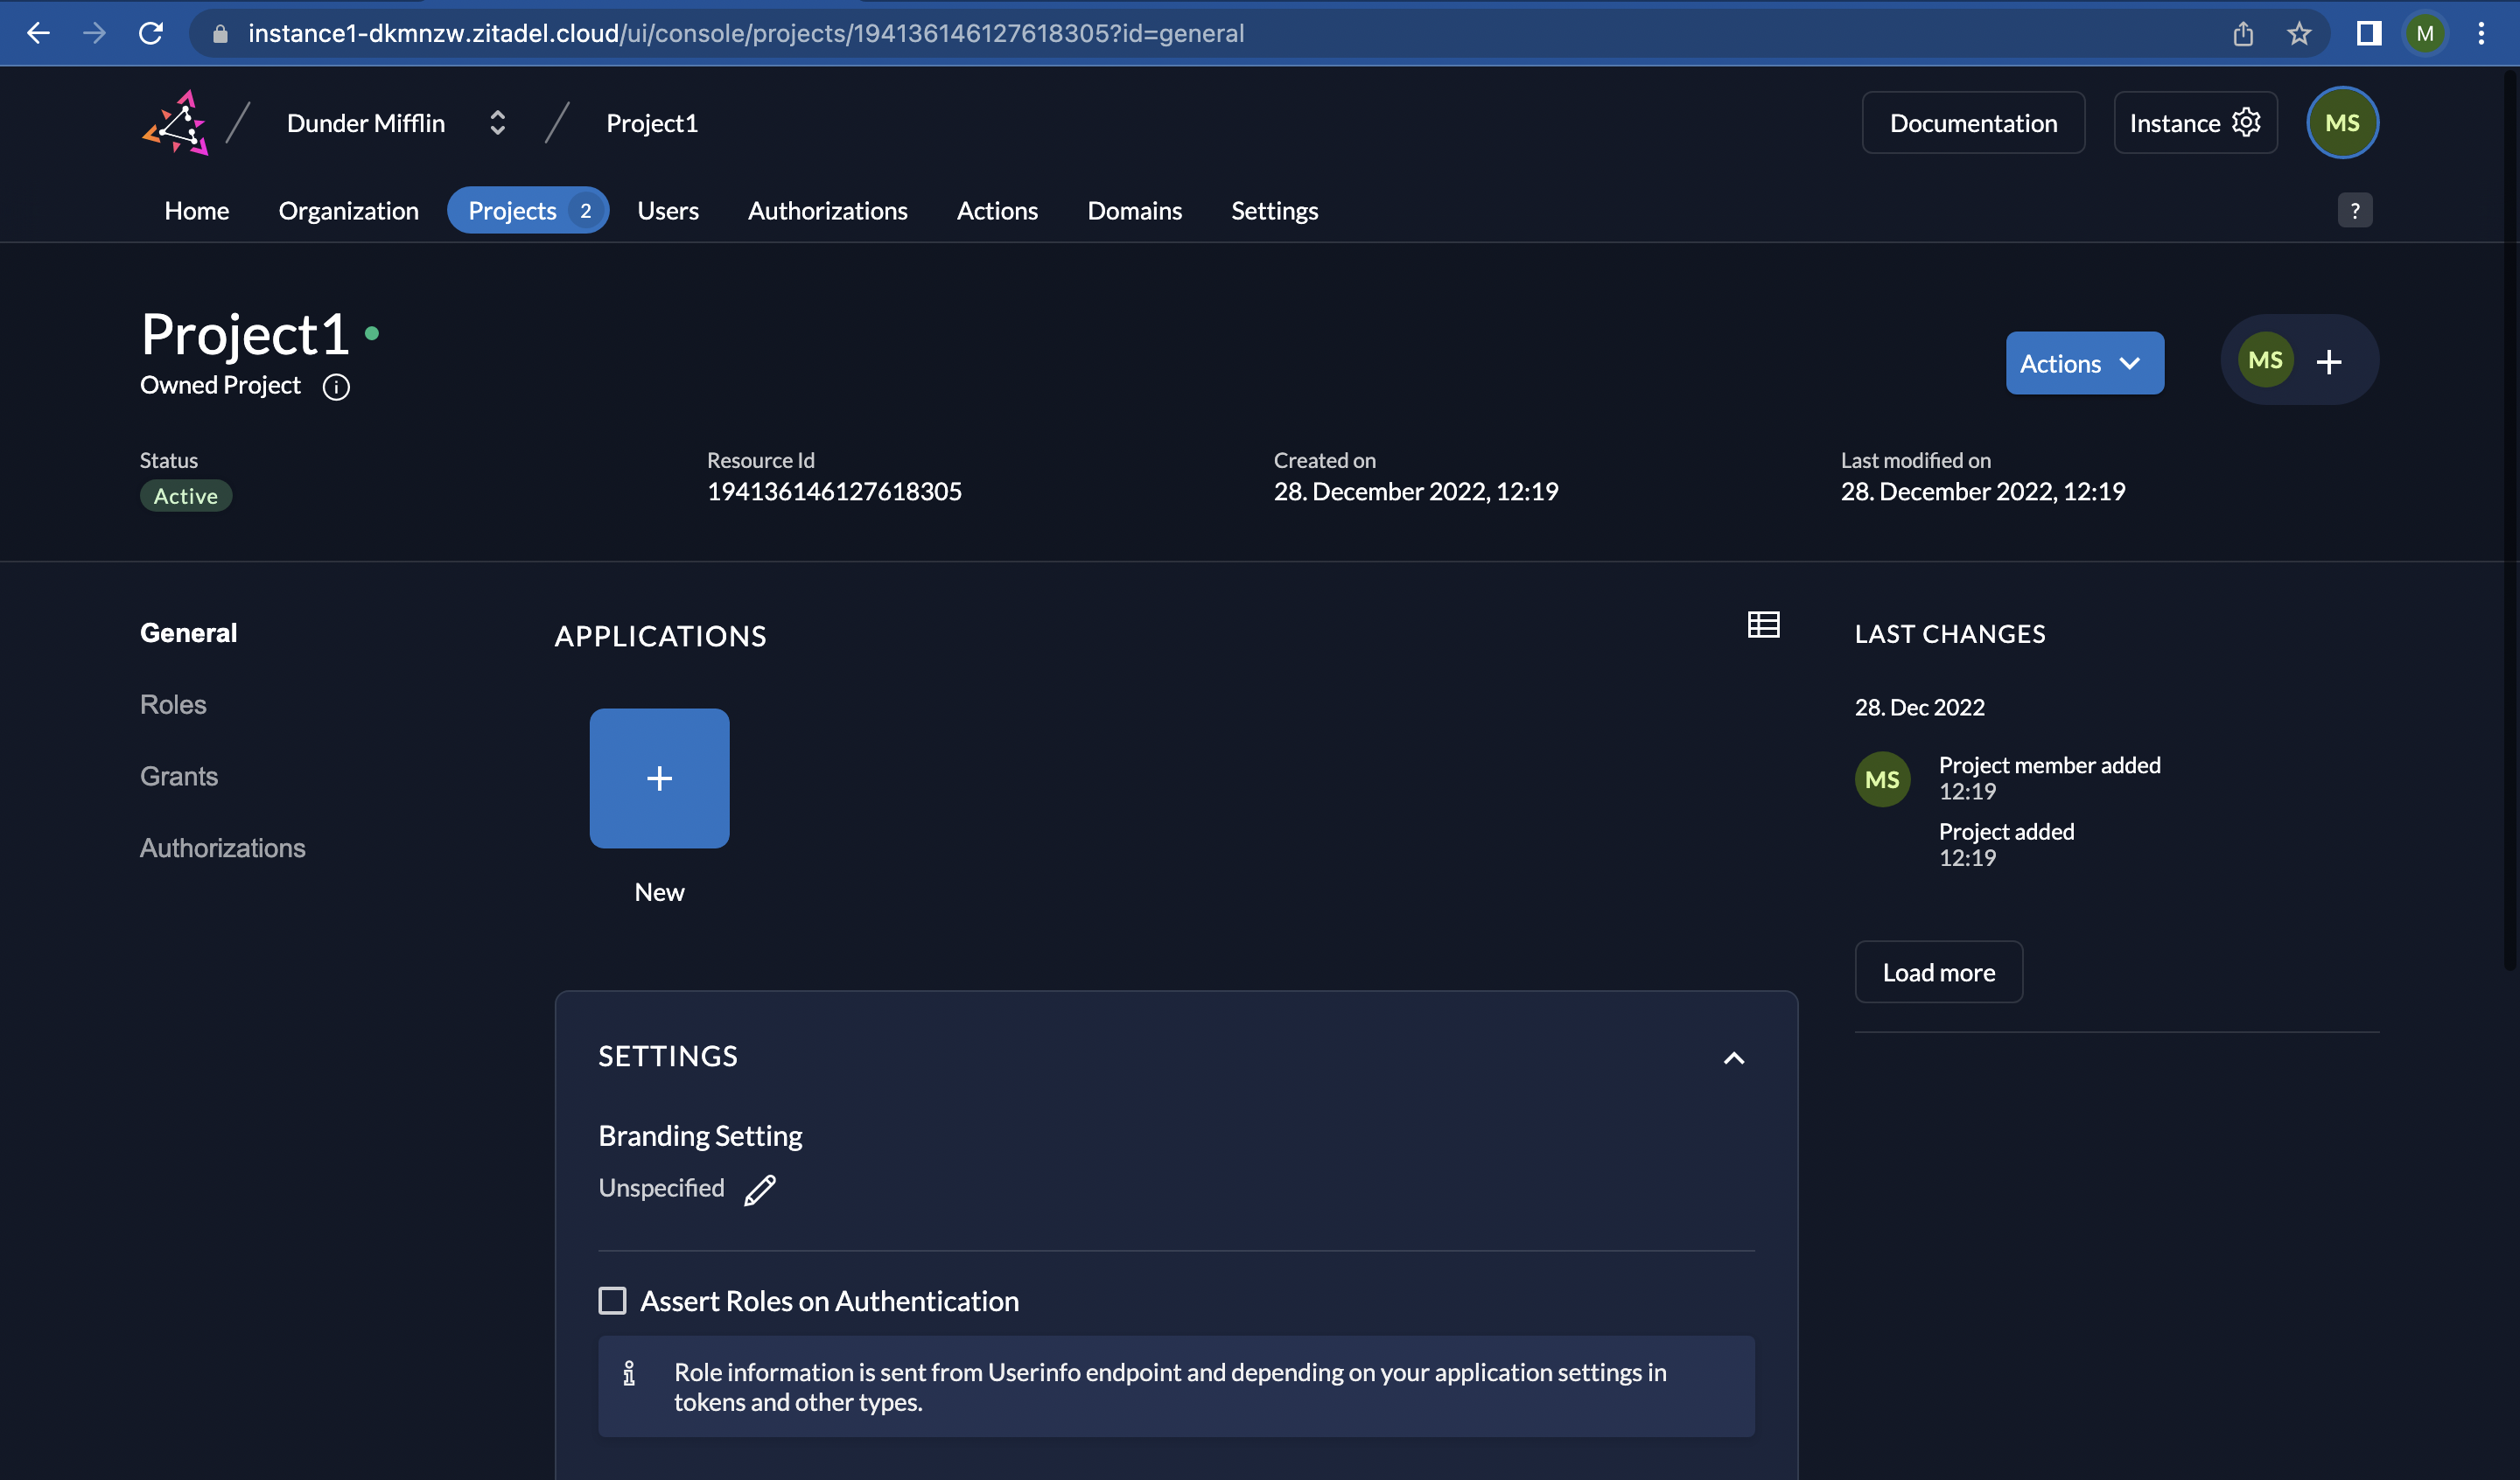
- Now you will be taken to the screen below. “Project1” has been created.
4. Add Users (optional)
Skip optional steps and jump directly to the create application step.
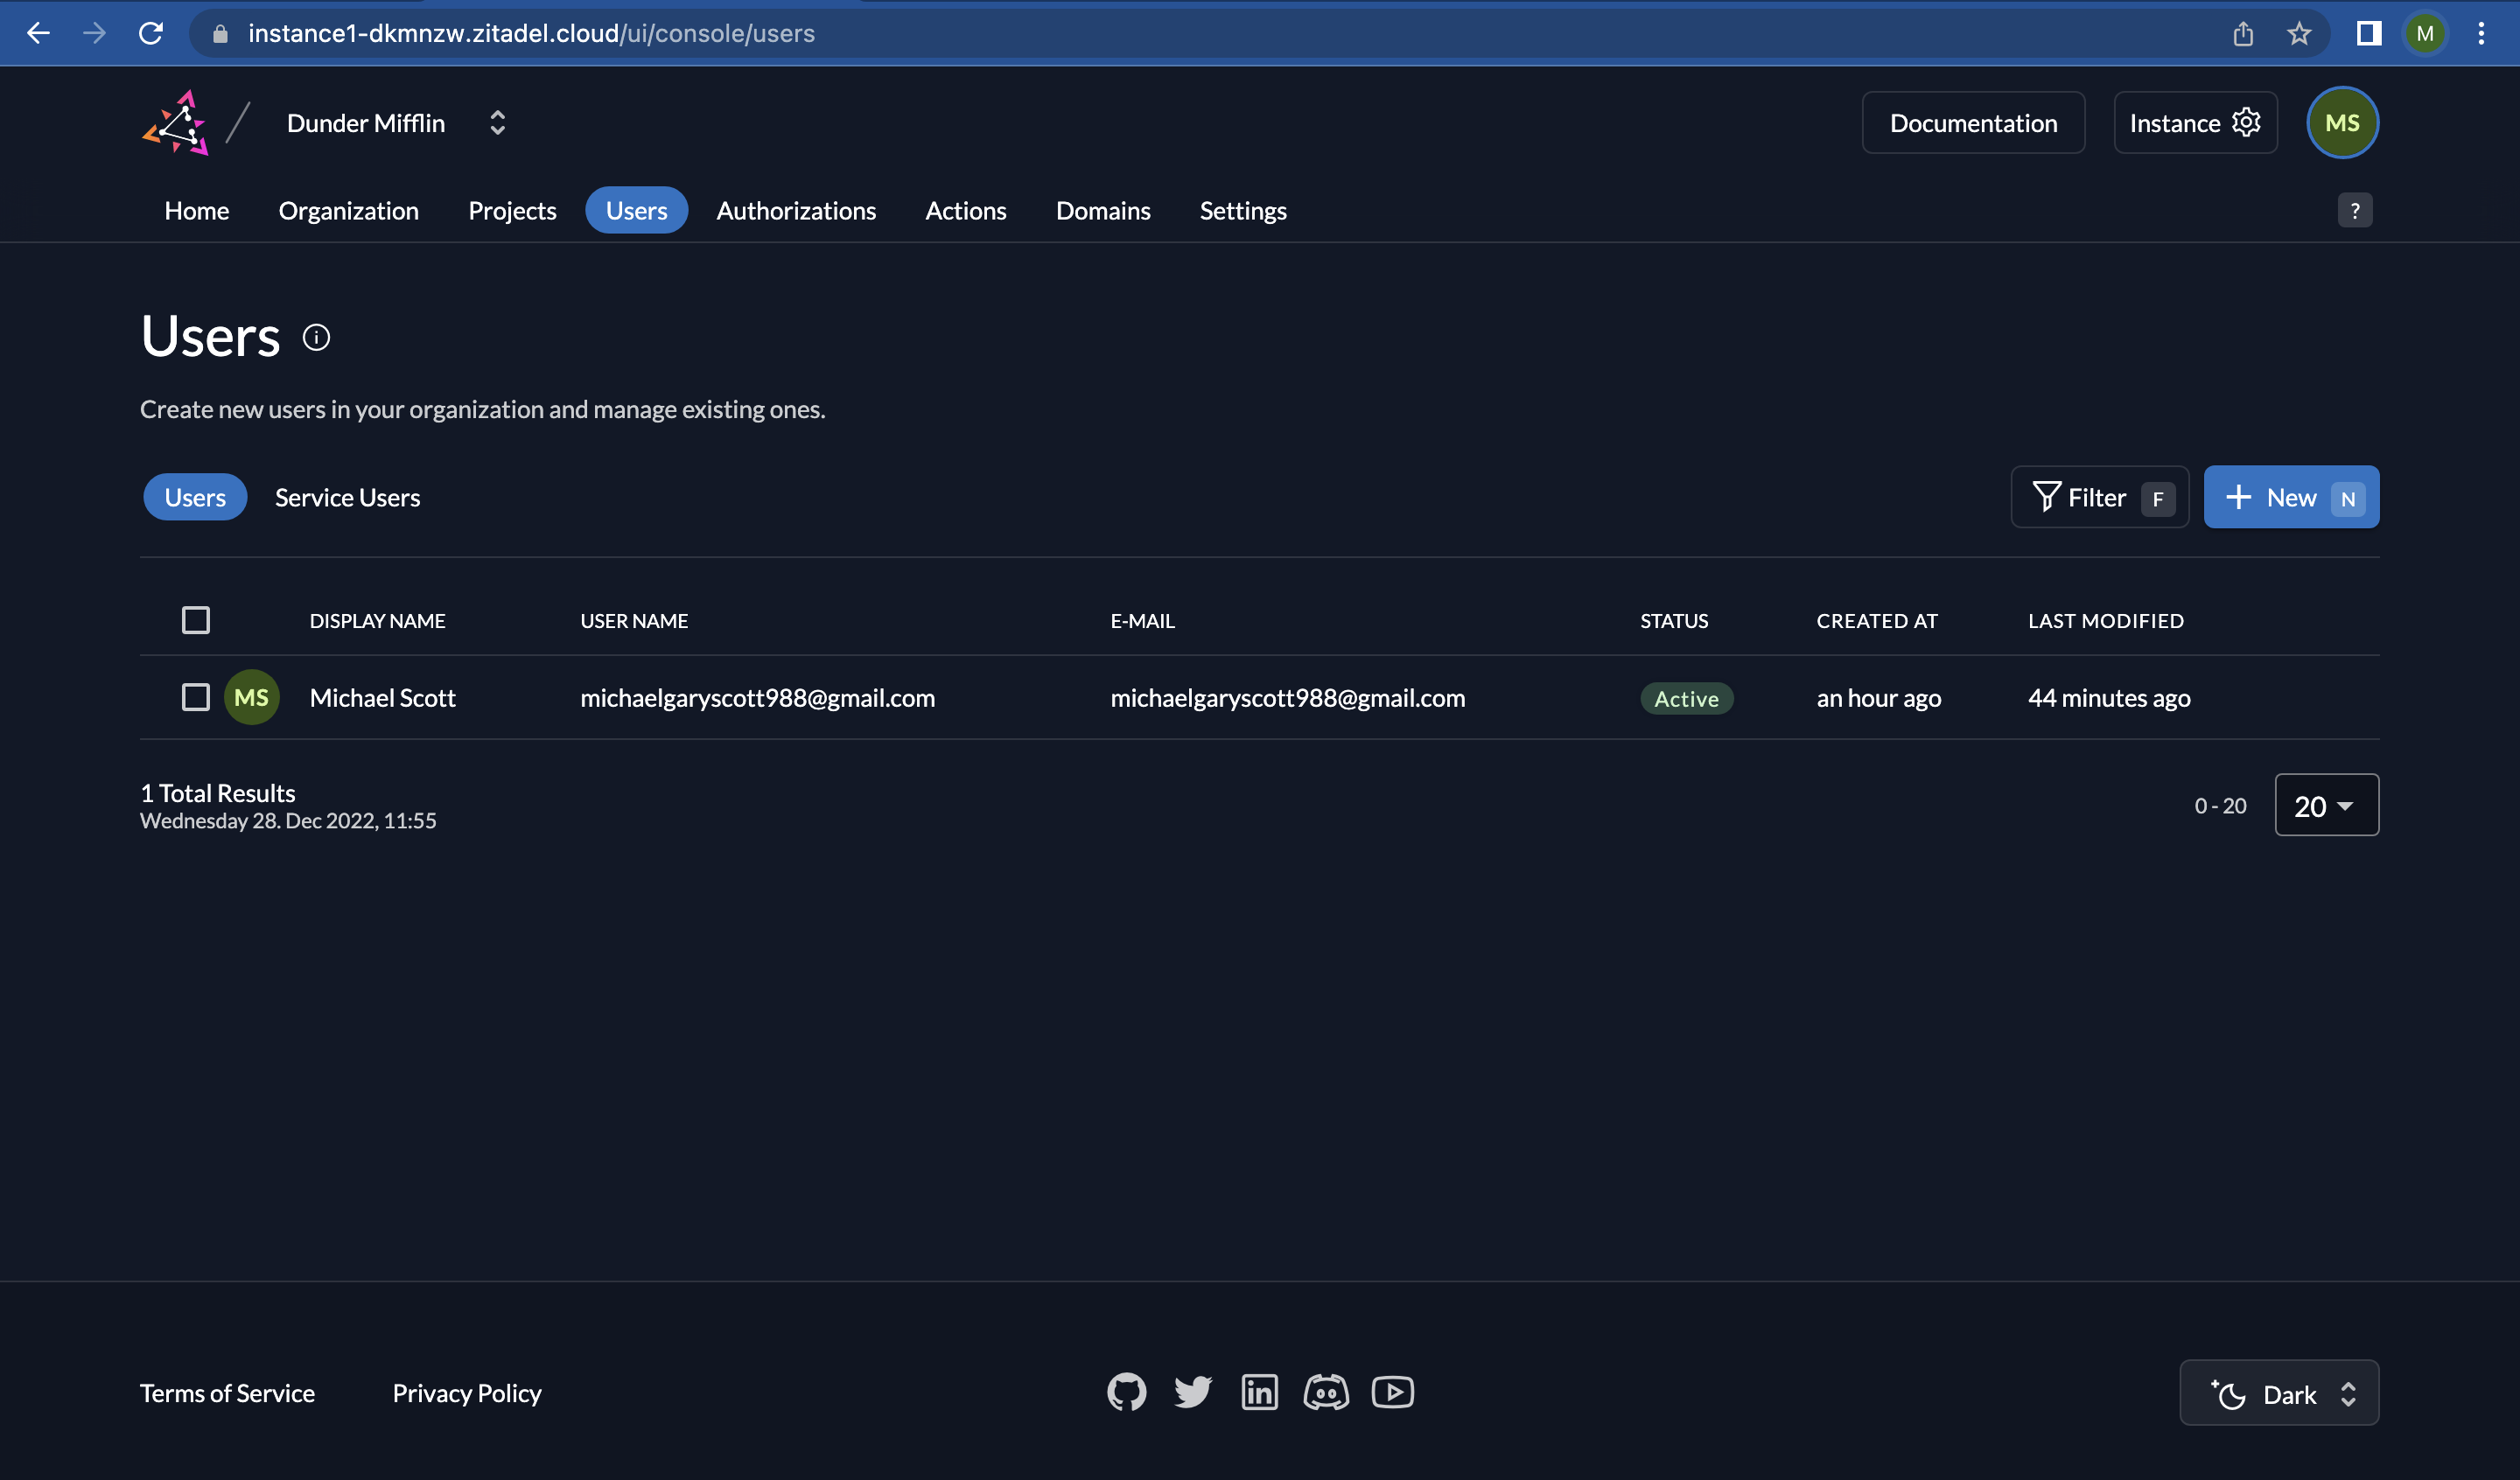
- To add users, click on “Users” at the top menu. You will see that the user you already created is listed as a user here. Click on the “New” button to create a new user.
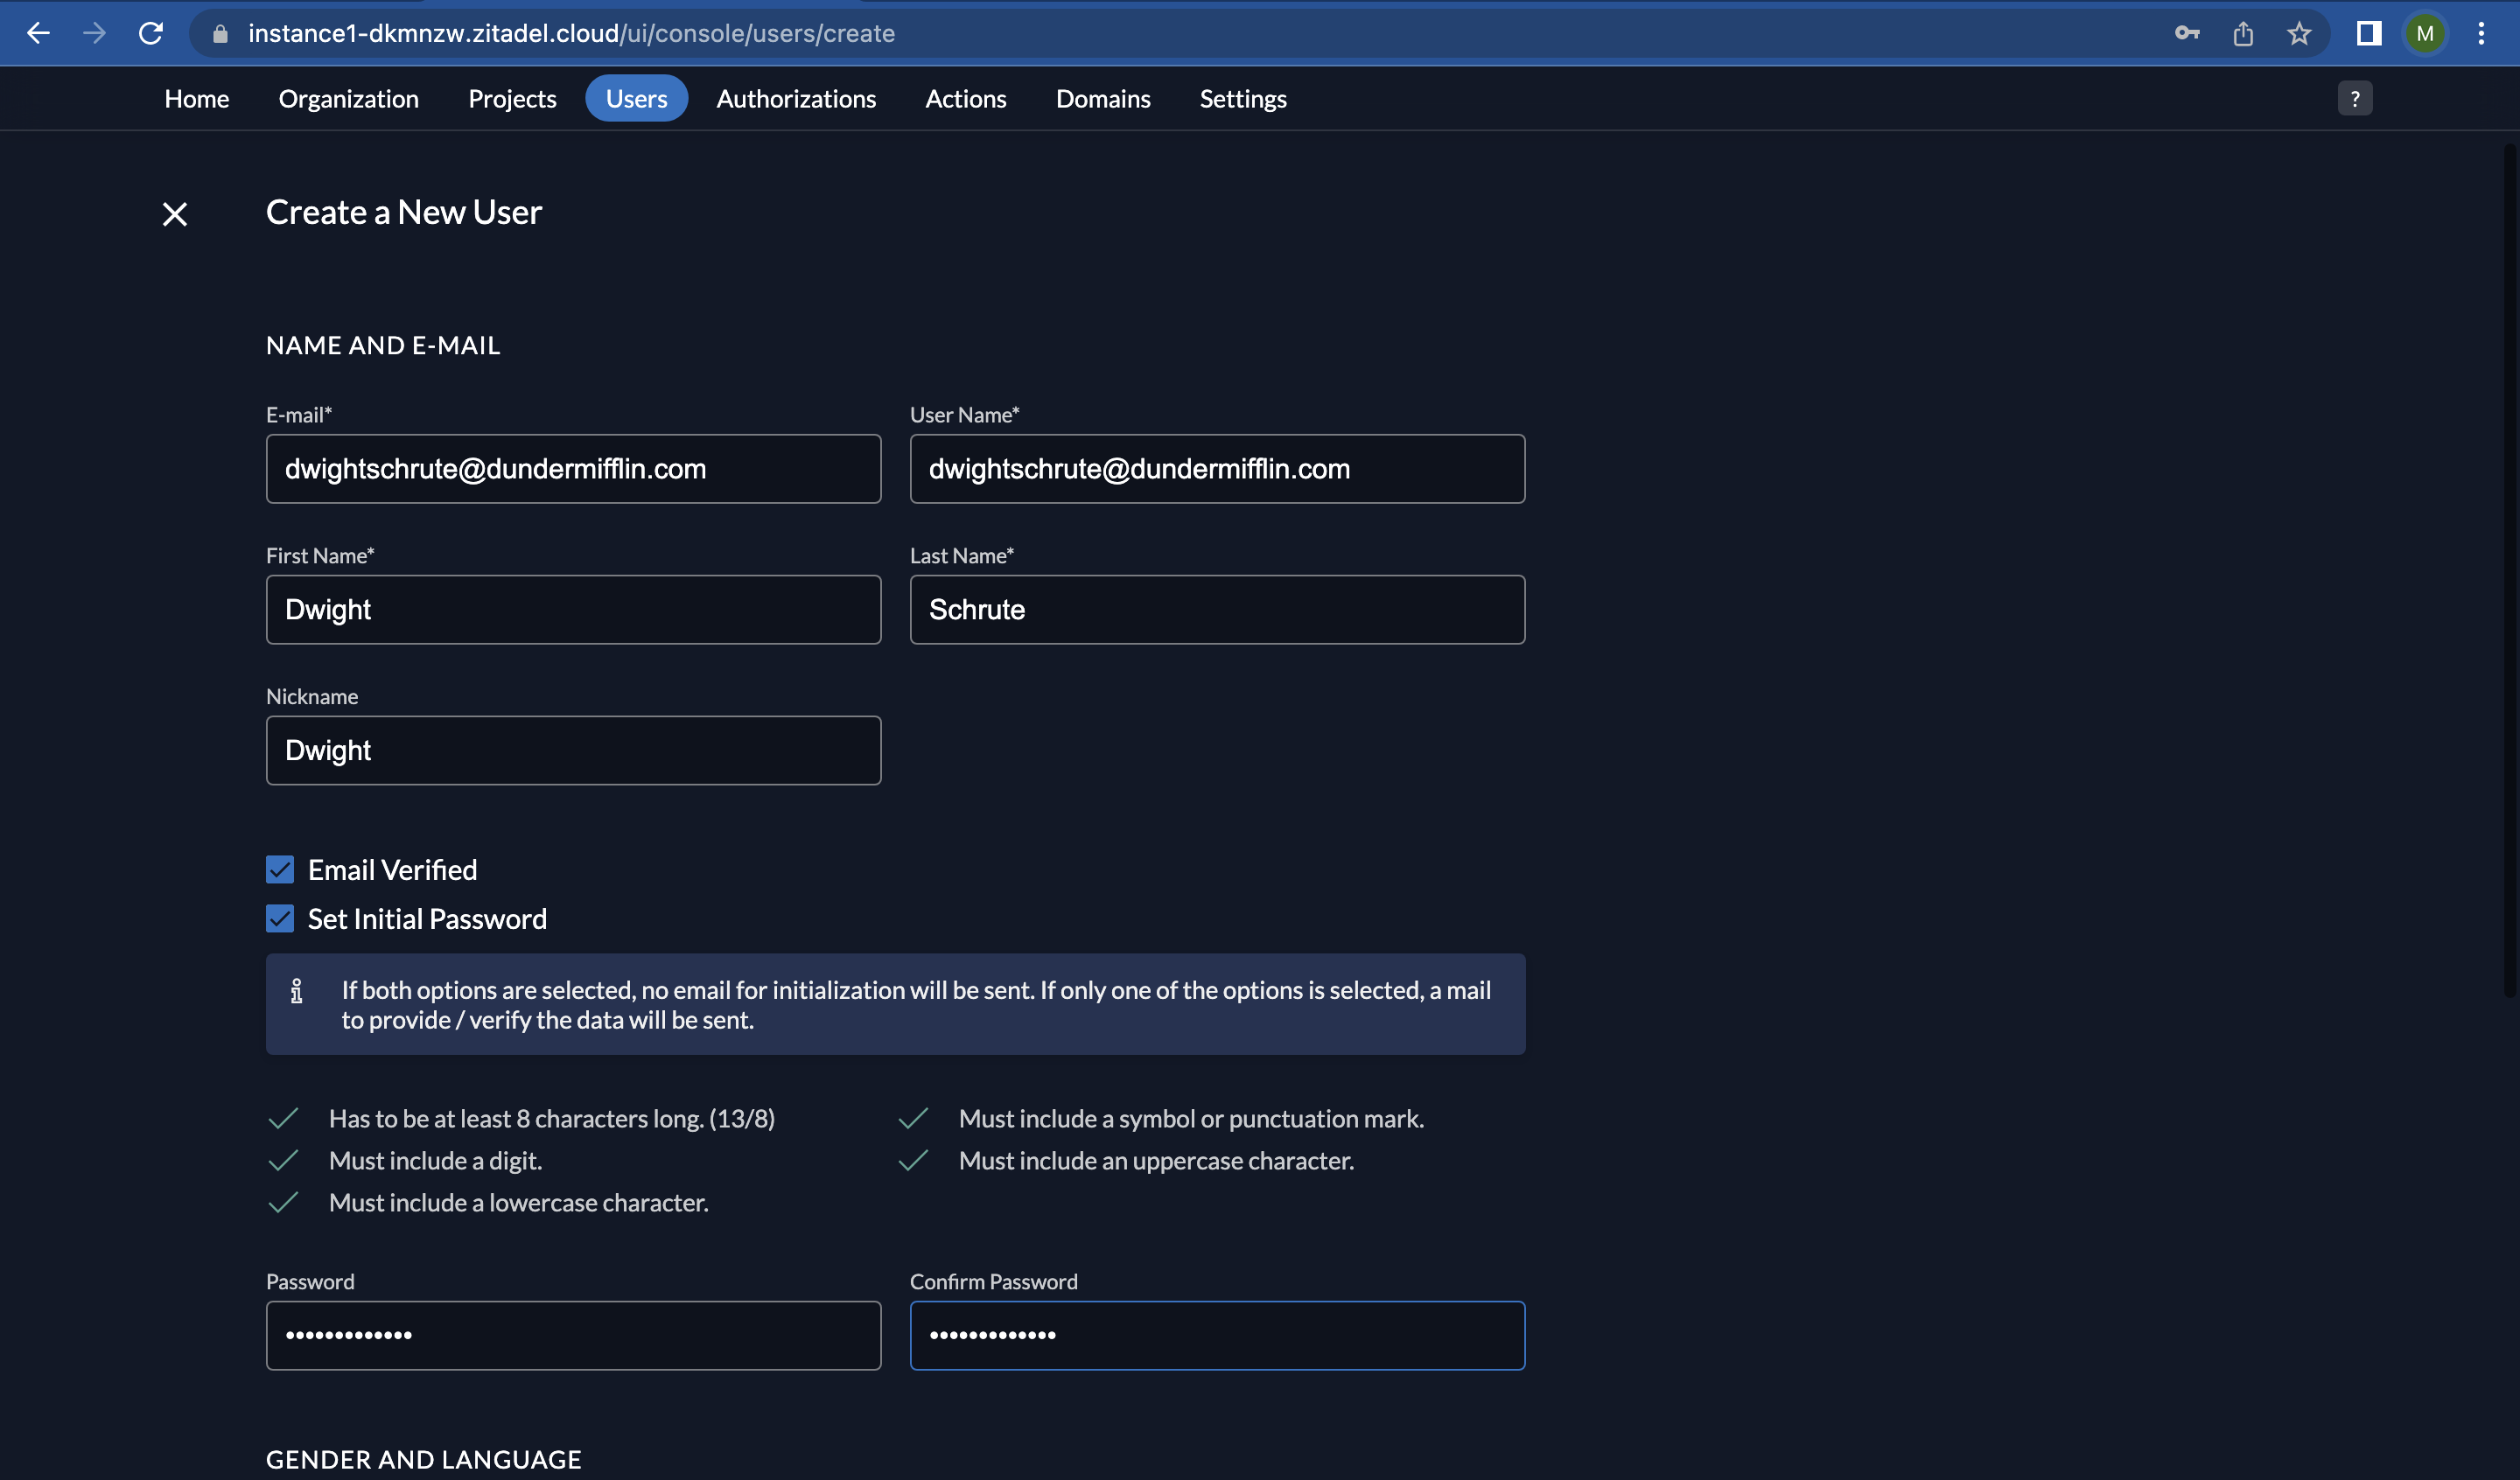
- Let’s add another user as shown below. Fill in the user details as shown below and click on the “Create” button when you are done.
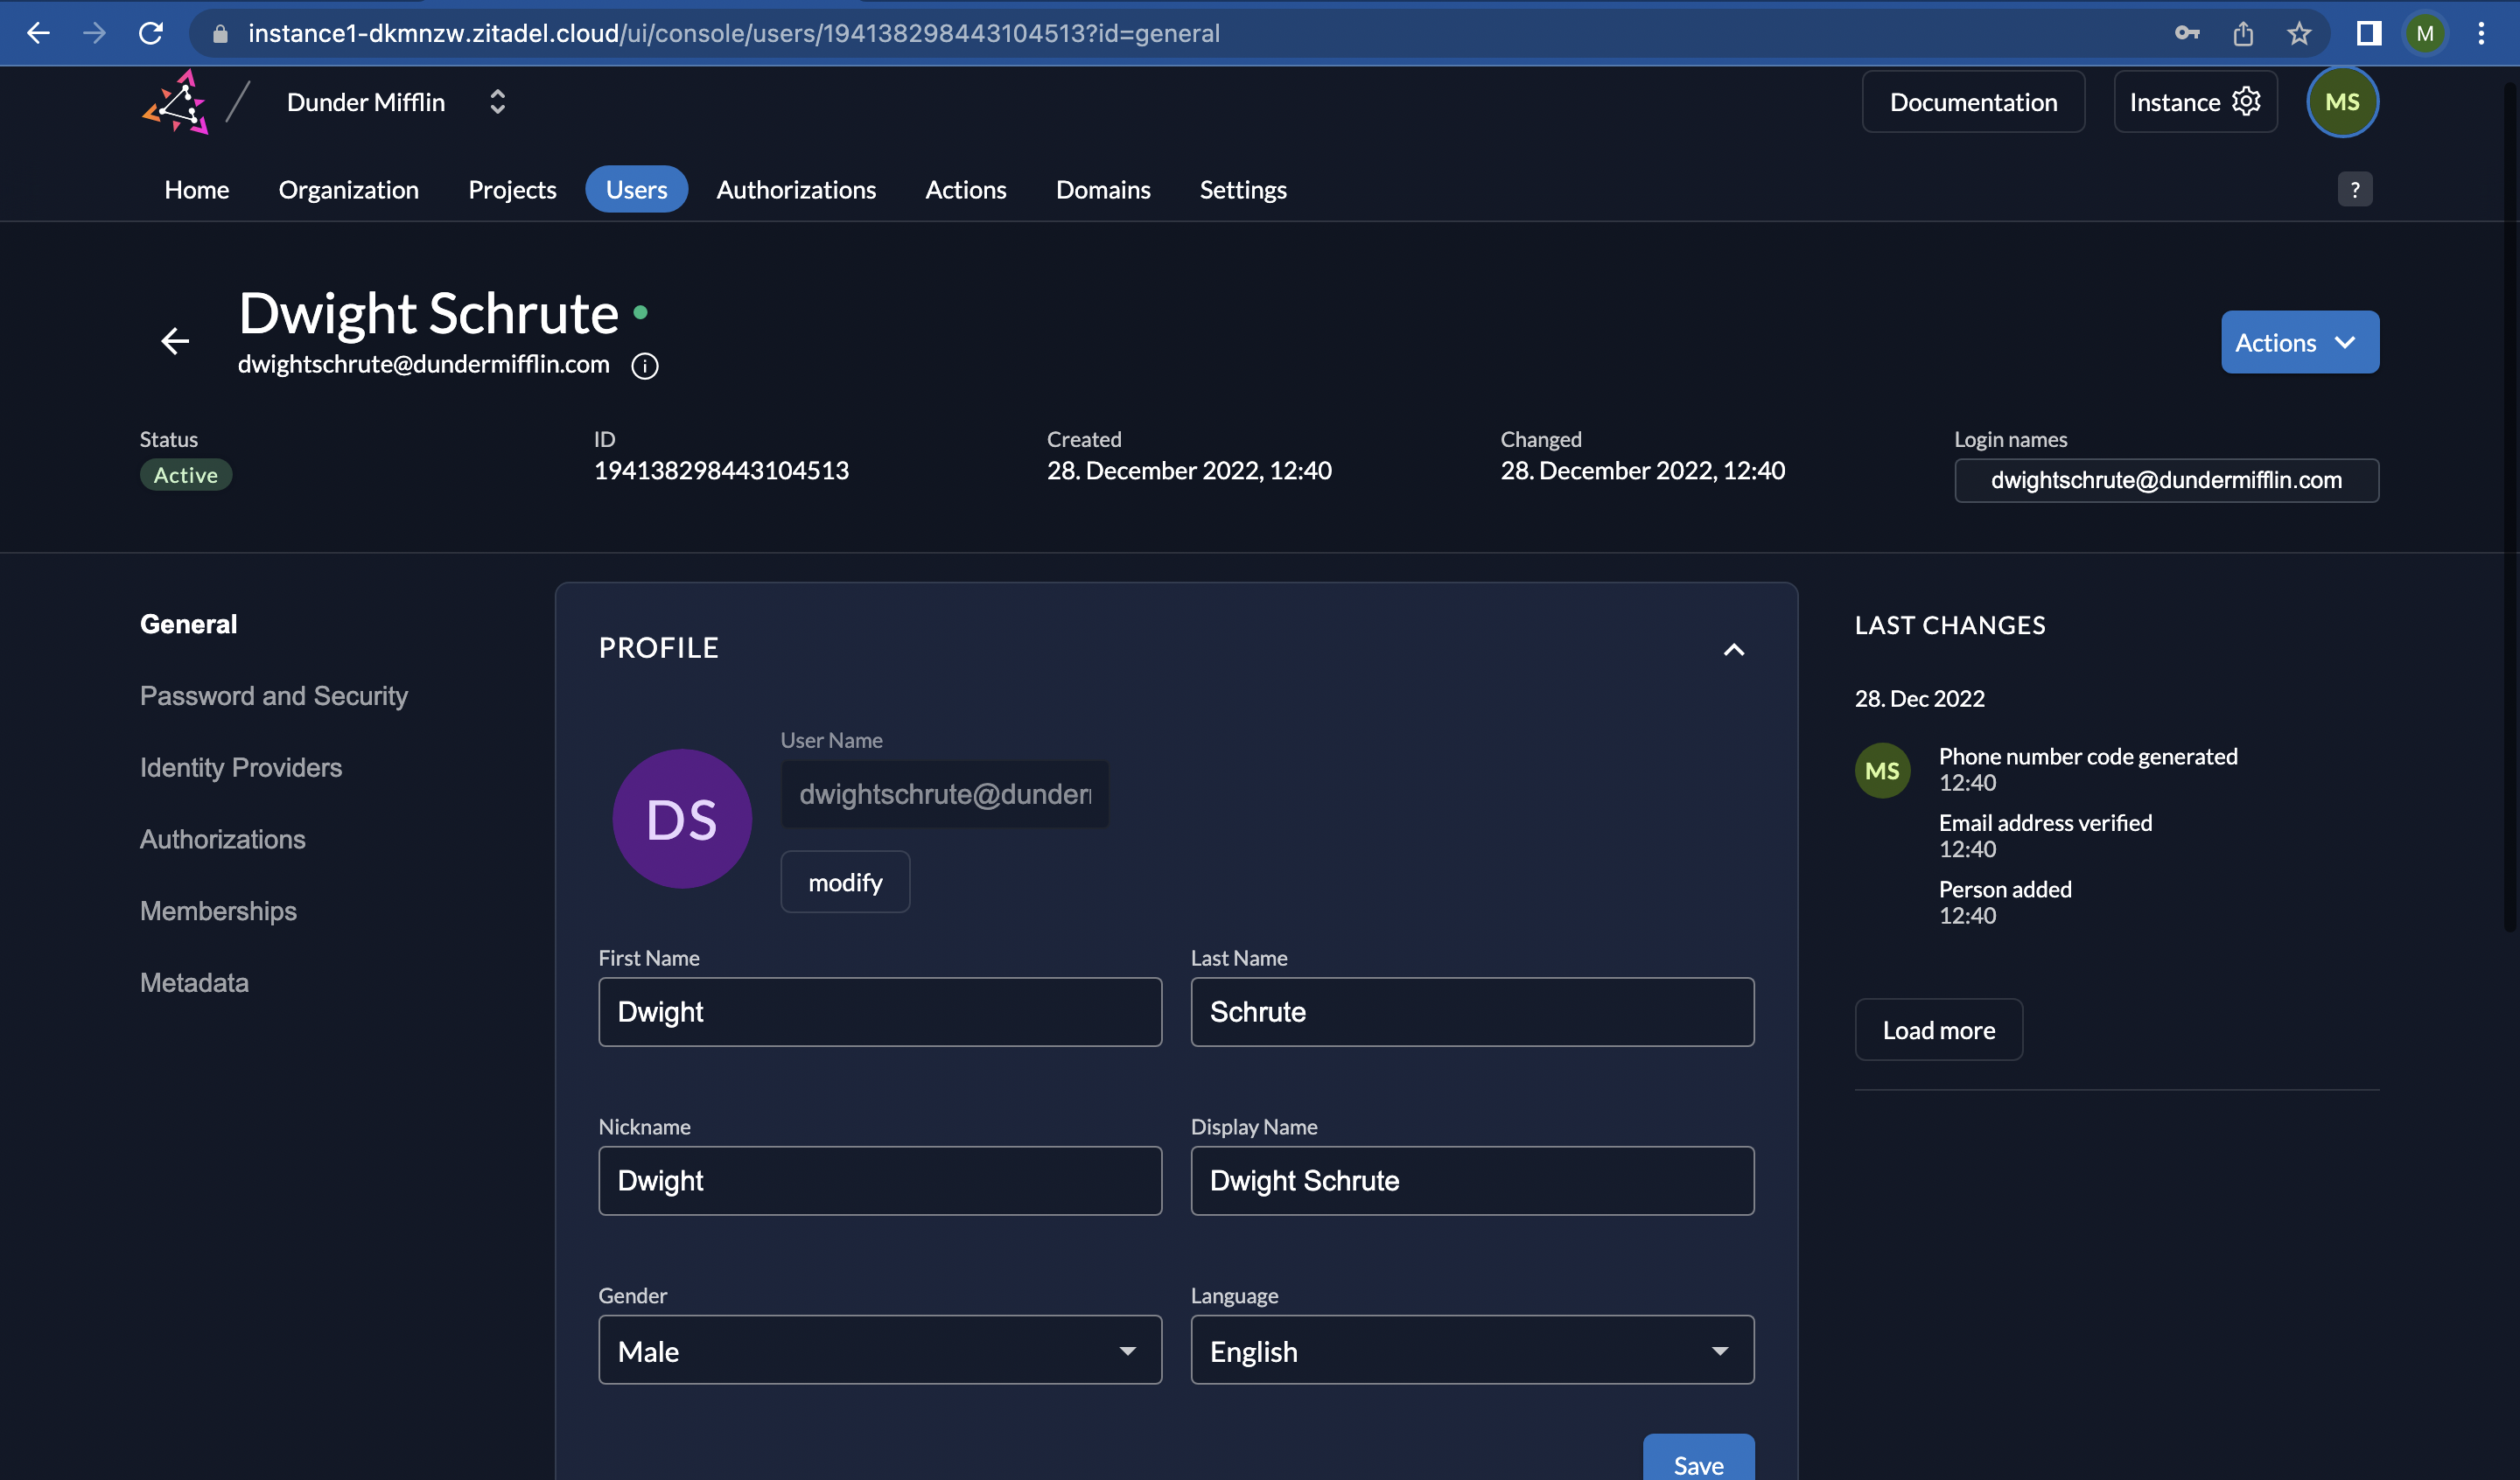
- The newly created user details will be displayed as shown below.
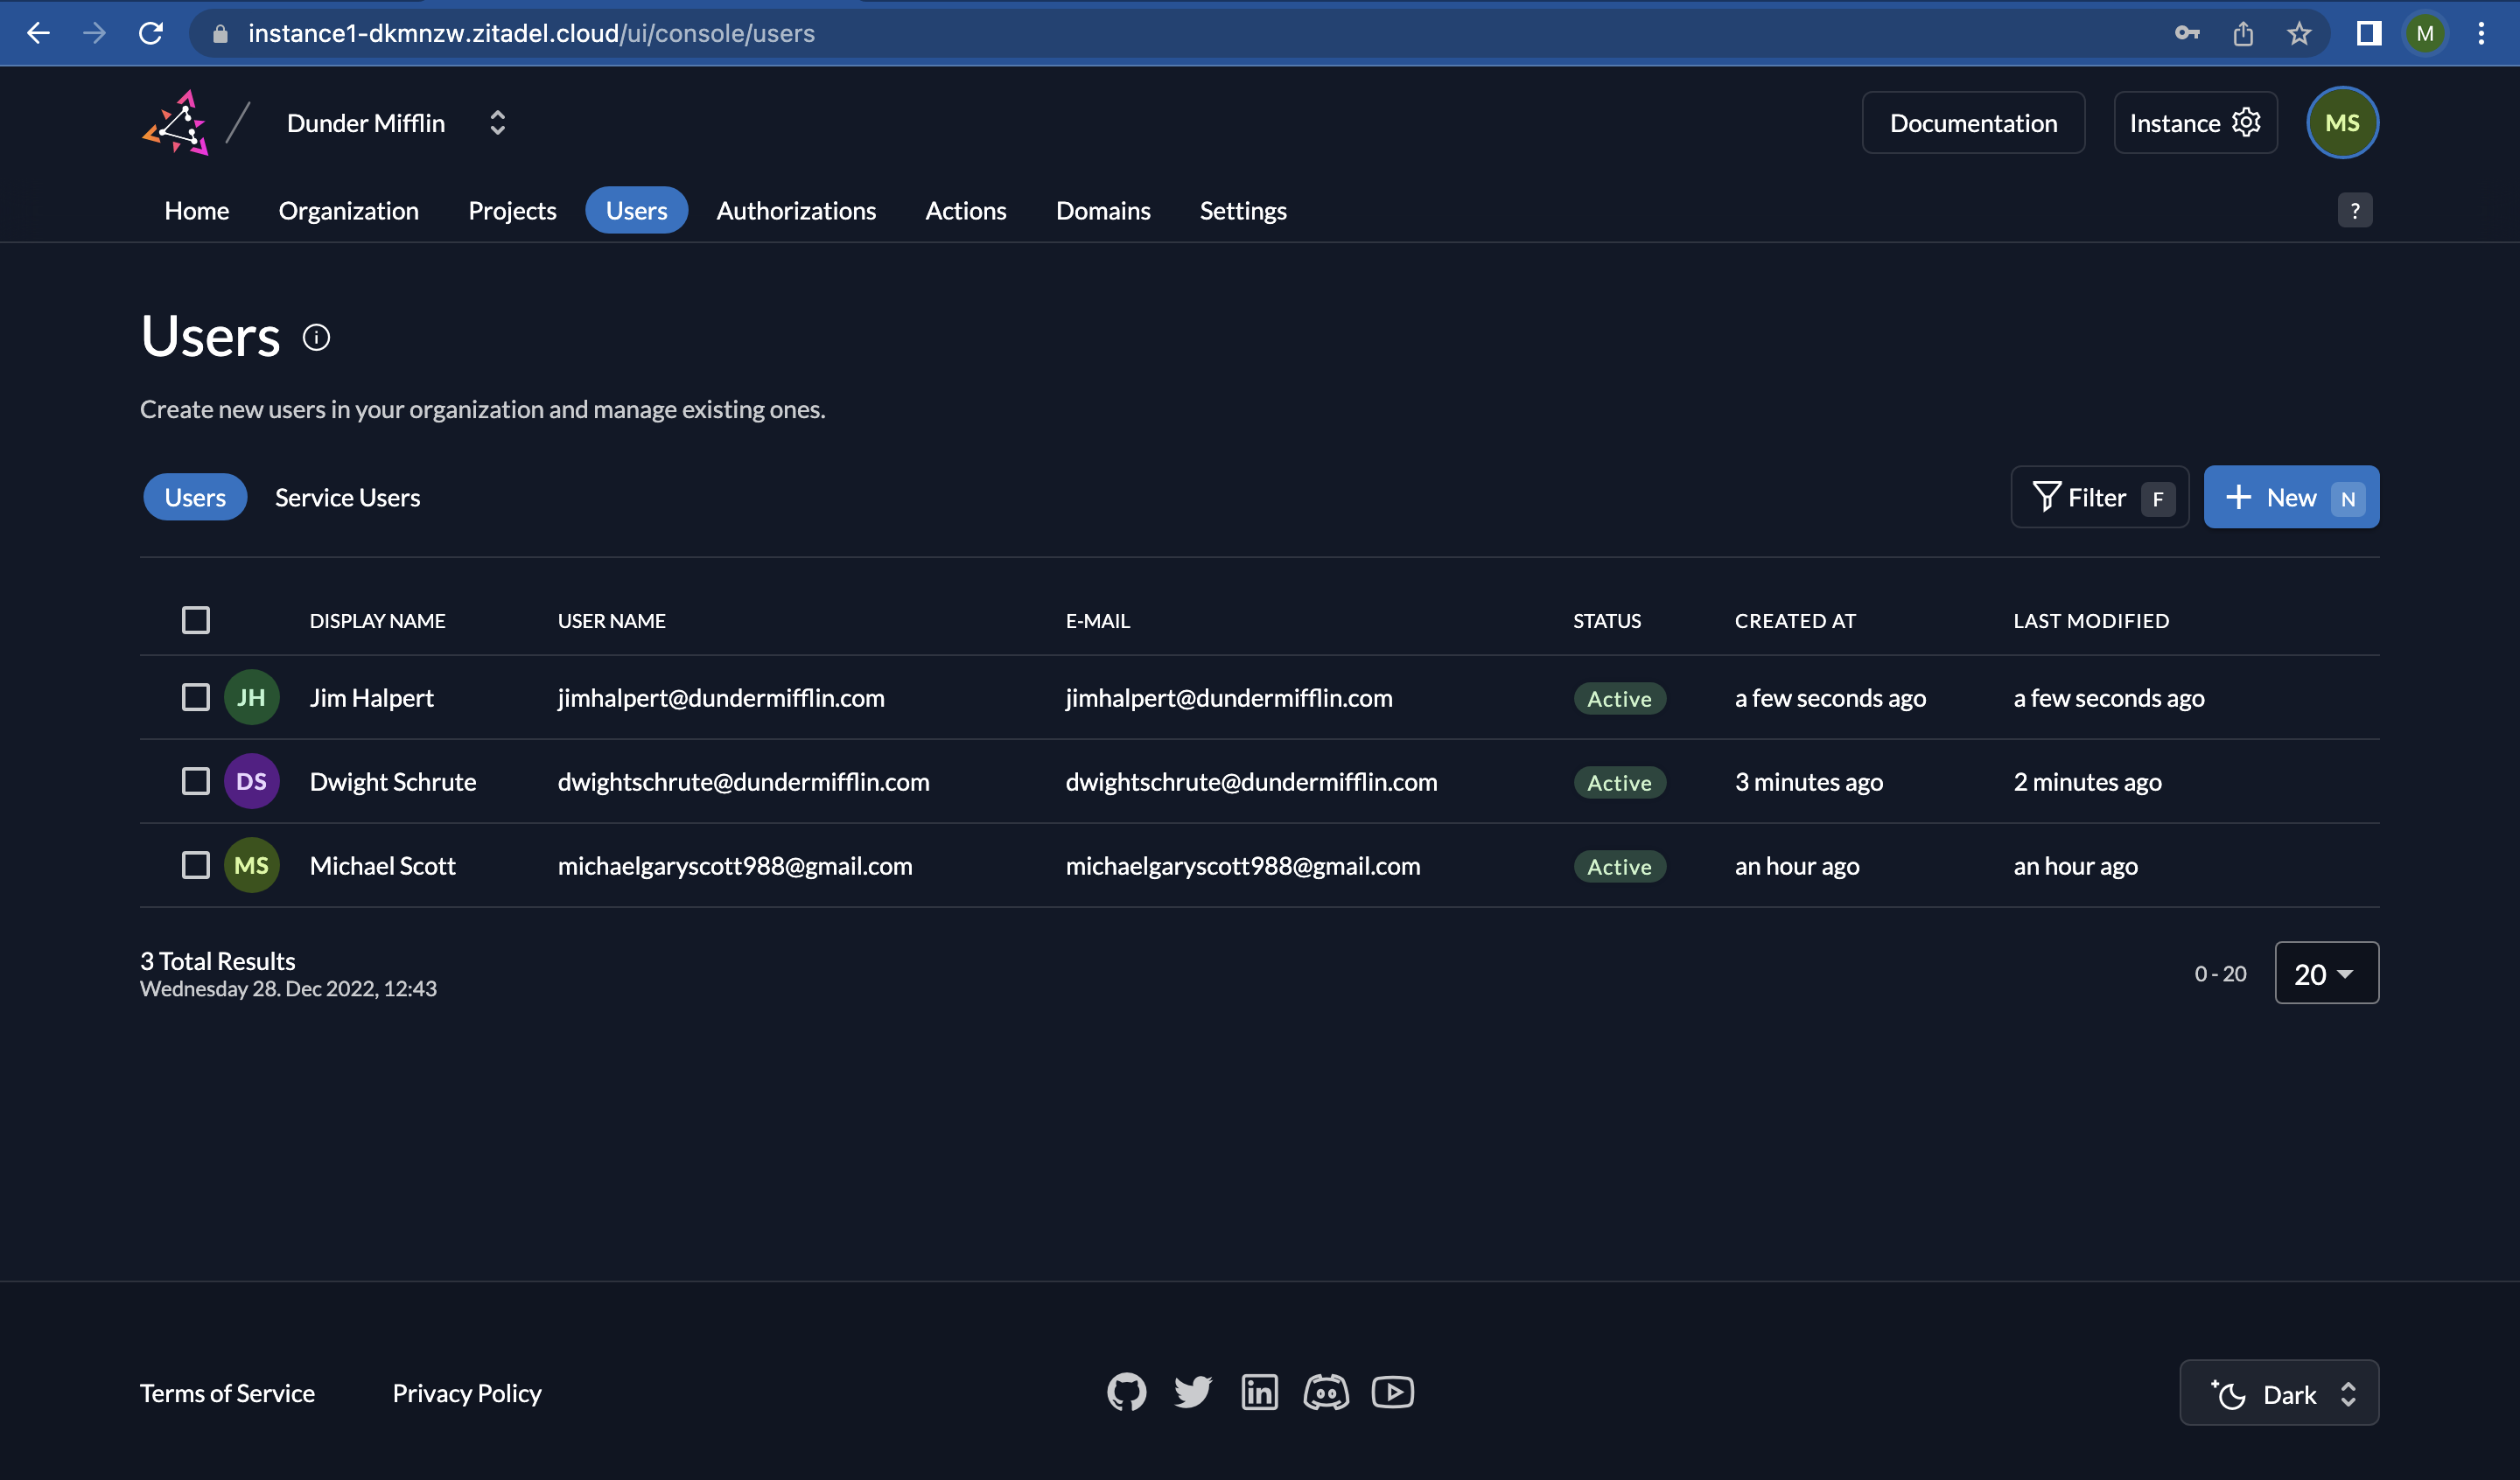
- Once you navigate back to the "Users" view, you will see a list of all the users that have been added to your instance. If you need to add more users, you can do so.
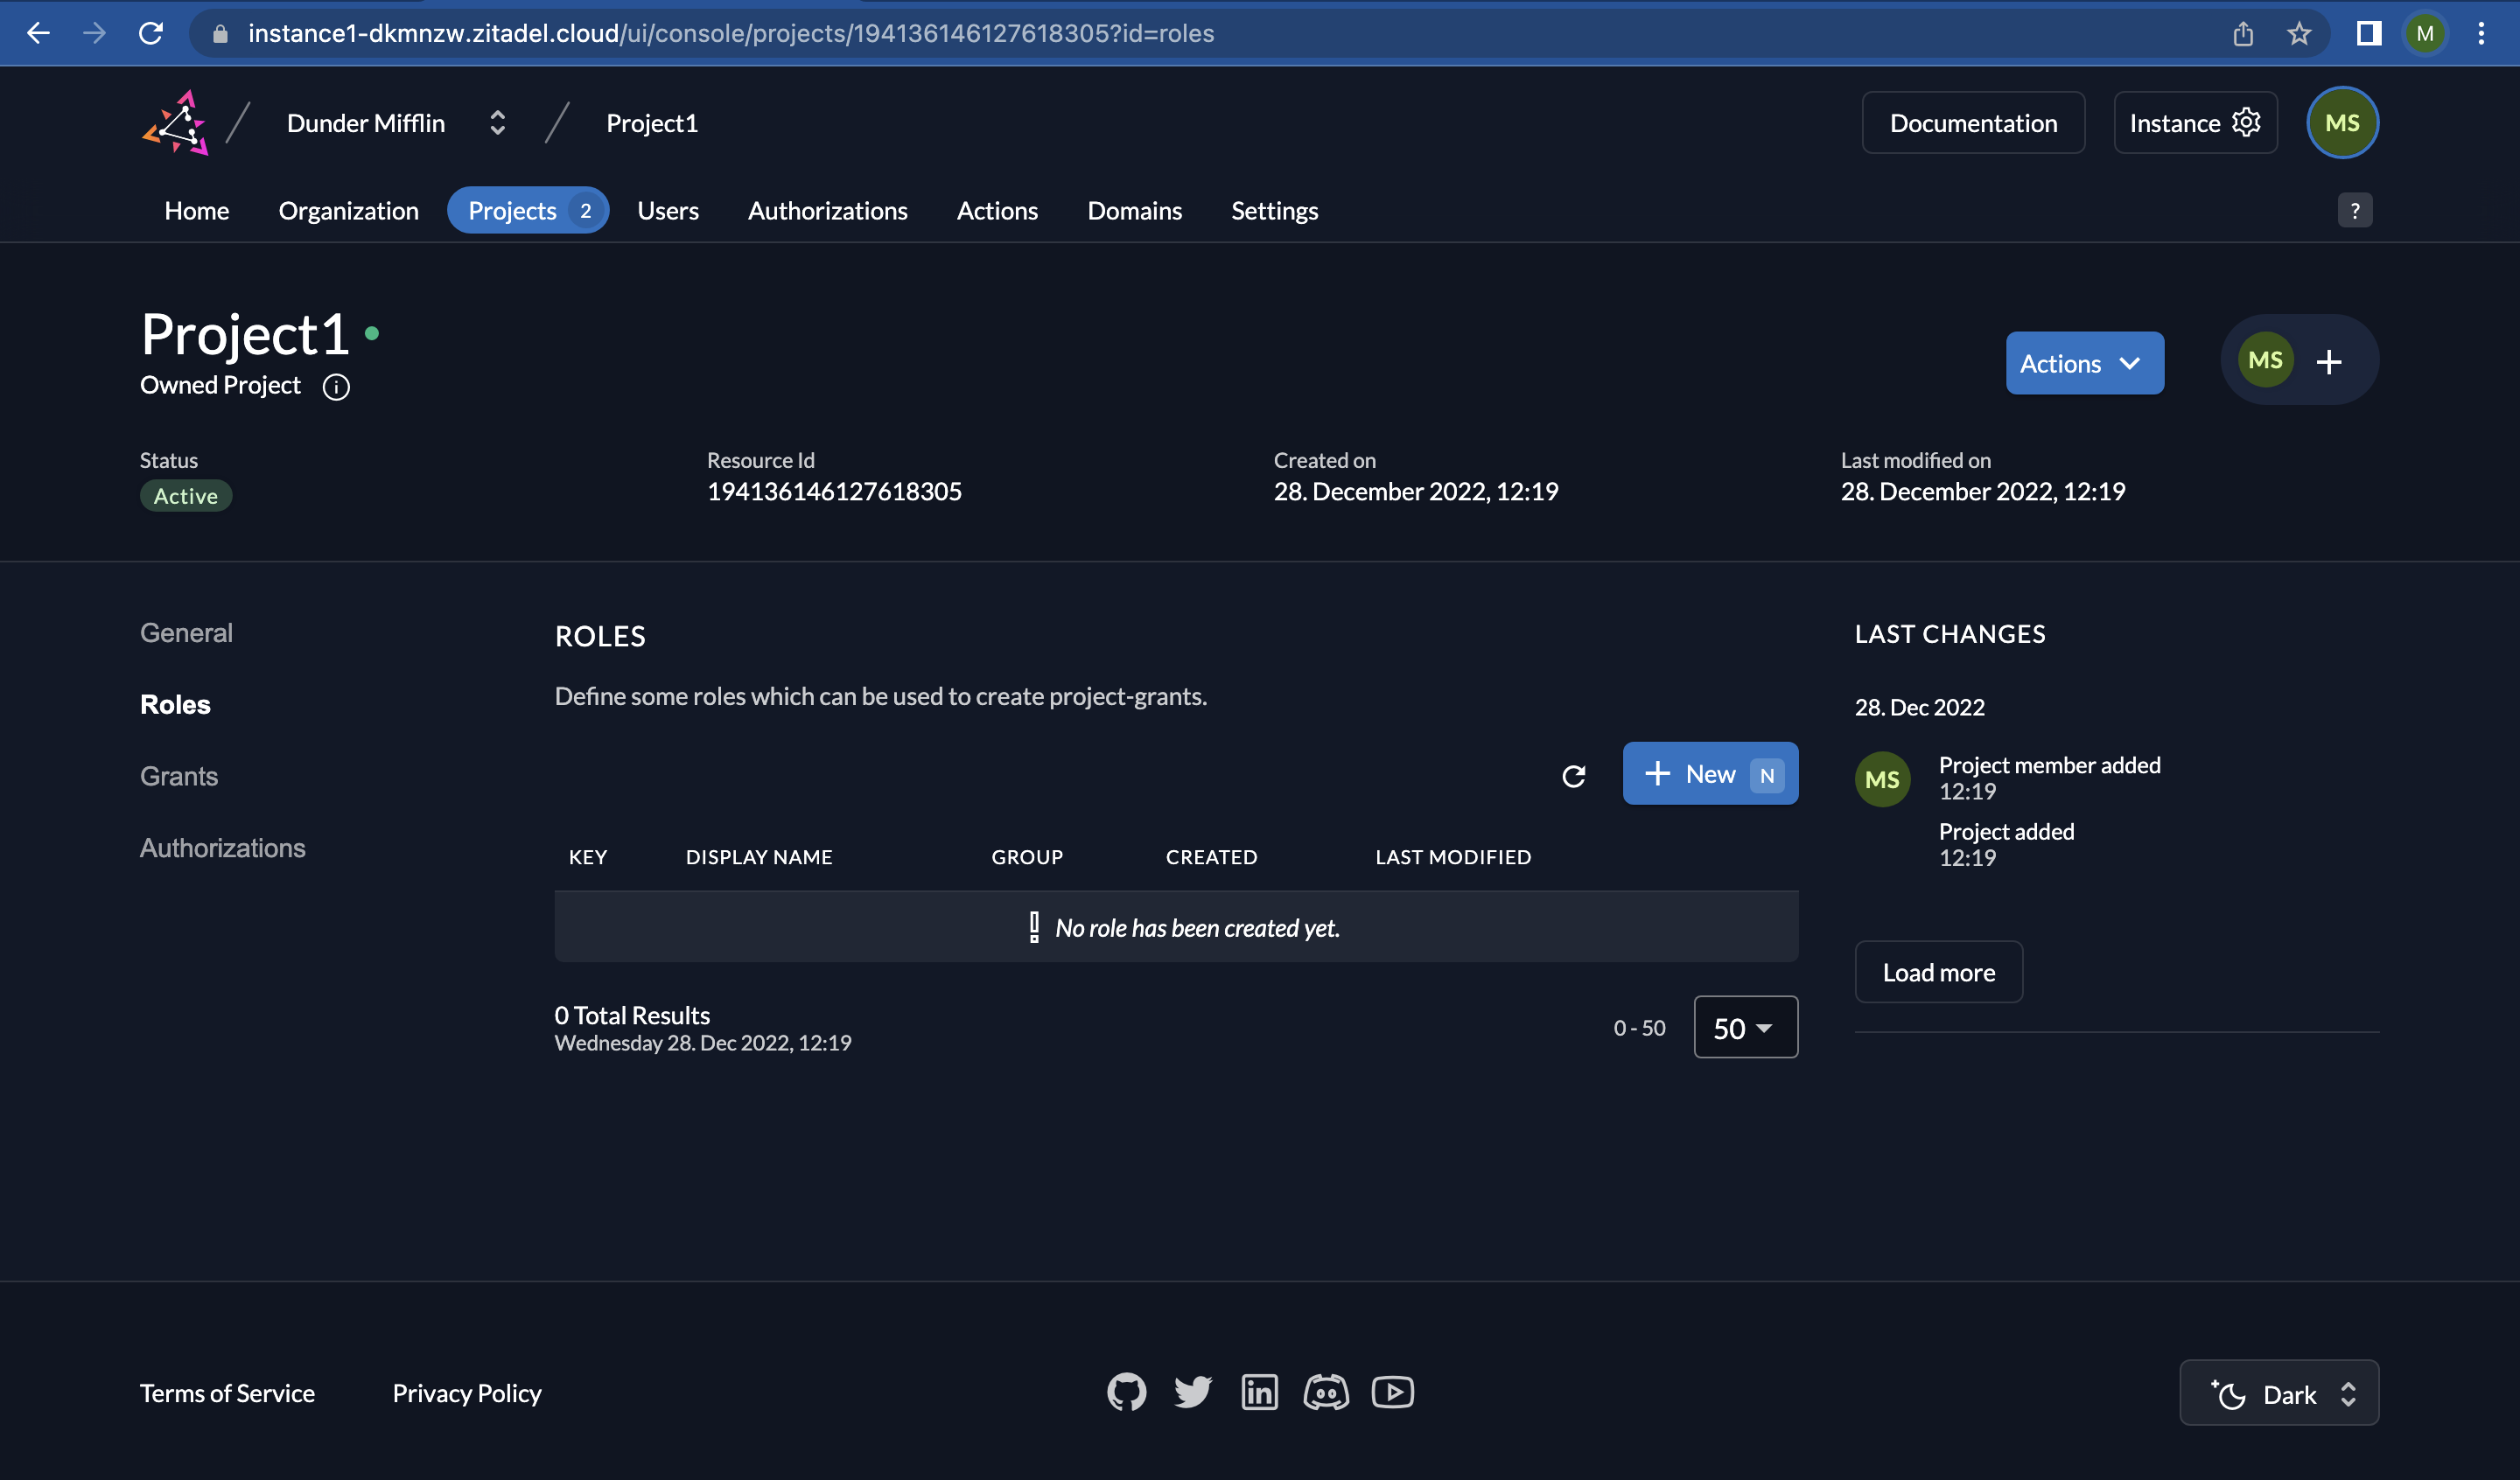
5. Add Roles to your Project (optional)
- To add roles to your project, click on “Roles” on the left as shown below. Next, click on the “New” button.
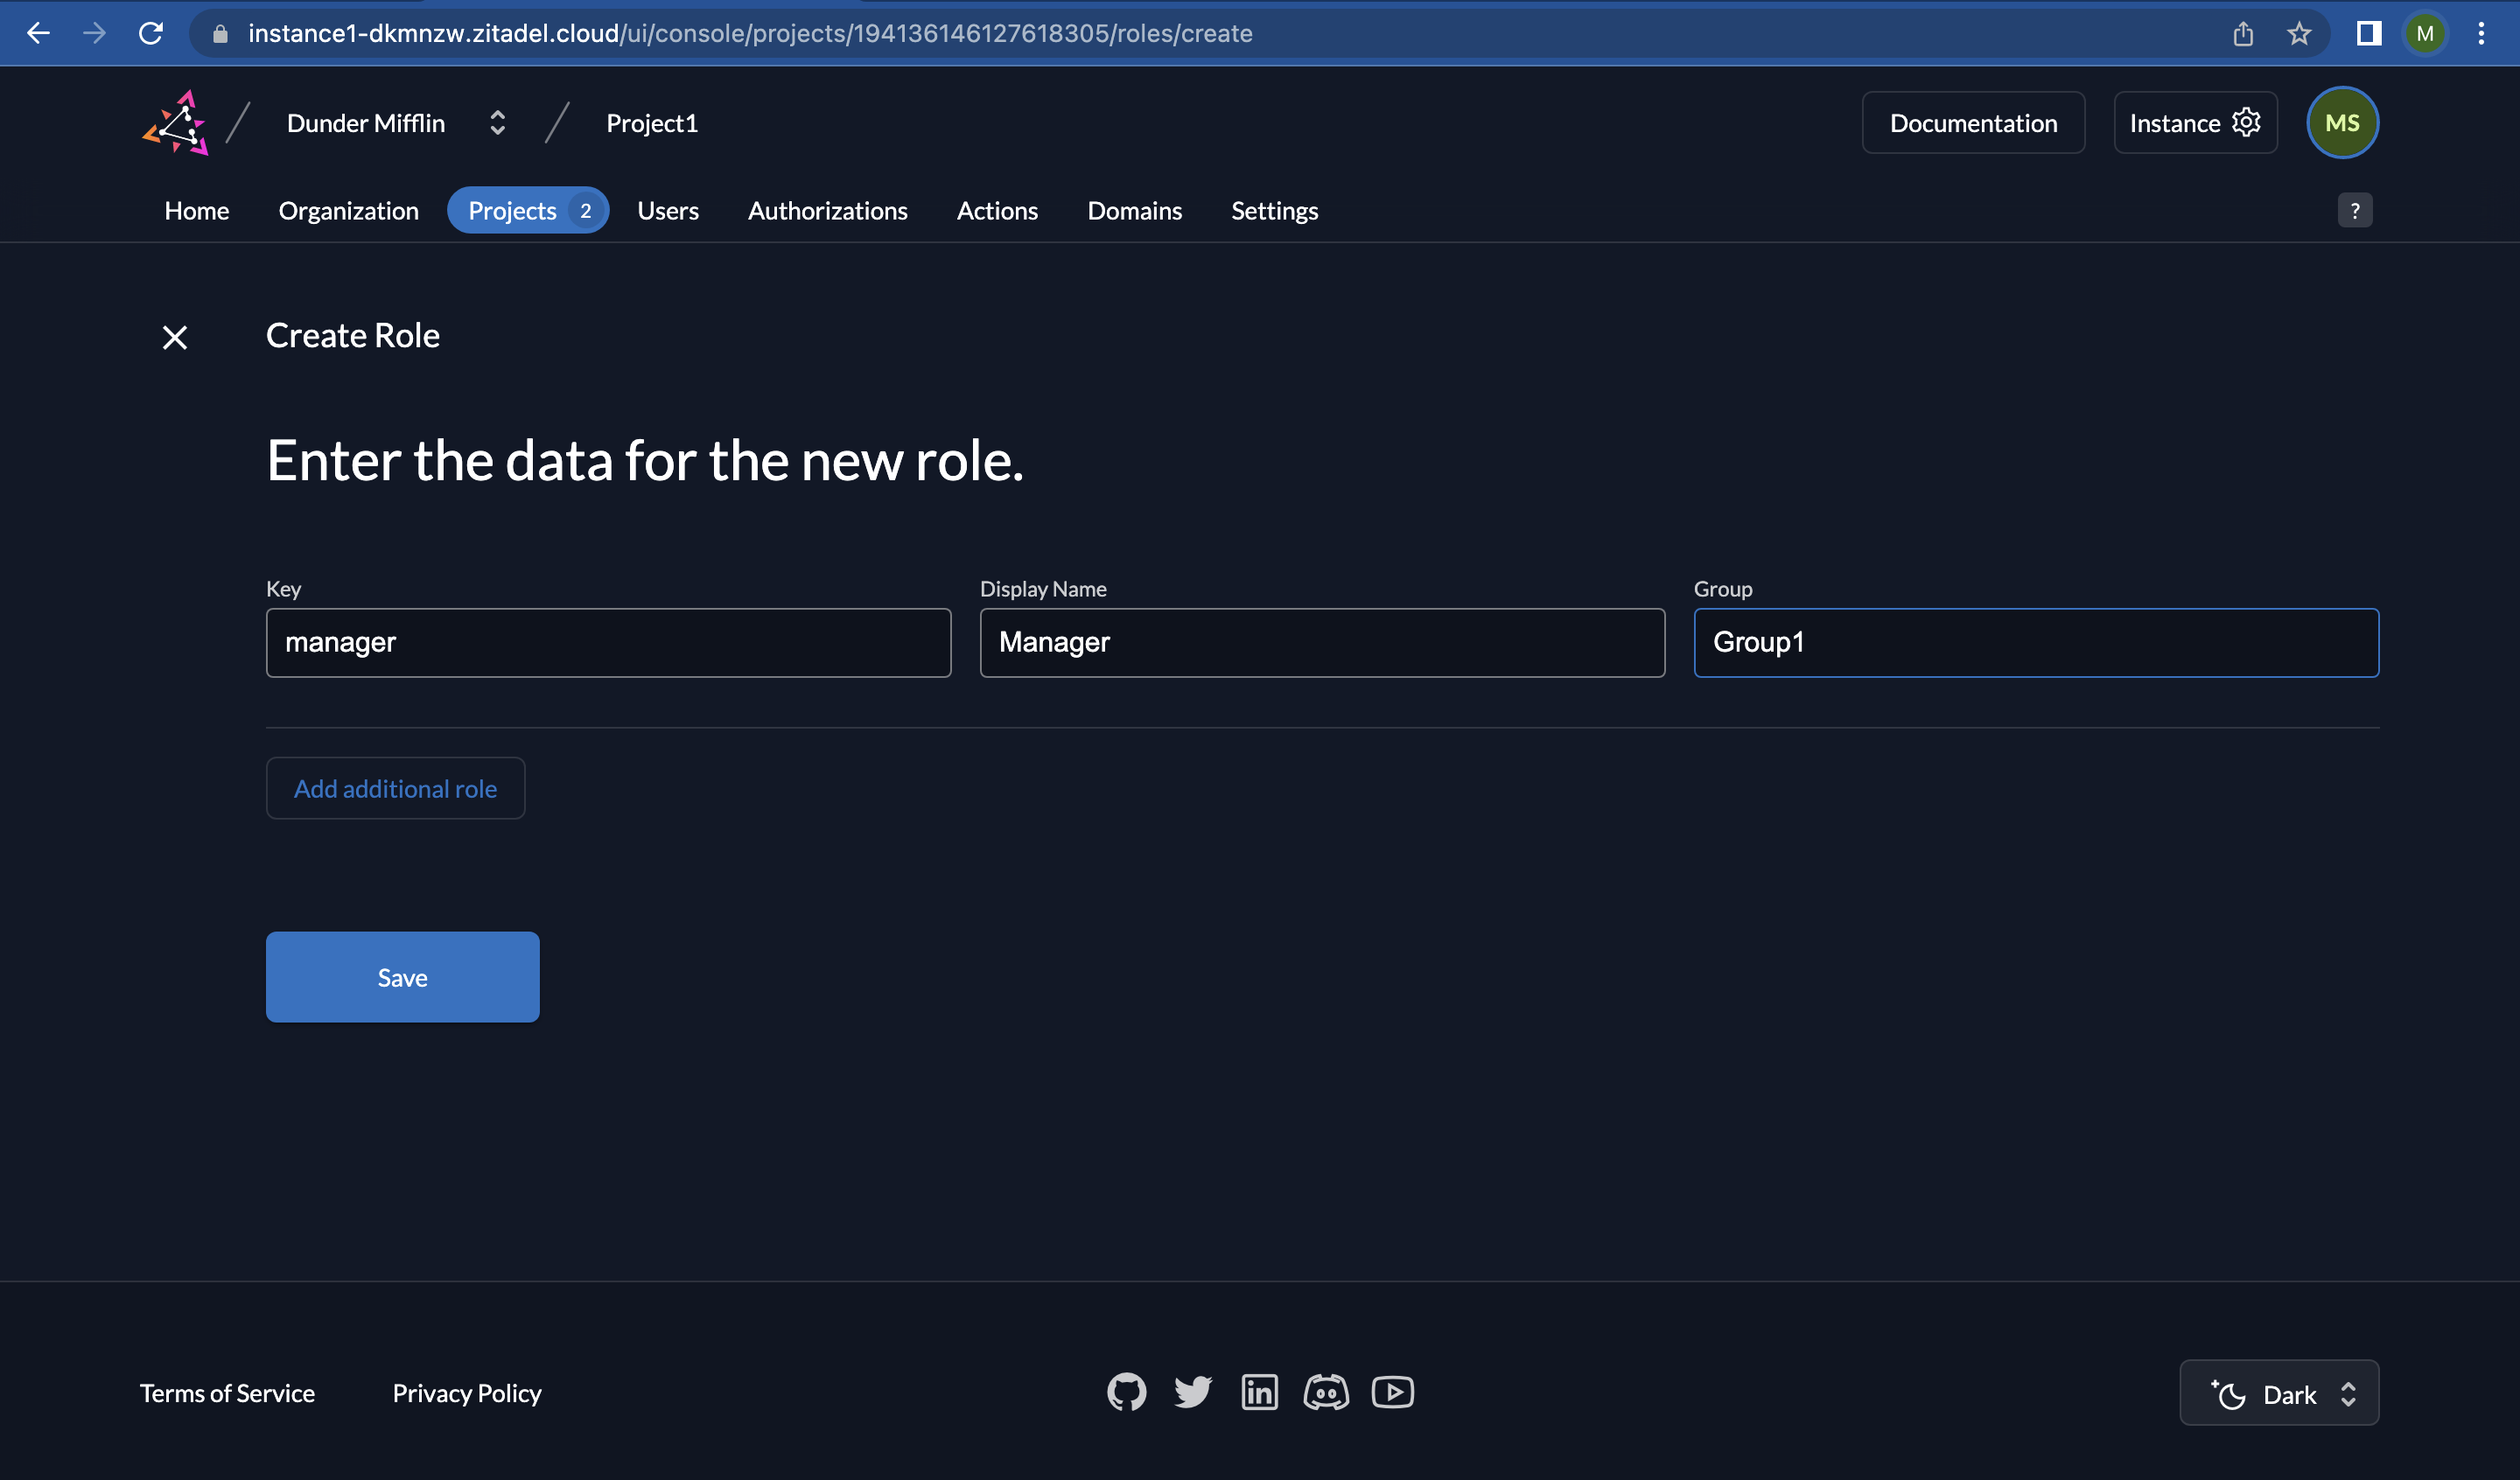
- Let’s create the role “manager” as shown below. Add “Manager” and “Group1” as display name and group respectively.
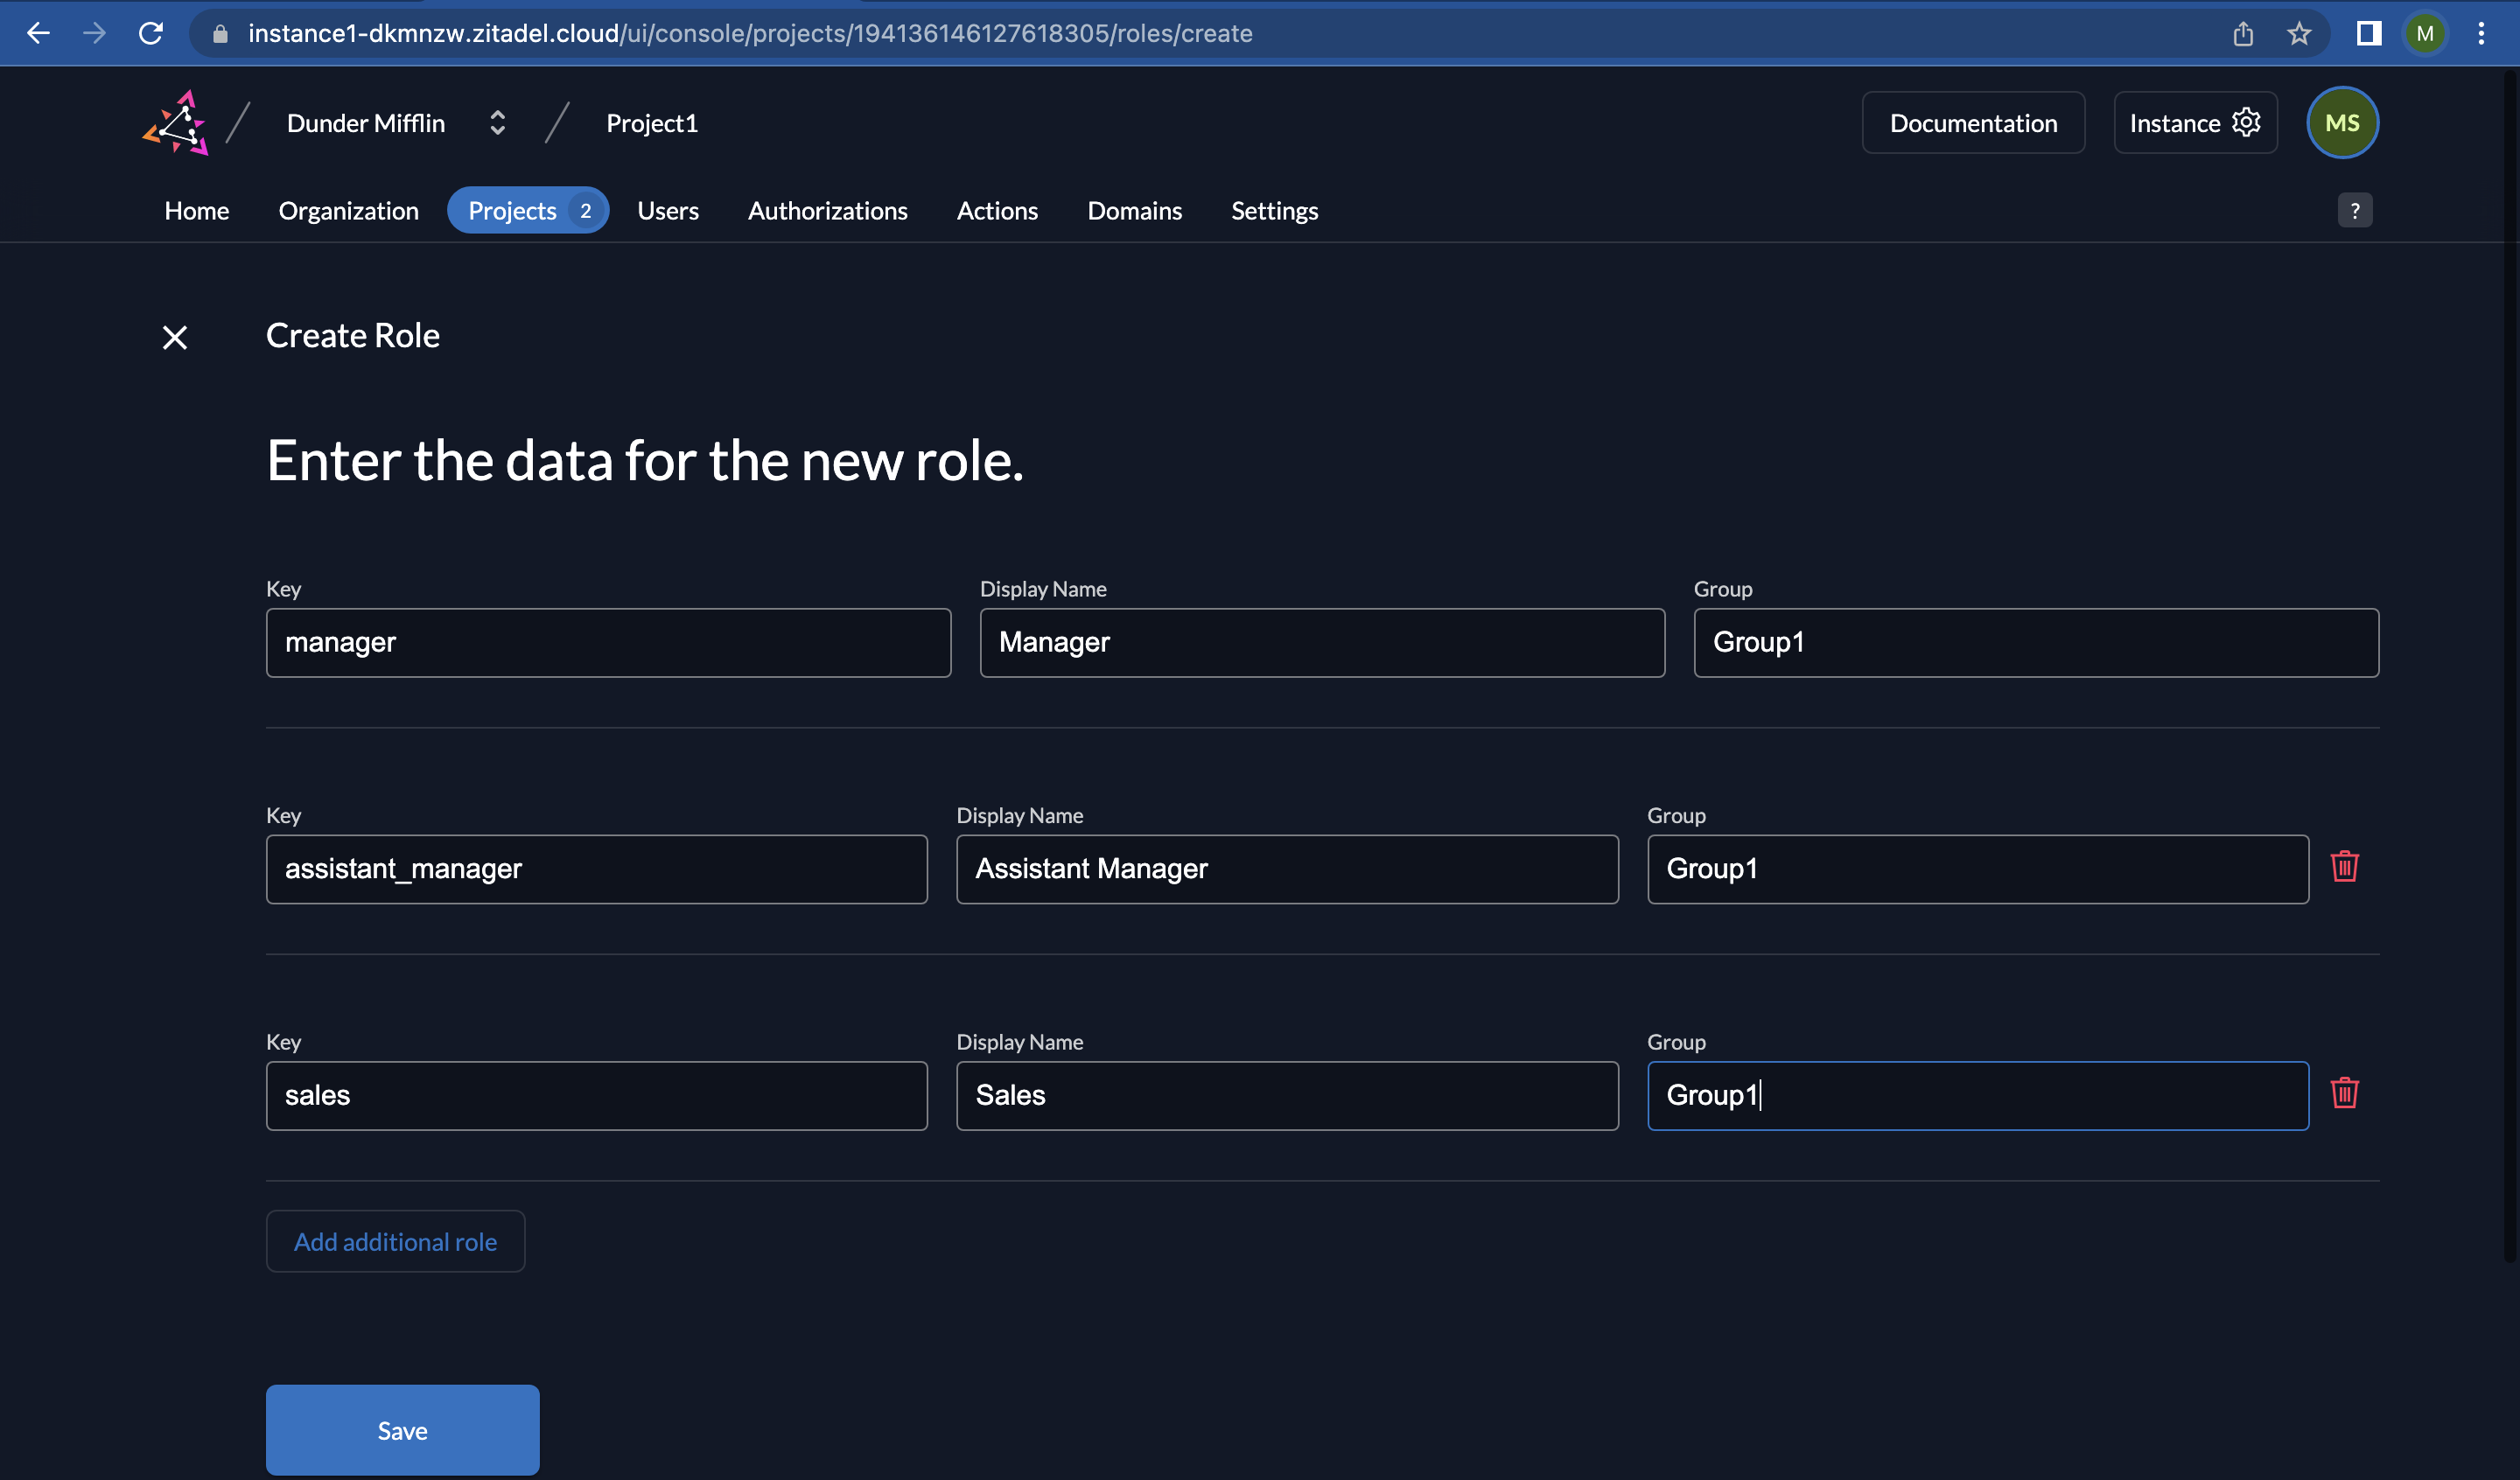
- You can also add other roles in this step by clicking on “Add additional role”. Let’s go ahead and add two more as shown below. Click “Save” when you are done.
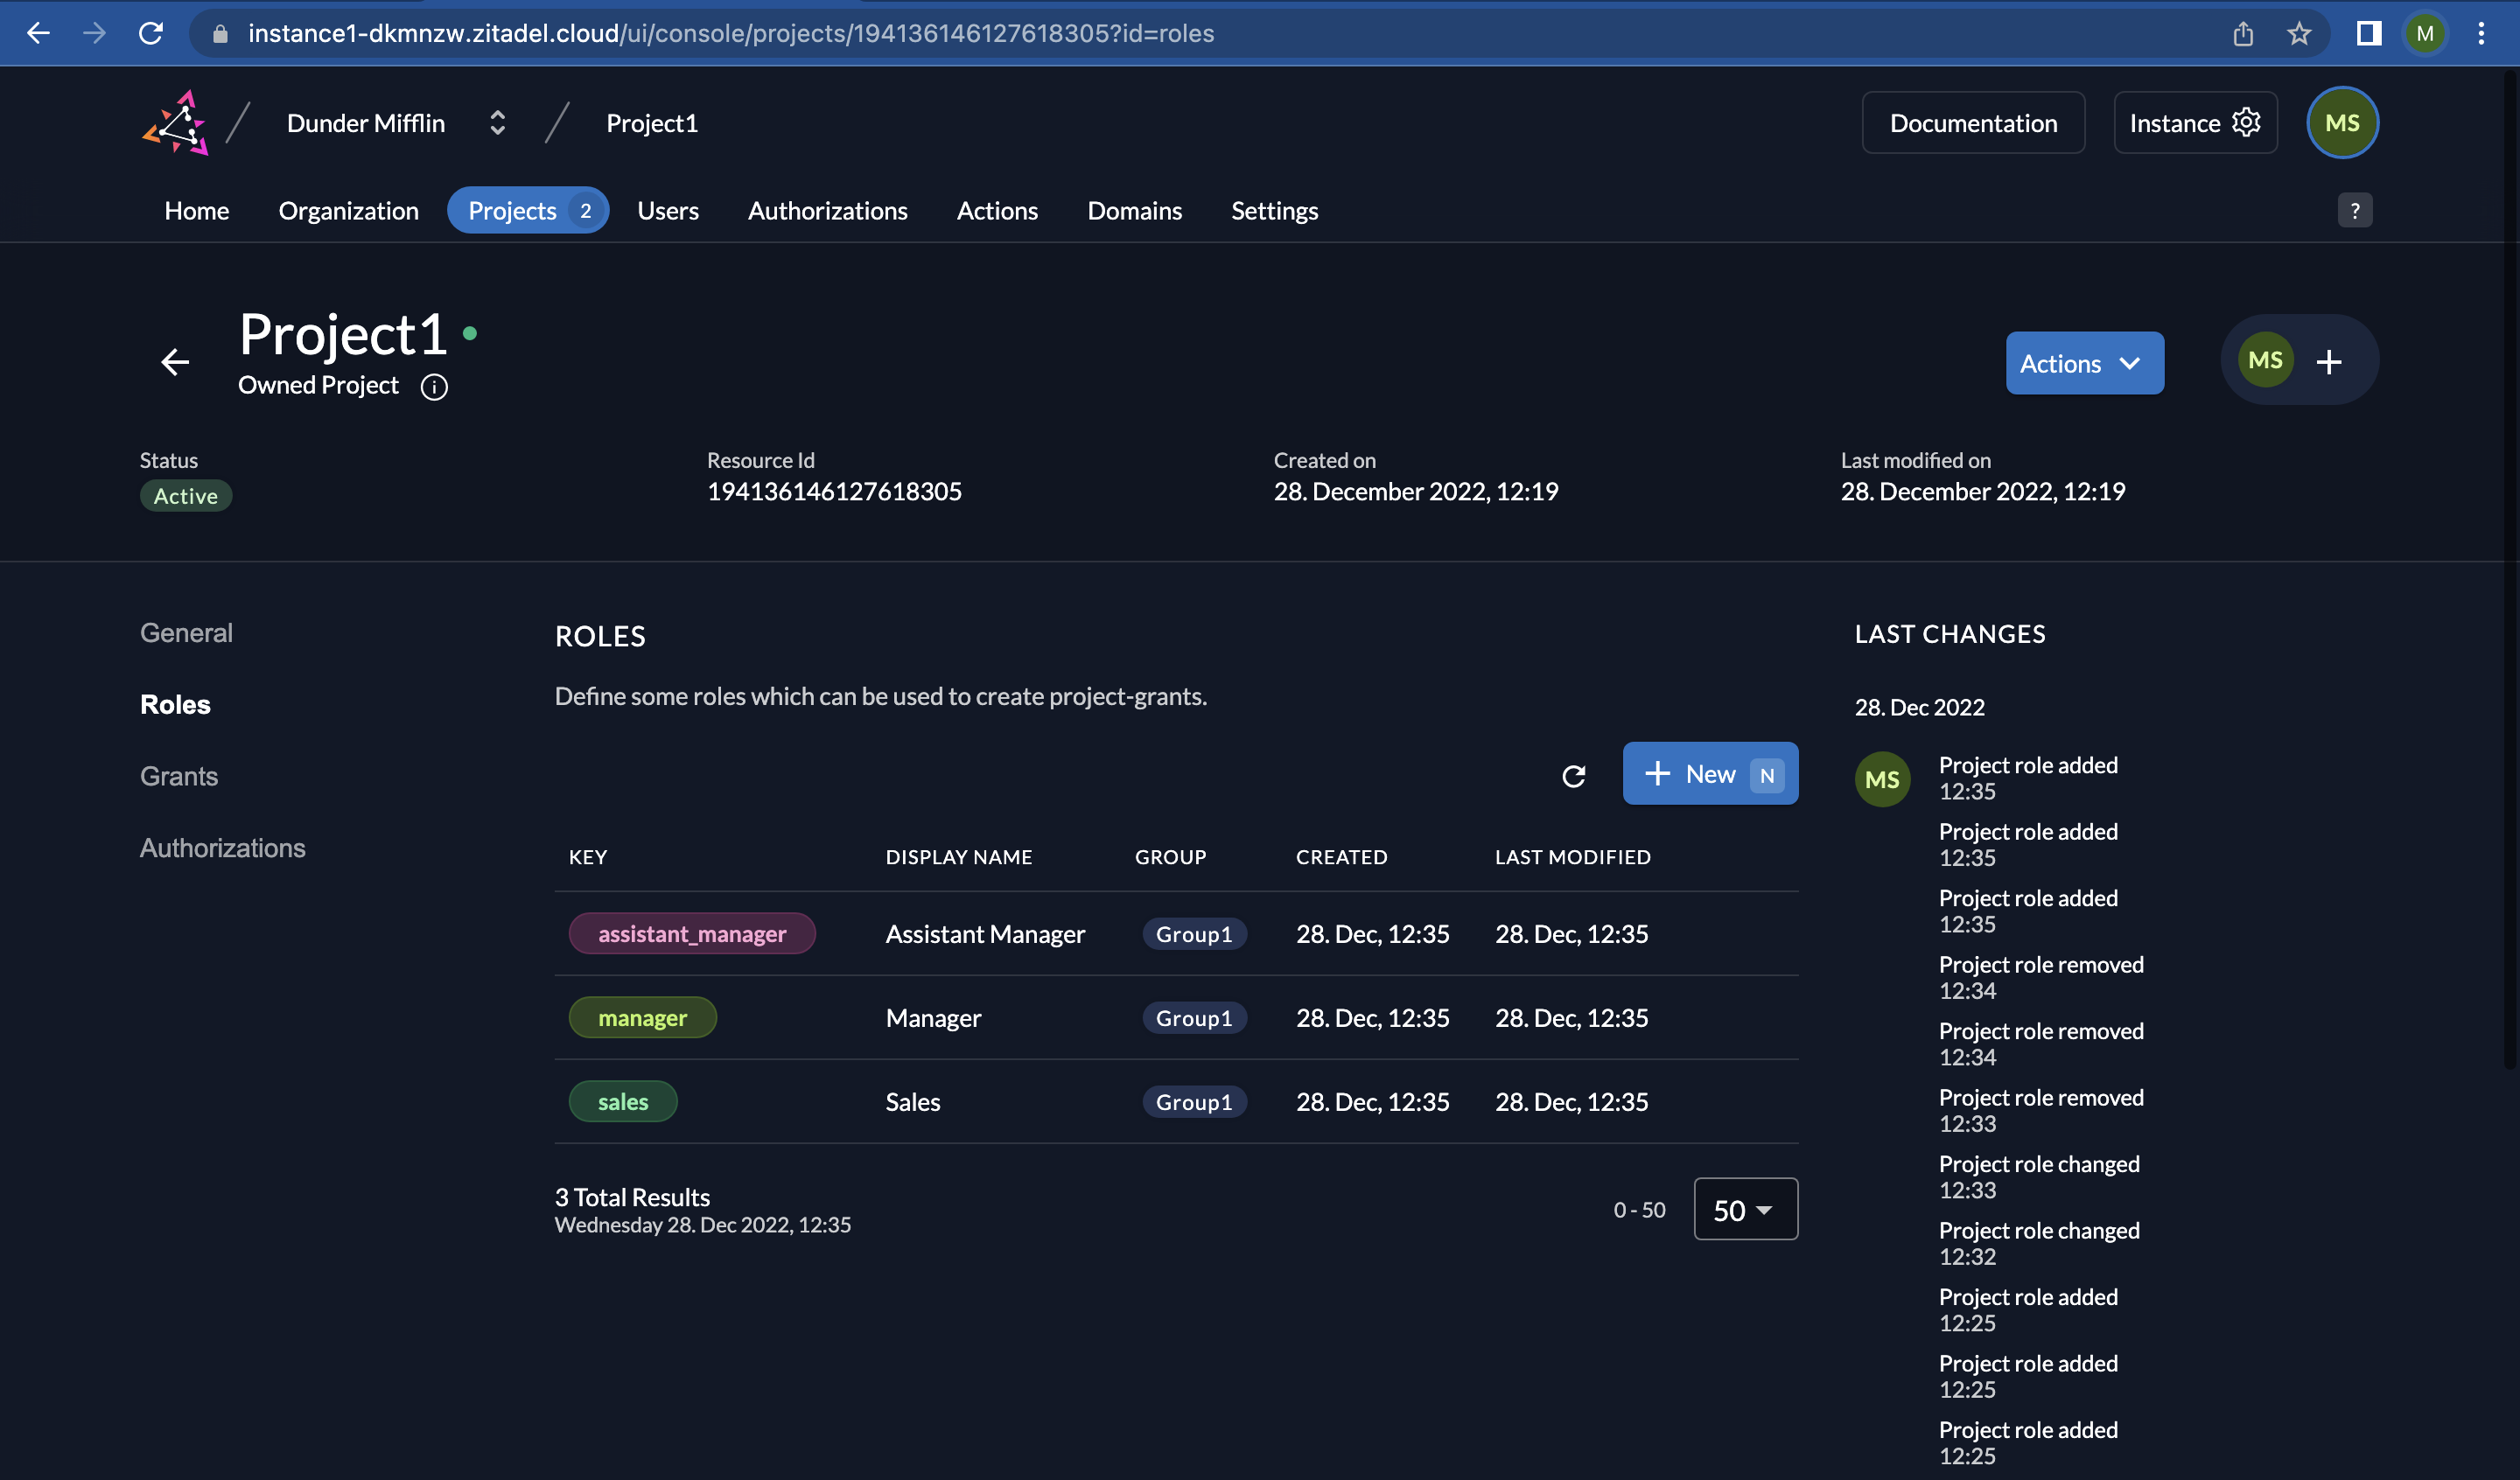
- Now you can view a list of all the roles you just created.
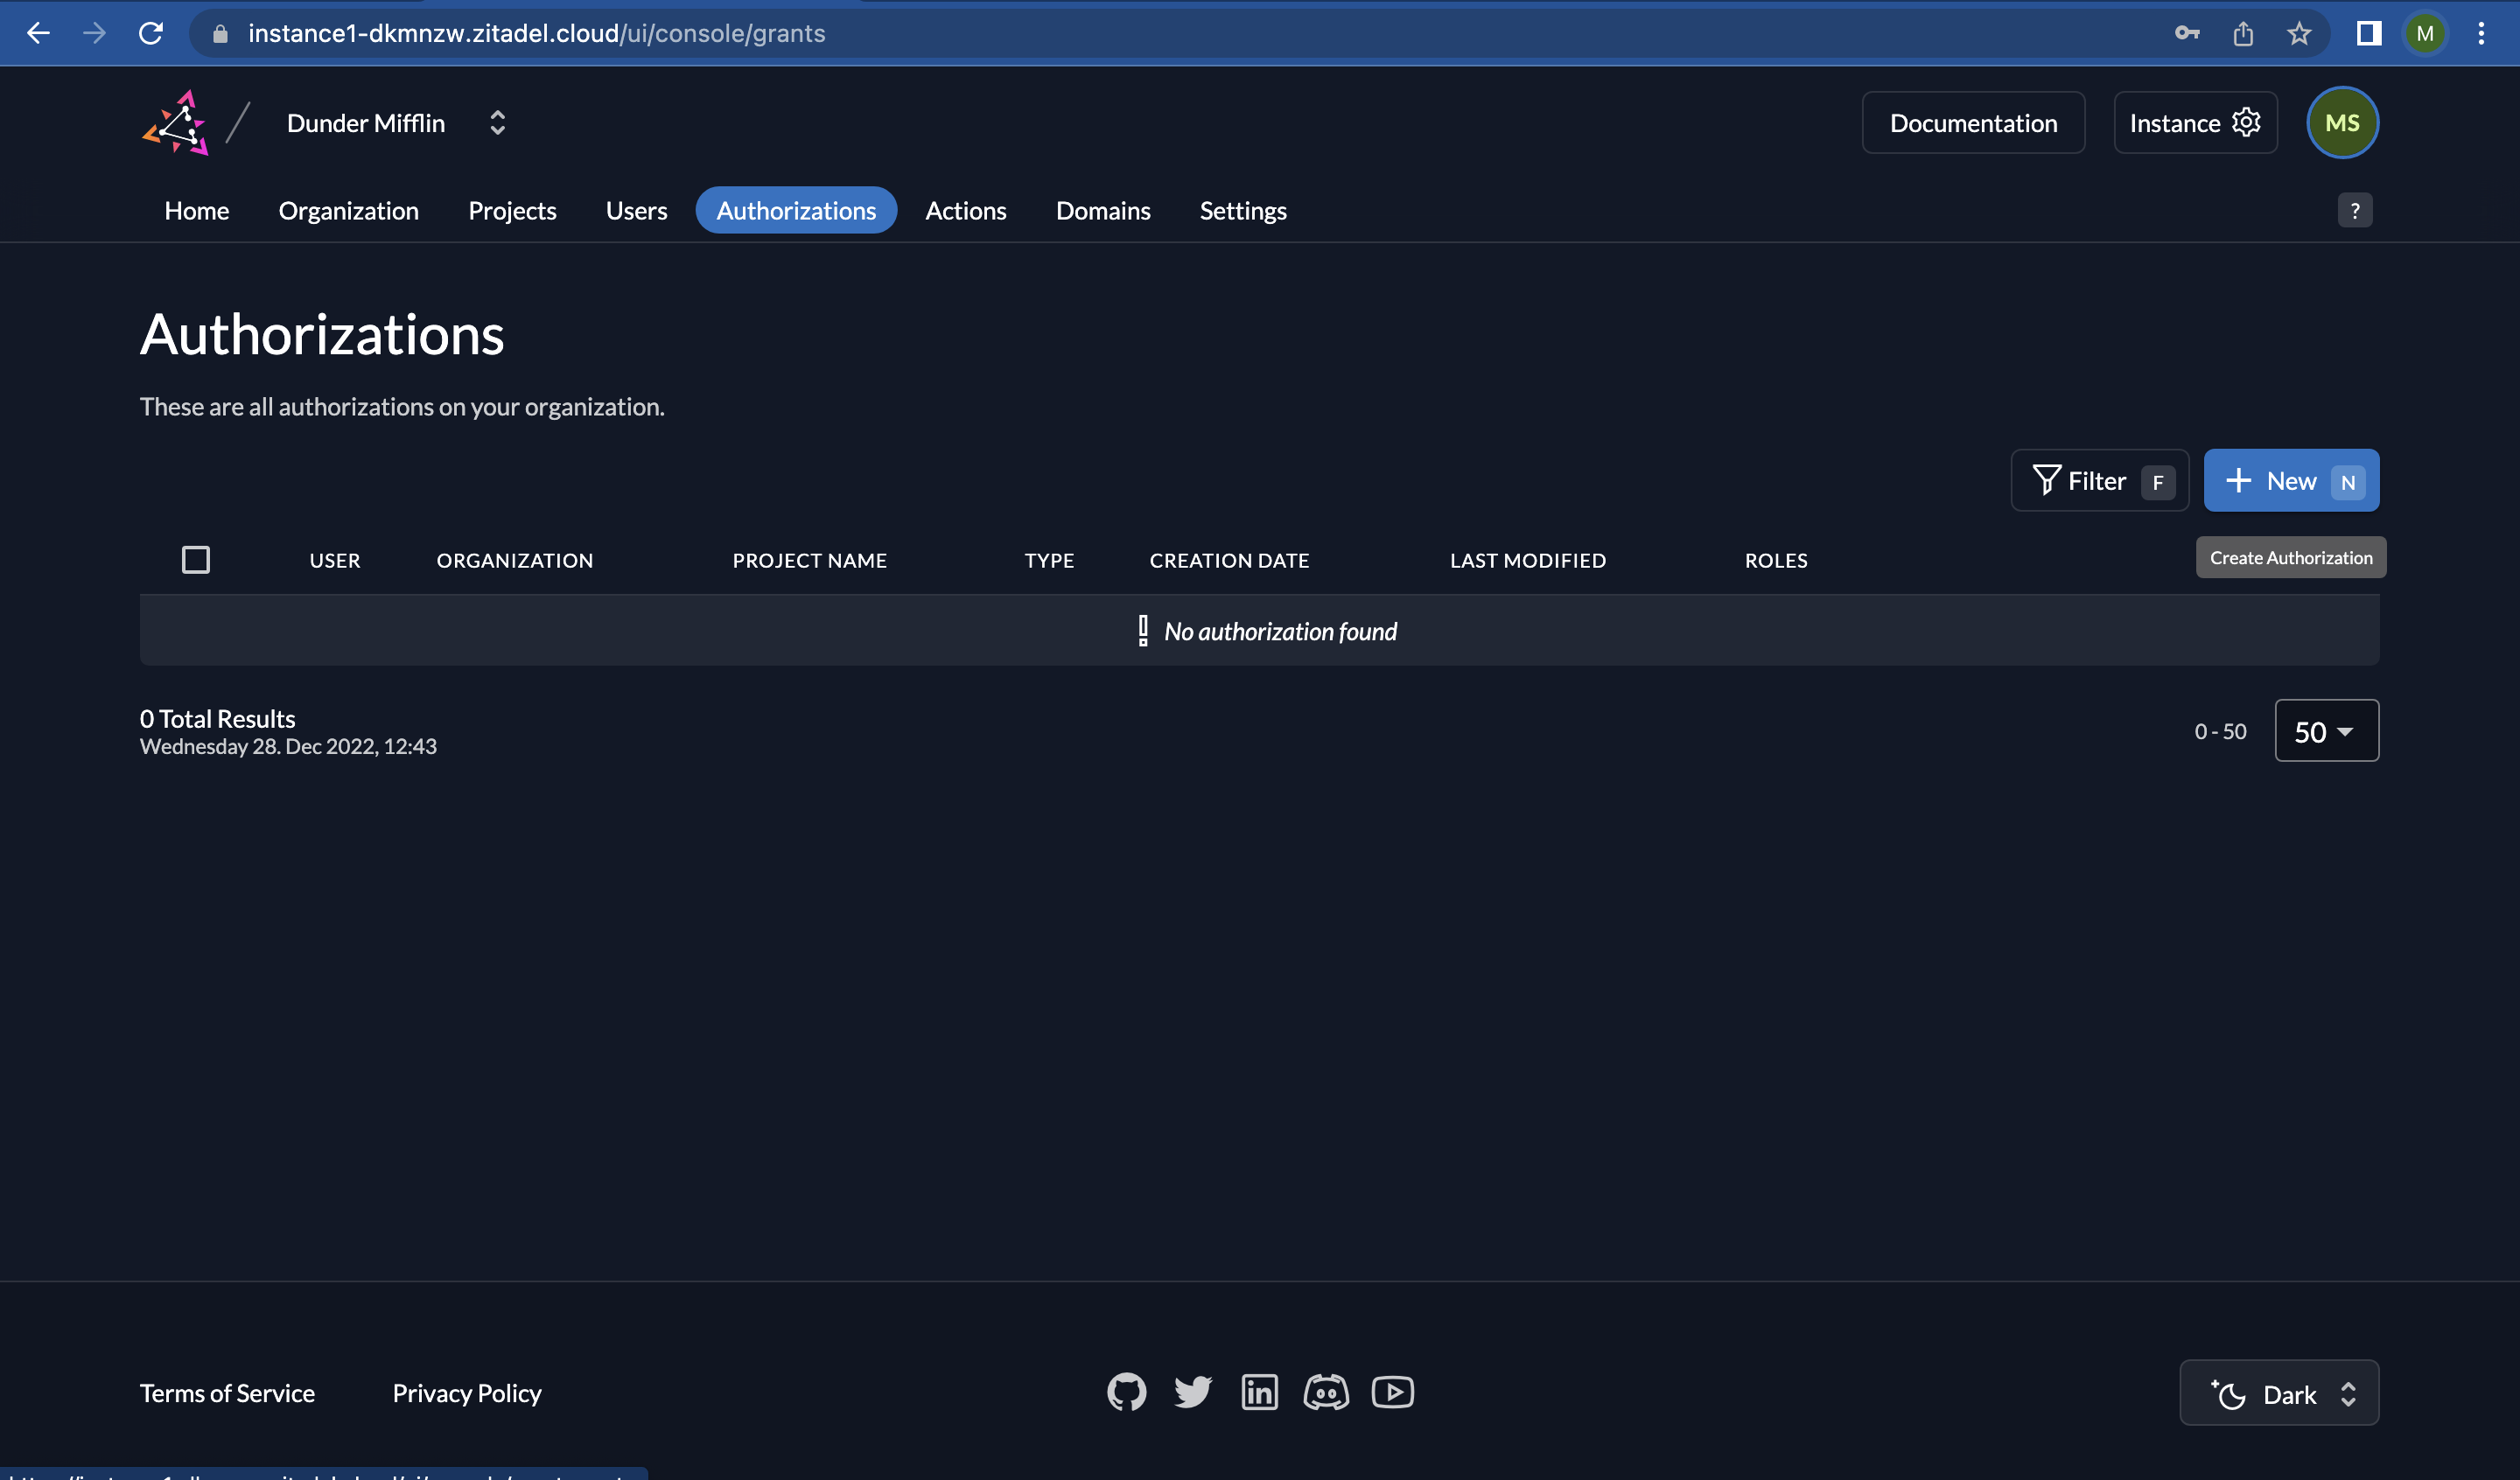
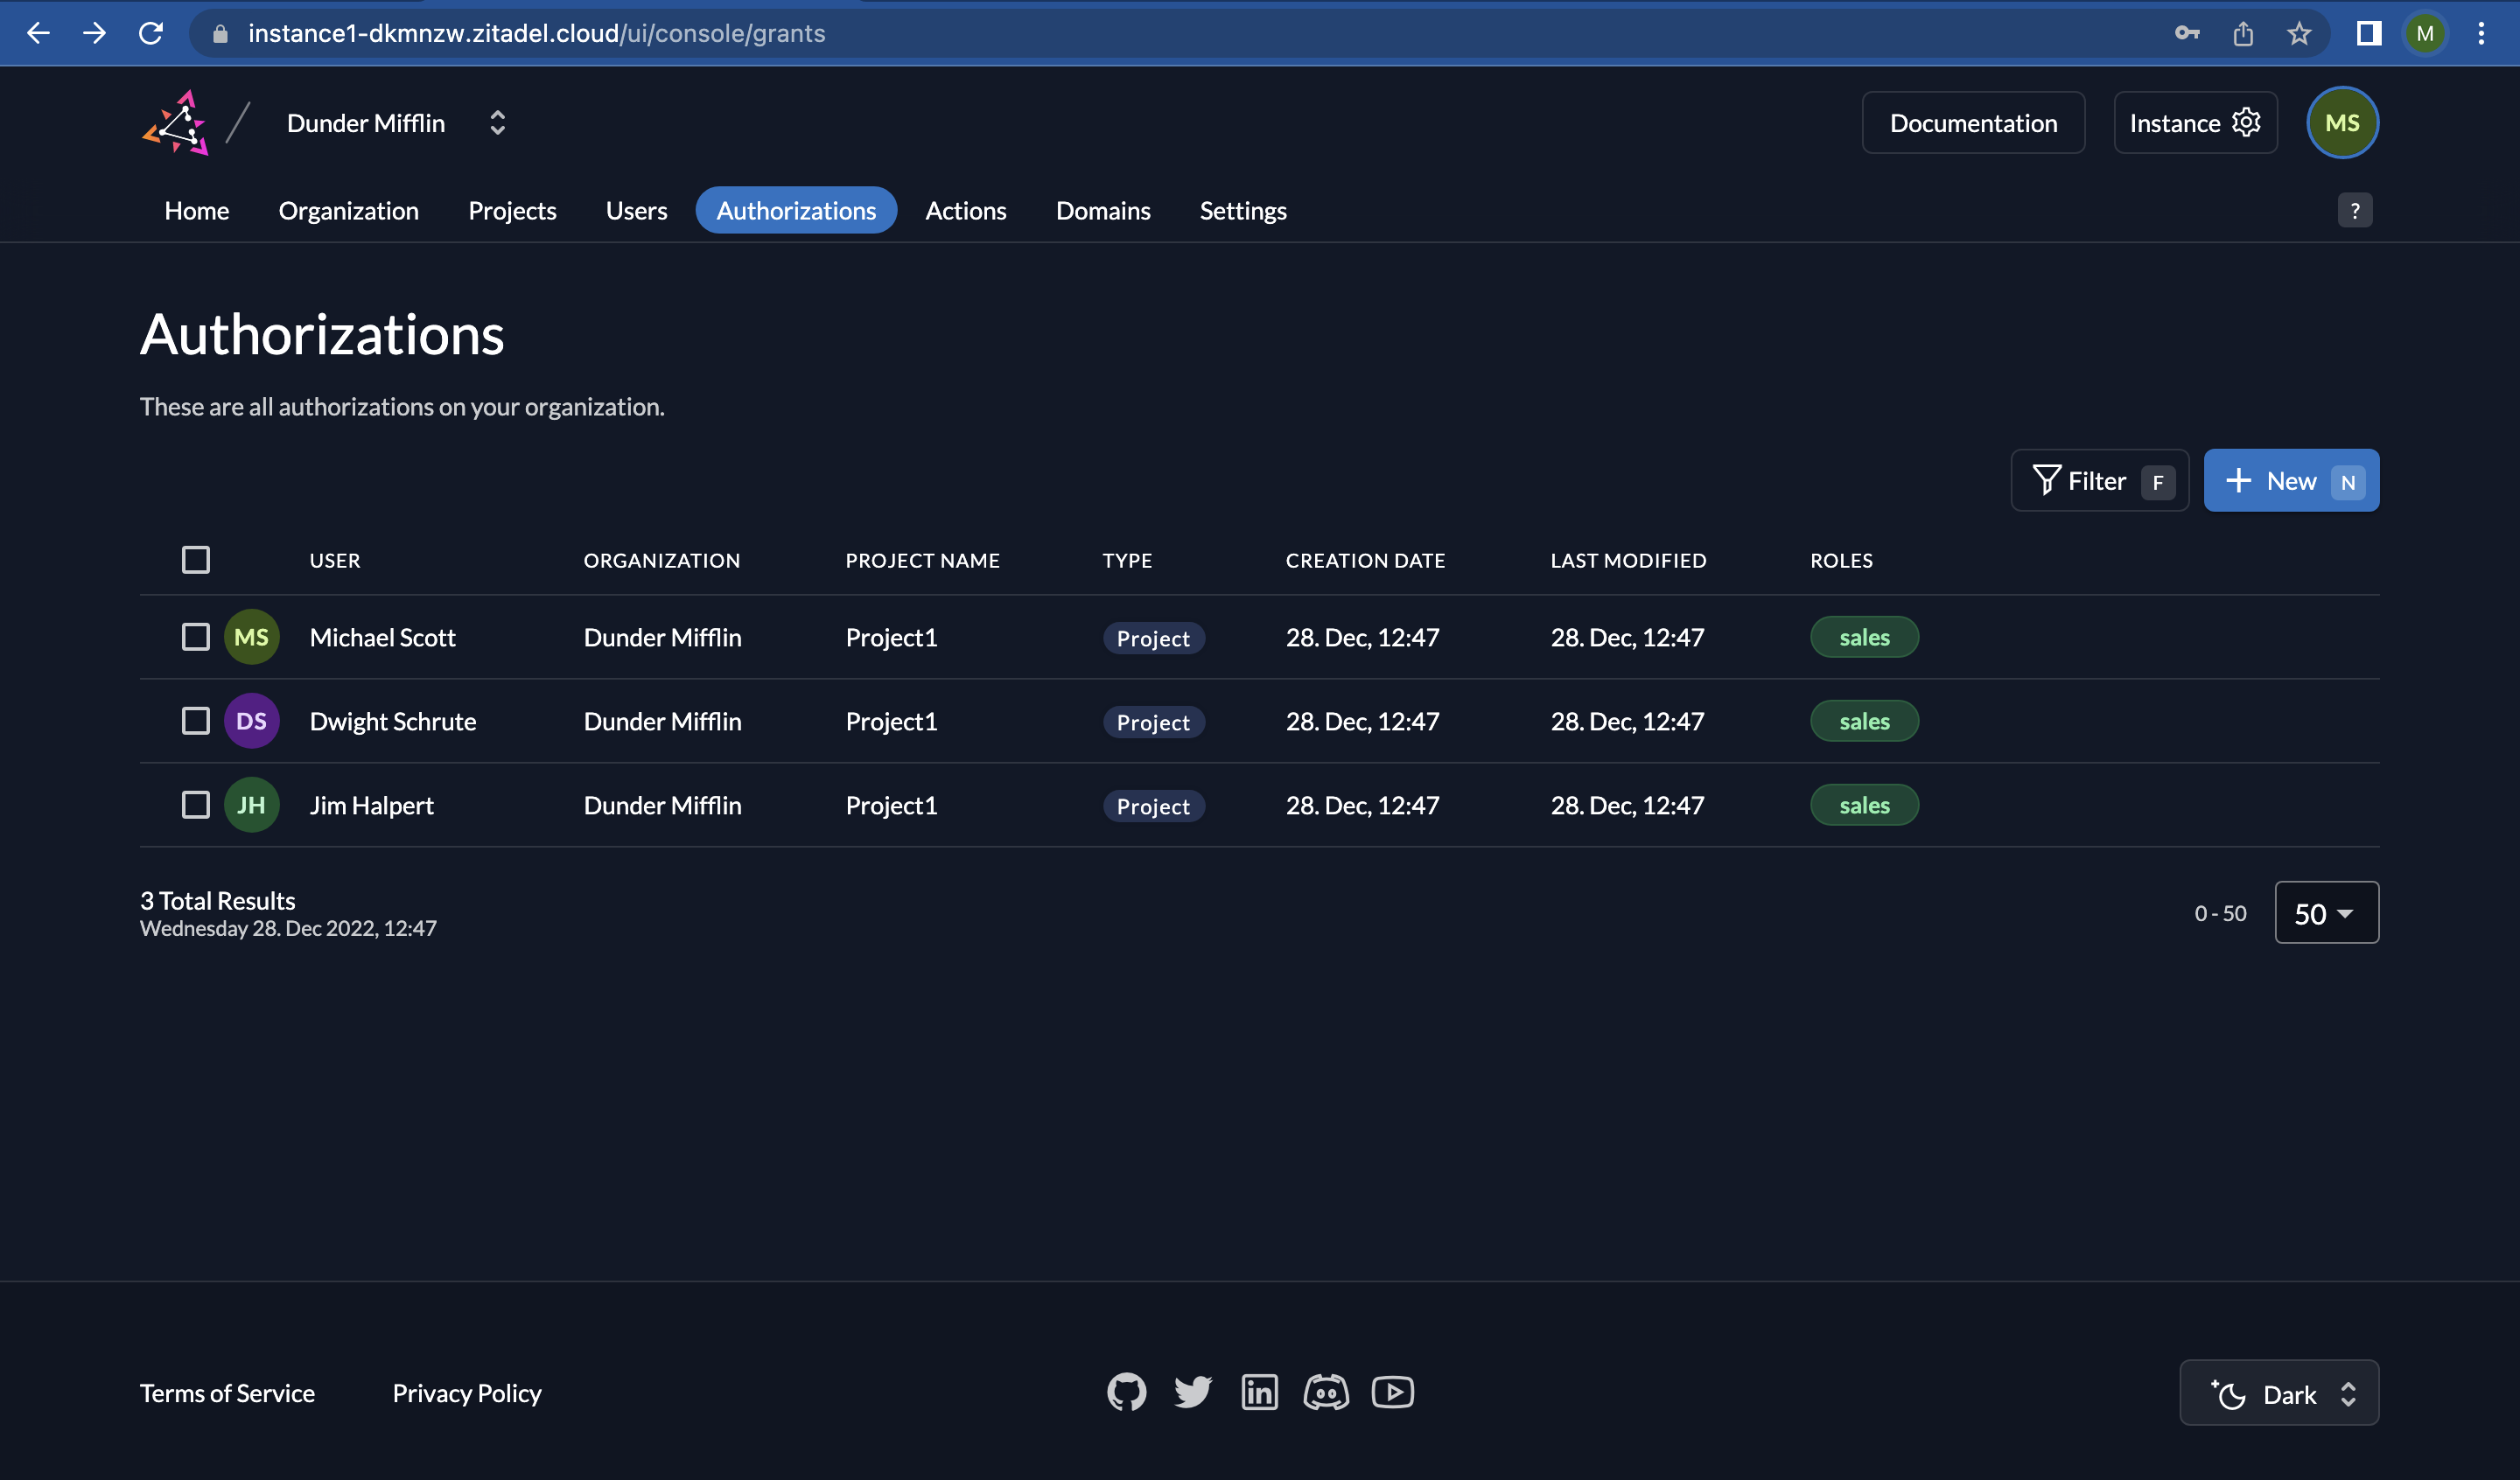
6. Add Authorizations to your Project
- Click on “Authorizations” on the top menu.
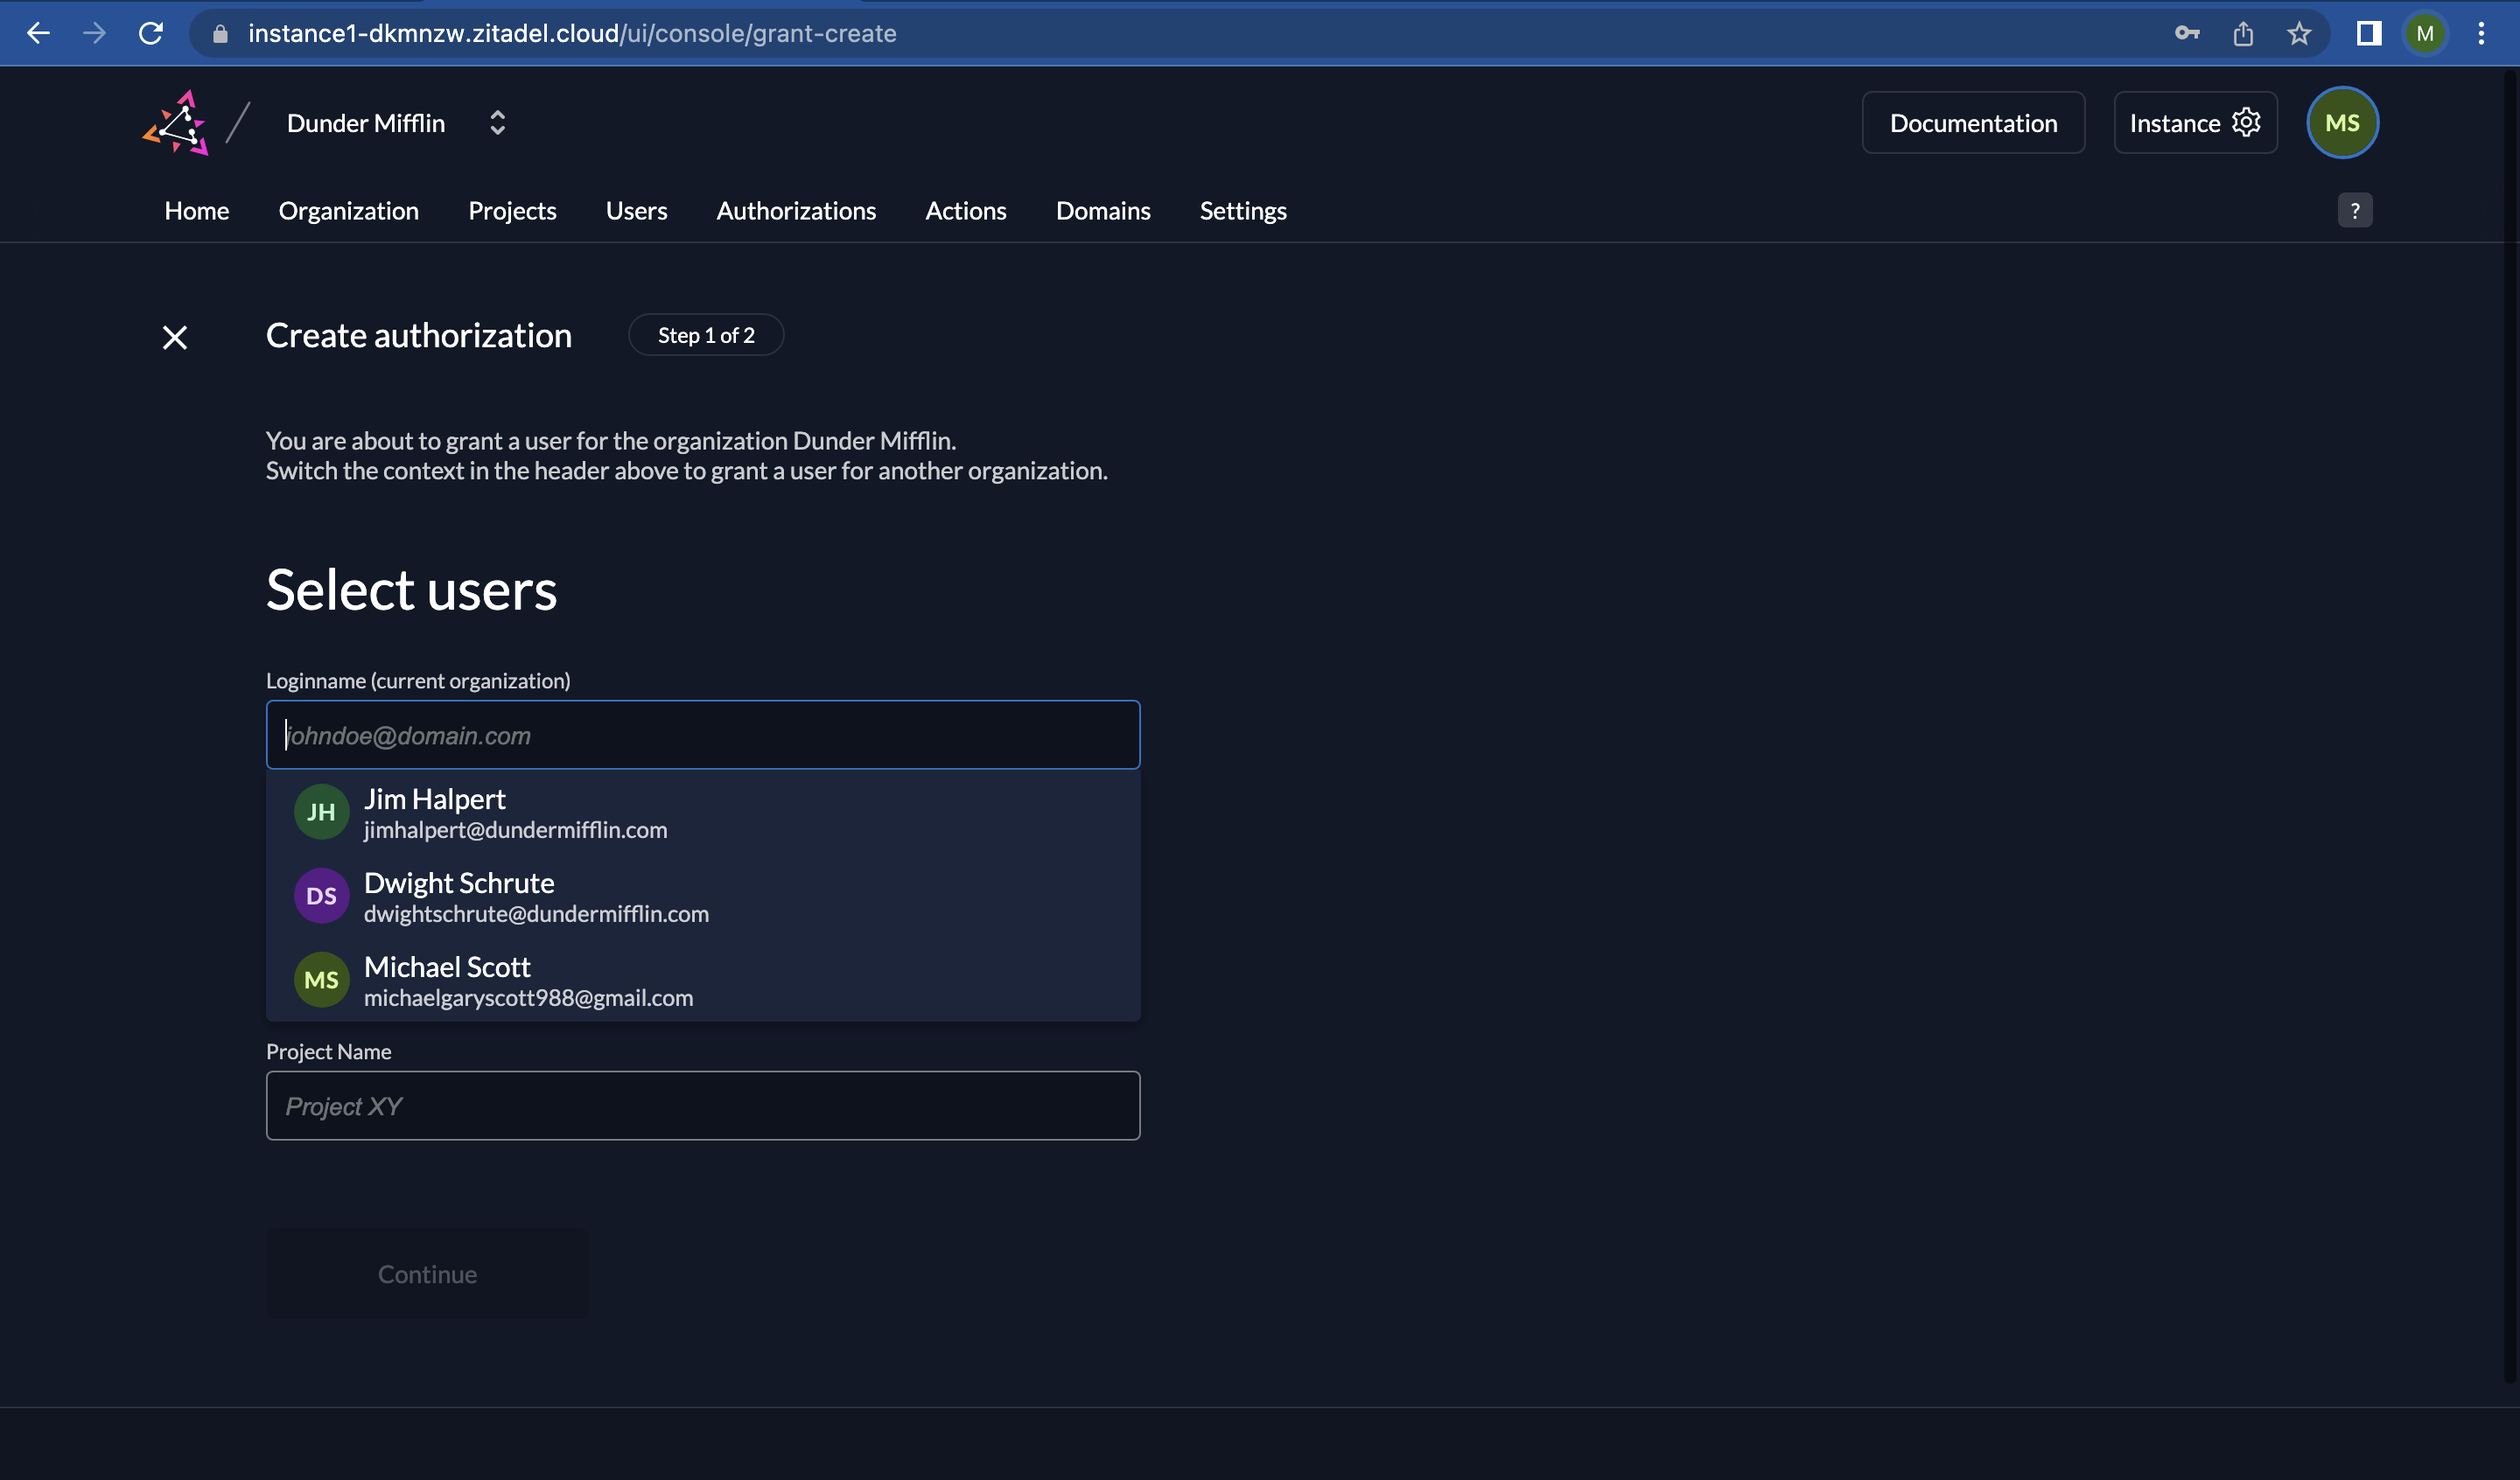
- Select users for the authorization. You can select 1 or more users for a single authorization grant. Let’s select all the users for this grant.
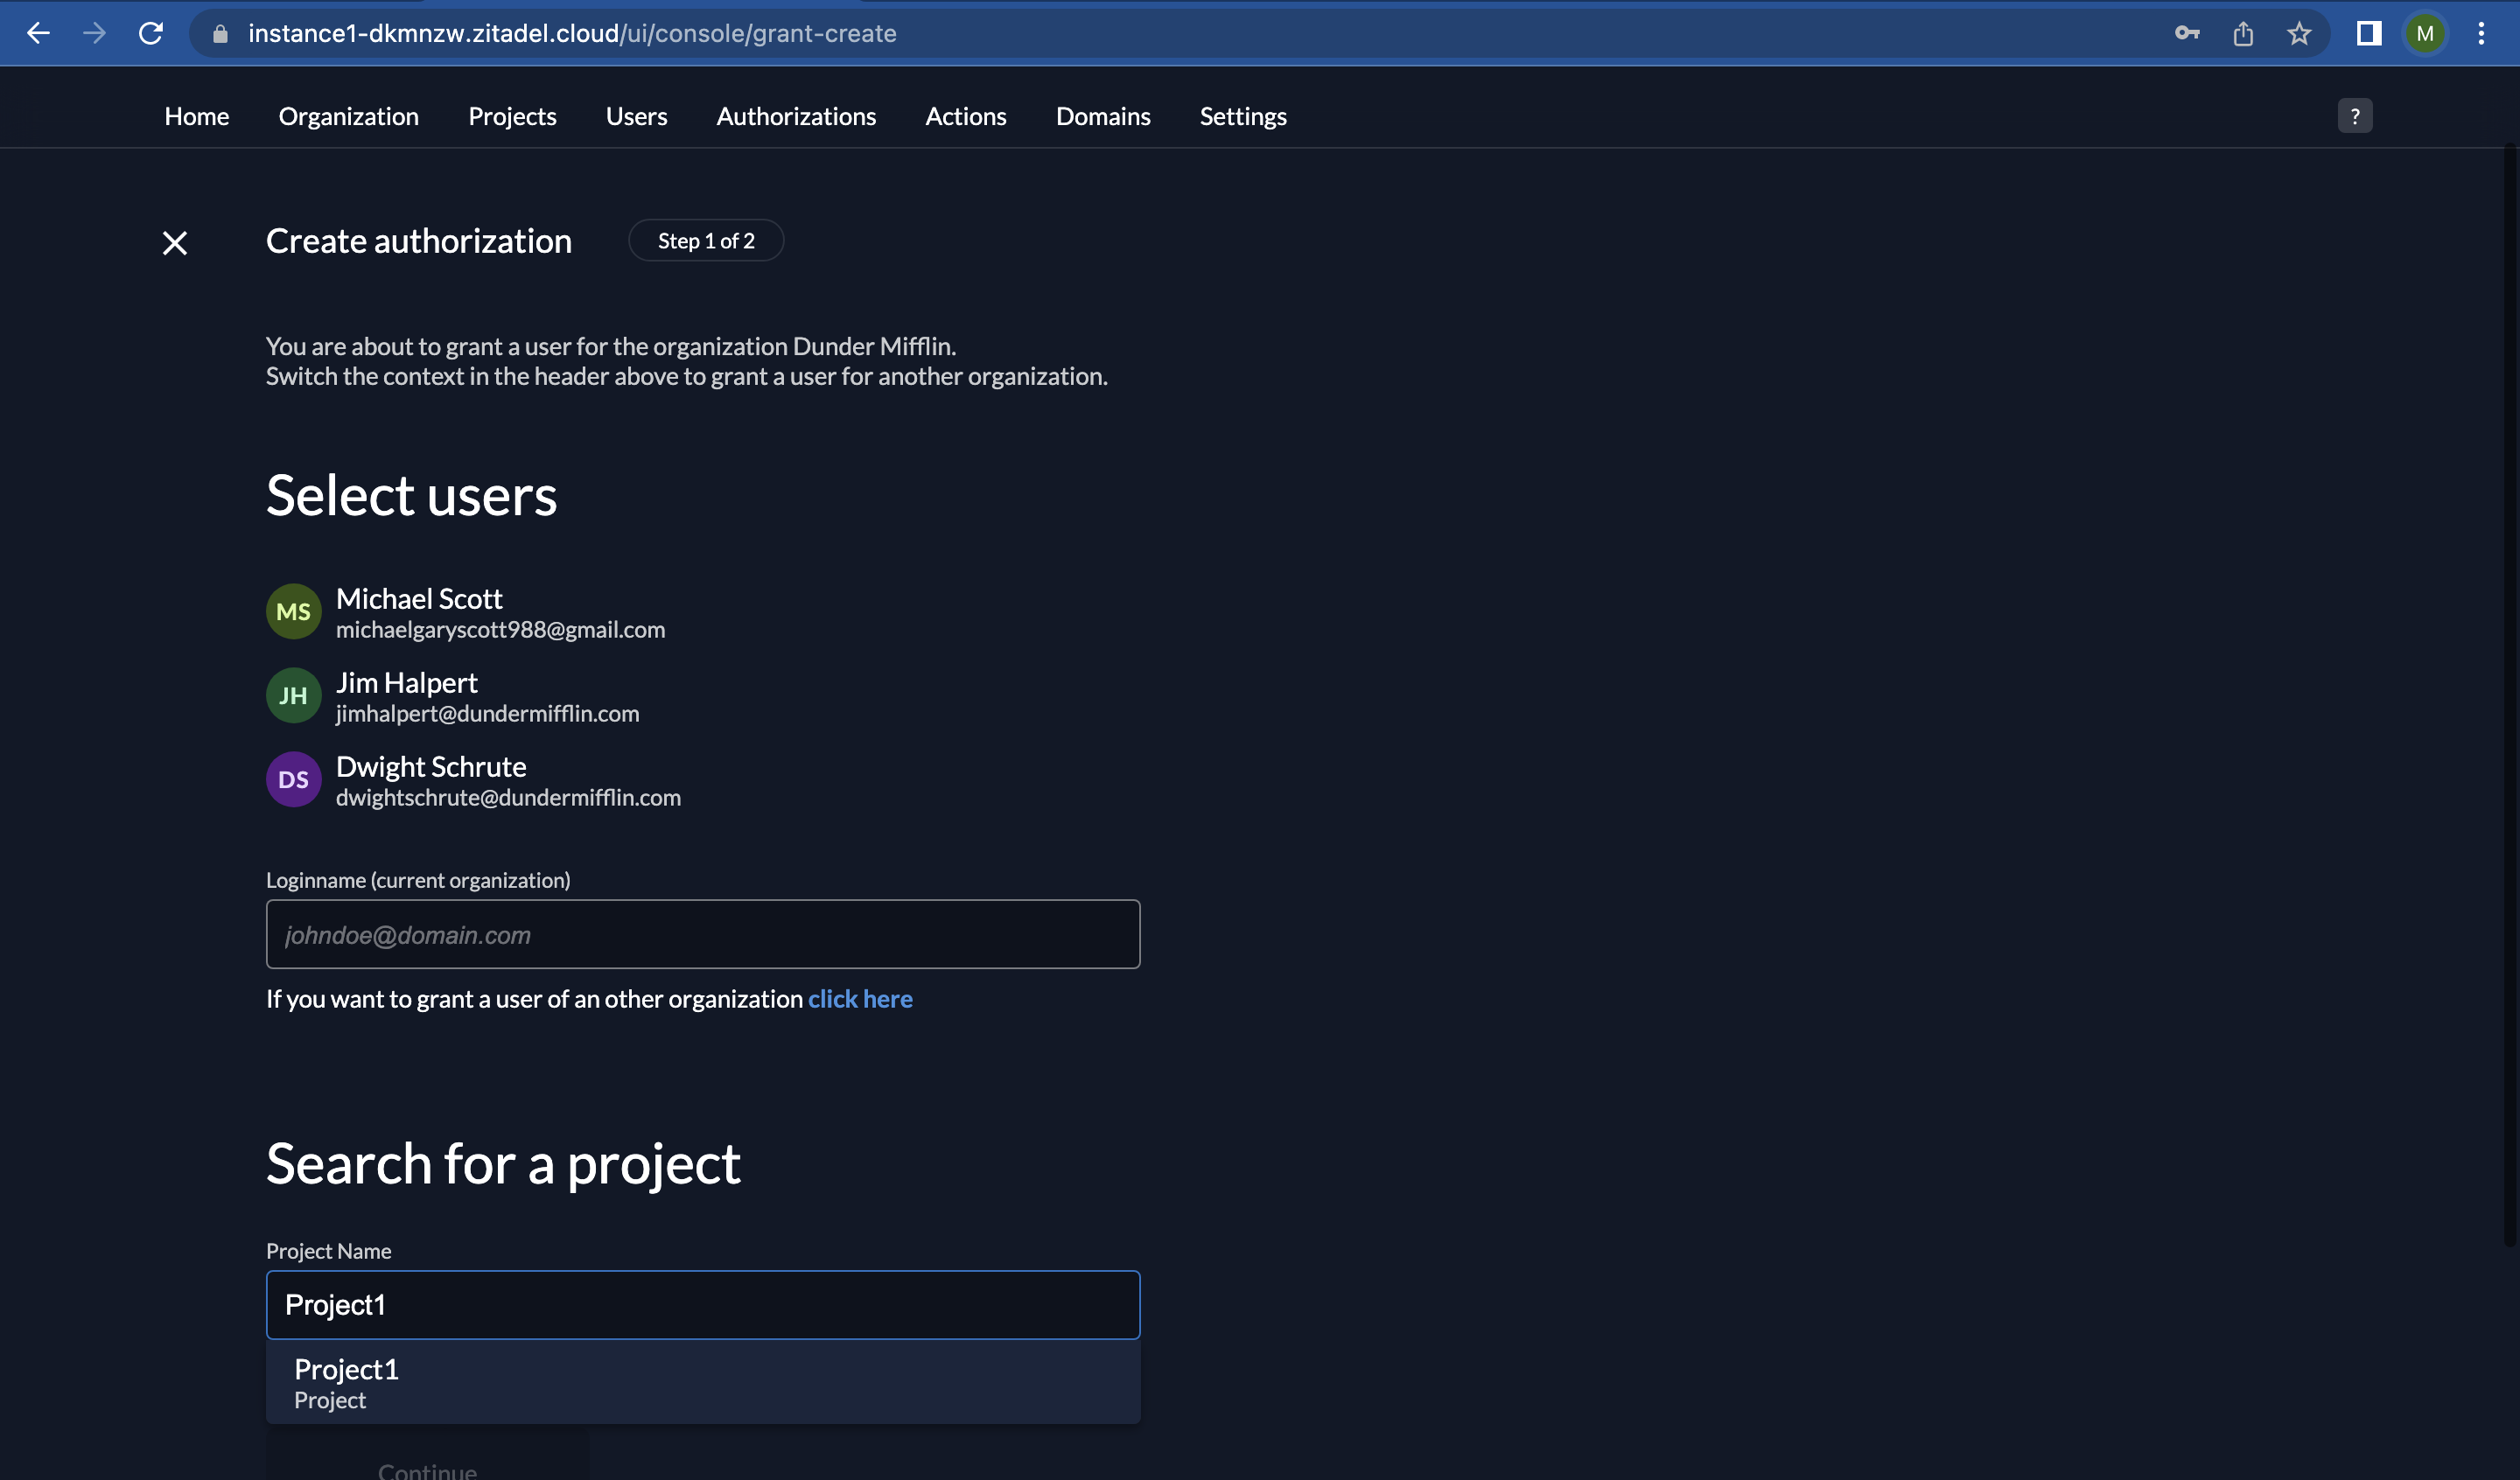
- Next, select a project. Since we created only “Project1” so far, you will see just that. Go ahead and select it.
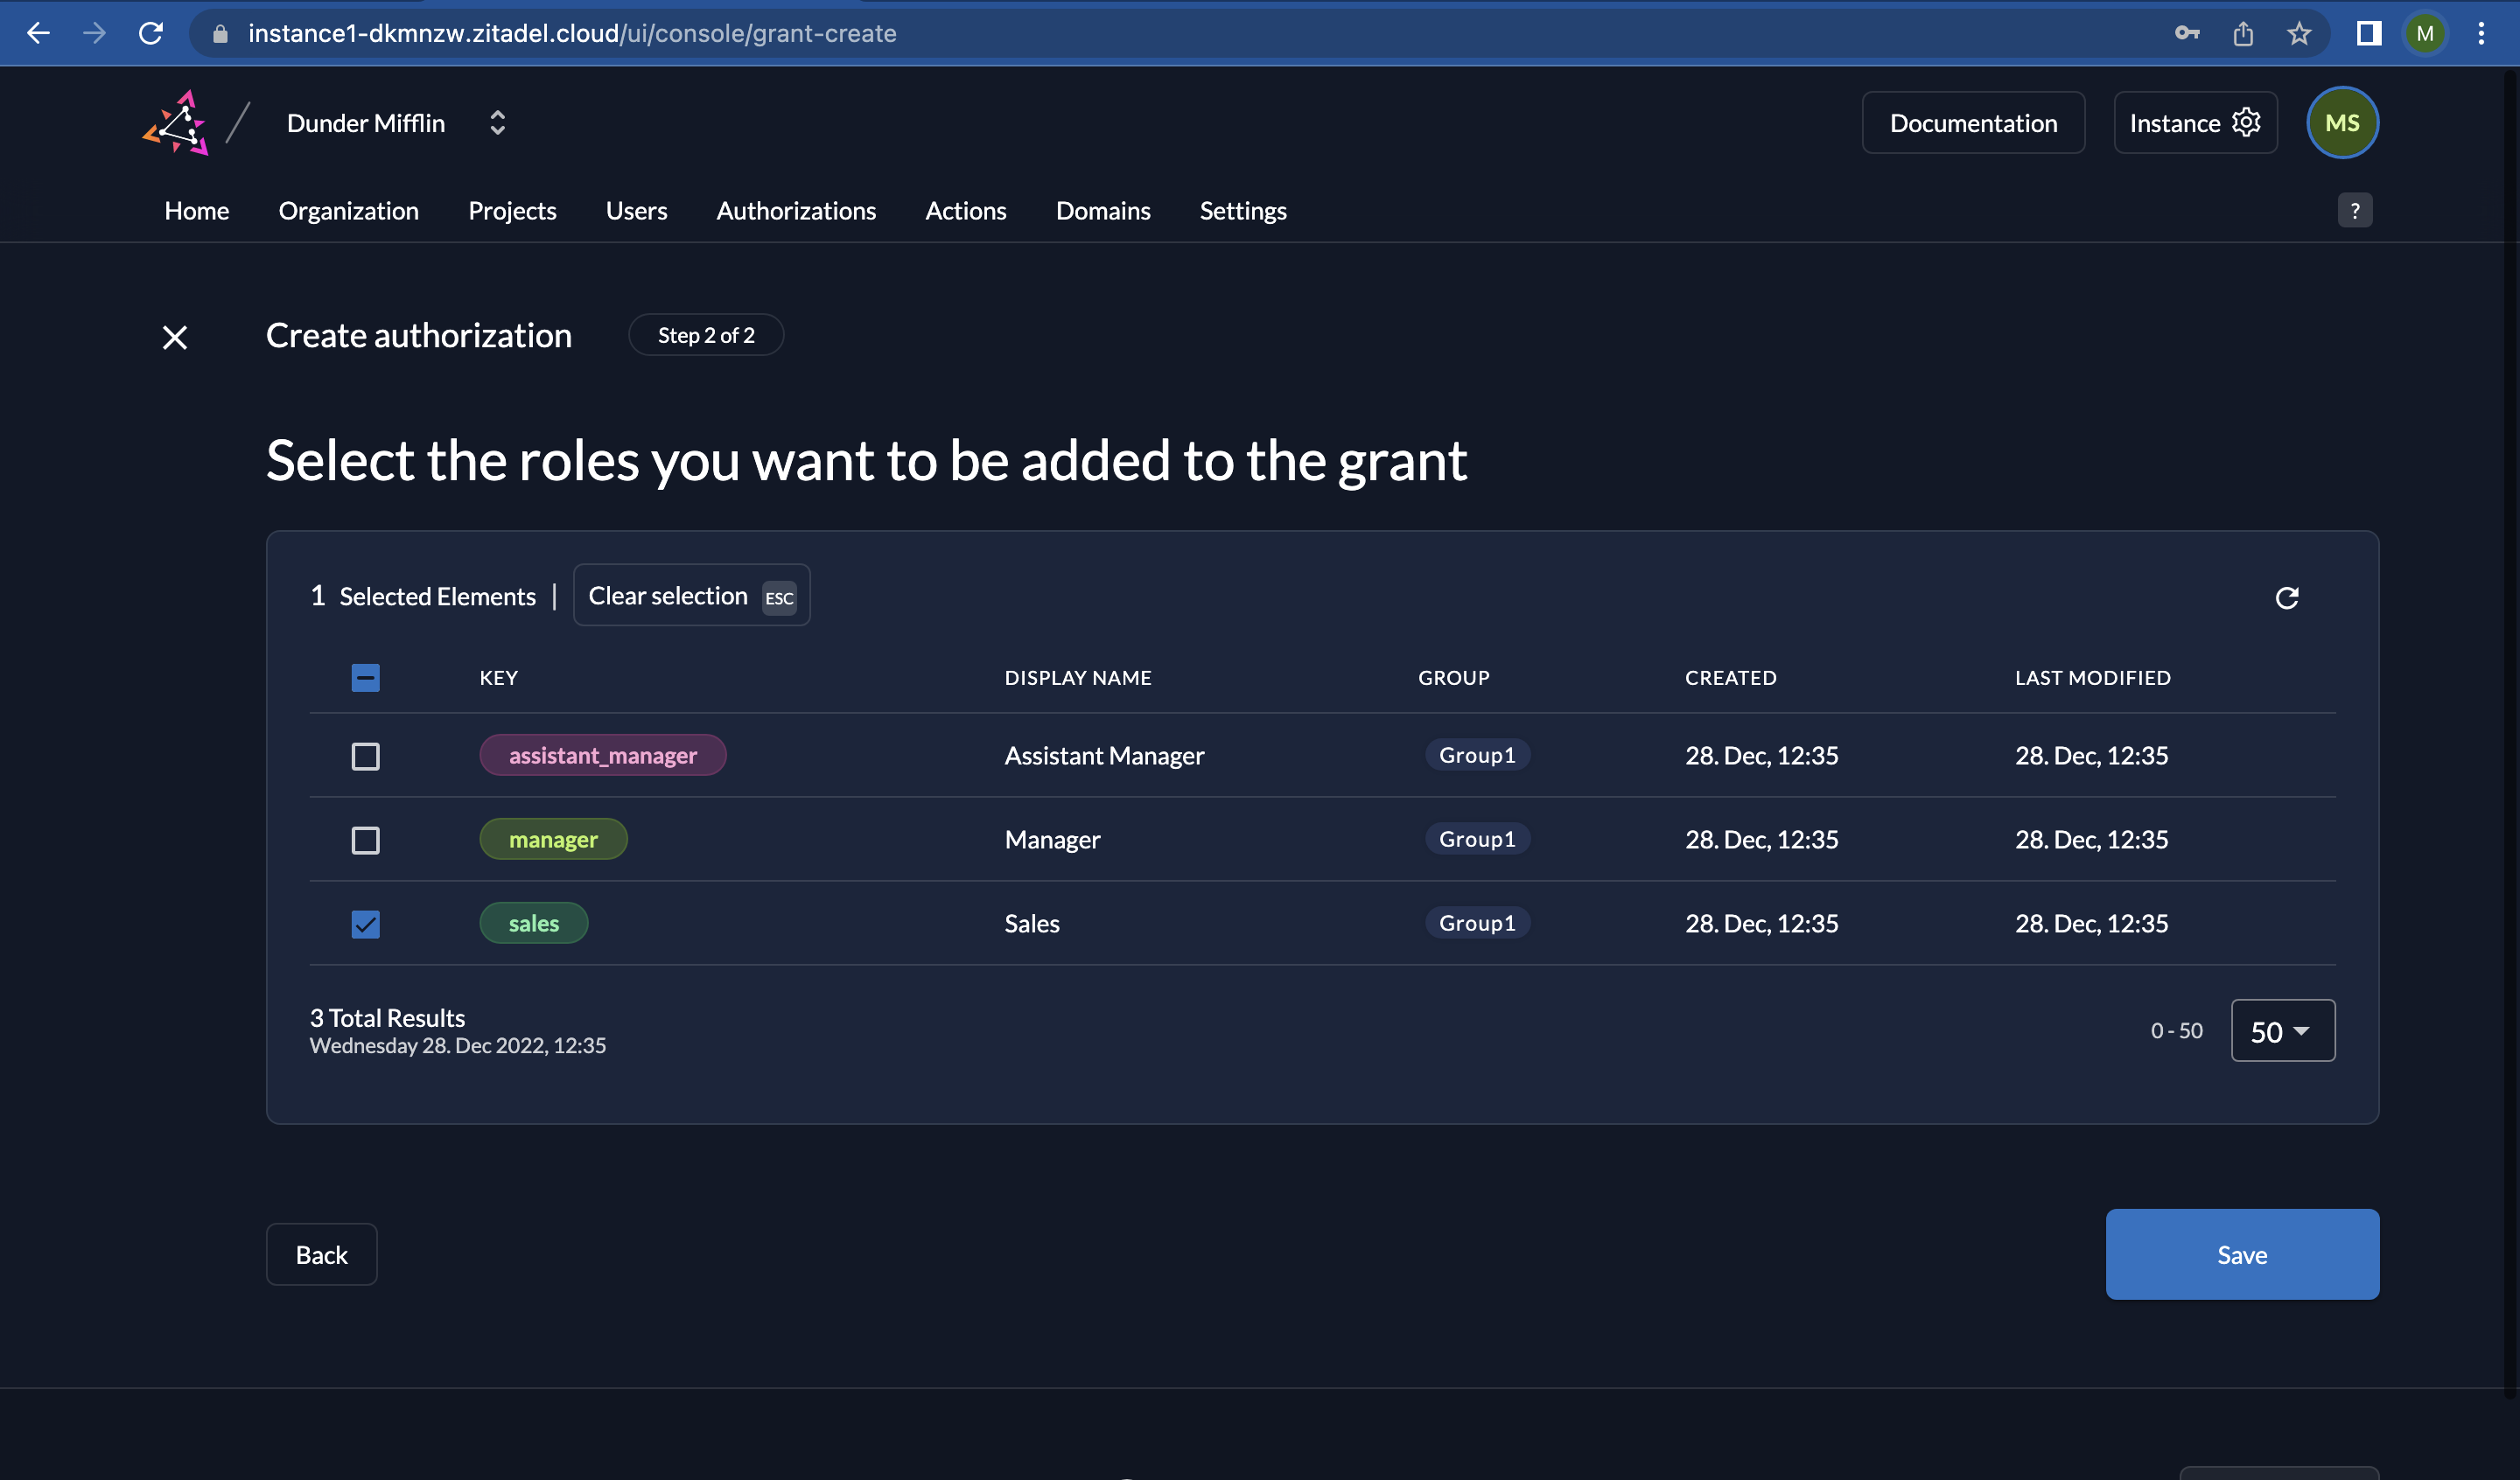
- Let’s select the role “sales”. Click on “Save”.
- Now you will see the users with their designated roles.
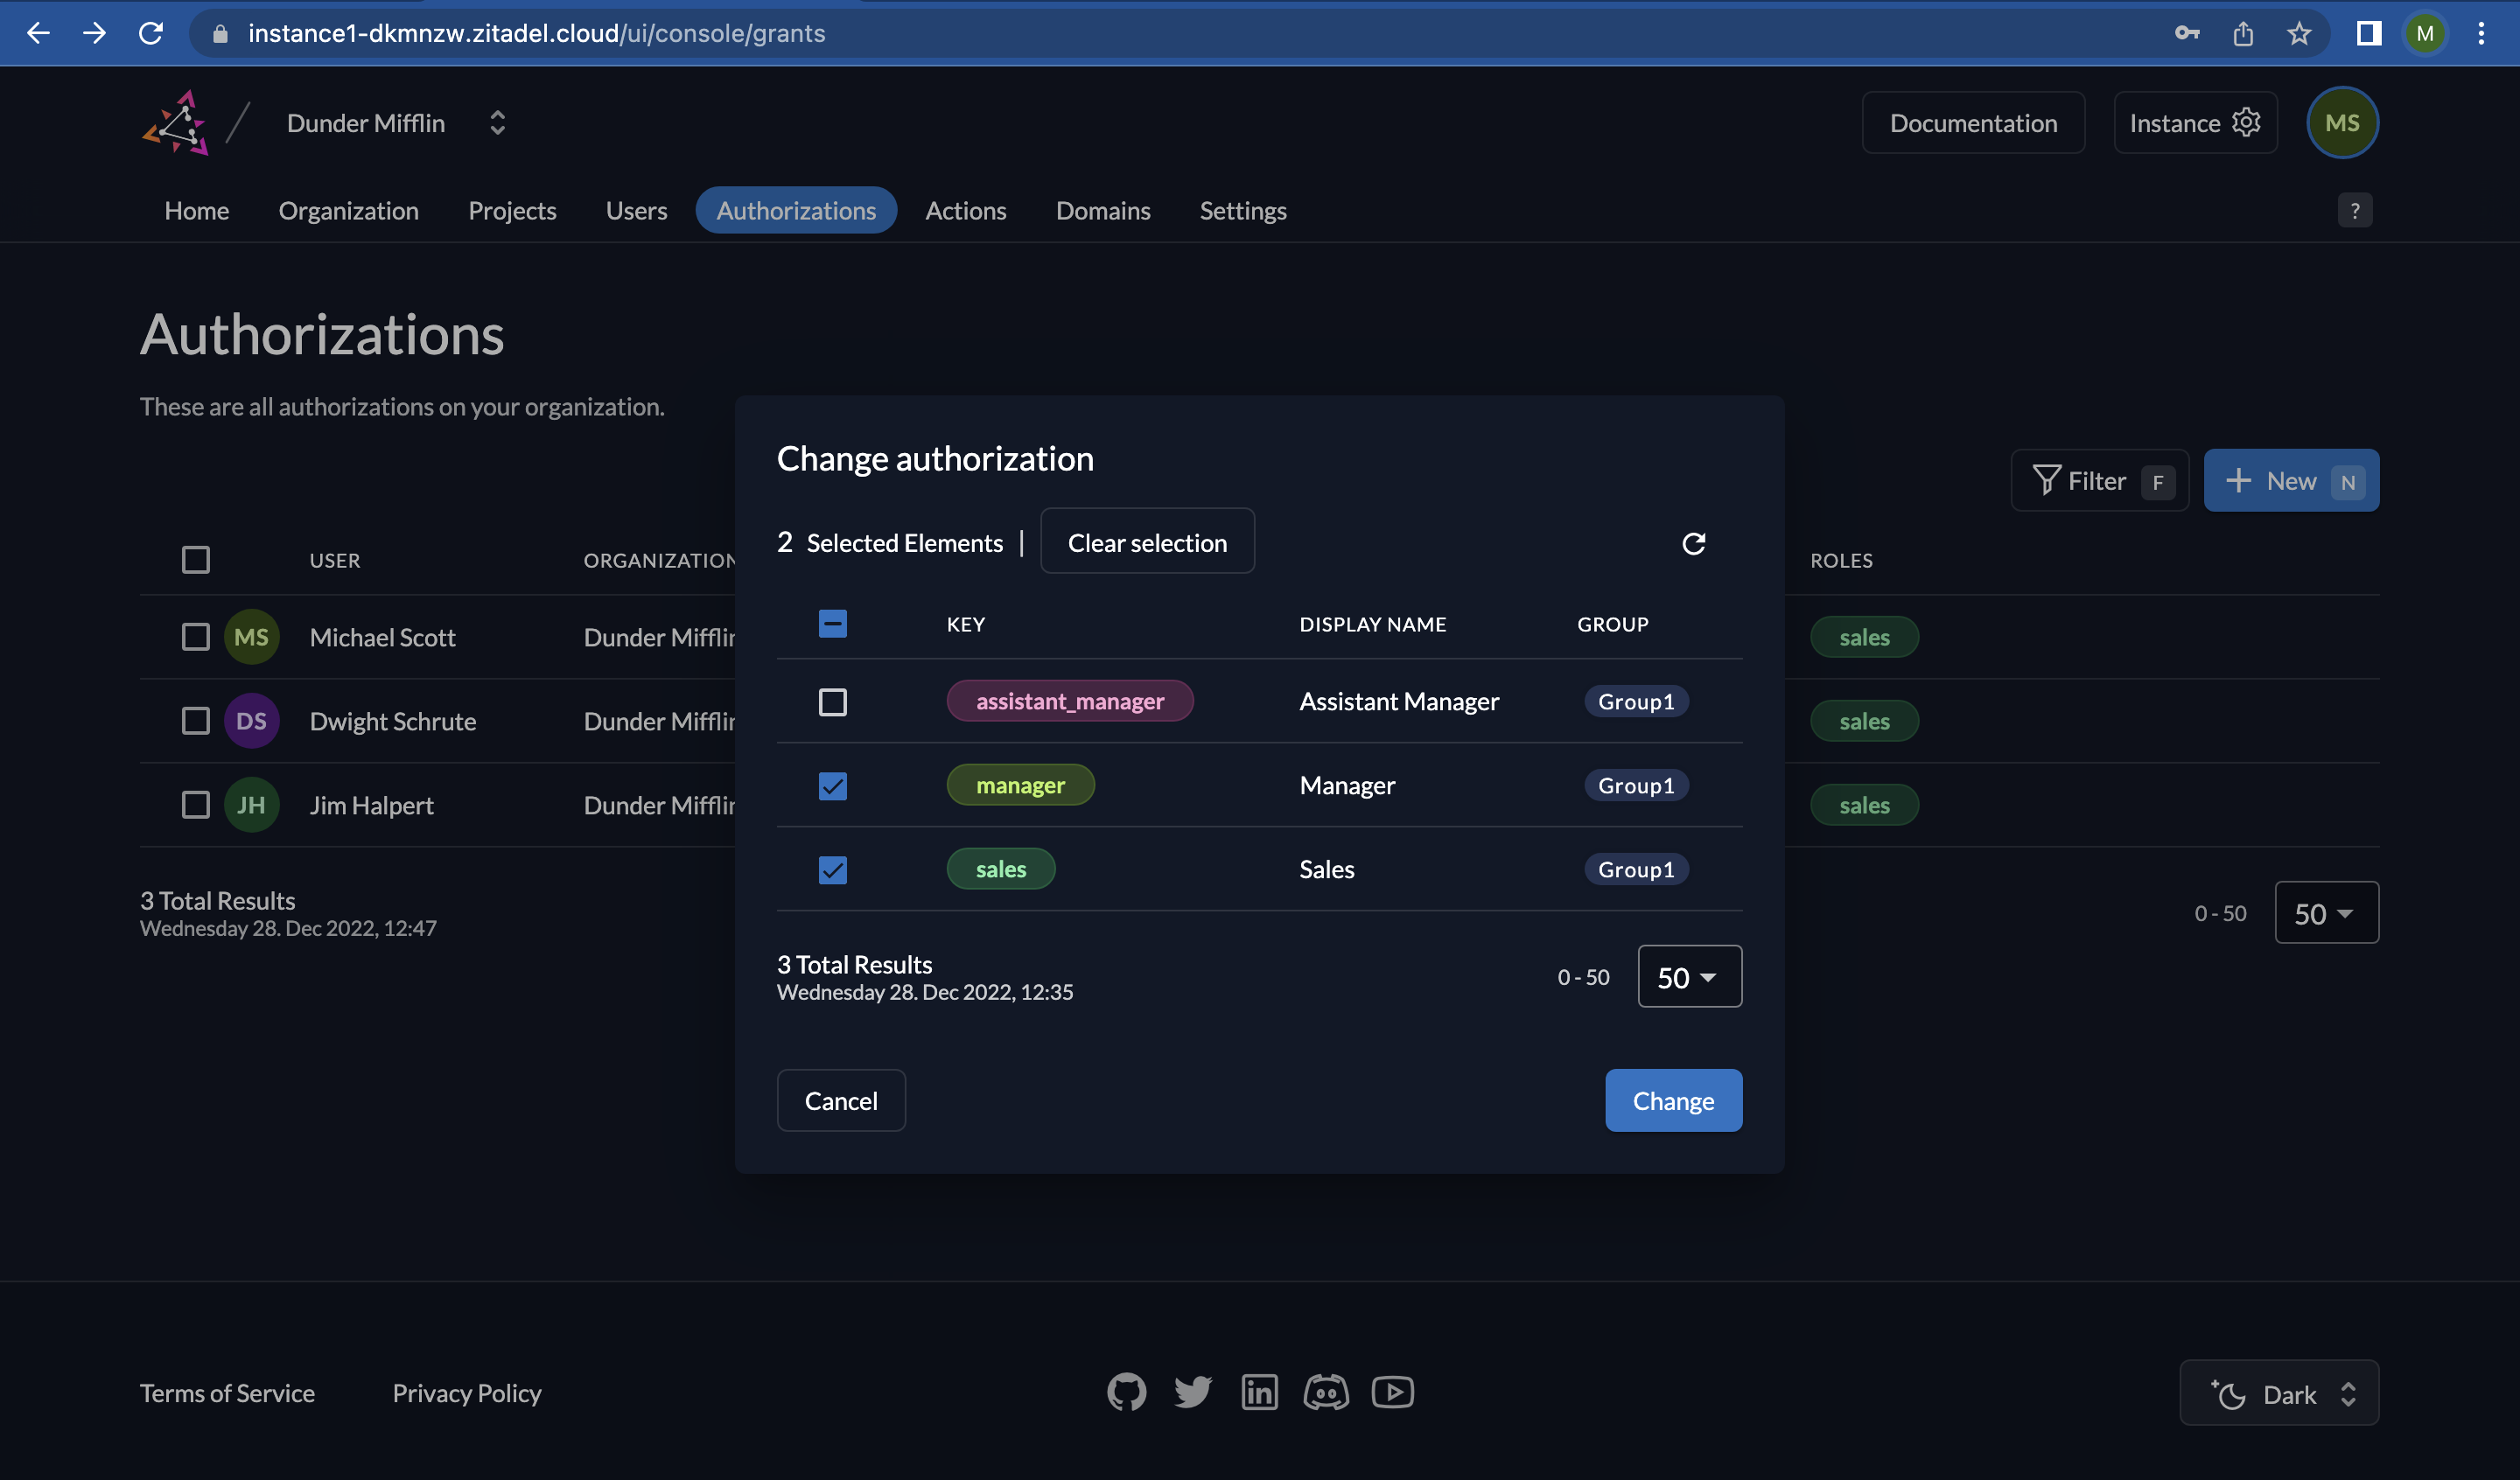
- To assign additional roles to a user, you can click on the user's name and select the desired roles from the list. This will grant the user additional permissions within the project. Click on “Change”.
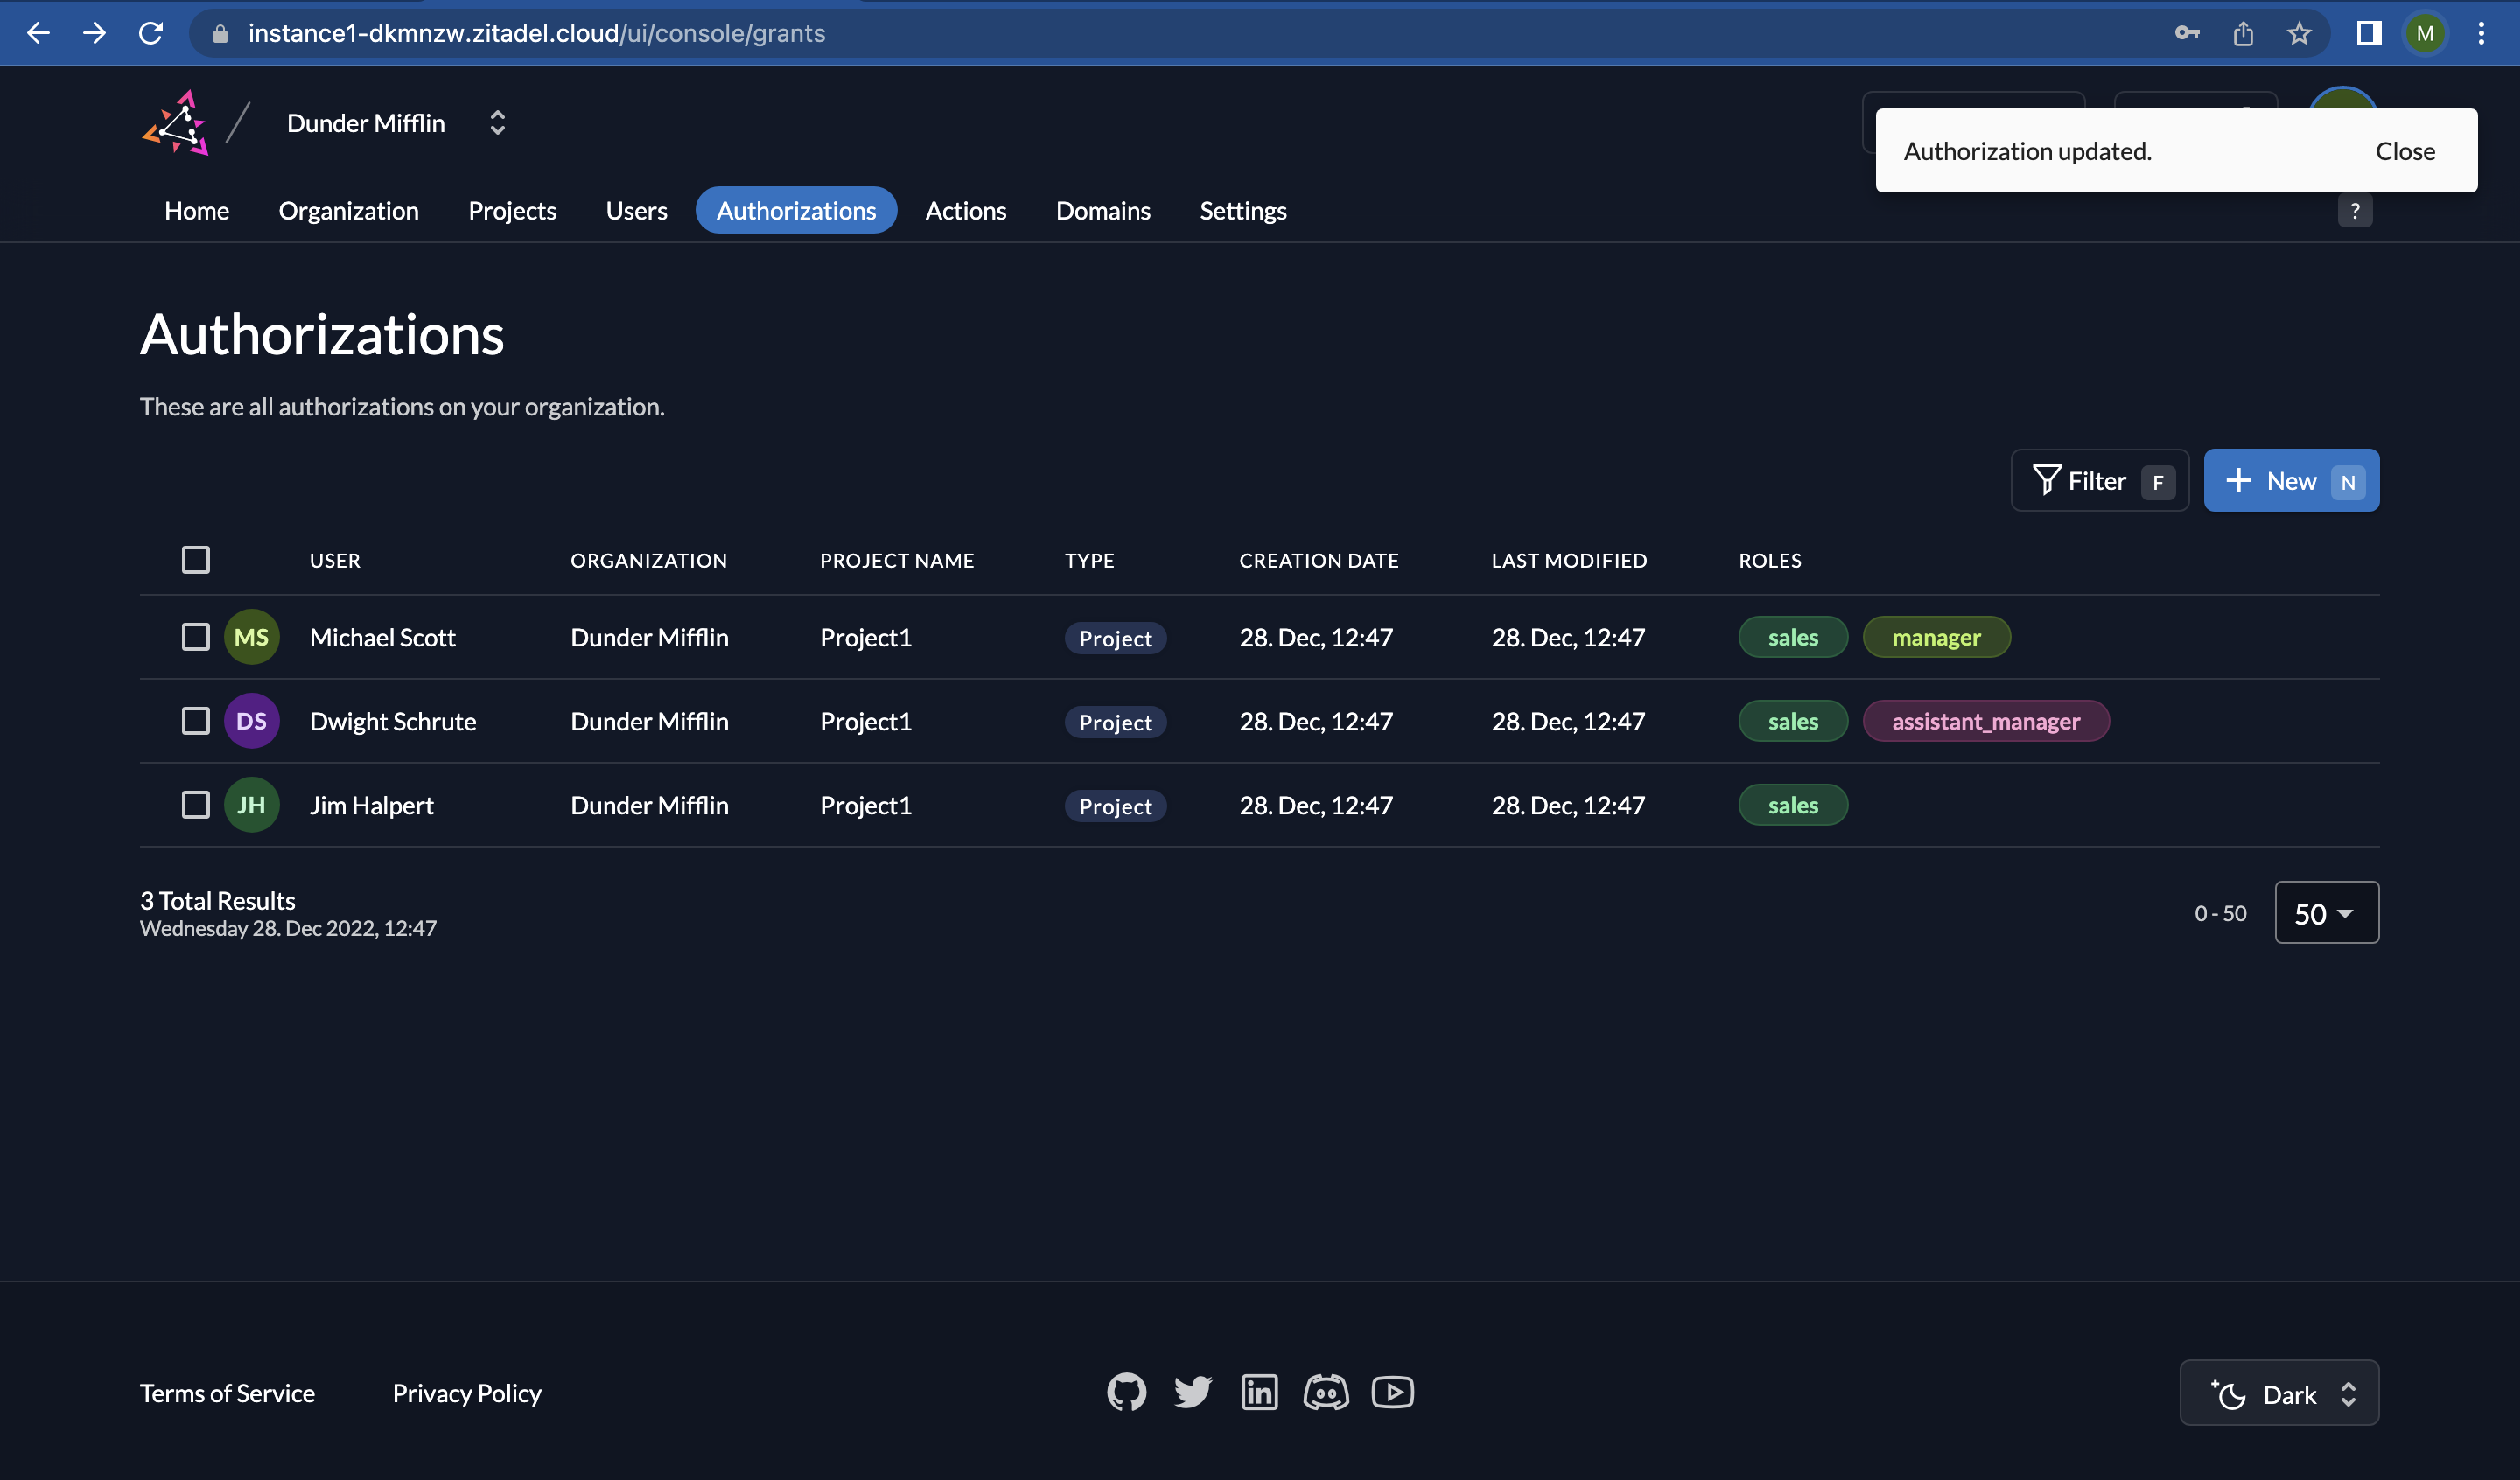
- You can see that additional roles have been assigned to the users in this updated authorization list and this should now give you an indication of how authorizations work in ZITADEL.
7. Create an Application in your Project
We will now create an application in the project, which will allow our React client application to access protected resources through the use of the OpenID Connect (OIDC) protocol.
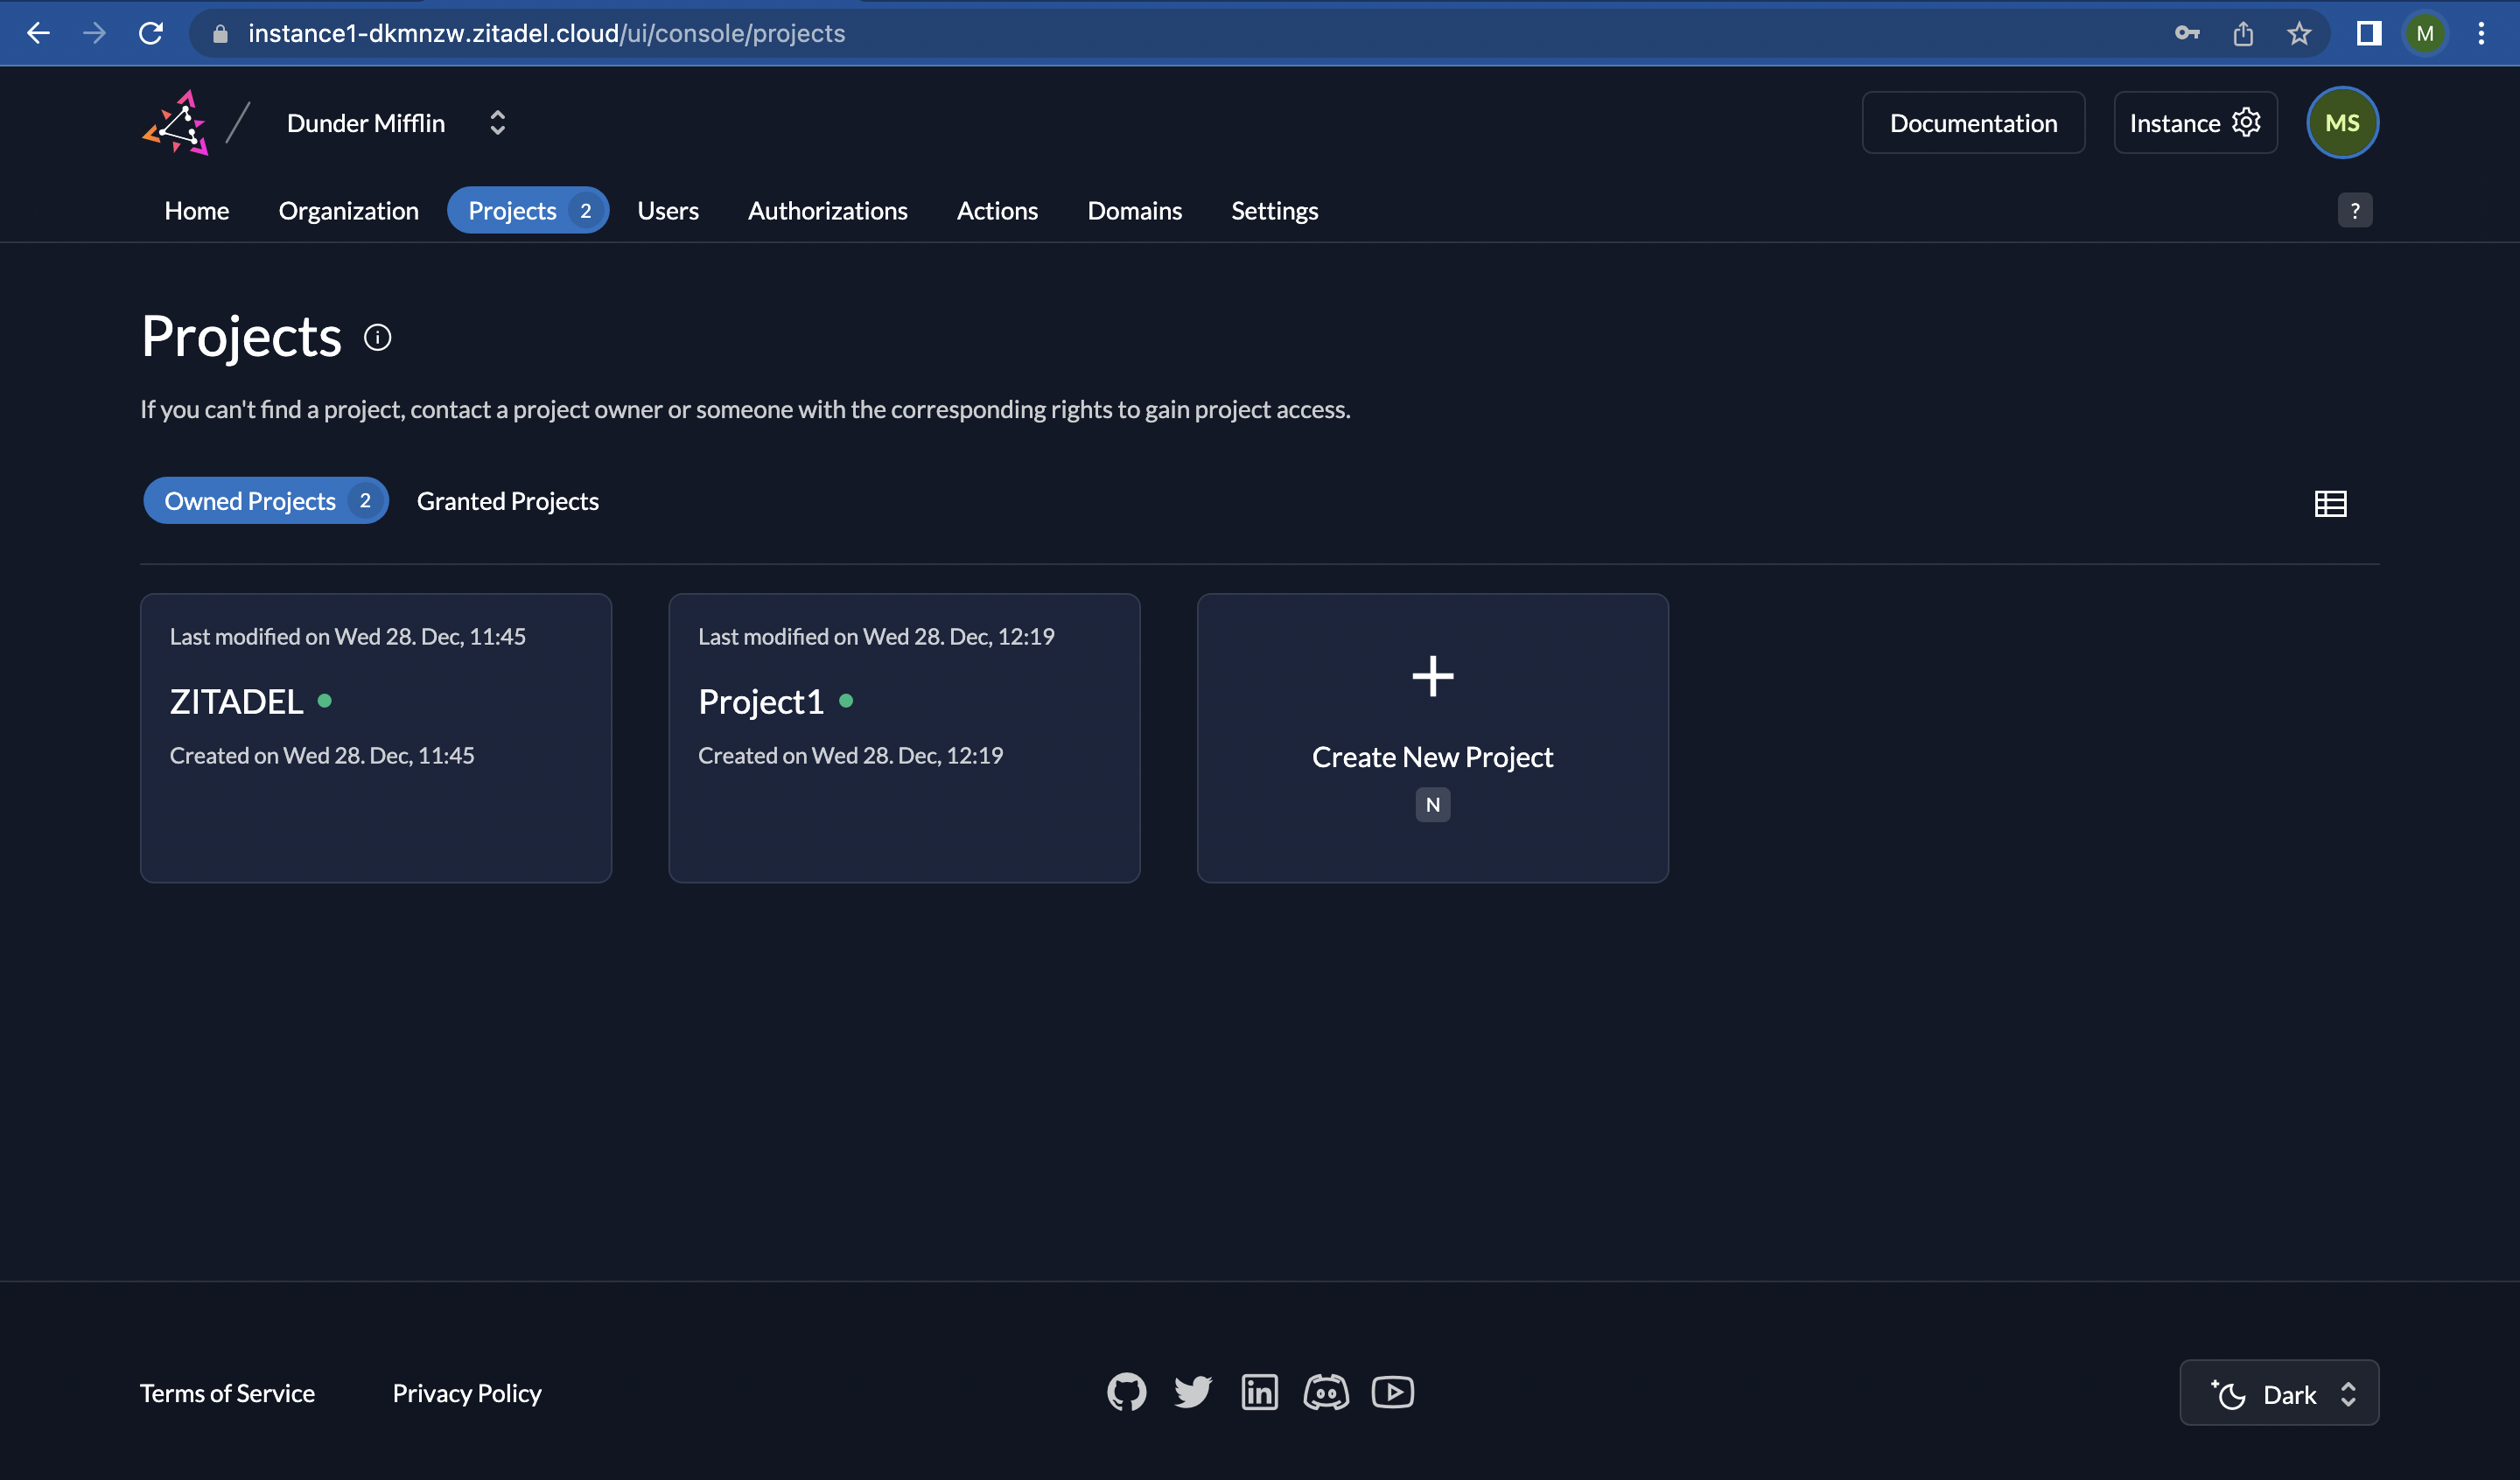
- Go to “Projects” and click on “Project1”.
- Click on “New” to add a new application.
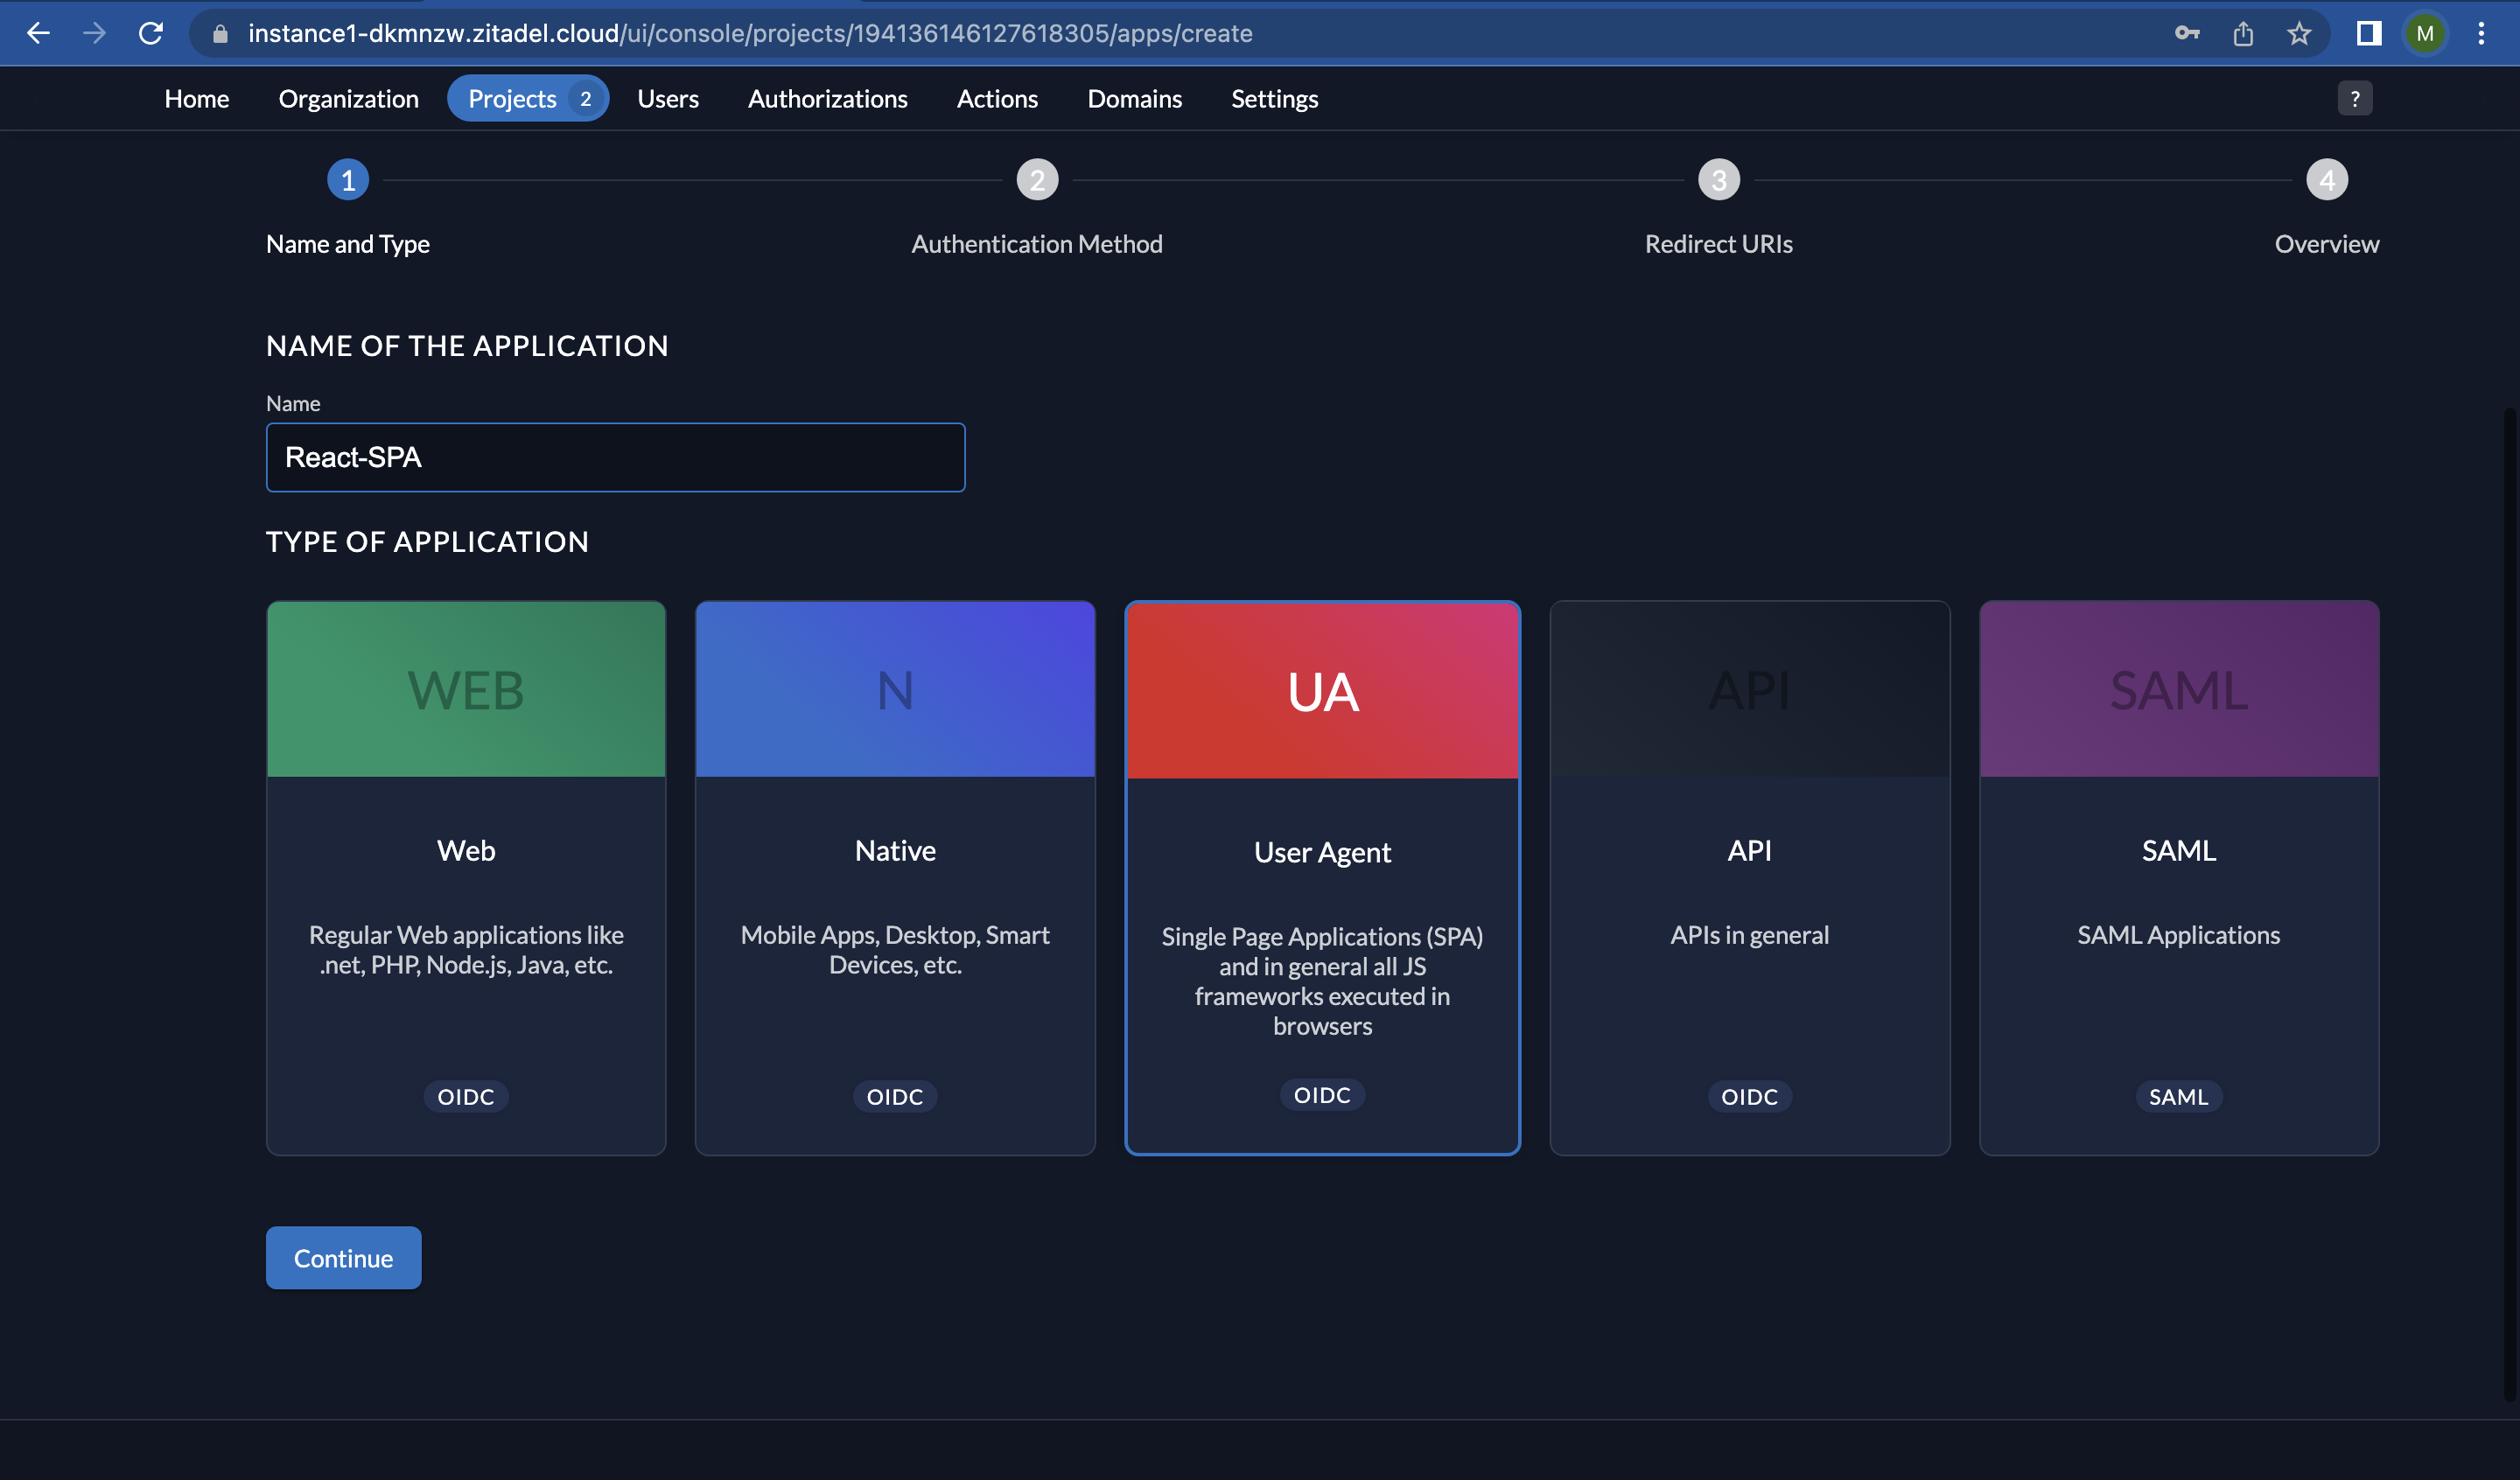
- Provide the name of the app as “React-SPA”. Select “User Agent” and click on “Continue”.
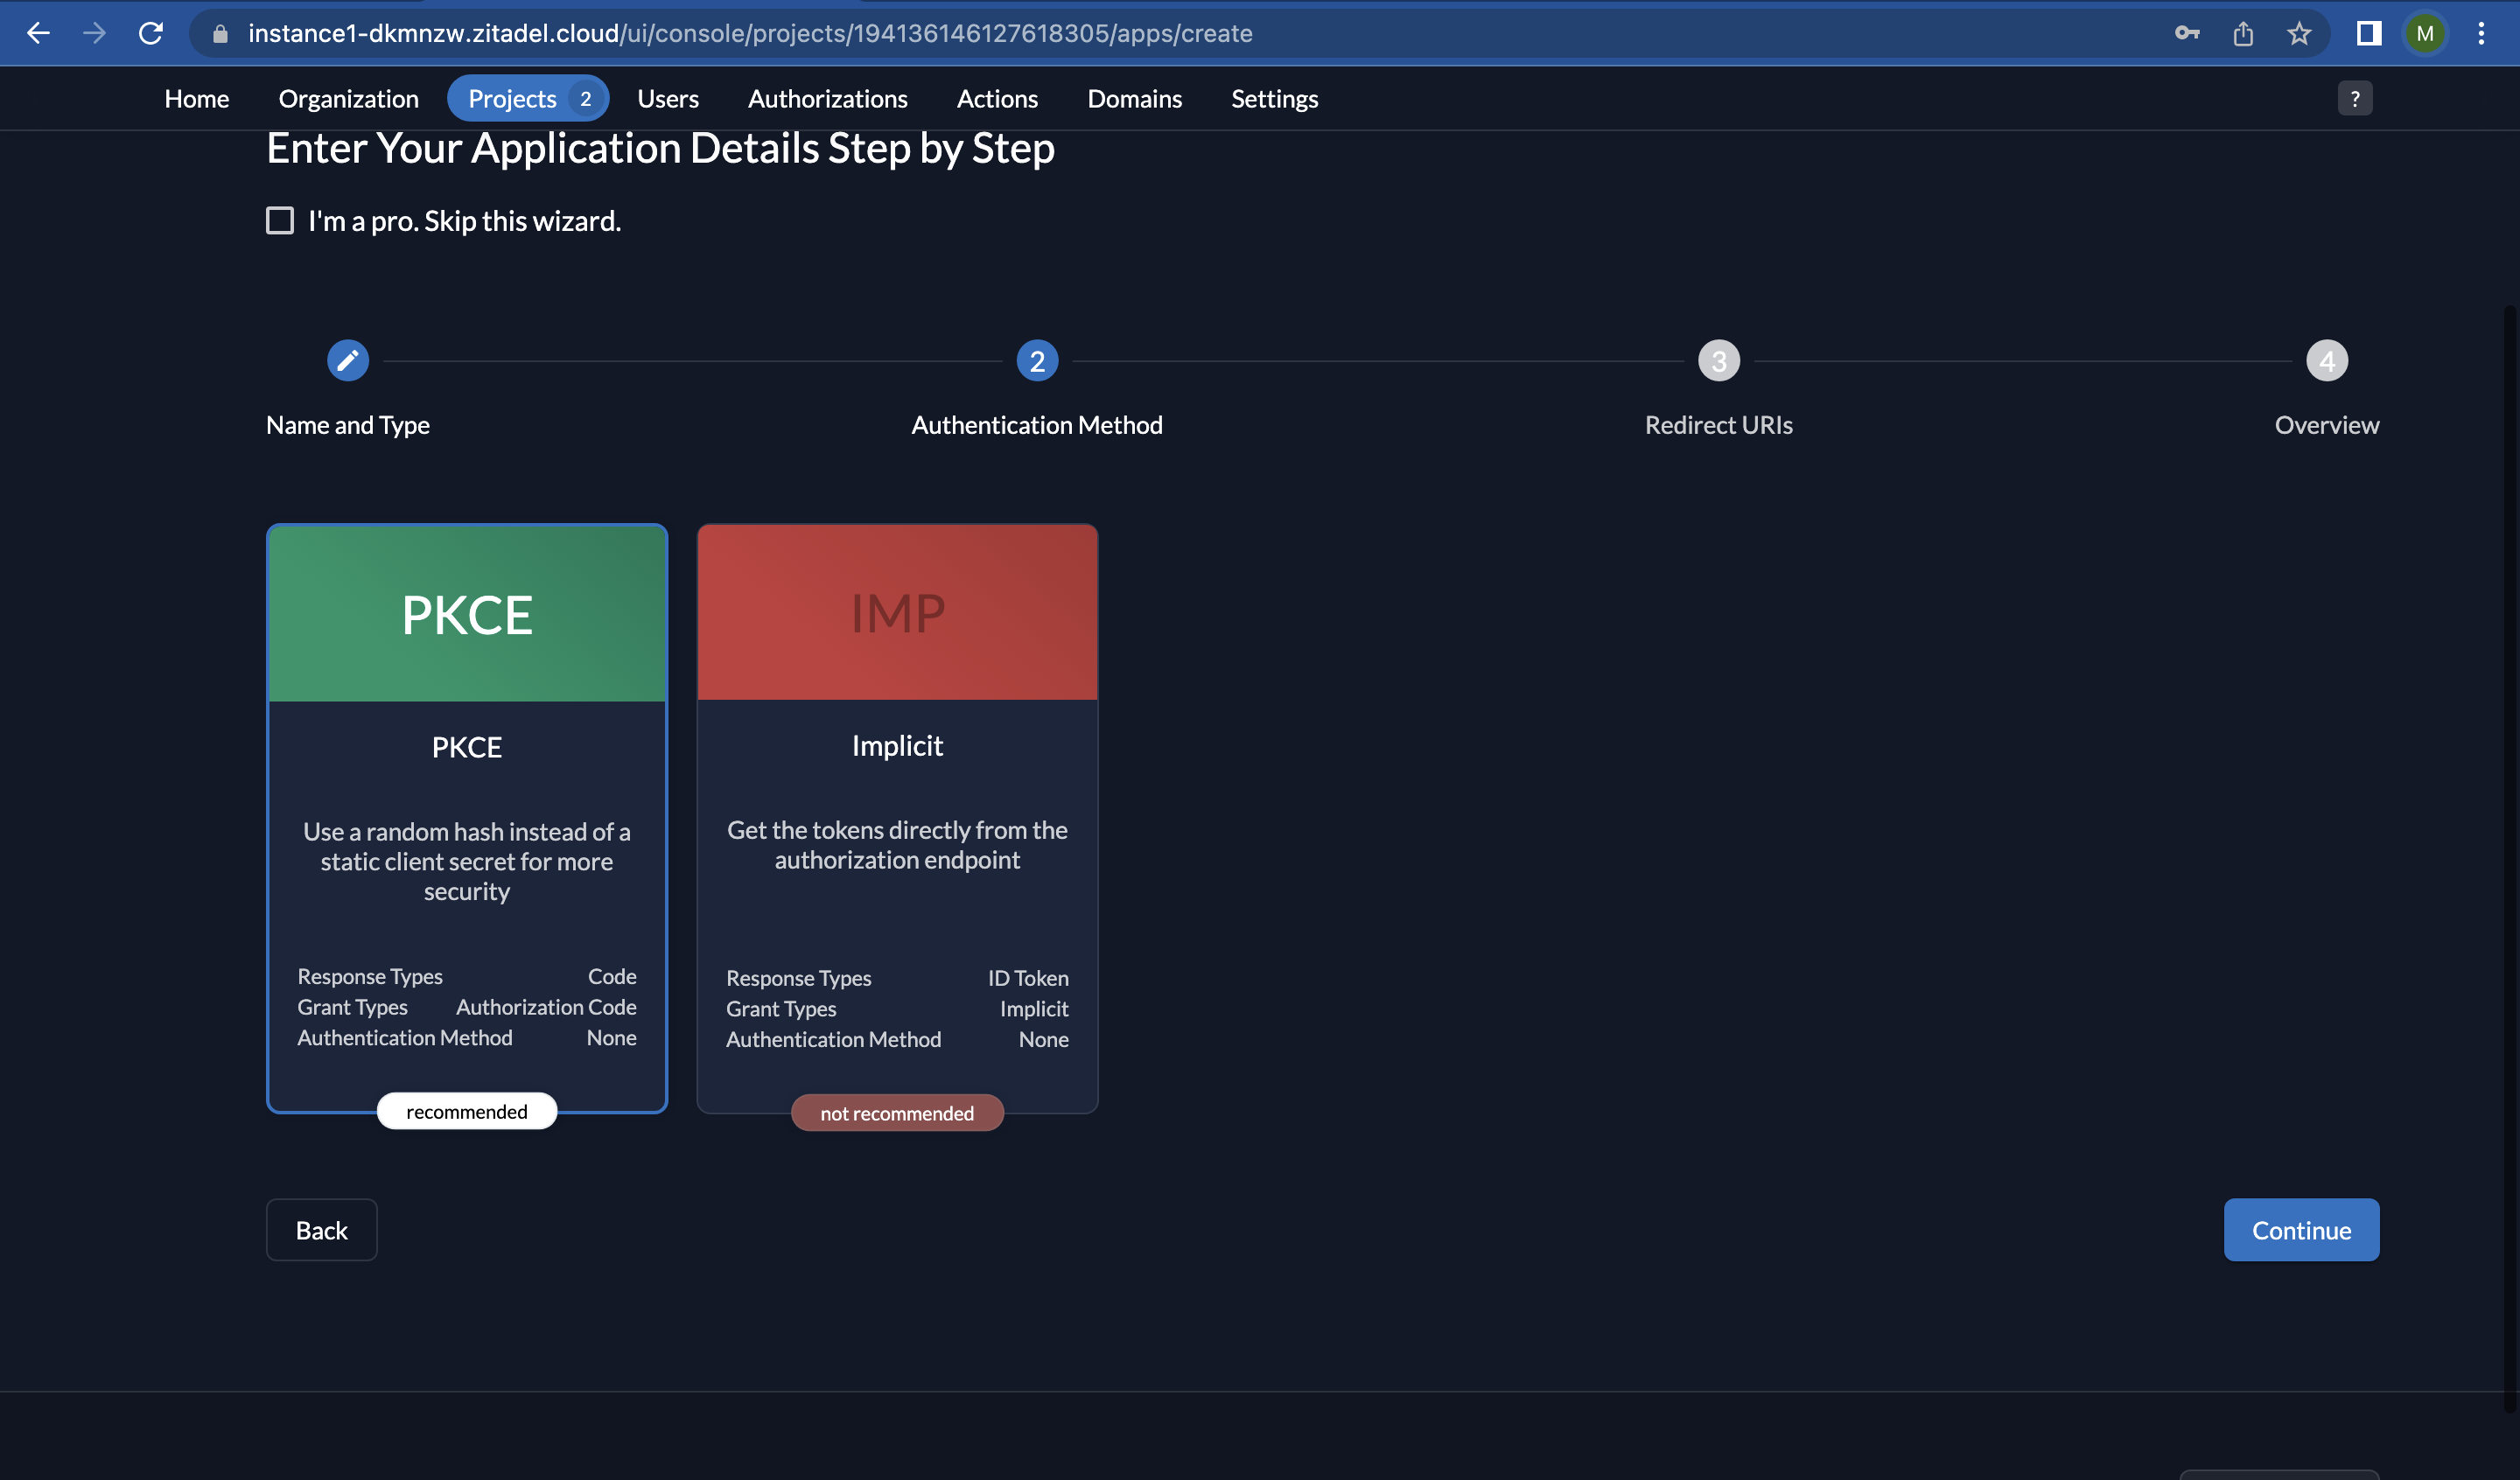
- Select “PKCE” because we recommend the use of Authorization Code in combination with Proof Key for Code Exchange (PKCE) for all web applications. More about the different app types can be found here. Click on "Continue".
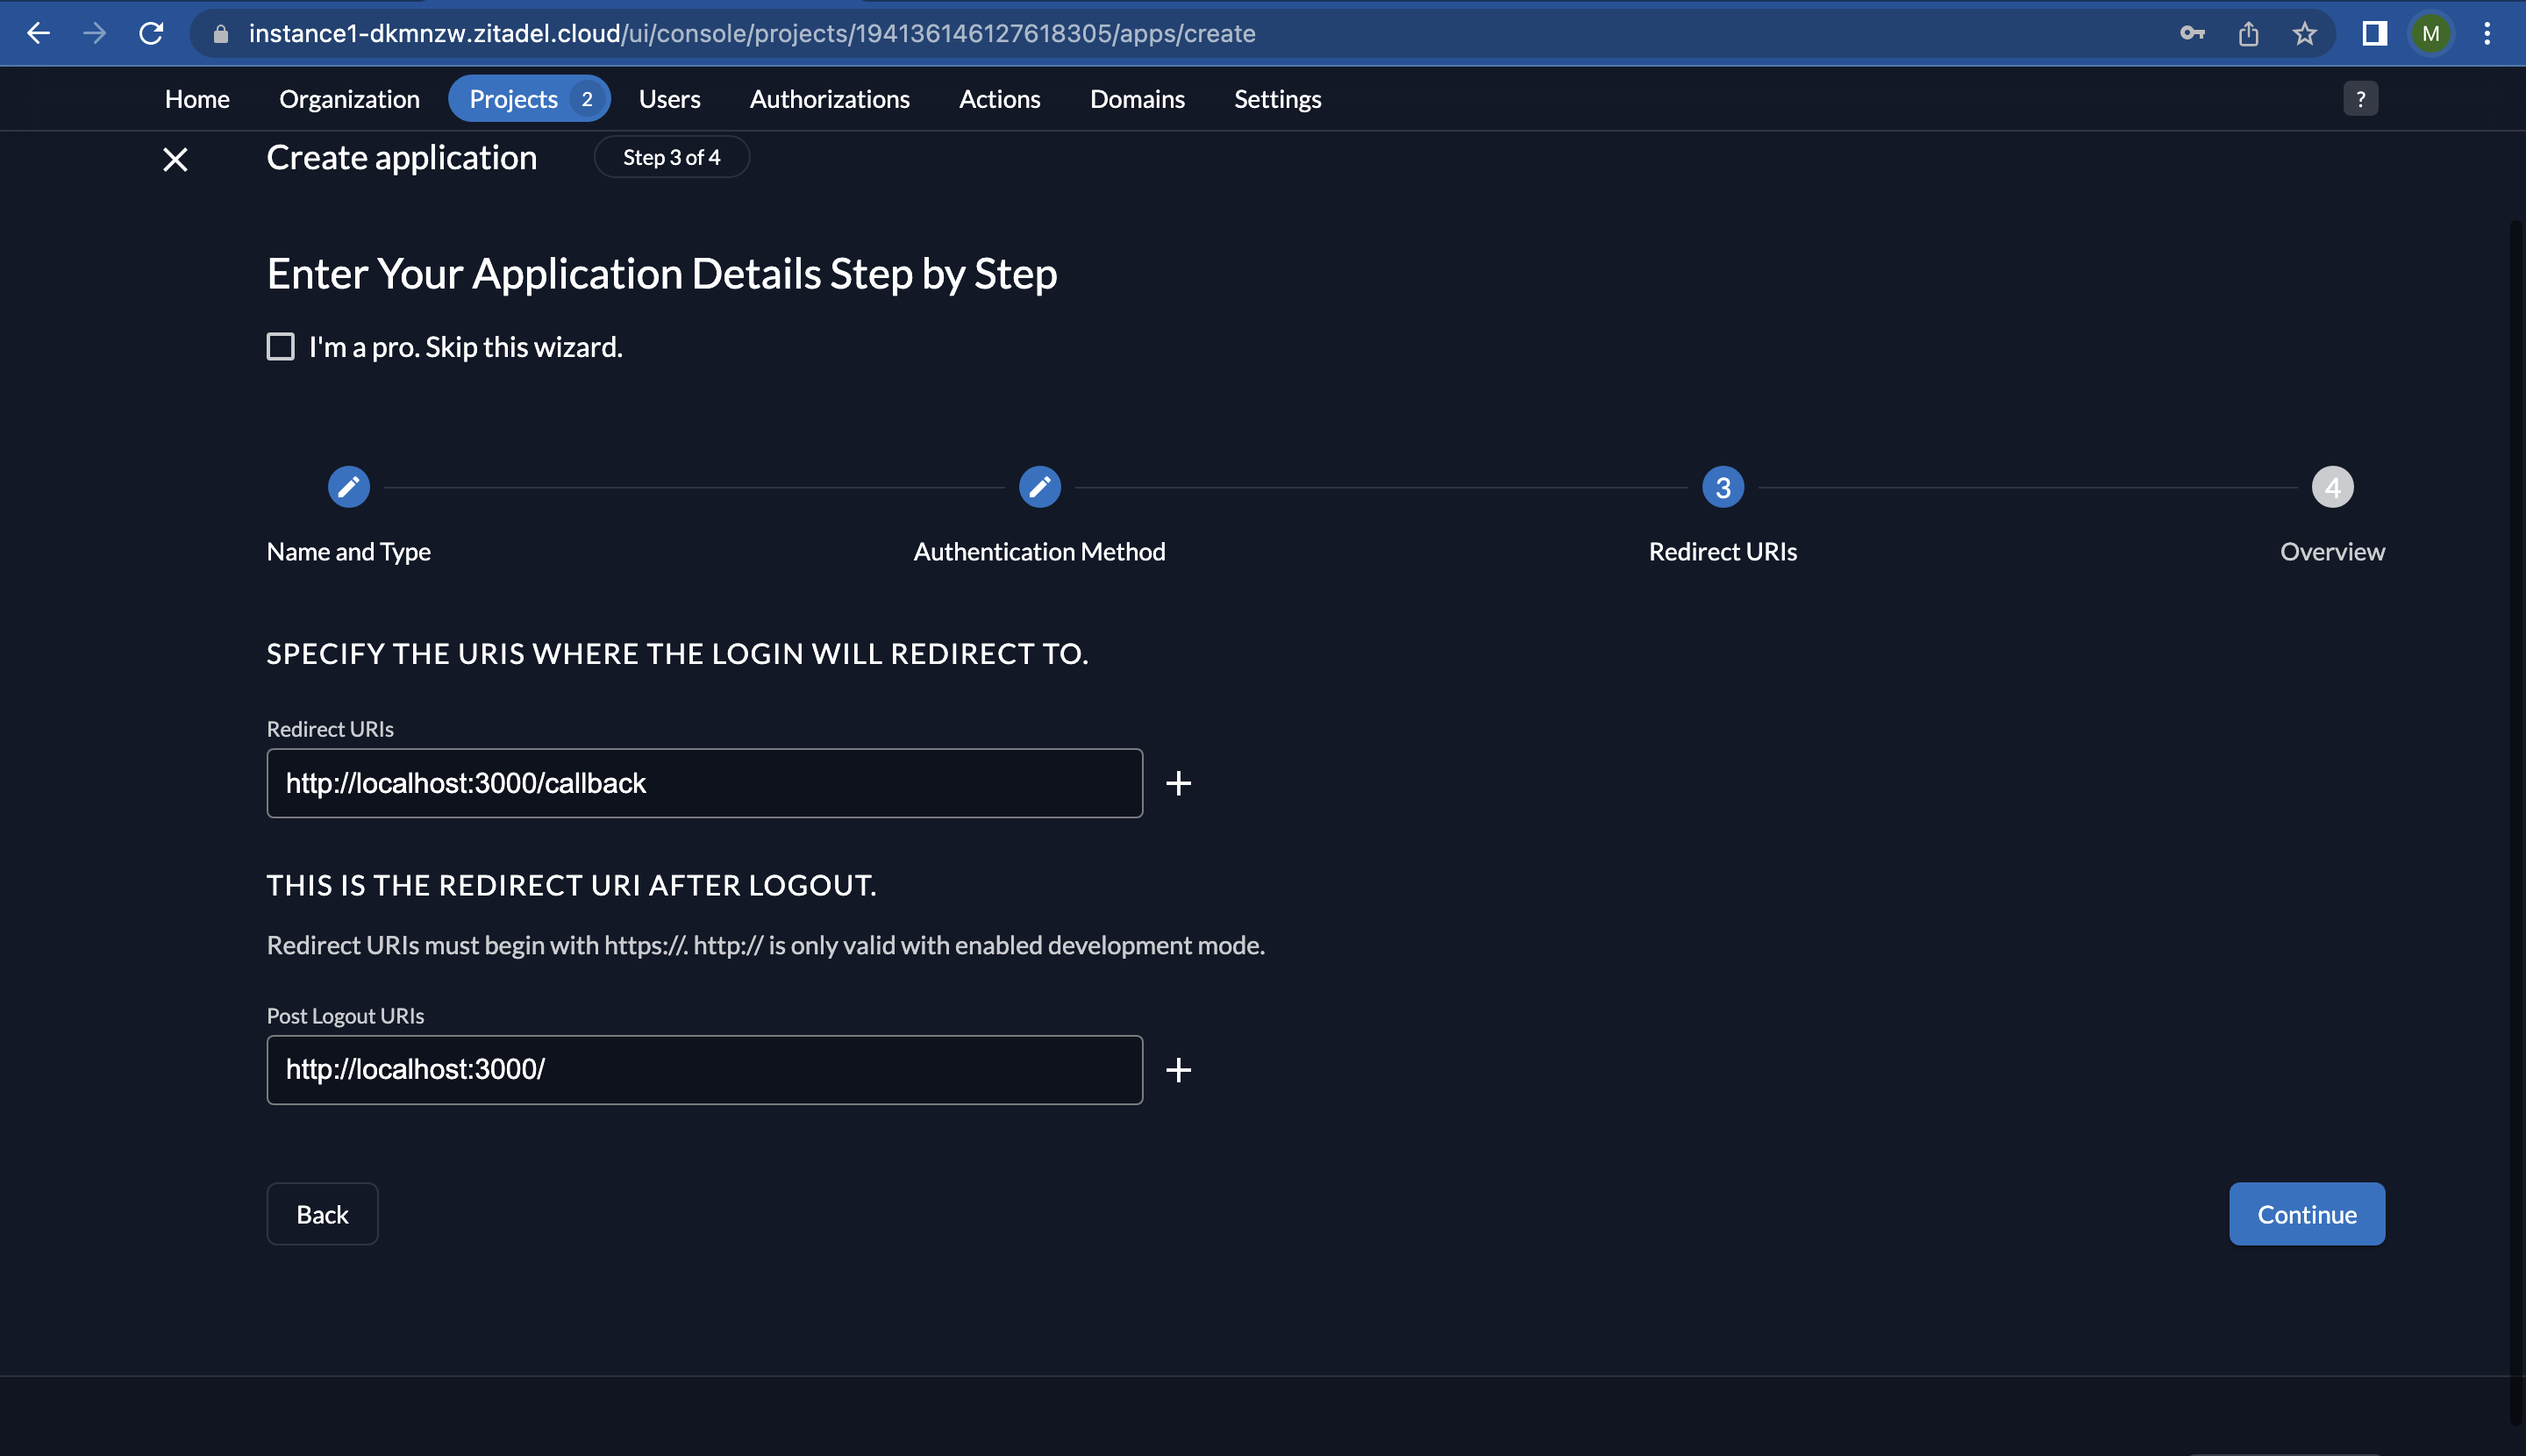
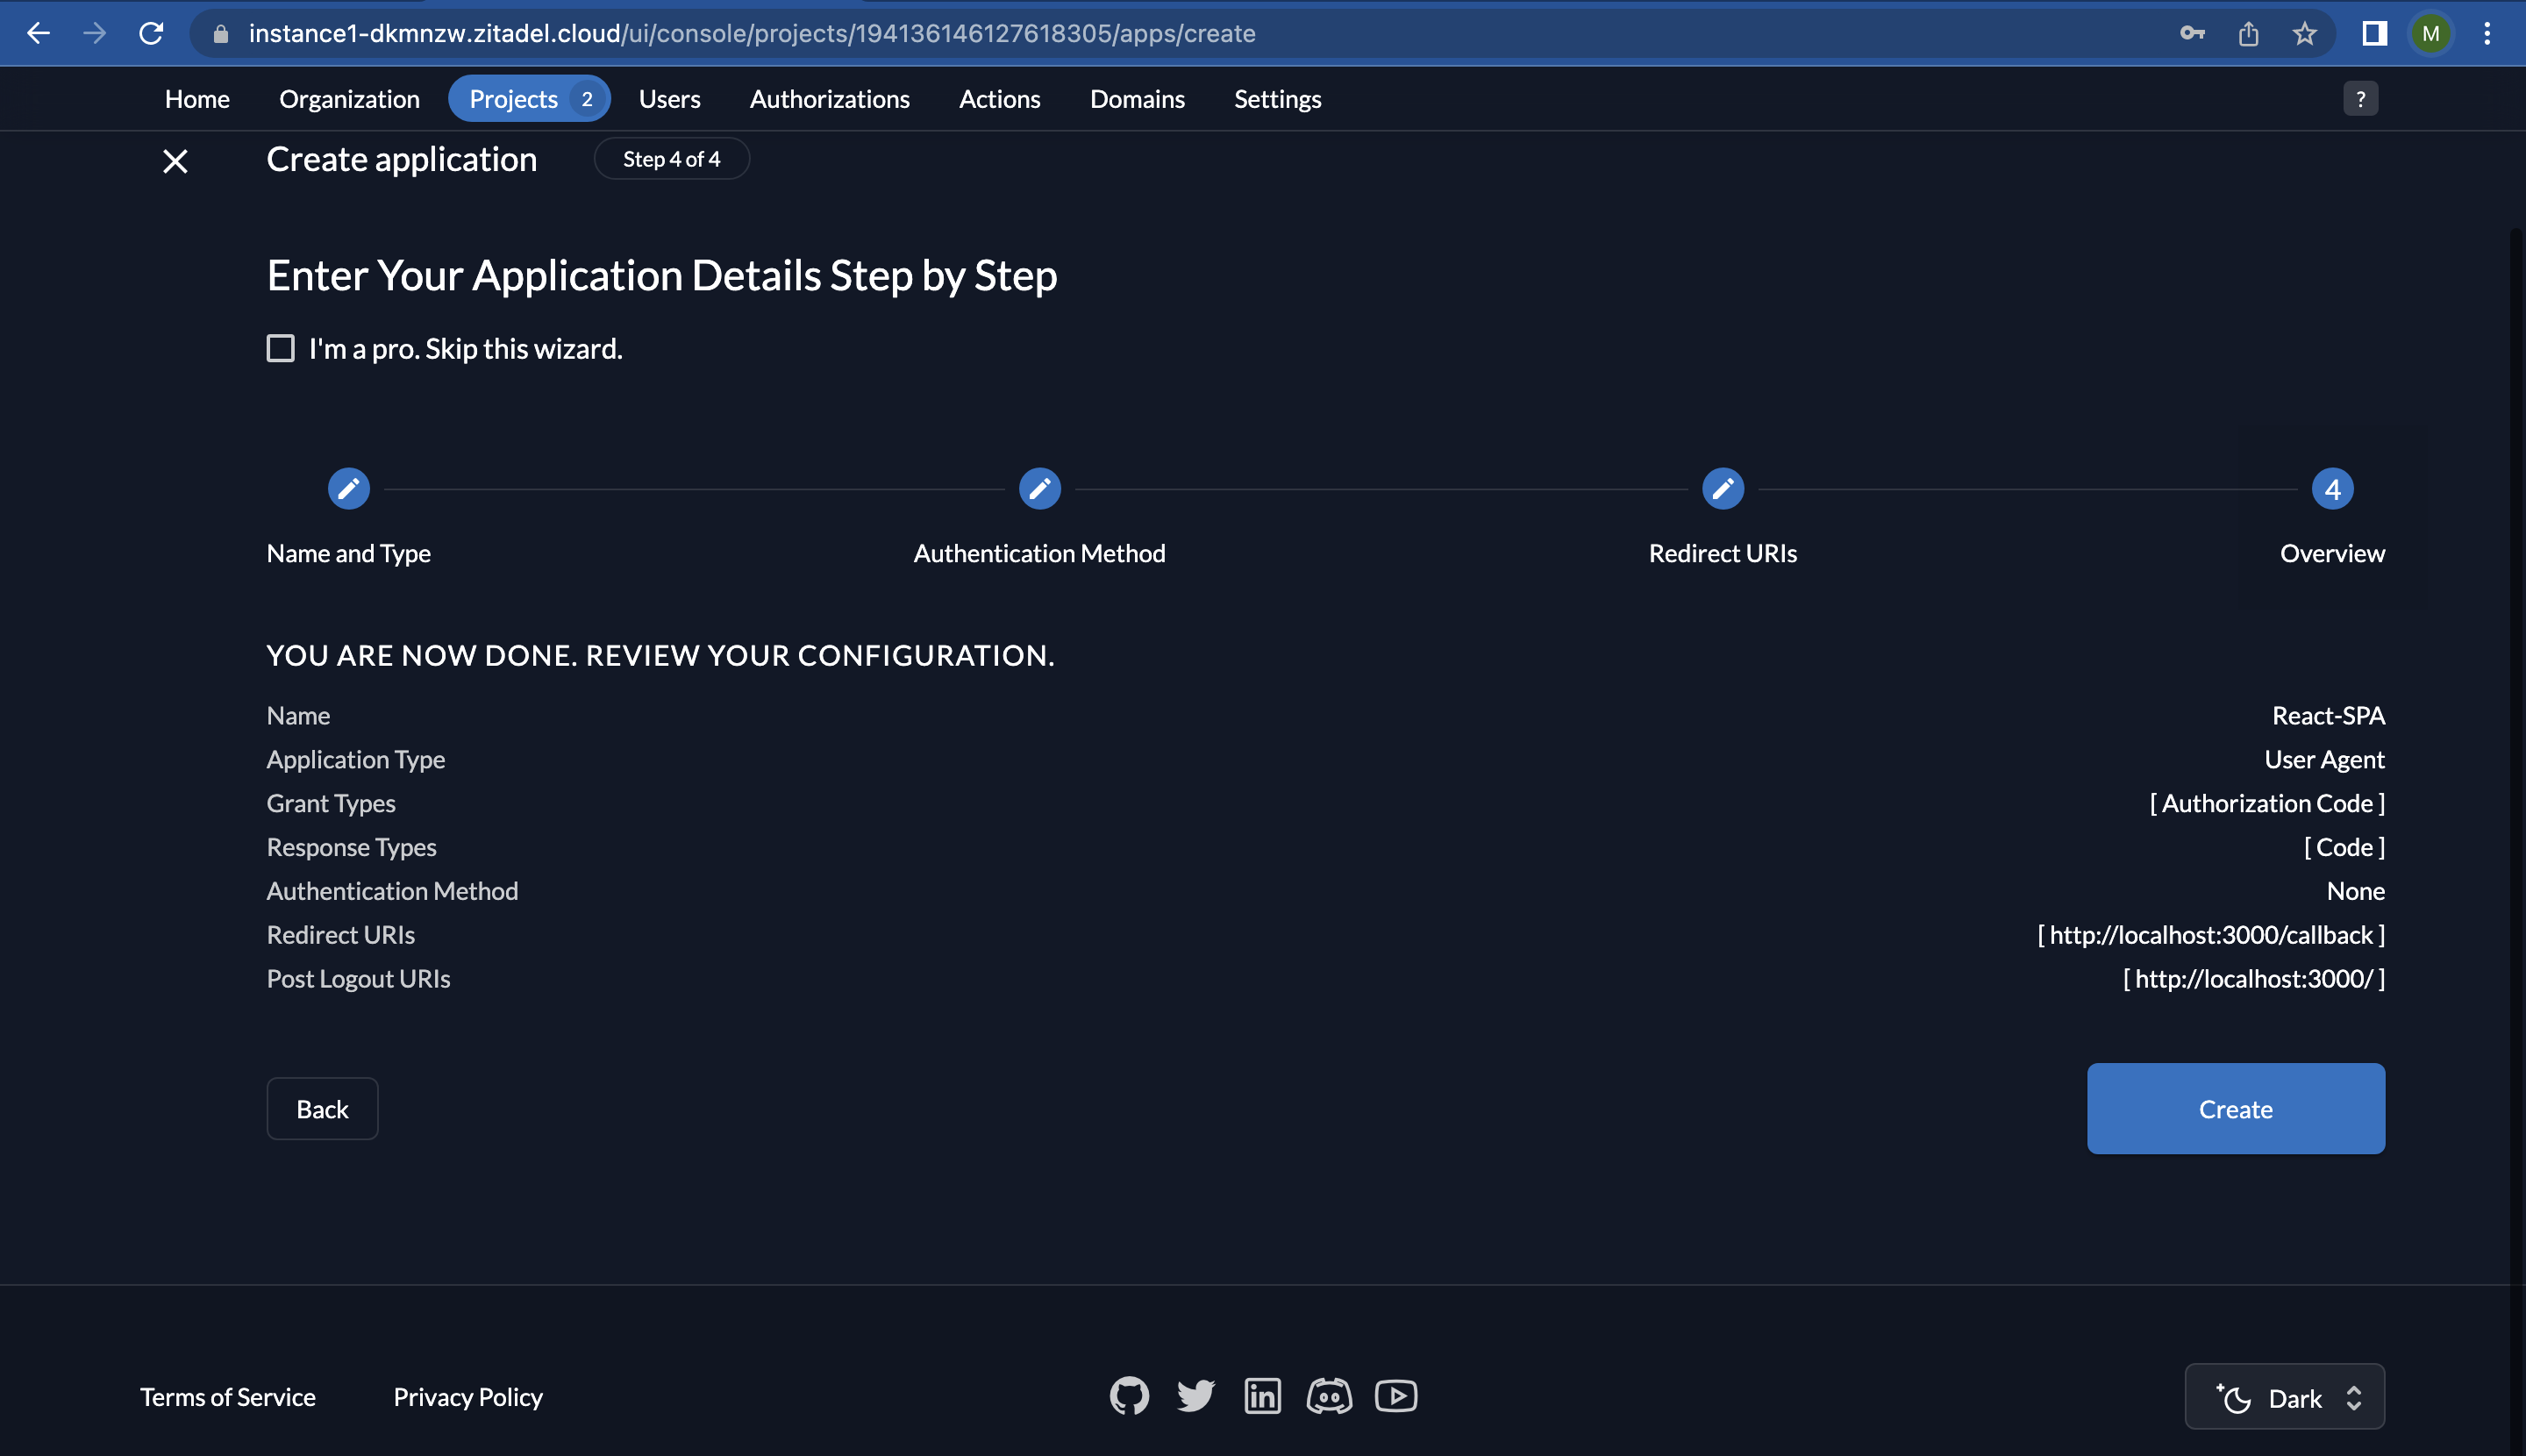
- The Redirect URL in your application is where the ZITADEL authorization server redirects the user after they have been authenticated. Set your “Redirect URI” to http://localhost:3000/callback and “Post Logout URI” to http://localhost:3000/. Click on “Continue”.
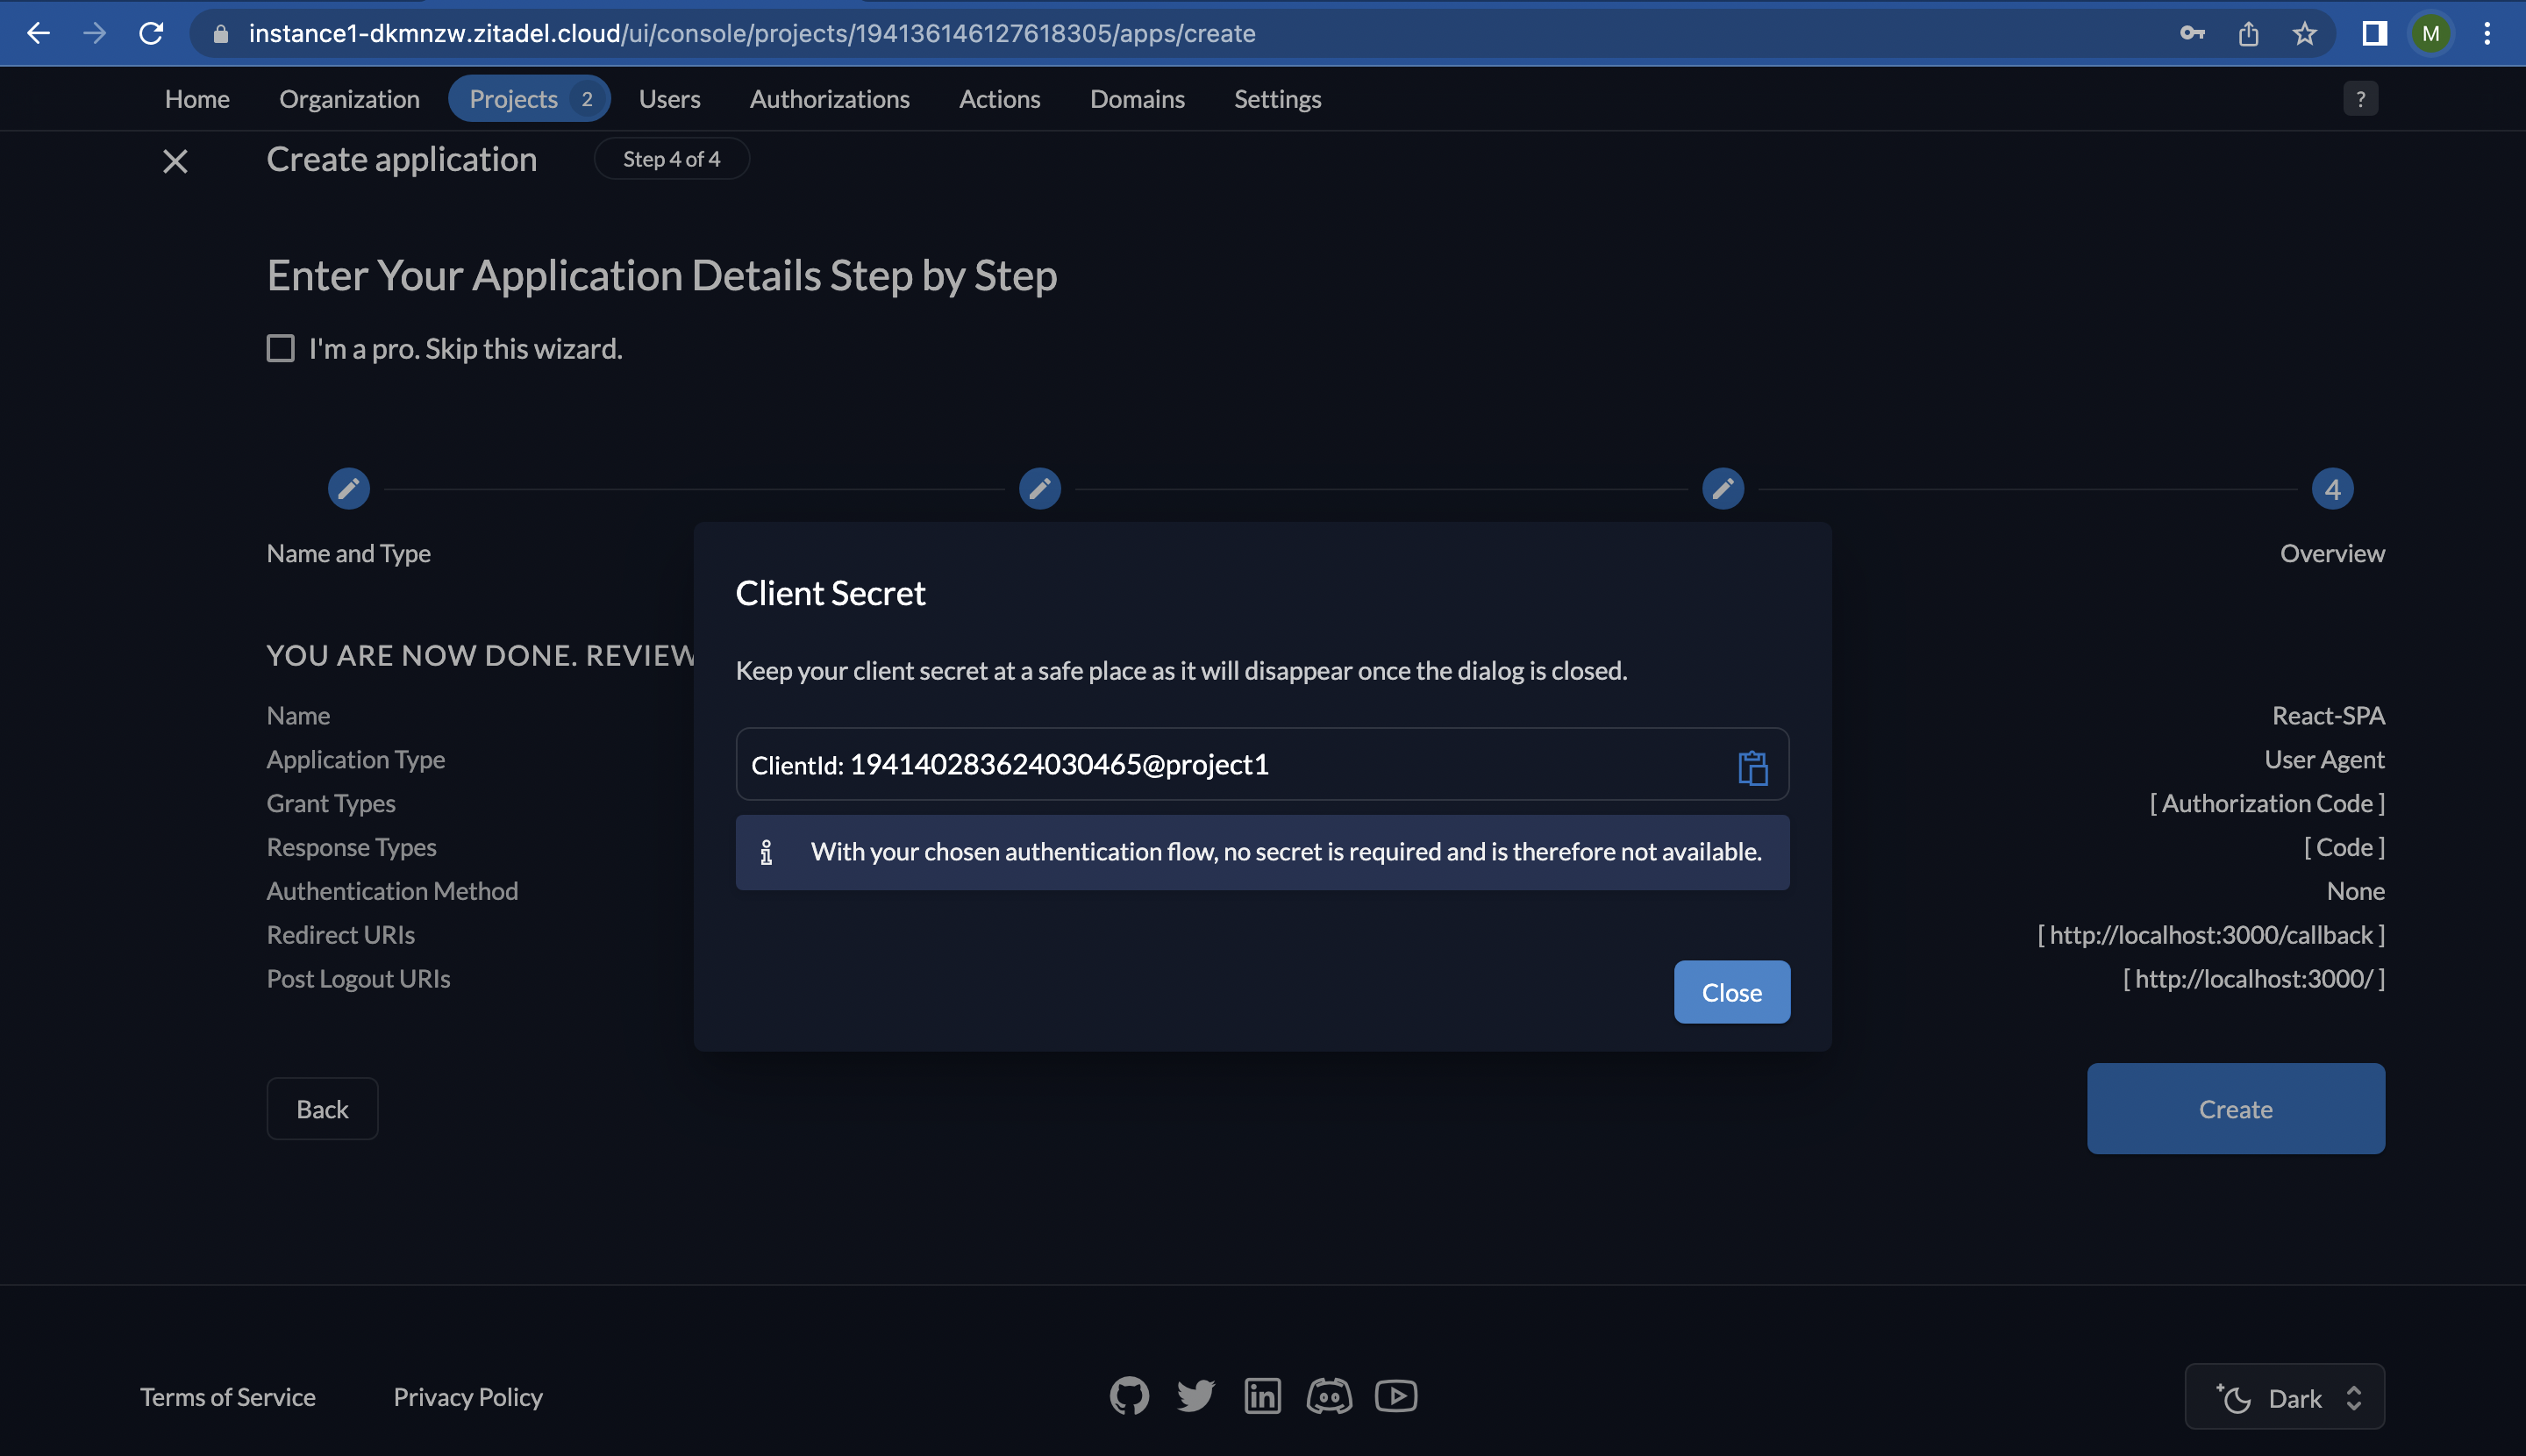
- Now you will be presented with the details of your application for review. Click on “Create”.
- After that, a window will appear showing you your “ClientId”. Click on “Close”.
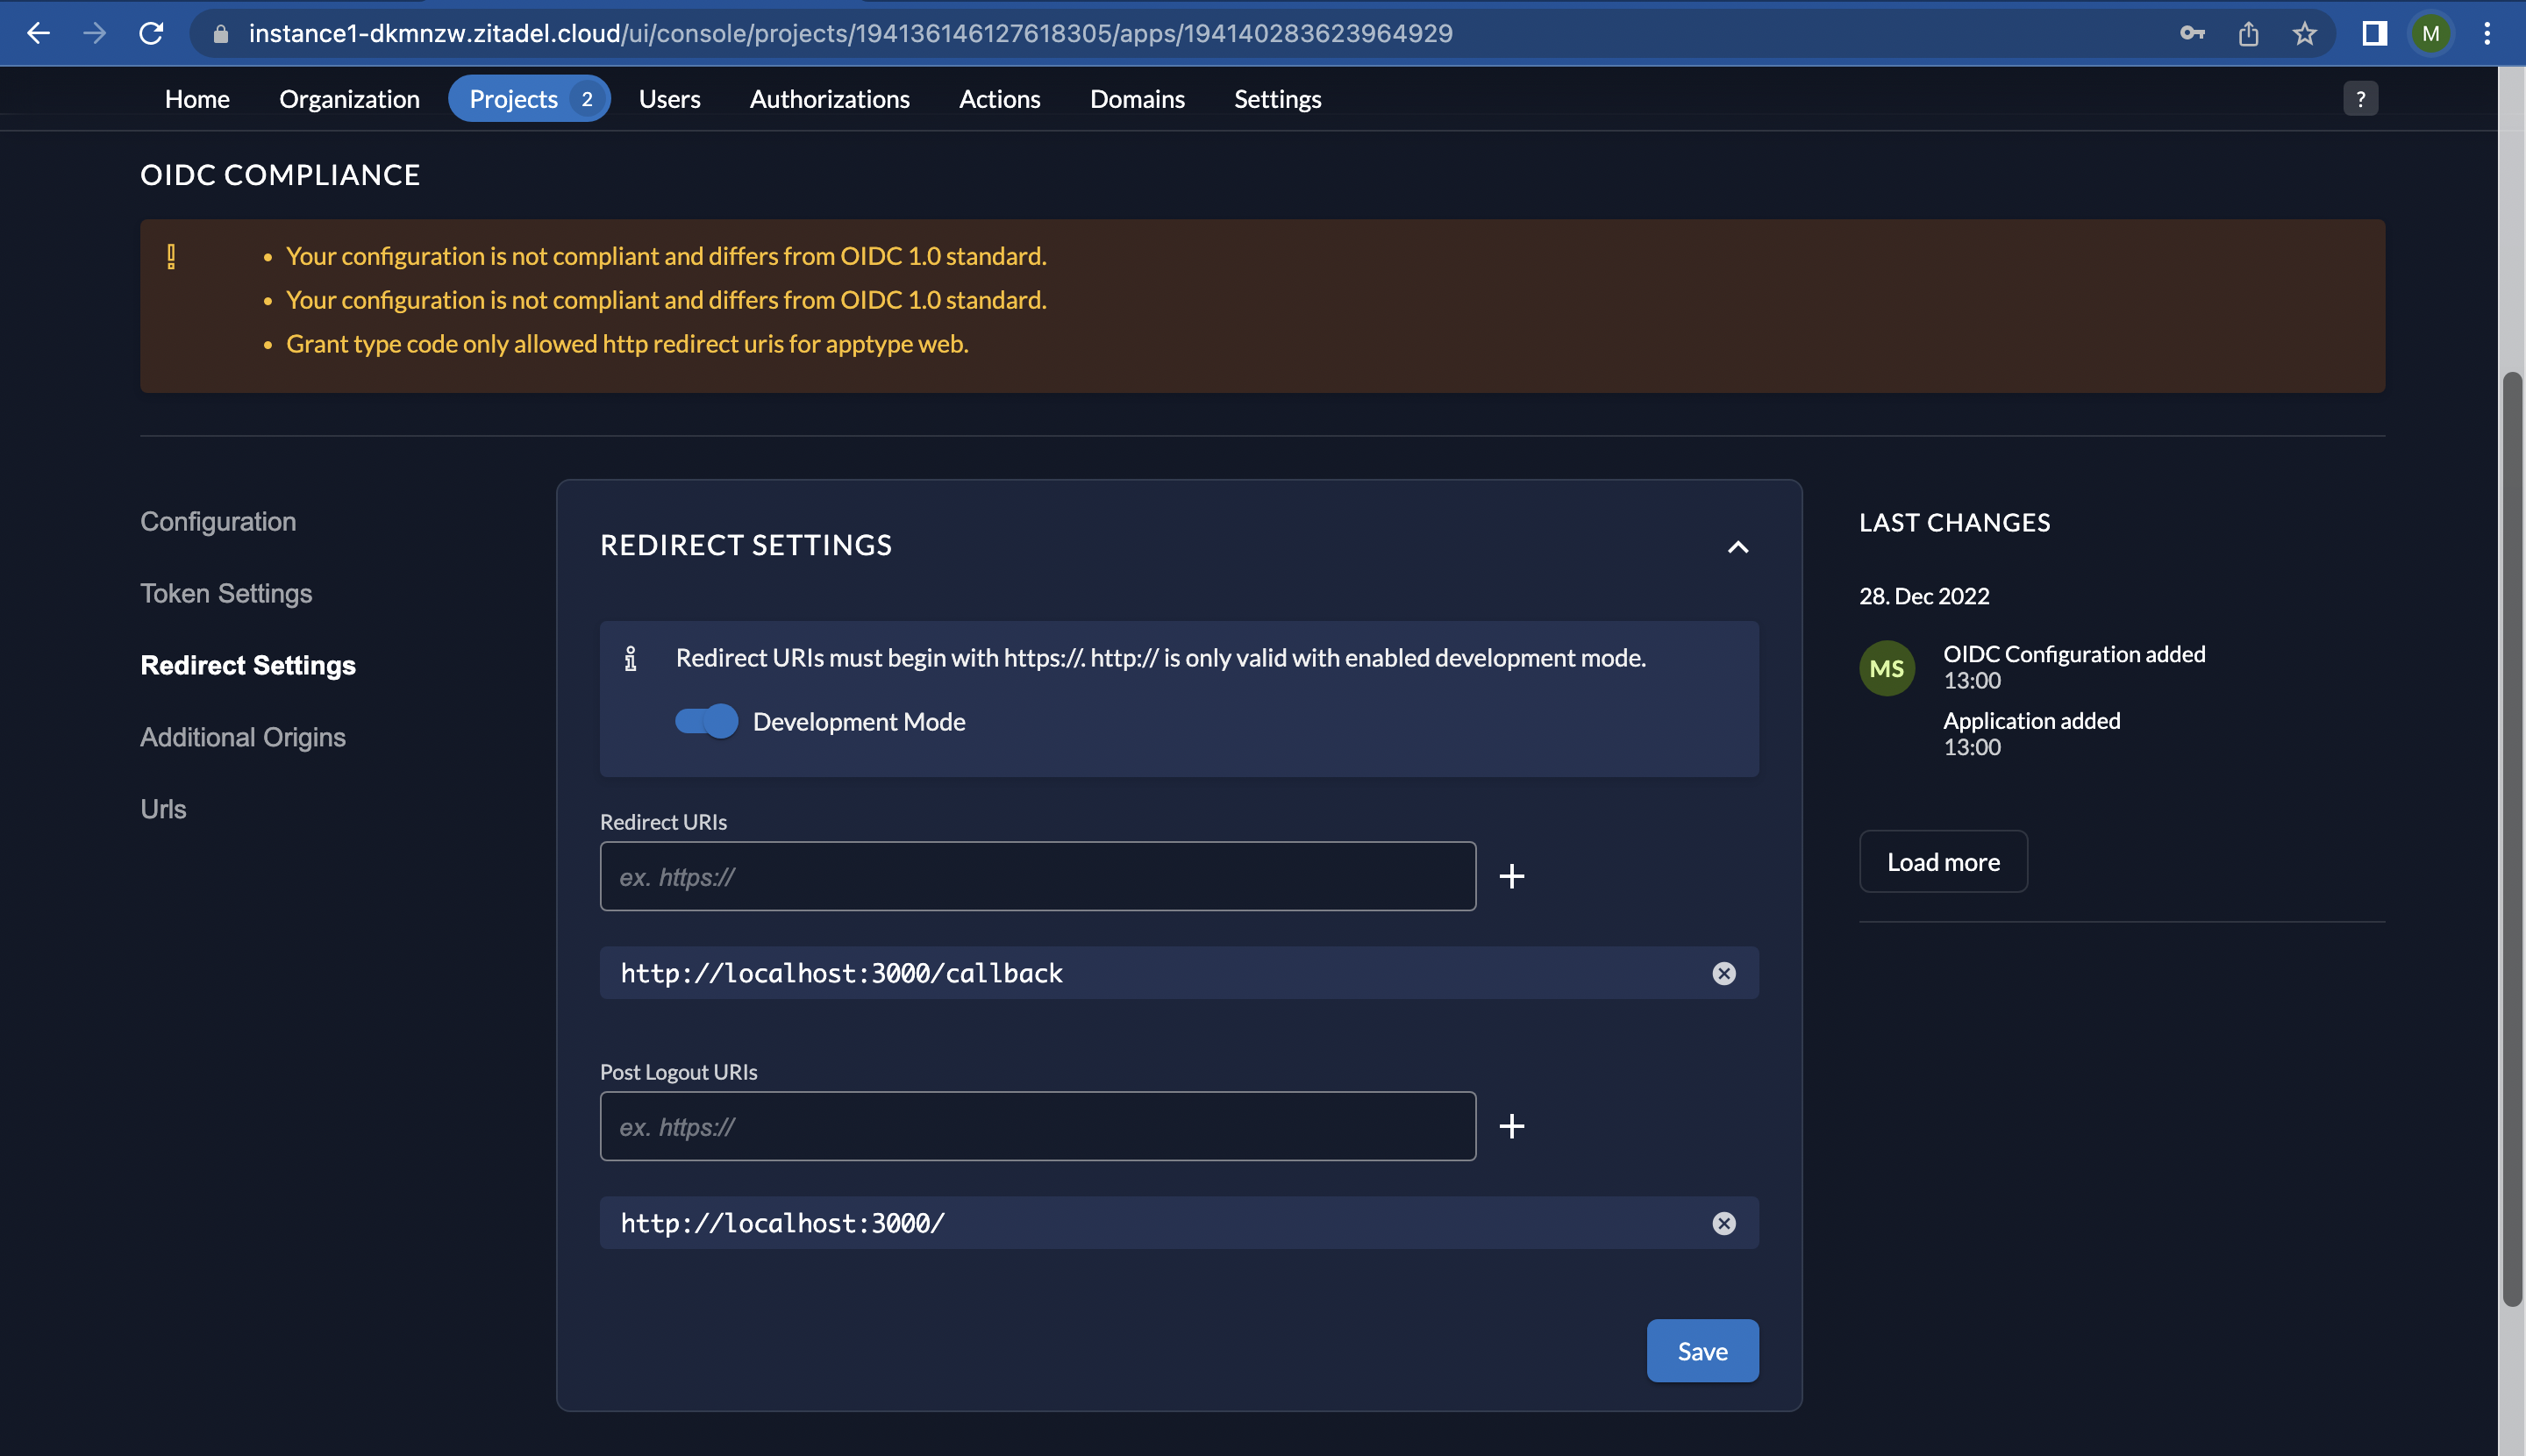
- On the following screen, you may notice some warnings at the top. These warnings are displayed because the URLs for our application are using unsecure HTTP instead of HTTPS. To resolve this, we will need to update our URLs, but there is a workaround to this so that we can continue using HTTP during the development phase.
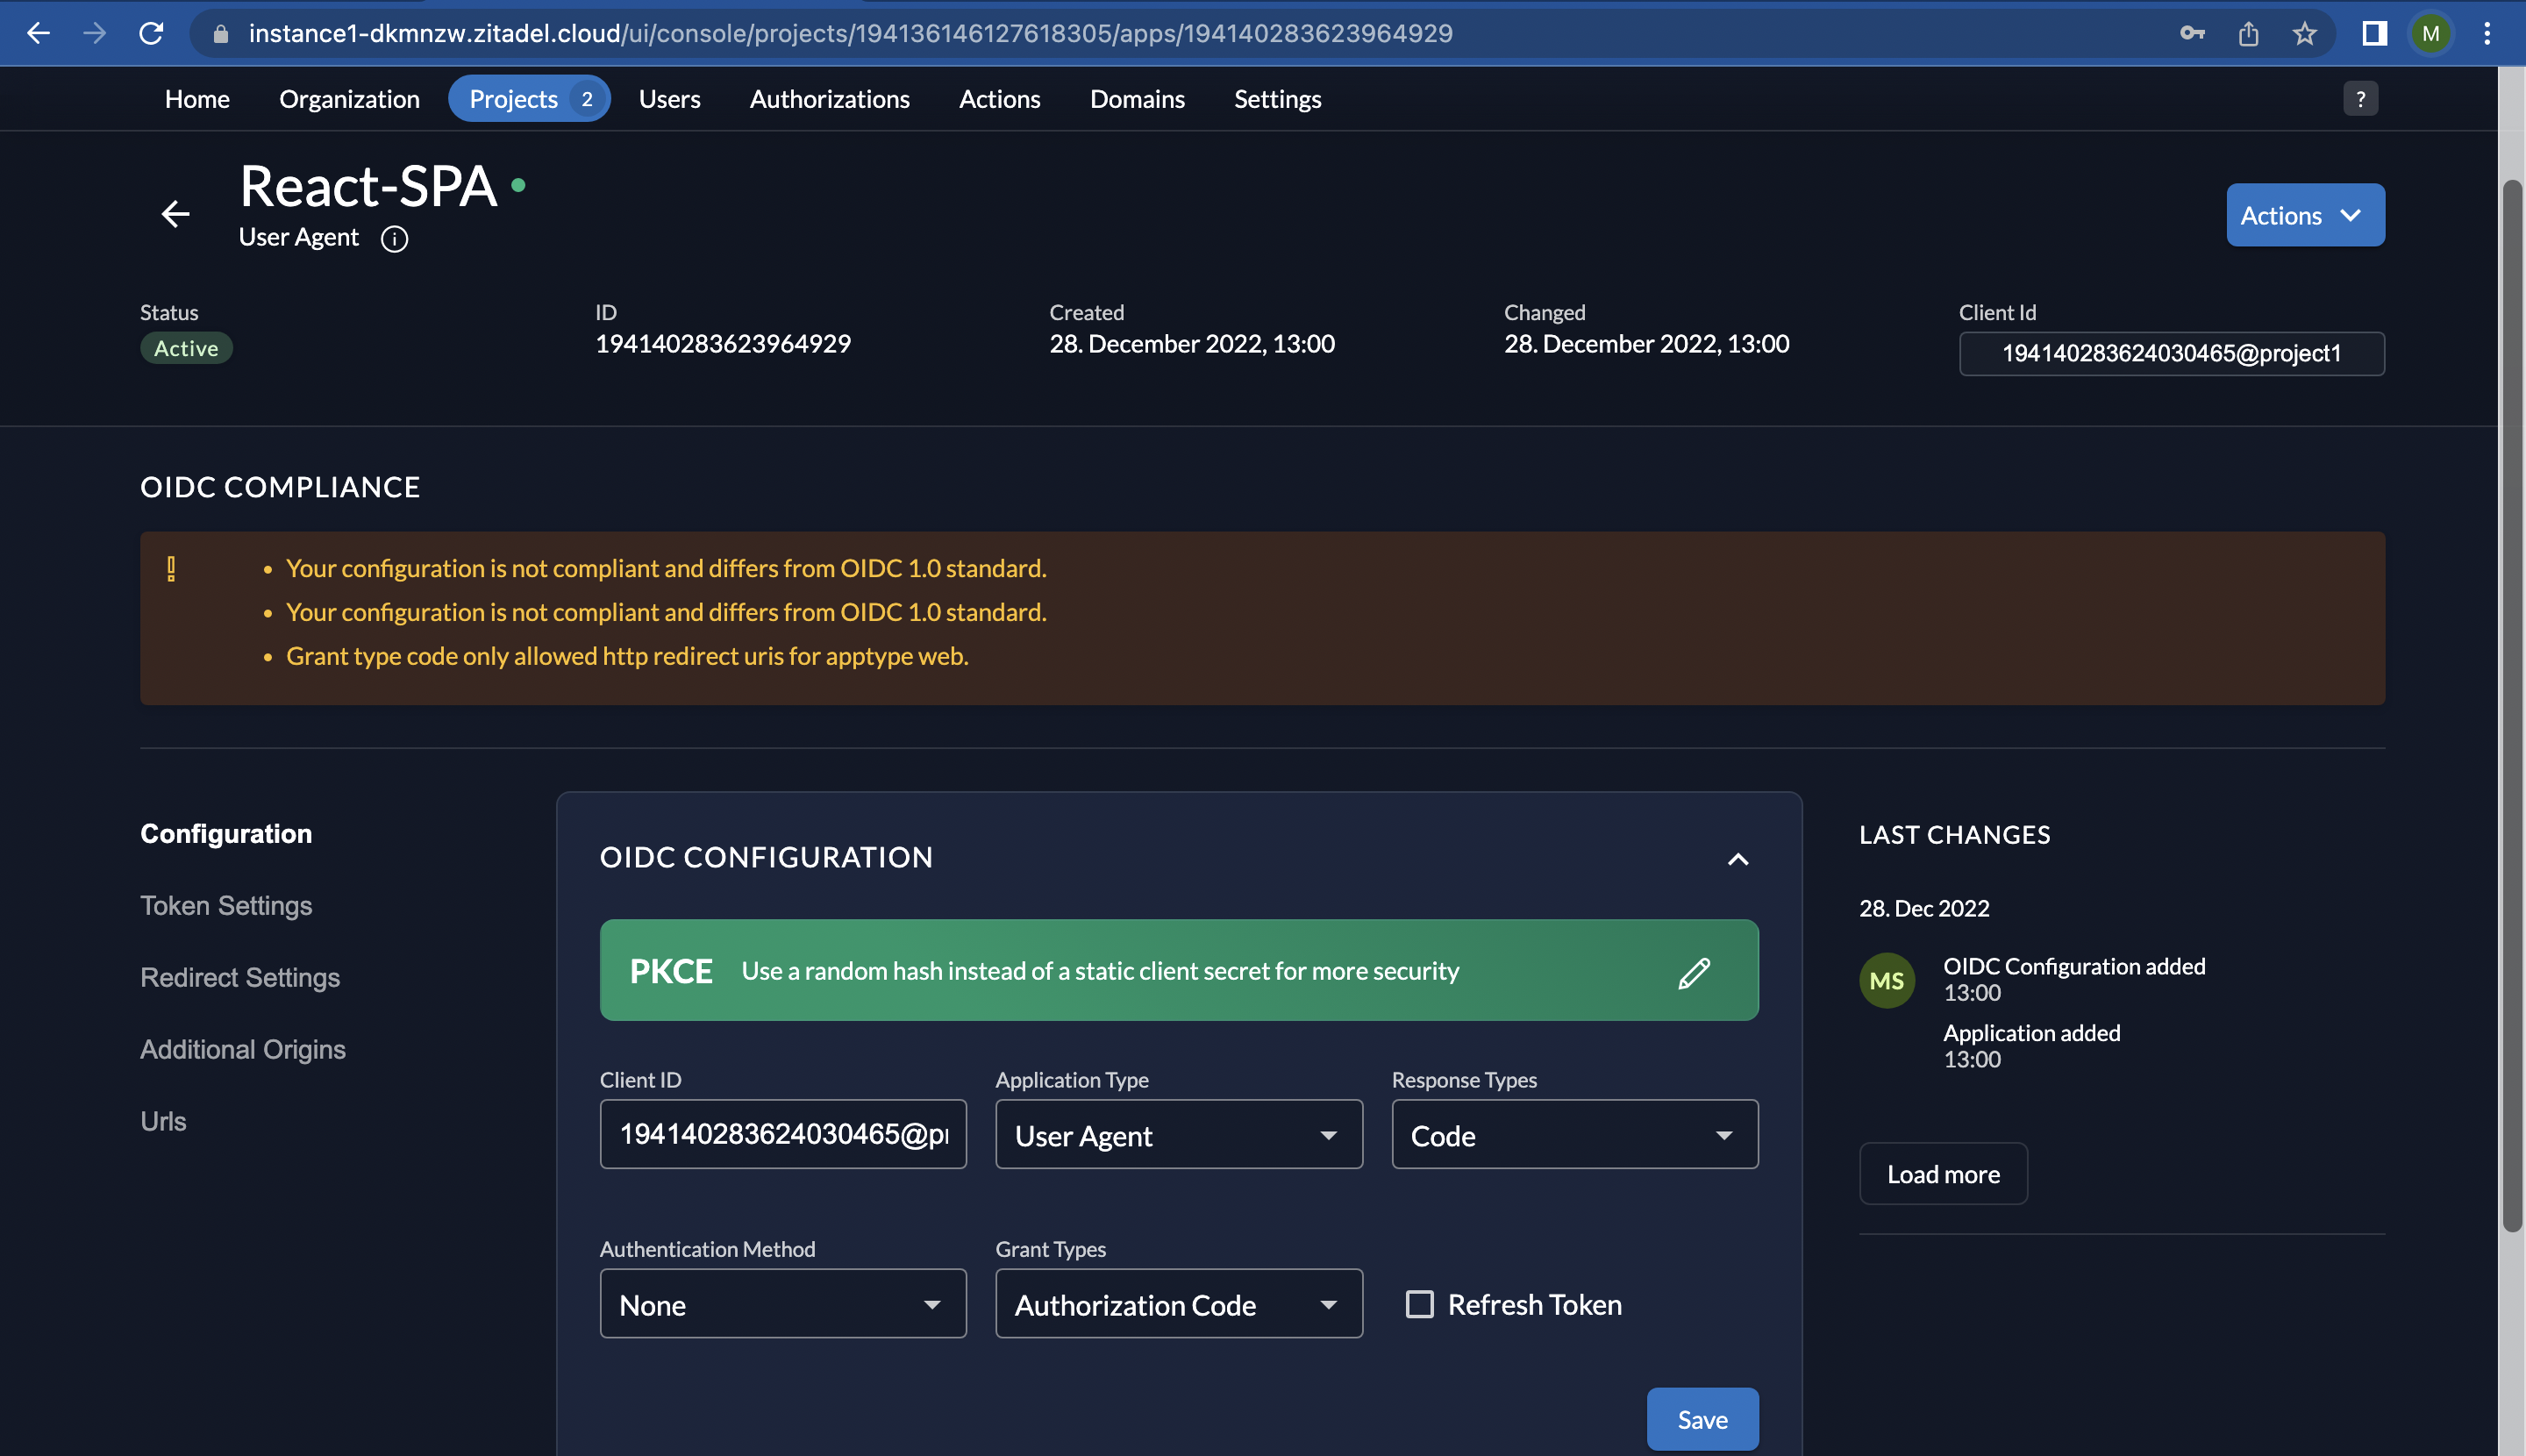
- To proceed with HTTP, go to “Redirect Settings” on the left.
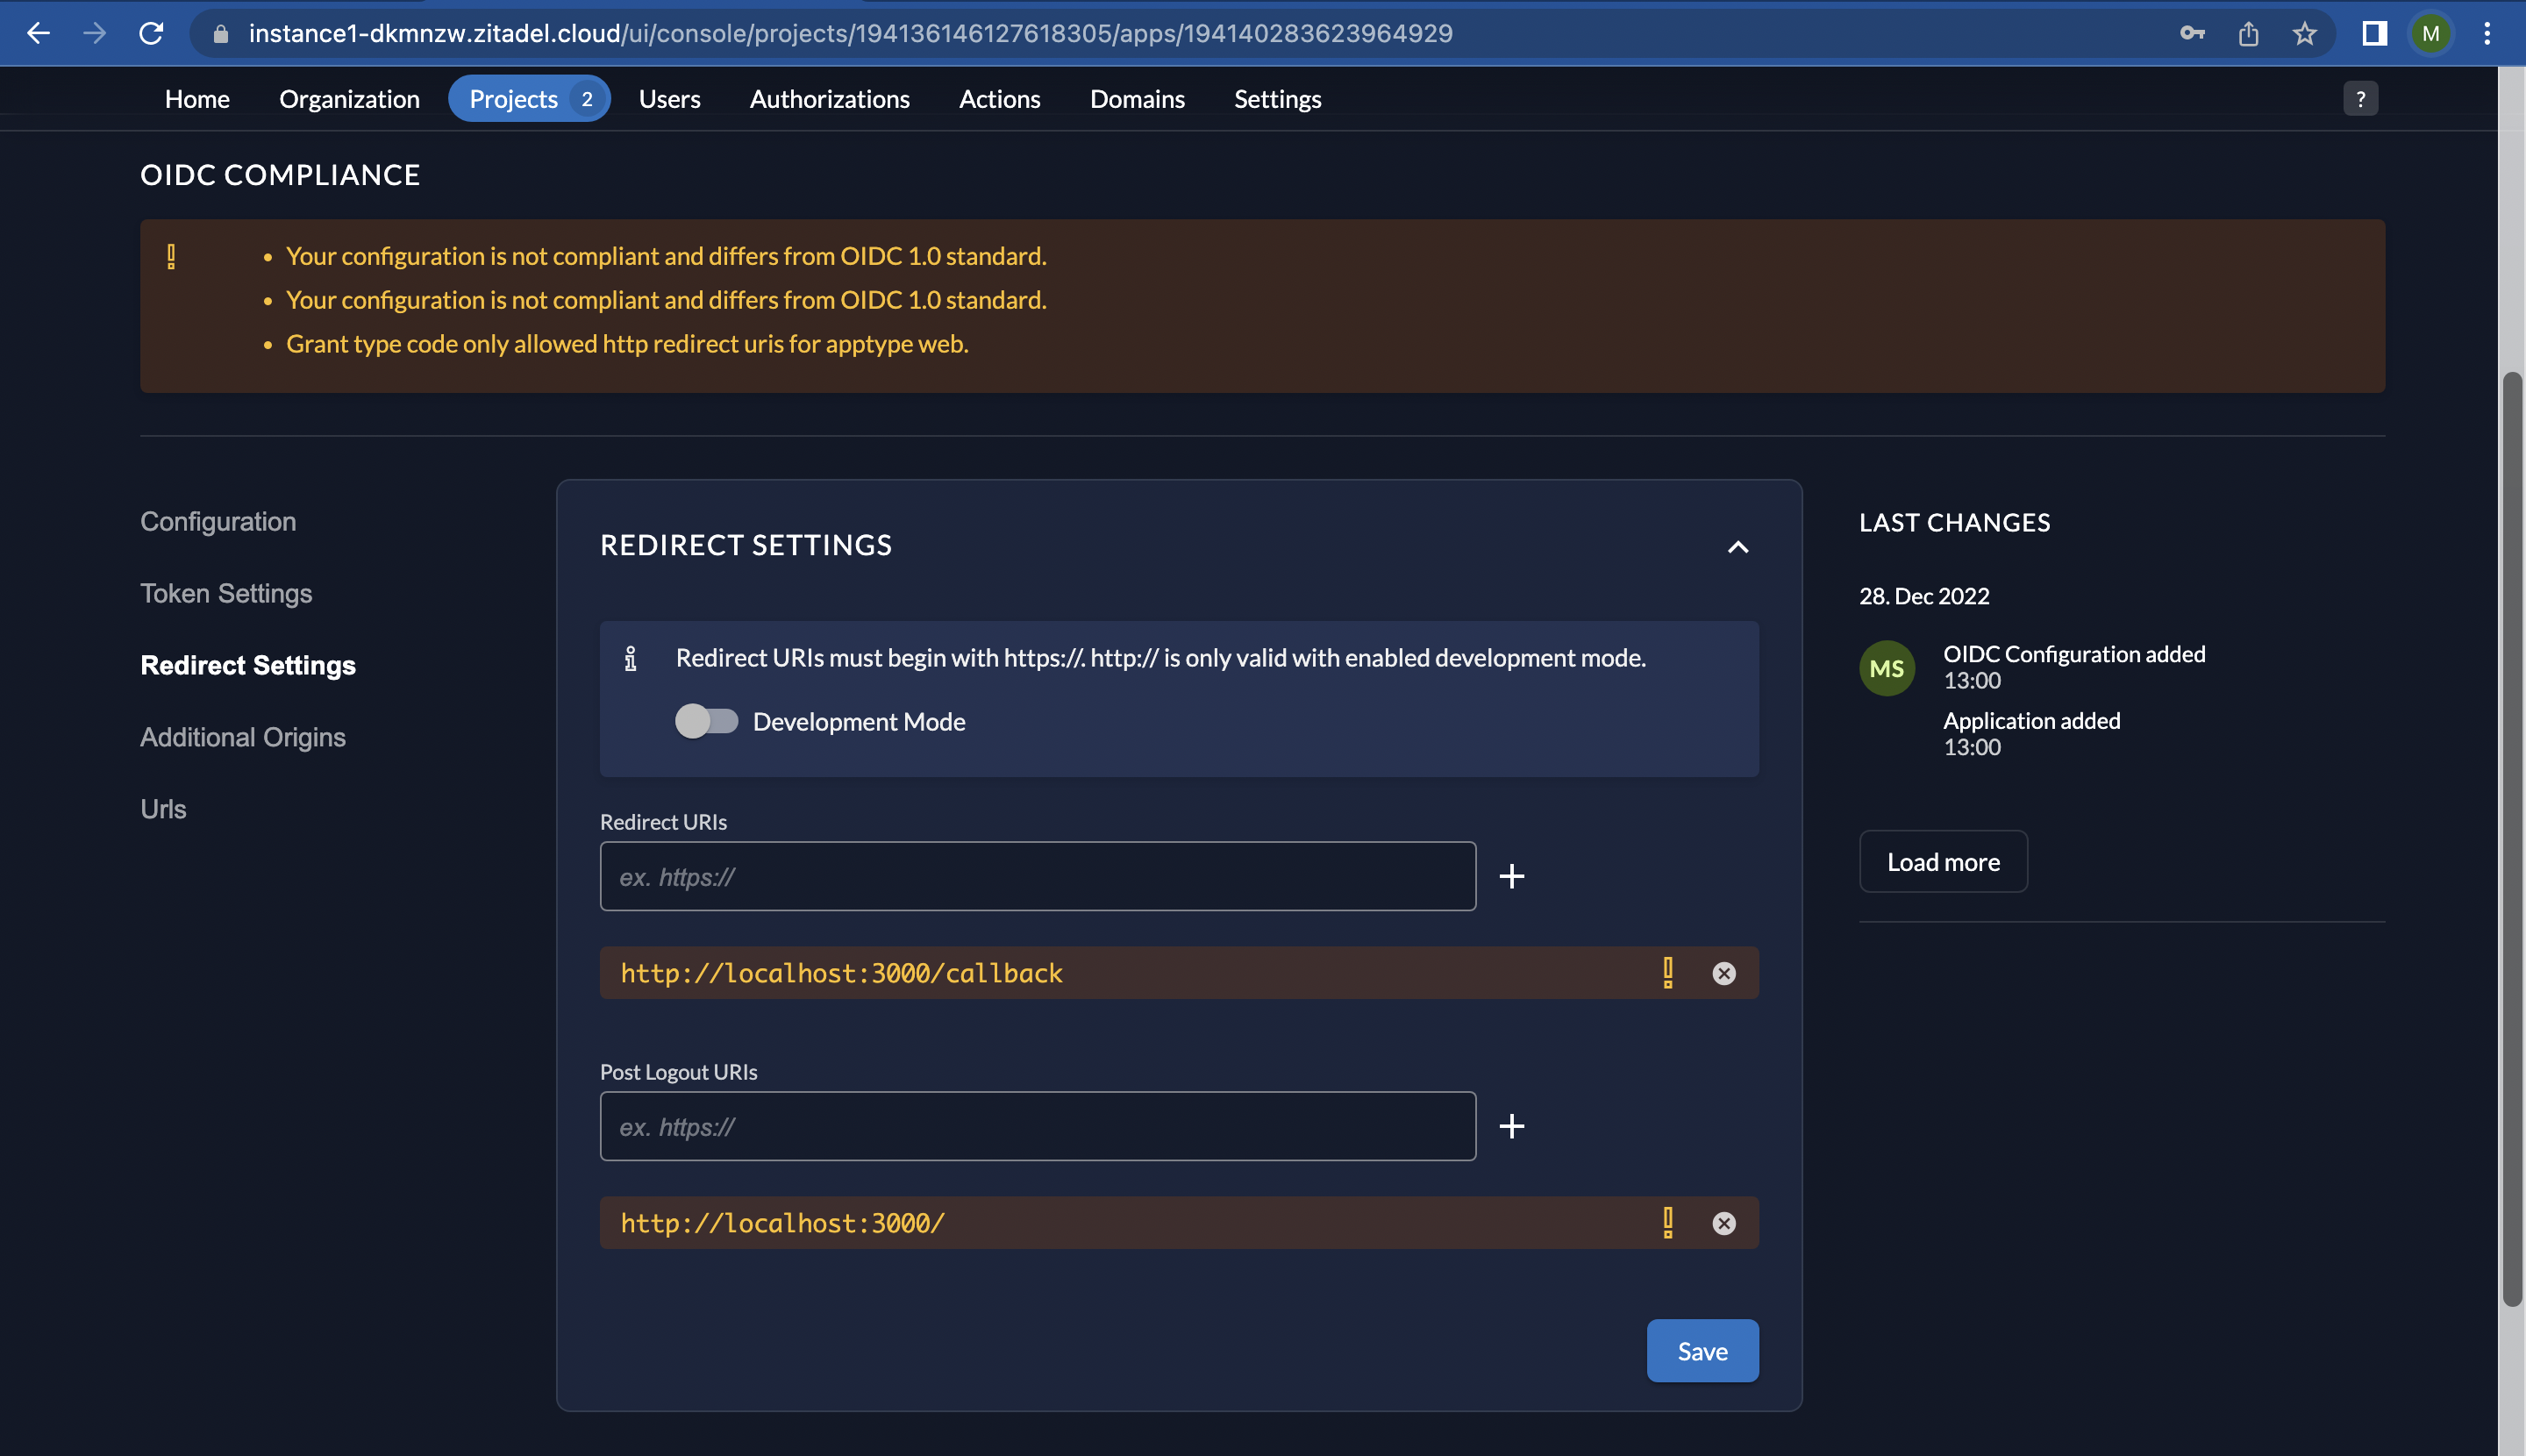
- Now activate “Development Mode” as shown below and click “Save”.
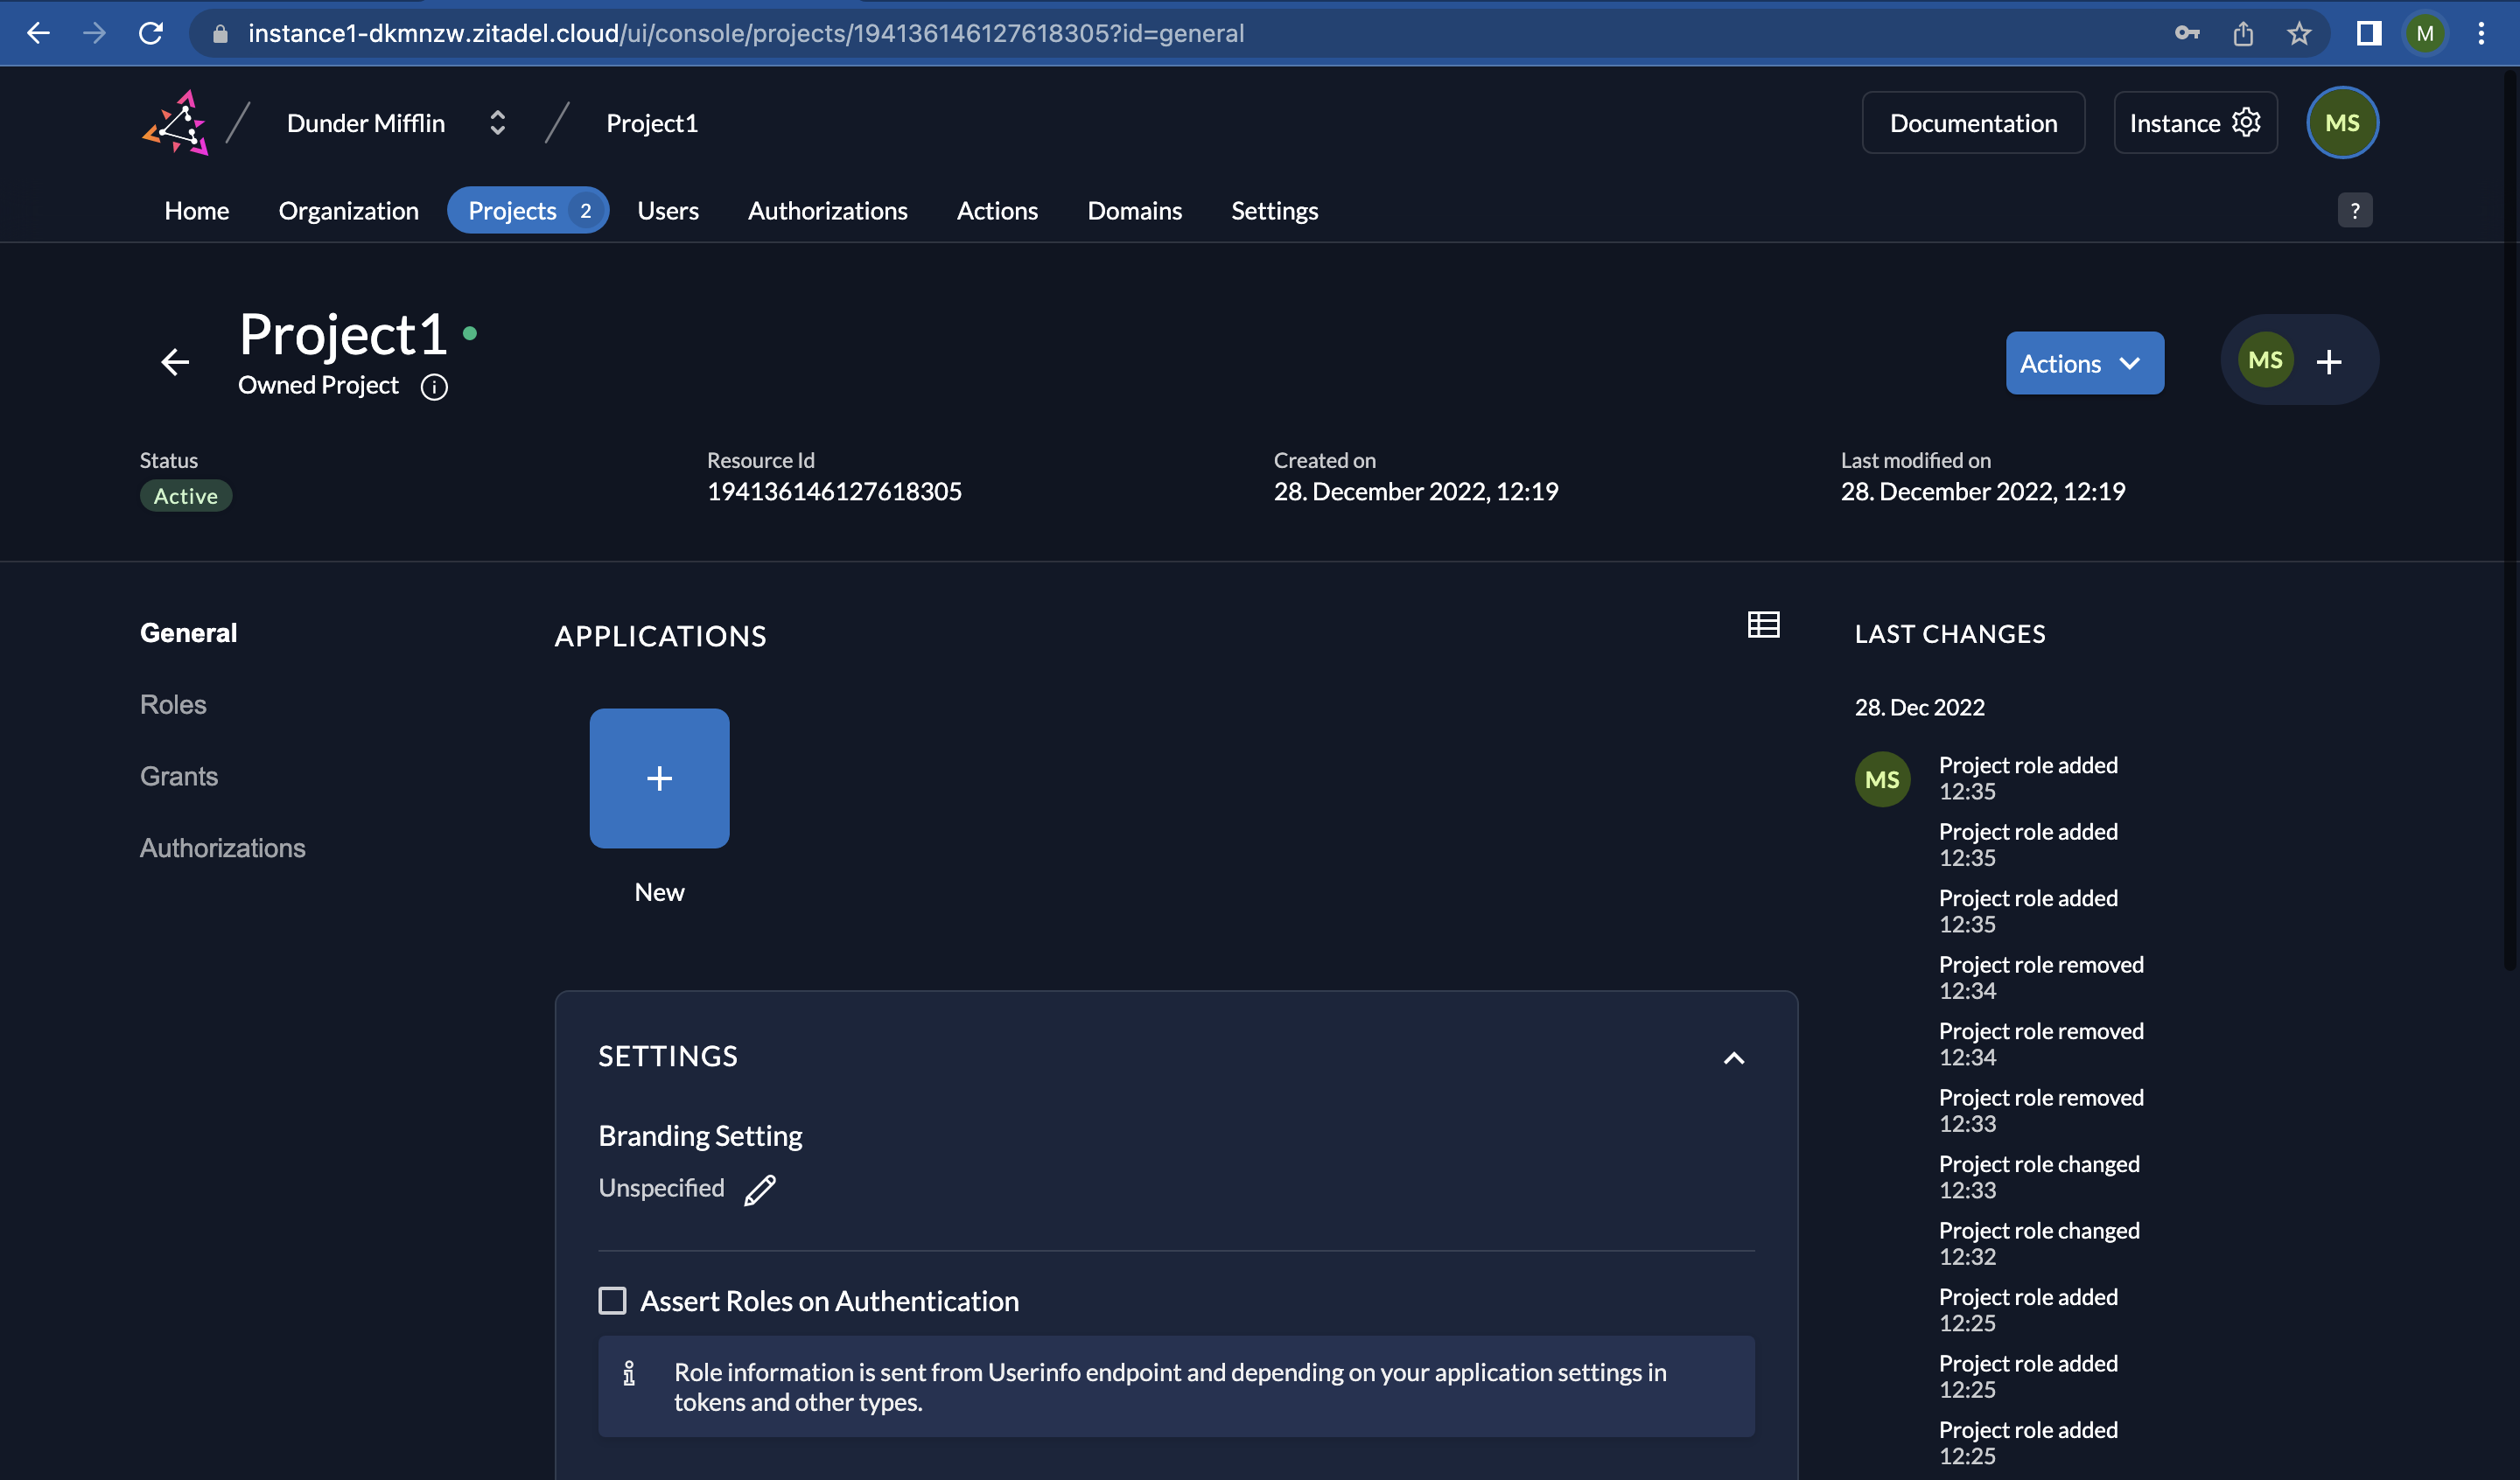
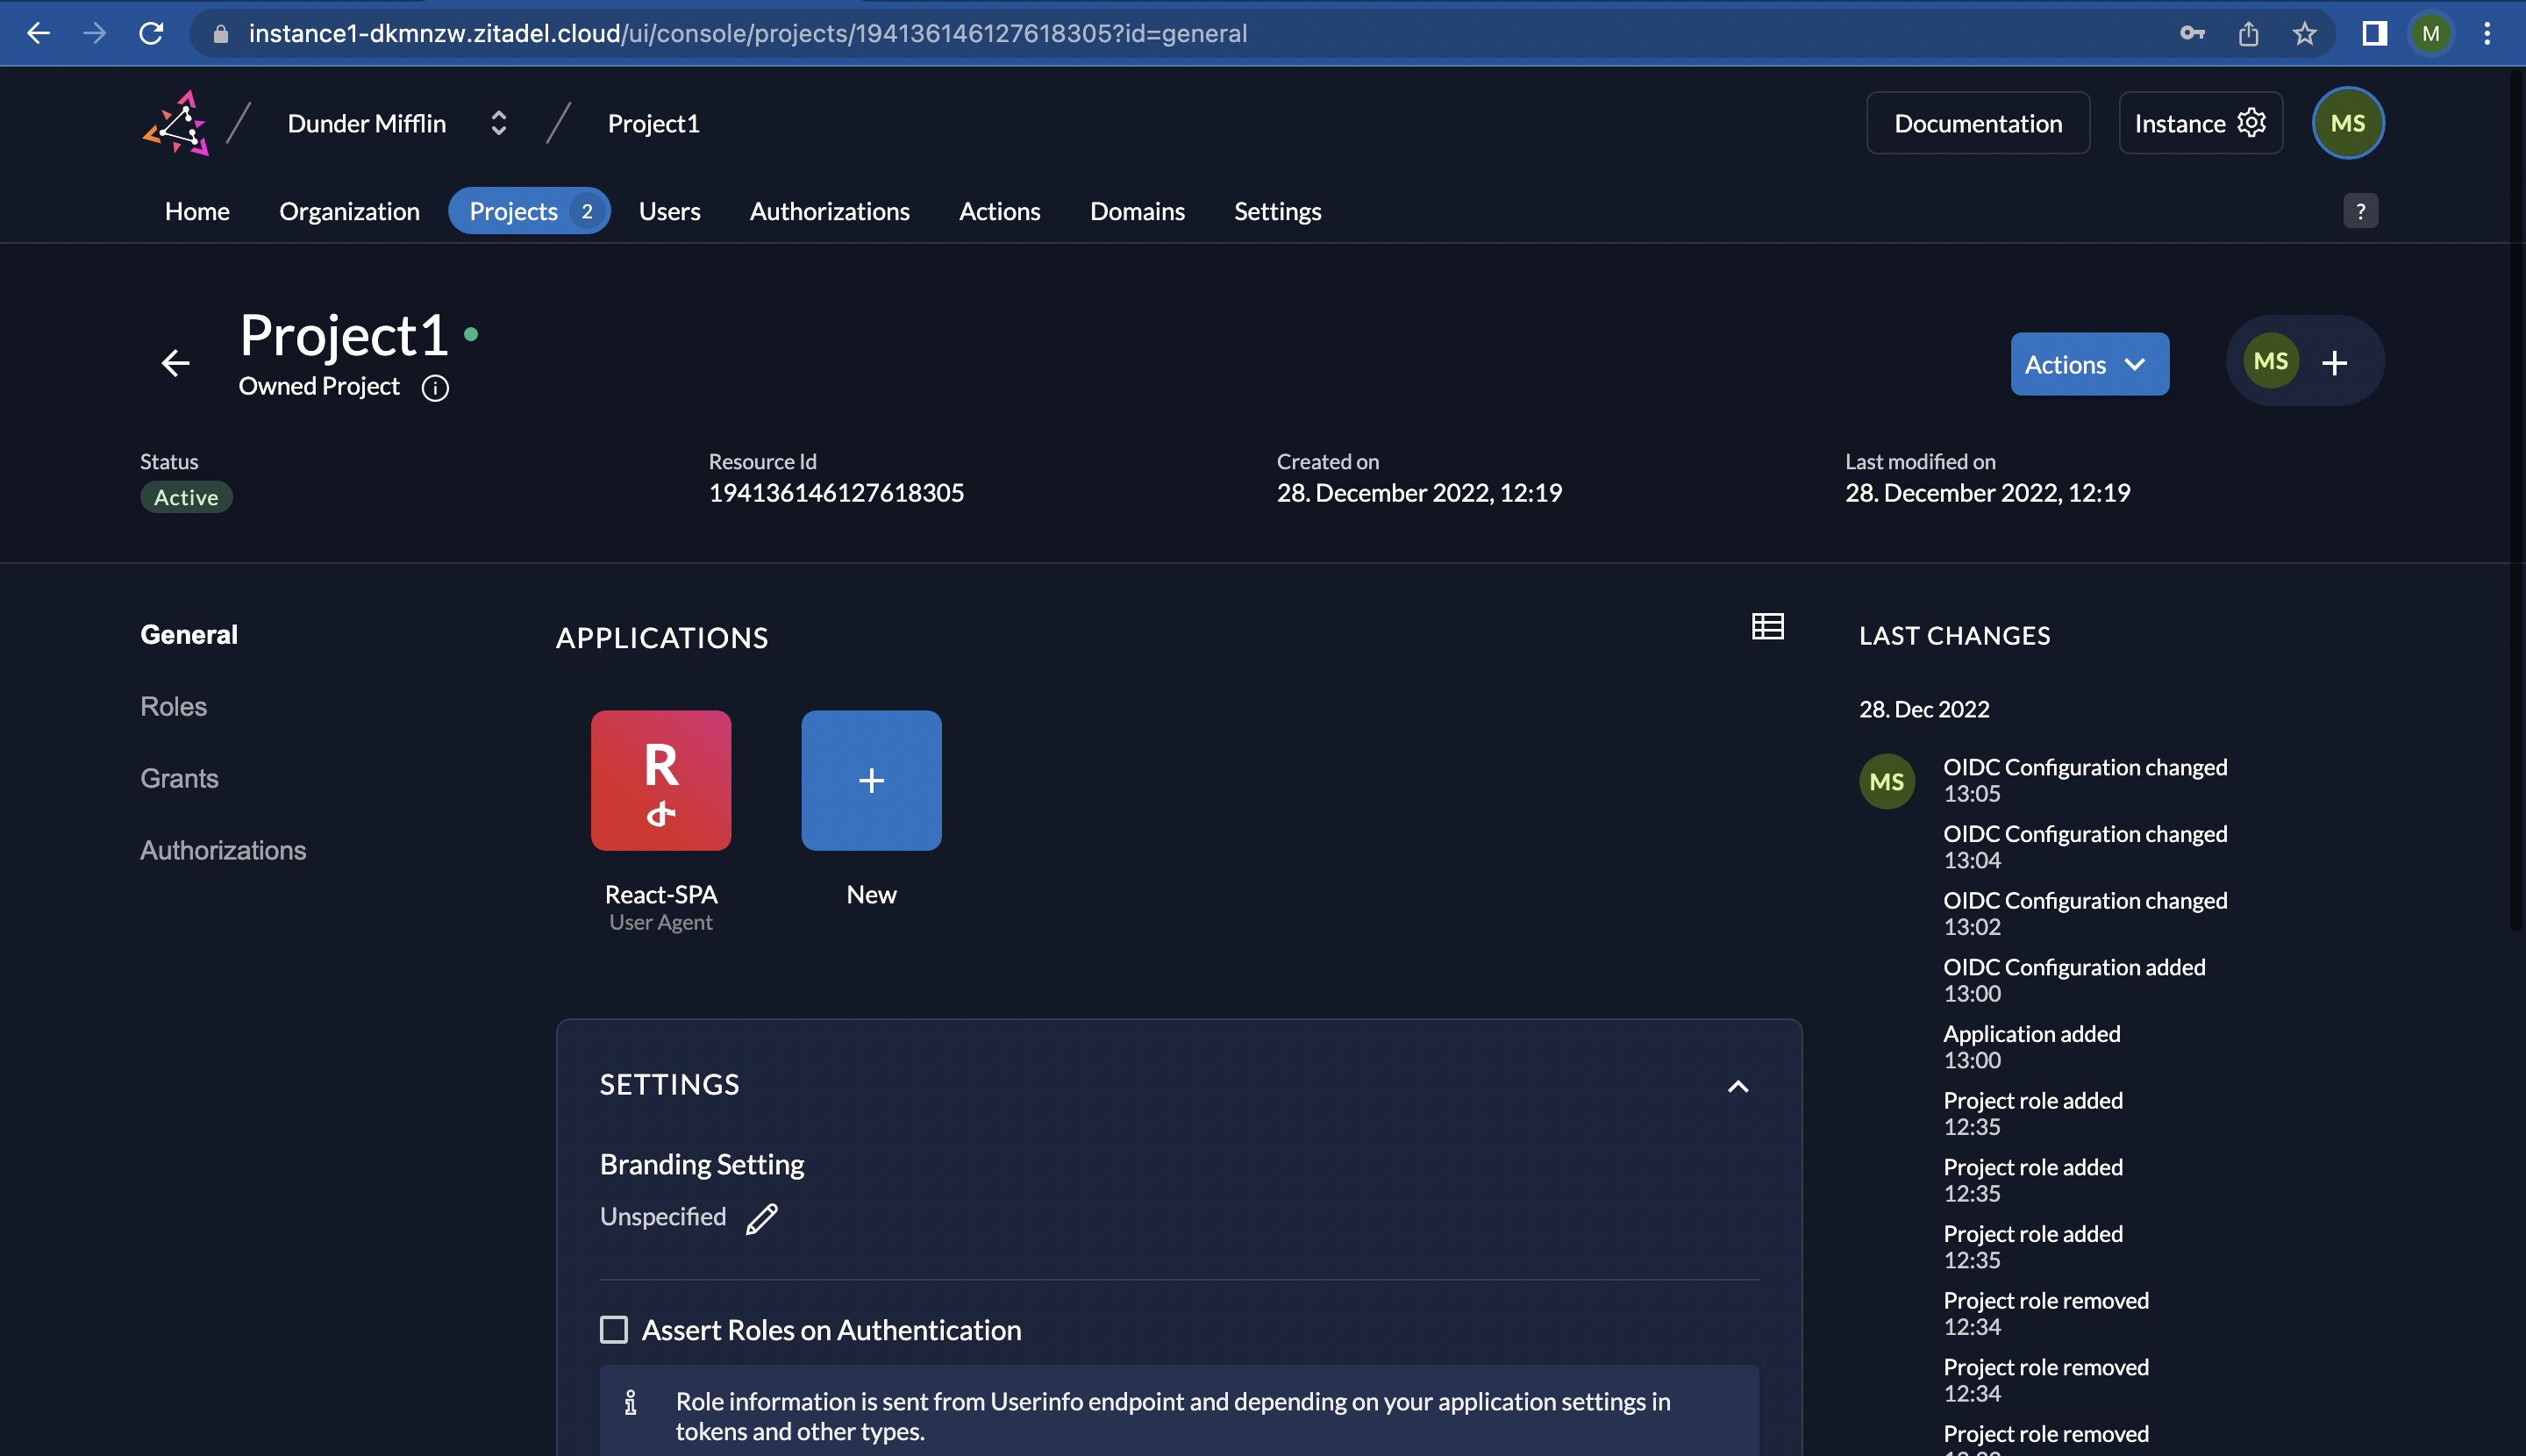
- Now if you go to “Projects” and “Project1”, you will see the “React-SPA” app listed as an application in the project:
8. Obtaining ClientId and OIDC Endpoints for your Application
You will need the ClientId and the OIDC endpoints (issuer and userinfo) when building your React application. The issuer URL is the base URL for the OIDC provider and includes the path to the OIDC discovery document, which contains information about the OIDC provider, including the authorization and token endpoints. By providing the issuer URL, you can use the OIDC library to automatically determine the endpoints for these requests.
The authorization endpoint is used to initiate the authorization process, the token endpoint is used to exchange authorization codes for access tokens, and the userinfo endpoint is used to retrieve information about the user. You need an access token to access the userinfo endpoint and other protected resources.
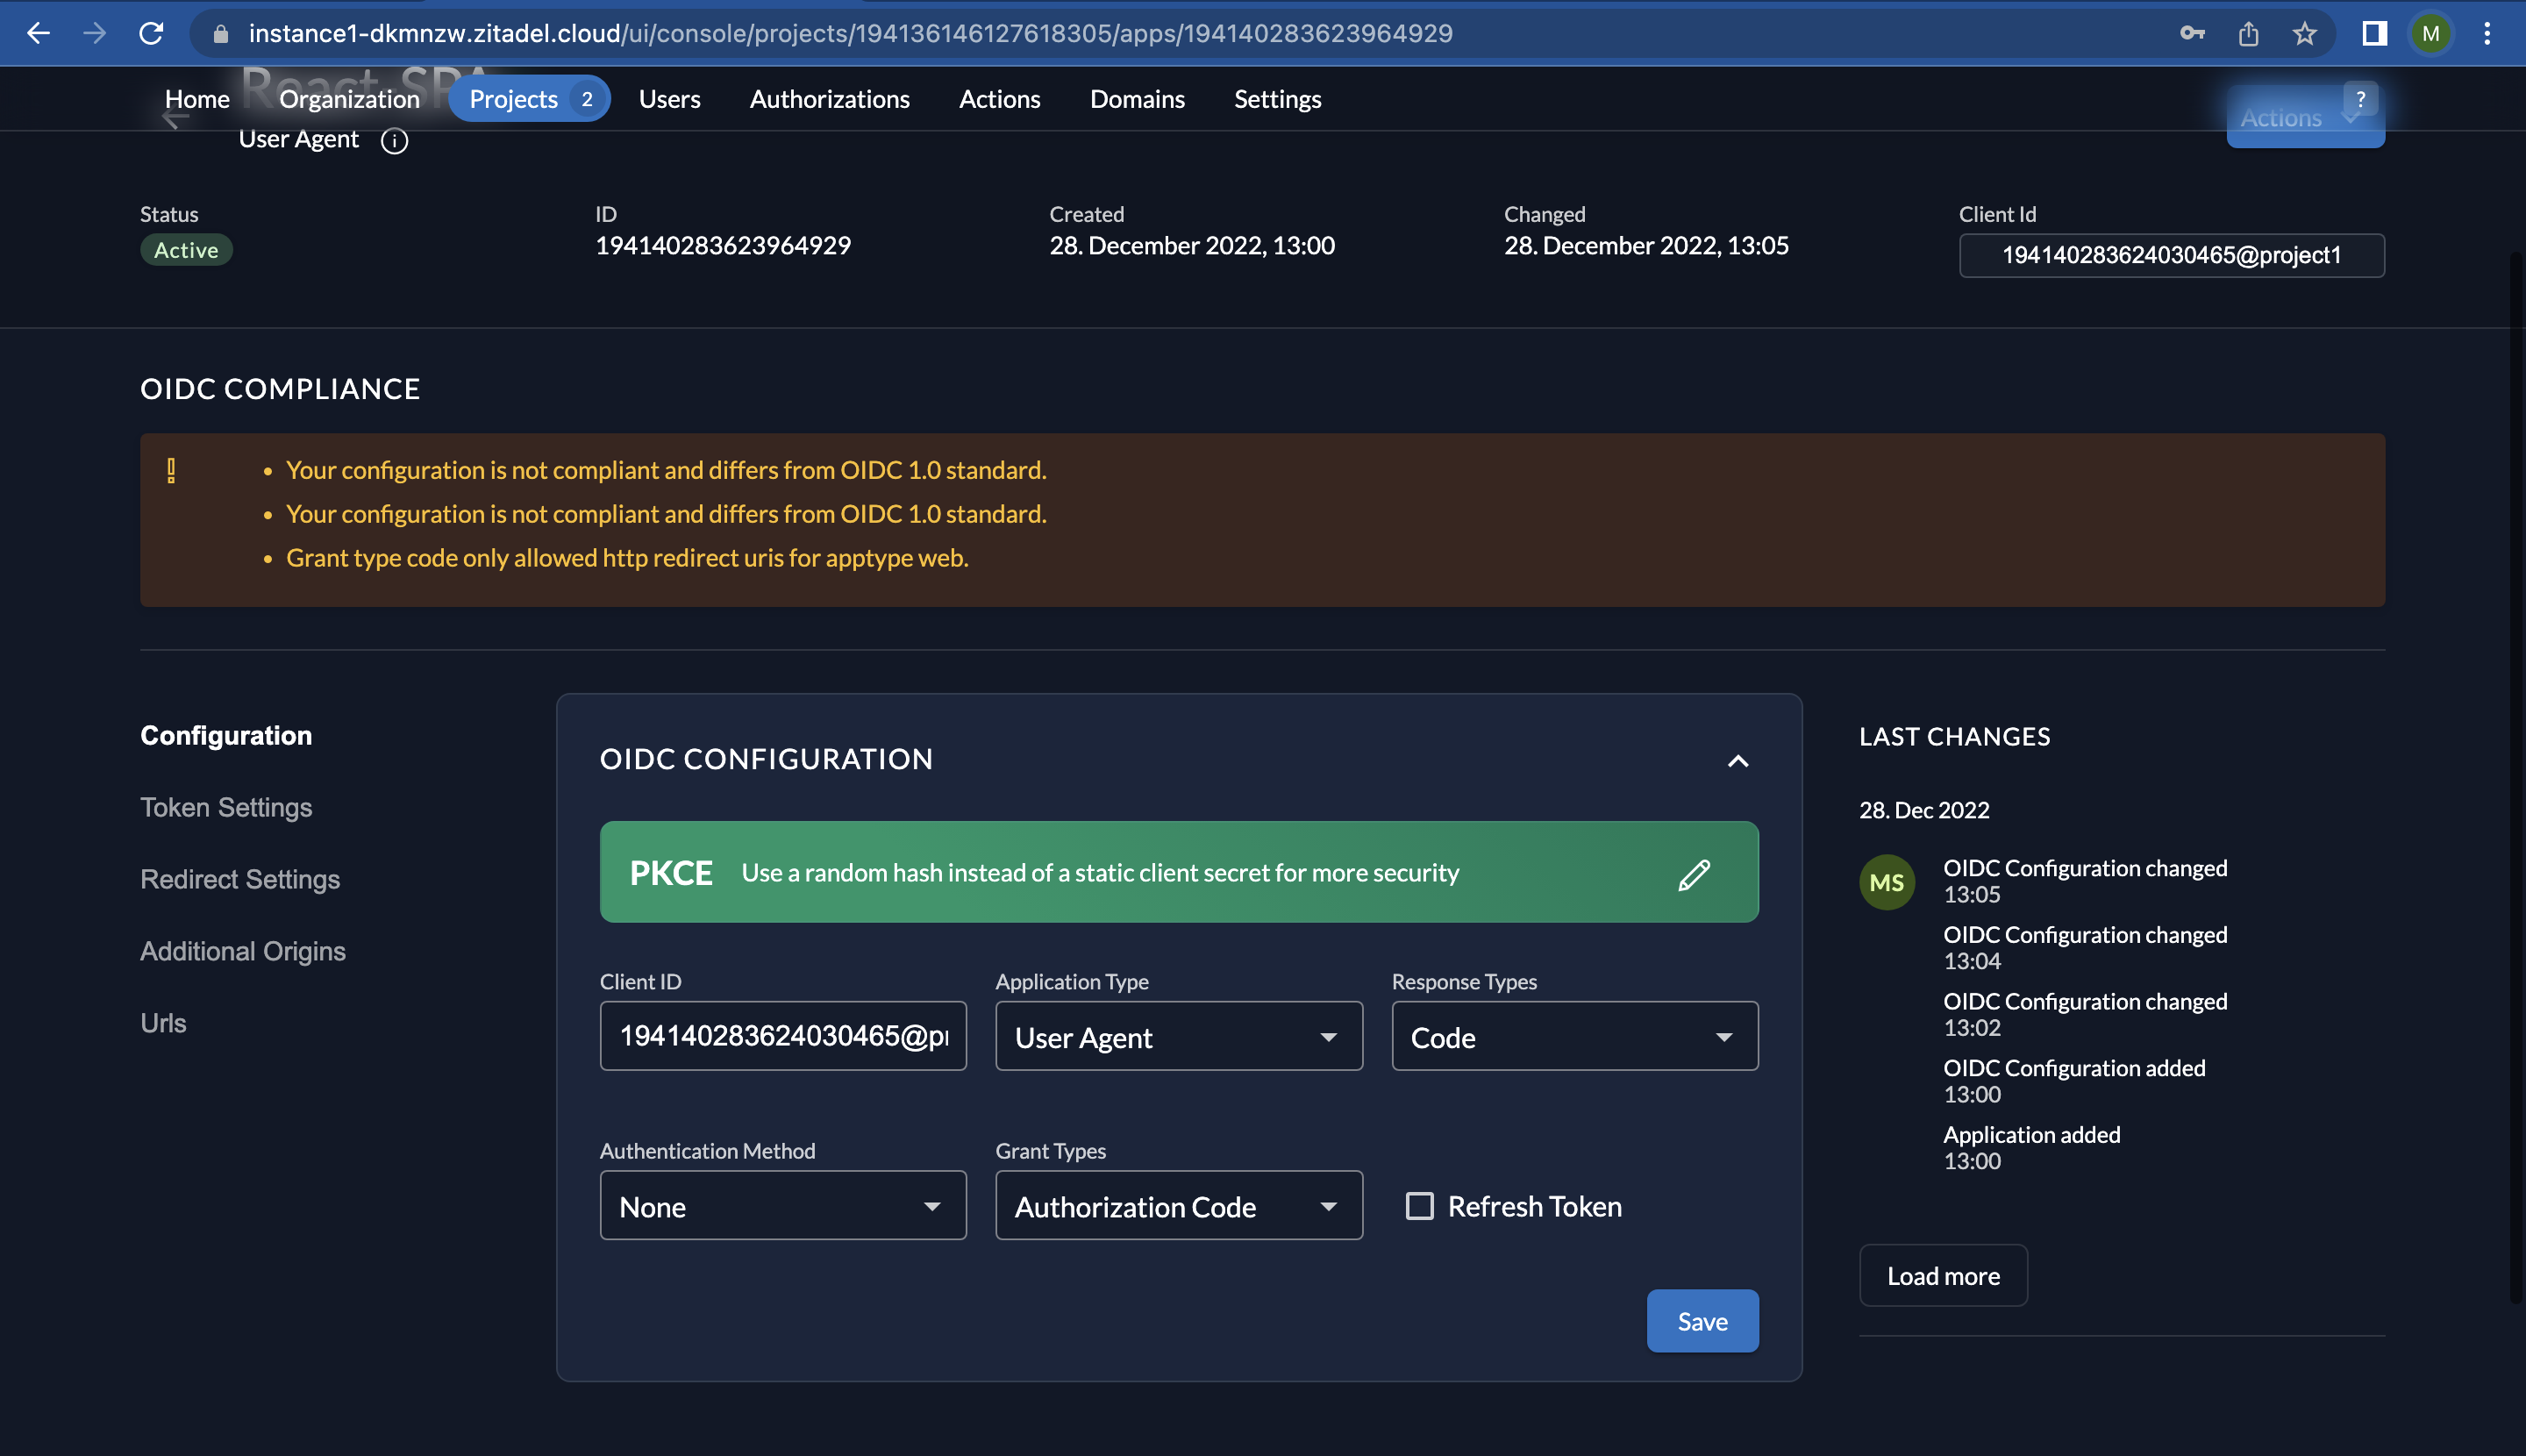
- Click on “Configurations” to access the Client ID as shown below:
- The issuer URL and userinfo endpoint can be accessed by clicking on “URLs” on the left. Make note of the corresponding values for “issuer” and “userinfo_endpoint”.

And with that, configuring ZITADEL for our application is complete. Now we can move on to building our React application. Let's get coding!
Create Your React Application with ZITADEL OIDC PKCE Authentication
1. Functional Requirements of the Application
- The user navigates to the React app (client) and clicks the "login" button.
- The app initiates the authorization process by redirecting the user’s browser to the authorization endpoint of the ZITADEL instance, along with the PKCE parameters (code challenge, and code challenge method).
- The user will see the ZITADEL login page, where the user can enter their credentials.
- After successful authentication, ZITADEL generates an authorization code and redirects the user back to the React app.
- The React app sends a request to the ZITADEL token endpoint, along with the authorization code and code verifier.
- ZITADEL verifies the code verifier to ensure that the authorization request is coming from the same client that initiated it. If it is valid, ZITADEL returns an access token to the React app.
- The React app uses the access token to make a request to the userinfo endpoint, which is protected by the OIDC protocol.
- The userinfo endpoint returns information about the logged-in user, such as their name and email address.
- The React app displays this information to the user.
- When the user wants to log out, the React app sends a request to the ZITADEL logout endpoint, which clears the access token and ends the user's session.
- The user will be redirected to the login page of the app.
The scope of this application for this quick start guide is limited to user authentication and doesn't include role-based authentication, even though we previously discussed adding roles and users.
2. Prerequisites
To follow along with this tutorial, you will need to have both React and Visual Studio Code (VSCode) installed on your machine.
ReactTo install React, you will need to have Node.js installed on your system. You can download and install Node.js from here.
Once you have Node.js installed, you can use the following command to install React:
npm install -g react
This will install the latest version of React globally on your system. You can then verify the installation by running the following command:
react -v
This should output the version of React that you have installed.
Visual Studio CodeTo install Visual Studio Code, go to their website and download and install the version for your operating system.
3. Development
1. Create Project
Open a new terminal window in Visual Studio Code.
Navigate to the folder where you want to create the React app.
Run the following command to create a new React app named "react-oidc-zitadel":
npx create-react-app react-oidc-zitadelNavigate to the "react-oidc-zitadel" folder:
cd react-oidc-zitadel
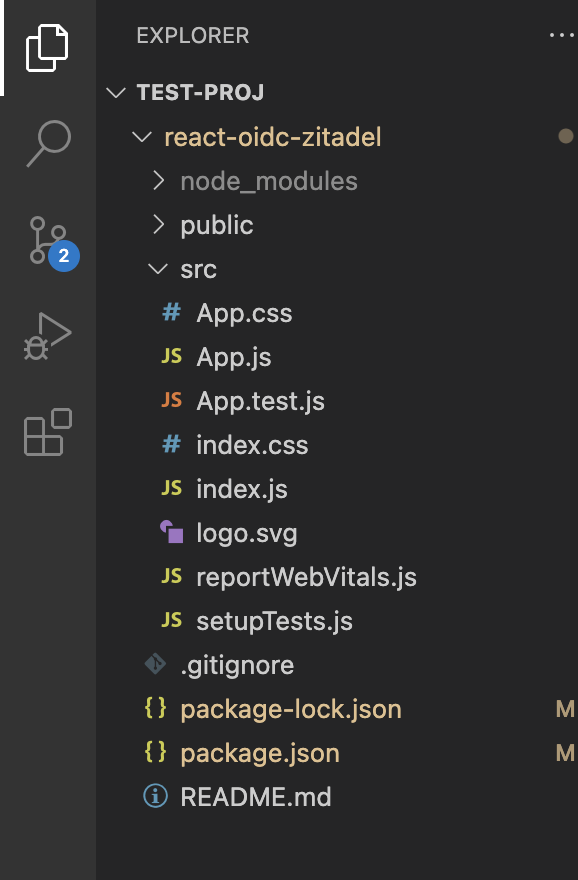
This will create the following files in your project:
The dependencies for this project include react-router-dom and oidc-client-ts. To include them in your React application, you will need to run the following command in your terminal:
npm install react-router-dom oidc-client-ts
2. Add Source Files
The code needed to run this project can be found here.
Replace the content in your App.js file with the one provided below:
import React, { useState, useEffect } from "react";
import { BrowserRouter, Routes, Route } from "react-router-dom";
import Login from "./components/Login";
import Callback from "./components/Callback";
import authConfig from "./authConfig";
import { UserManager, WebStorageStateStore } from "oidc-client-ts";

function App() {
  const userManager = new UserManager({
    userStore: new WebStorageStateStore({ store: window.localStorage }),
    ...authConfig,
  });

  function authorize() {
    userManager.signinRedirect({ state: "a2123a67ff11413fa19217a9ea0fbad5" });
  }

  function clearAuth() {
    userManager.signoutRedirect();
  }

  const [authenticated, setAuthenticated] = useState(null);
  const [userInfo, setUserInfo] = useState(null);

  useEffect(() => {
    userManager.getUser().then((user) => {
      if (user) {
        setAuthenticated(true);
      } else {
        setAuthenticated(false);
      }
    });
  }, [userManager]);

  return (
    <BrowserRouter>
      <Routes>
        <Route
          path="/"
          element={<Login auth={authenticated} handleLogin={authorize} />}
        />
        <Route
          path="/callback"
          element={
            <Callback
              auth={authenticated}
              setAuth={setAuthenticated}
              userInfo={userInfo}
              setUserInfo={setUserInfo}
              handleLogout={clearAuth}
              userManager={userManager}
            />
          }
        />
      </Routes>
    </BrowserRouter>
  );
}

export default App;
The App.js file is the root component of the React app that initializes the OIDC flow and manages the user's session. It does this by:
- Importing the necessary libraries and components from the dependencies, including the
oidc-client-tslibrary, theauthConfigfile with the OIDC configuration values, and the Login and Callback components. - Initializing a new
UserManagerinstance with the OIDC configuration values from the authConfig file. TheUserManagerinstance manages the OIDC flow and stores the user's session information. - Defining two functions:
authorizeandclearAuth. Theauthorizefunction initiates the OIDC flow when the user clicks theloginbutton, while theclearAuthfunction ends the user's session when the user clicks thelogoutbutton. - Defining two state variables:
authenticatedanduserInfo. The authenticated variable is a boolean that indicates whether the user is authenticated or not, while theuserInfovariable stores the user's information when they are authenticated. - Using the
useEffecthook to retrieve the user's session information from theUserManagerinstance and updating theauthenticatedanduserInfostate variables accordingly. - Defining the routes for the app using the
react-router-domlibrary, including the/and/callbackroutes for the login and callback pages, respectively. TheLoginandCallbackcomponents handle the login and callback processes, respectively.
Create a folder named components in the src directory. Create two files named Login.js and Callback.js.
Paste the following code to Login.js.
import { Navigate } from "react-router-dom";

const Login = ({ auth, handleLogin, userManager }) => {
  return (
    <div>
      {auth === null && <div>Loading...</div>}
      {auth === false && (
        <div>
          <h1>Welcome!</h1>
          <button
            onClick={() => {
              // Perform the authorization request, including the code challenge
              handleLogin();
            }}
          >
            Please log in.
          </button>
        </div>
      )}
      {auth && <Navigate to="/callback" />}
    </div>
  );
};

export default Login;
The / route corresponds to the login page, which is rendered by the Login component. The Login(Login.js) component is a functional component that displays the login button and calls the handleLogin function (which corresponds to the authorize function defined in the App component) when the button is clicked. This initiates the OIDC flow by redirecting the user to the authorization endpoint.
Paste the following code to Callback.js.
import React, { useEffect } from 'react';
import authConfig from '../authConfig';

const Callback = ({ auth, setAuth, userManager, userInfo, setUserInfo, handleLogout }) => {

  useEffect(() => {
    if (auth === null) {
      userManager.signinRedirectCallback().then((user) => {
        if (user) {
          setAuth(true);
          const access_token = user.access_token;
          // Make a request to the user info endpoint using the access token
          fetch(authConfig.userinfo_endpoint, {
            headers: {
              'Authorization': `Bearer ${access_token}`
            }
          })
            .then(response => response.json())
            .then(userInfo => {
              setUserInfo(userInfo);
            });
        } else {
          setAuth(false);
        }
      }).catch((error) => {
        setAuth(false);
      });
    }
  }, [auth, userManager, setAuth]);


  if (auth === true && userInfo) {
    return (
      <div>
        <h1>Welcome, {userInfo.name}!</h1>
        <h2>Your ZITADEL Profile Information</h2>
        <h3>Name:  {userInfo.name}</h3>
        <h3>Email: {userInfo.email}</h3>
        <h3>Email Verified: {userInfo.email_verified? "Yes": "No"}</h3>
        <h3>Locale: {userInfo.locale}</h3>

        <button onClick={handleLogout}>Log out</button>
      </div>
    );
  }
  else {
      return <div>Loading...</div>;
    }

};

export default Callback;
The /callback route corresponds to the callback page, which is rendered by the Callback(Callback.js) component. The Callback component is also a functional component that handles the callback from the authorization server after the user logs in. It retrieves the authorization code from the URL, exchanges it for an access token and id token, and retrieves the user's information from the userinfo endpoint. It also sets the authenticated and userInfo state variables in the App(App.js) component and displays the logout button. When the logout button is clicked, the clearAuth function is called and the user's session is ended. The clearAuth function is defined in the App component and is called with no arguments. It initiates the end session flow by redirecting the user to the end session endpoint.
Create a new file in the src folder named authConfig.js and paste the following code to it.
const authConfig = {
    authority: 'https://some_text.zitadel.cloud/', //Replace with your issuer URL
    client_id: 'ABC123@Project', //Replace with your client id
    redirect_uri: 'http://localhost:3000/callback',
    response_type: 'code',
    scope: 'openid profile email',
    post_logout_redirect_uri: 'http://localhost:3000/',
    userinfo_endpoint: 'https://instance-some_text.zitadel.cloud/oidc/v1/userinfo', //Replace with your user-info endpoint
    response_mode: 'query',
    code_challenge_method: 'S256',
  };

 export default authConfig;
The authConfig.js file exports an object with configuration values for the OIDC flow. These values are used to initialize the UserManager instance in the App component. The configuration values include the:
- authority (the URL of the authorization server). Don’t forget to replace the
authorityvalue with the “issuer URL” that you obtained from this step. - client_id (the unique identifier for the client application). Don’t forget to replace the
client_idwith your “ClientId” that you obtained from this step. - redirect_uri (the URL to redirect to after the authorization flow is complete)
- response_type (the type of response expected from the authorization server)
- scope (the permissions requested from the user)
- post_logout_redirect_uri (the URL to redirect to after the user logs out)
- userinfo_endpoint (the URL of the endpoint to retrieve the user's information). Don’t forget to replace the
userinfo_endointwith your “userinfo_endpoint” that you obtained from this step. - response_mode (the method to use to send the authorization response)
- code_challenge_method (the method to use to generate the code challenge).
Note that the oidc-client-ts library automatically handles the generation of the code verifier and code challenge when the user clicks on the login button, eliminating the need for the application to manually generate and include these values in the requests.
In the PKCE flow, the code verifier is a random string generated by the client application, and the code challenge is a transformed version of the code verifier using the SHA-256 hashing algorithm.
Add a file called style.css to the src folder to apply CSS styling to the pages.
/* The body element covers the entire page, so setting the background color here
   will set the background color for the whole page */
   body {
    font-family: 'Open Sans', sans-serif;
    /* The hex code for the light blue color from the image is #9fd3e0 */
    background-color: #9fd3e0;
    /* Center the text in the body element */
    text-align: center;
  }

  /* The h1, h2, and h3 elements are used for headings */
  h1, h2, h3 {
    /* The hex code for the dark blue color from the image is #2c3e50 */
    color: #2c3e50;
    text-align: center;
  }

  /* The button element represents a clickable button */
  button {
    /* The hex code for the light purple color from the image is #9b59b6 */
    background-color: #9b59b6;
    /* The hex code for the white color is #ffffff */
    color: #ffffff;
    /* Add some padding and a border to the button */
    padding: 10px 20px;
    border: none;
    /* Add some hover effect to the button */
    cursor: pointer;
  }

  button:hover {
    /* The hex code for the dark purple color from the image is #8e44ad */
    background-color: #8e44ad;
  }
Go to index.js and replace
import './index.css';withimport './style.css'. Your index.js file should look like this:
import React from 'react';
import ReactDOM from 'react-dom/client';
import './style.css';
import App from './App';
import reportWebVitals from './reportWebVitals';

const root = ReactDOM.createRoot(document.getElementById('root'));
root.render(
  <React.StrictMode>
    <App />
  </React.StrictMode>
);

// If you want to start measuring performance in your app, pass a function
// to log results (for example: reportWebVitals(console.log))
// or send to an analytics endpoint. Learn more: https://bit.ly/CRA-vitals
reportWebVitals();
4. Running the Application
- Run
npm startto start the development server. - Open your browser and navigate to
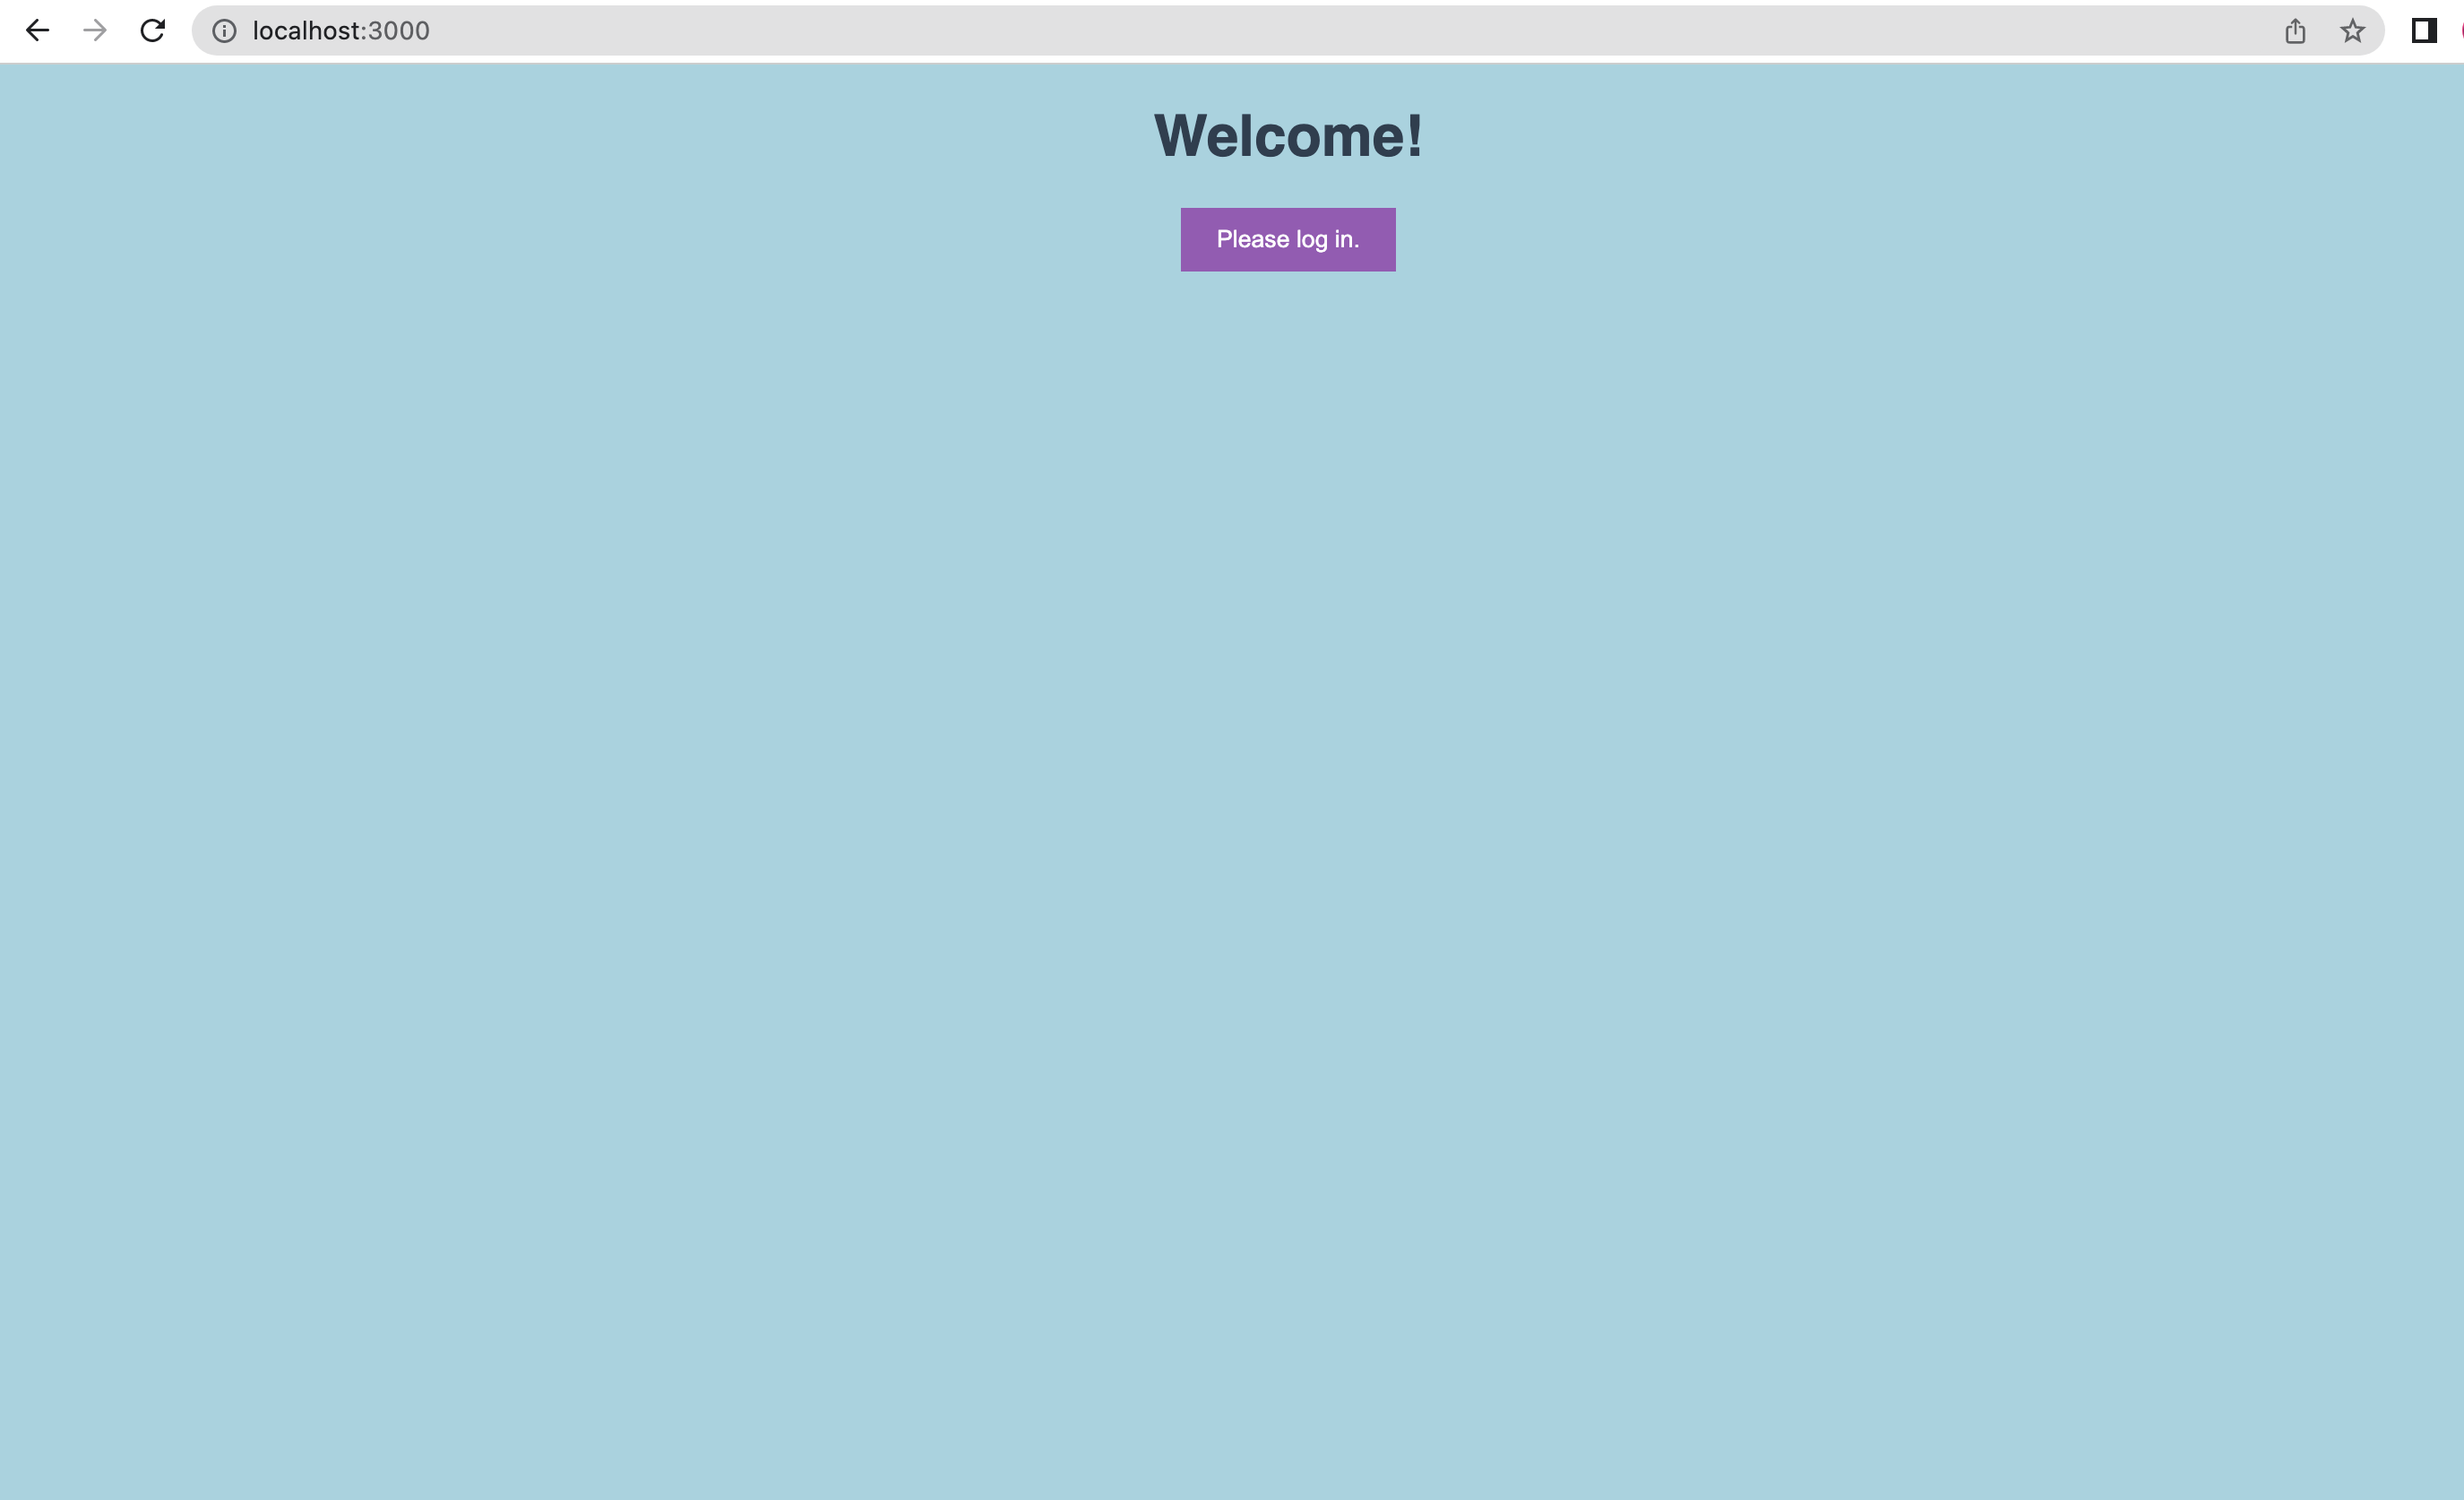
http://localhost:3000/to view the app. - You will see the login page, which is the landing page of the app, when you run the application. Click on the “Please log in” button.
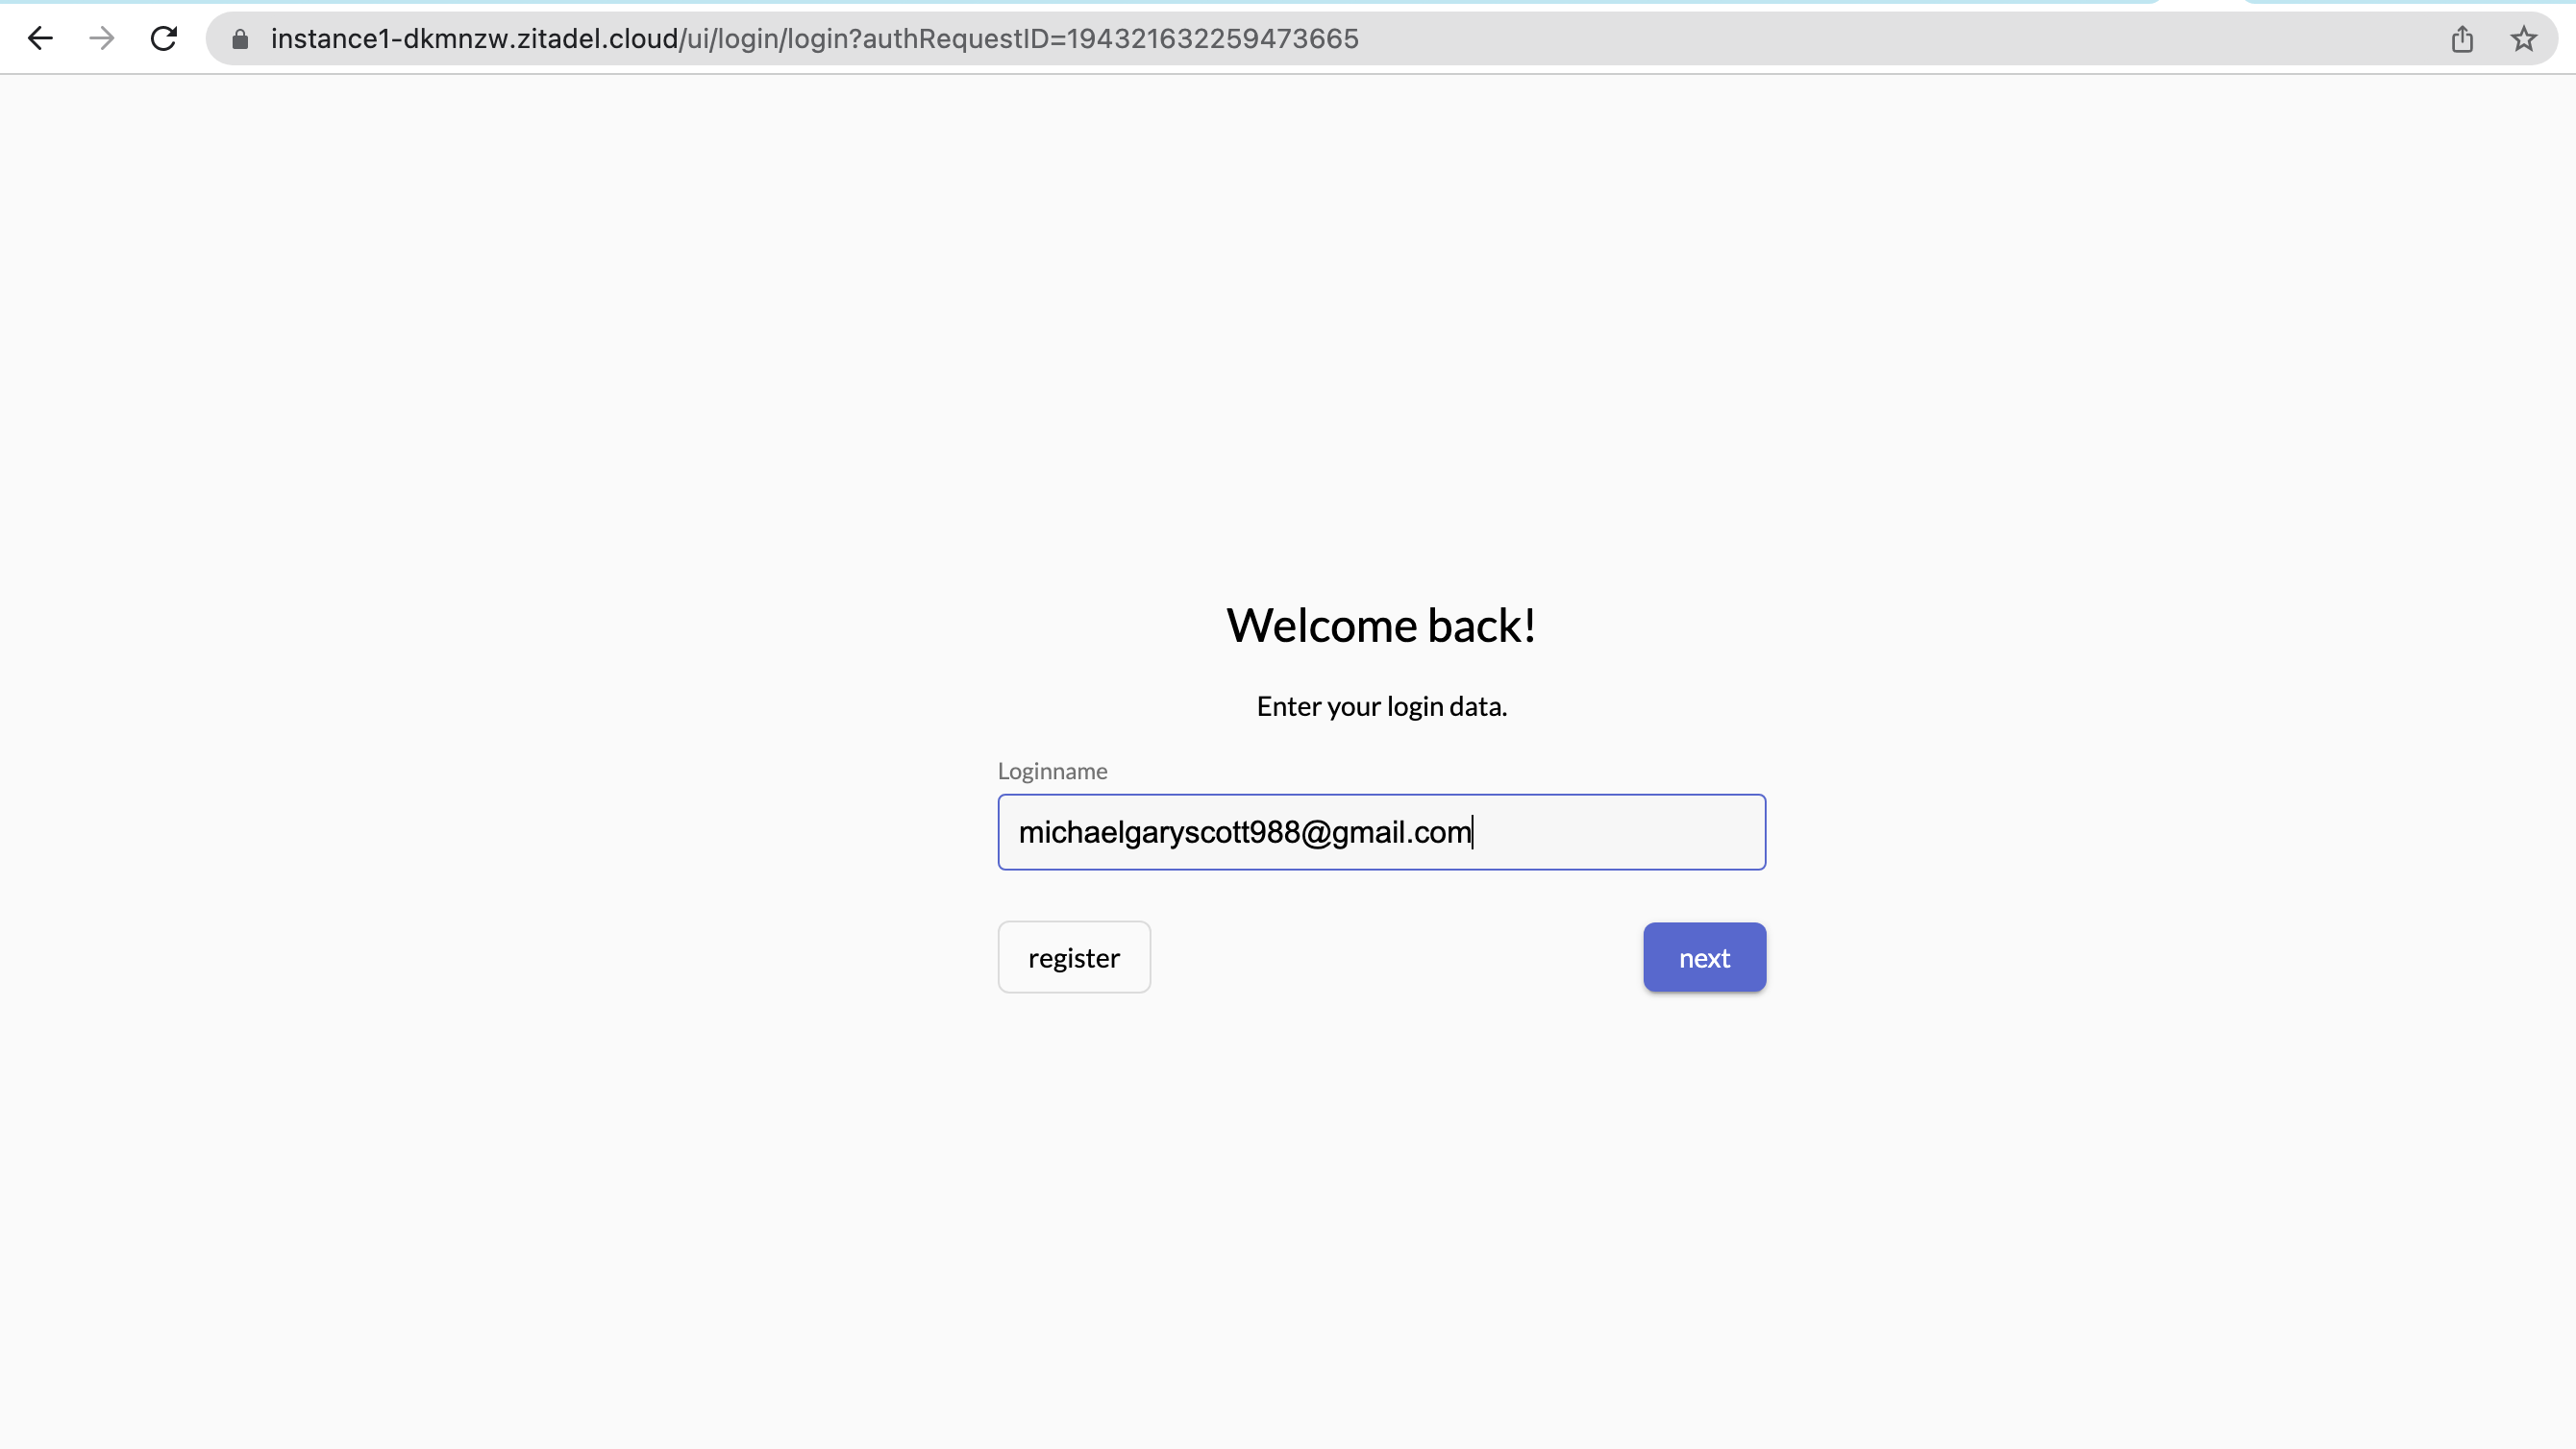
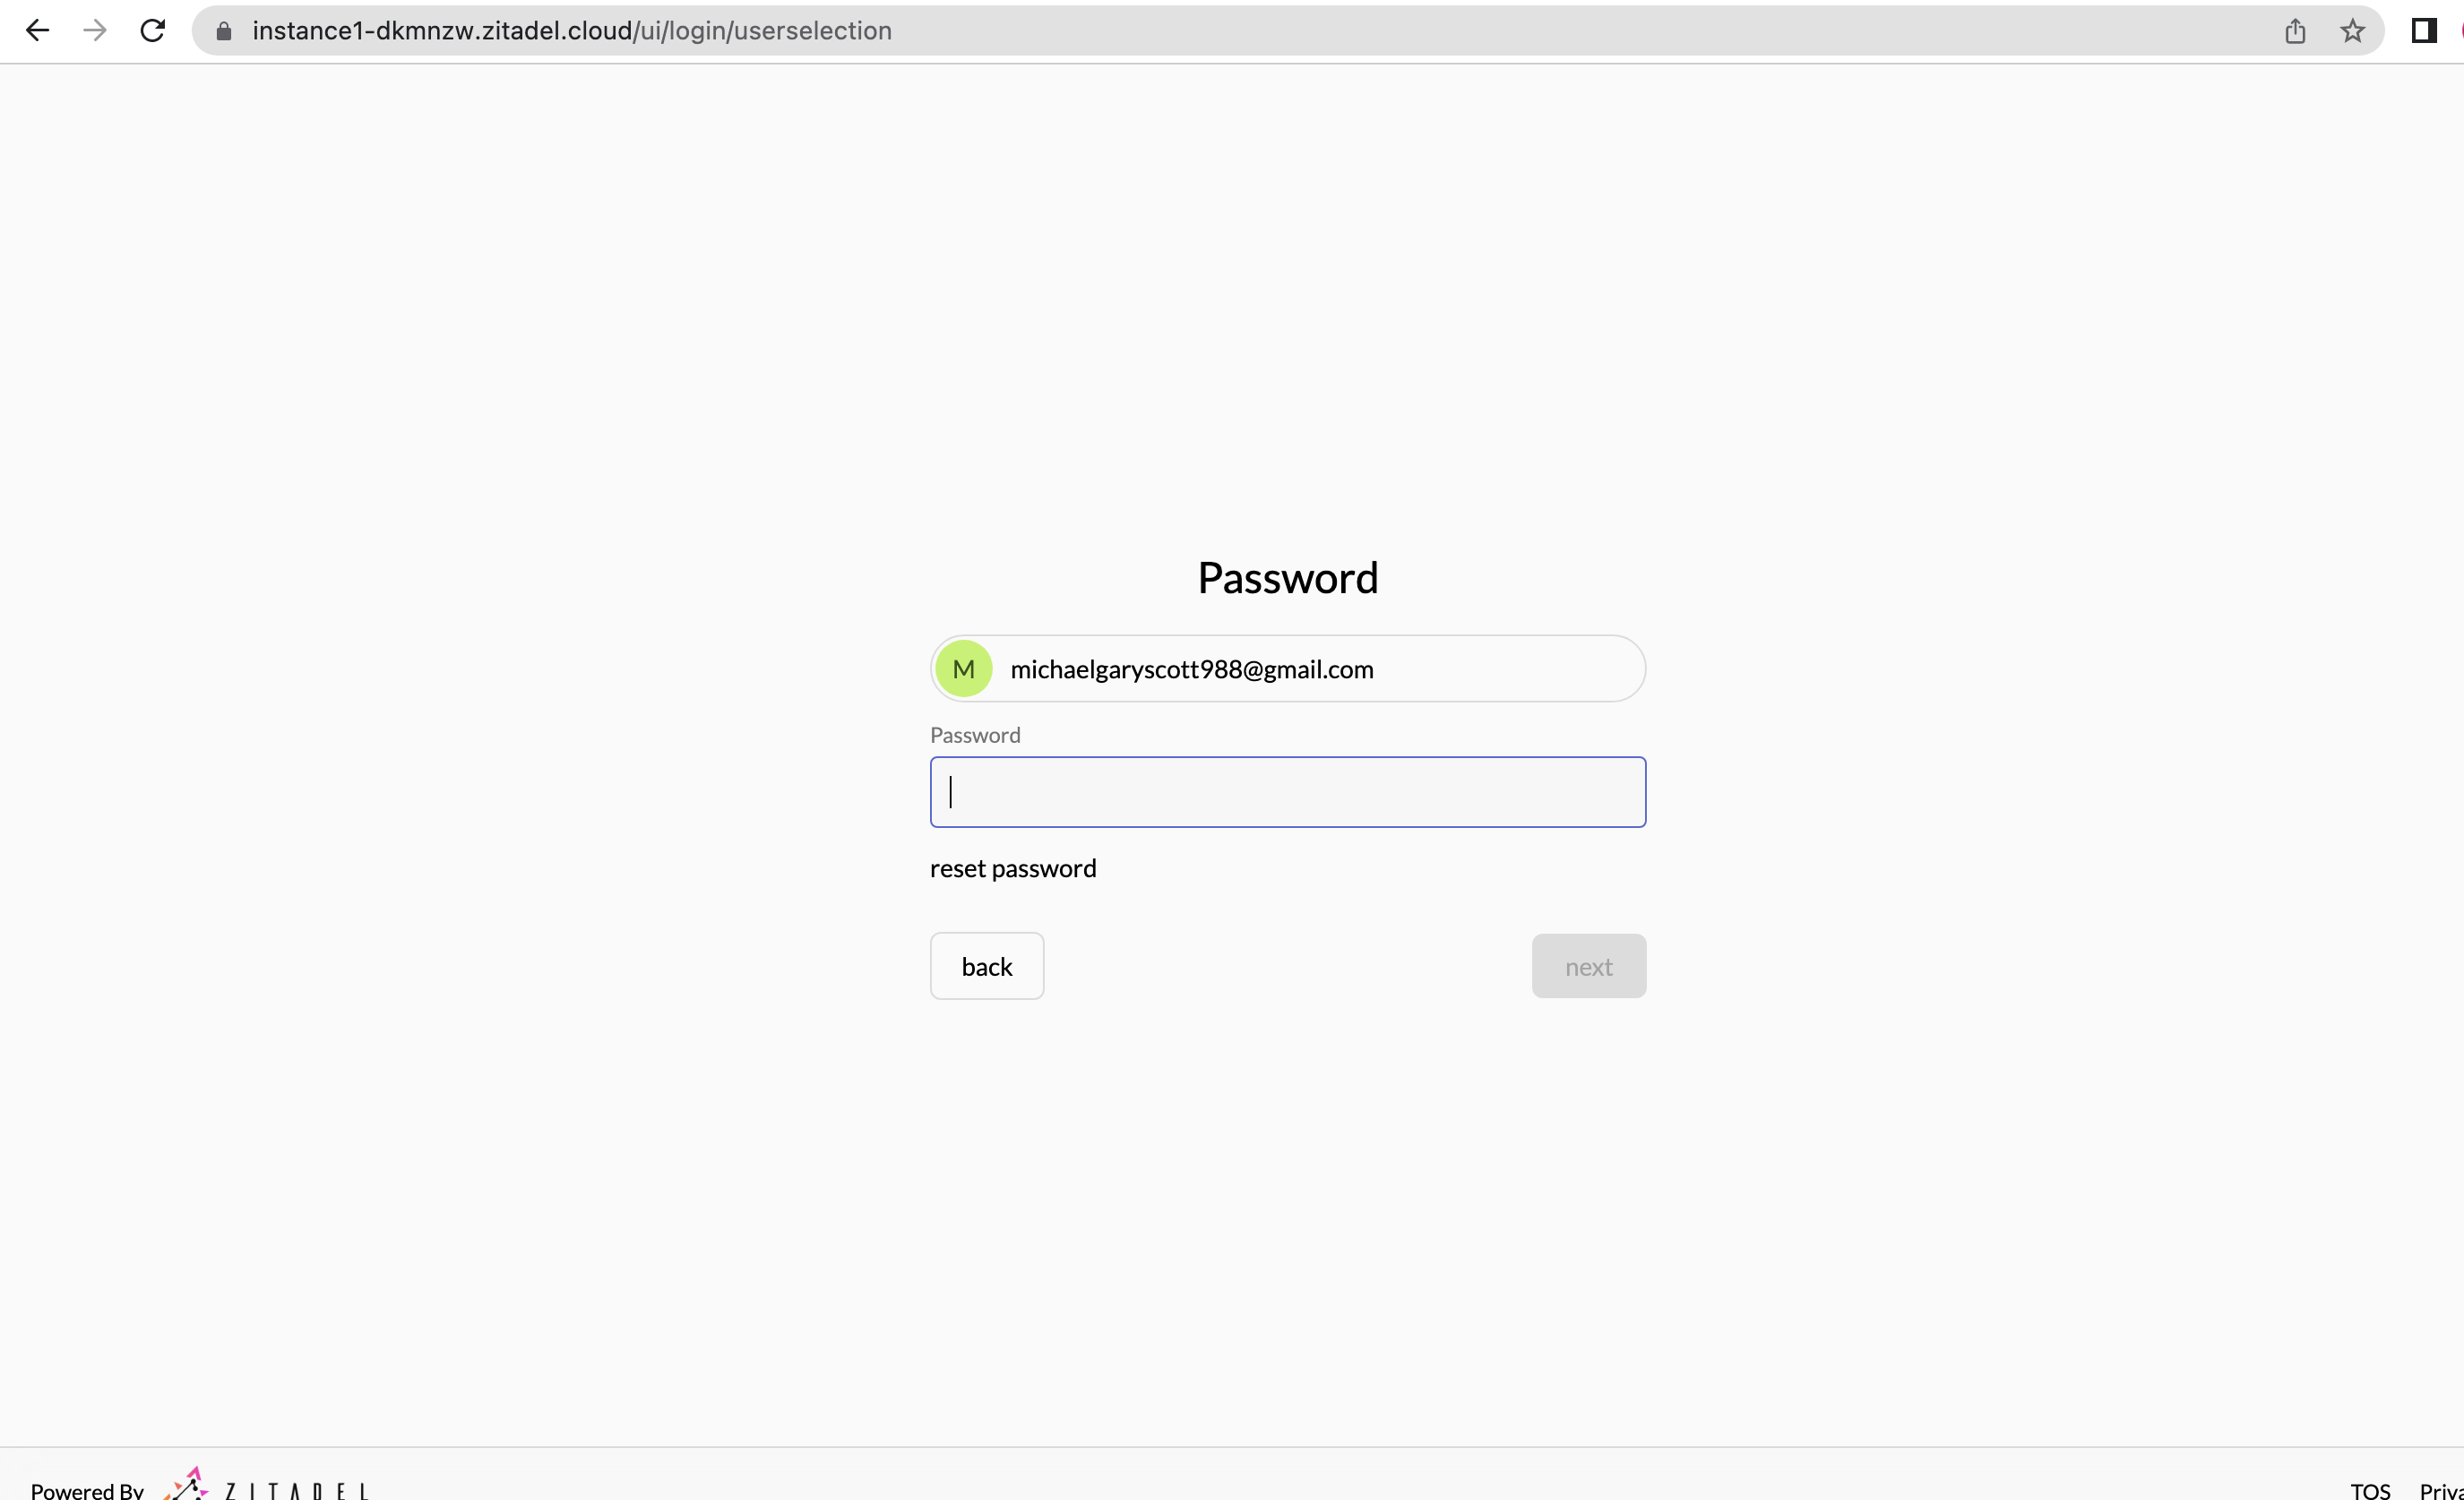
- You will be redirected to the ZITADEL login page. Add your username/email and click on “next”.
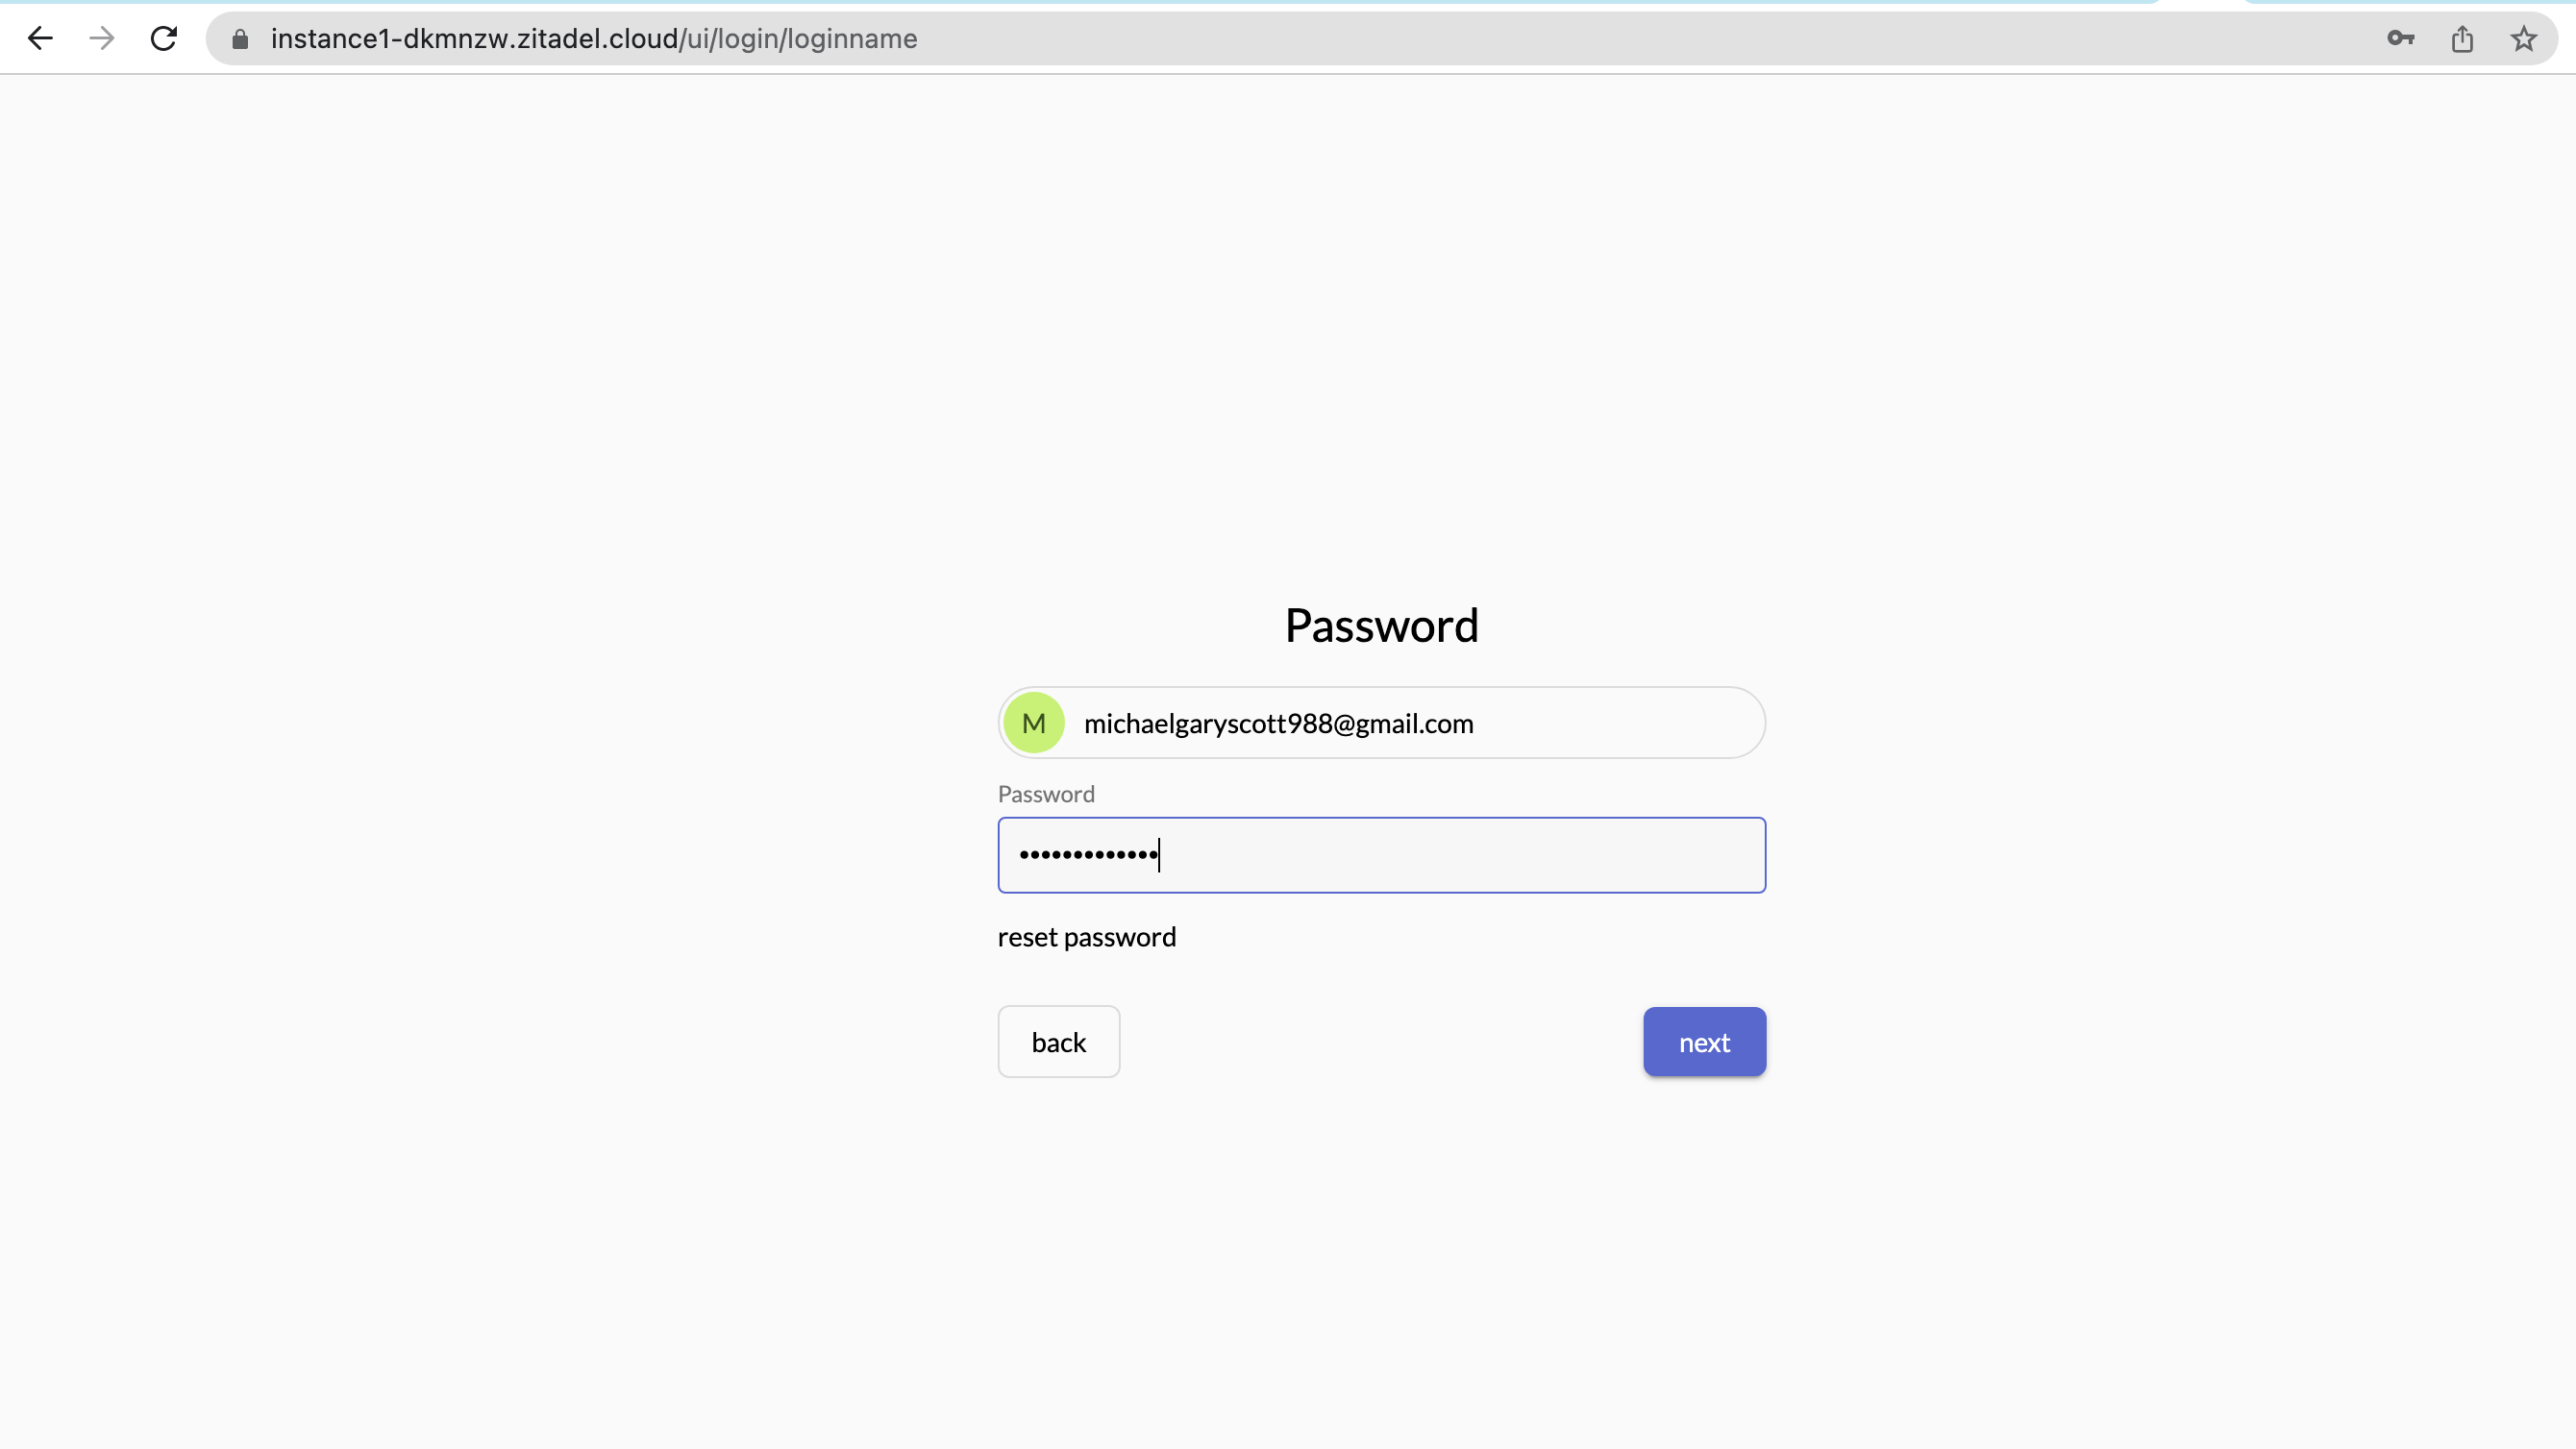
- Enter your password and click on “next”.
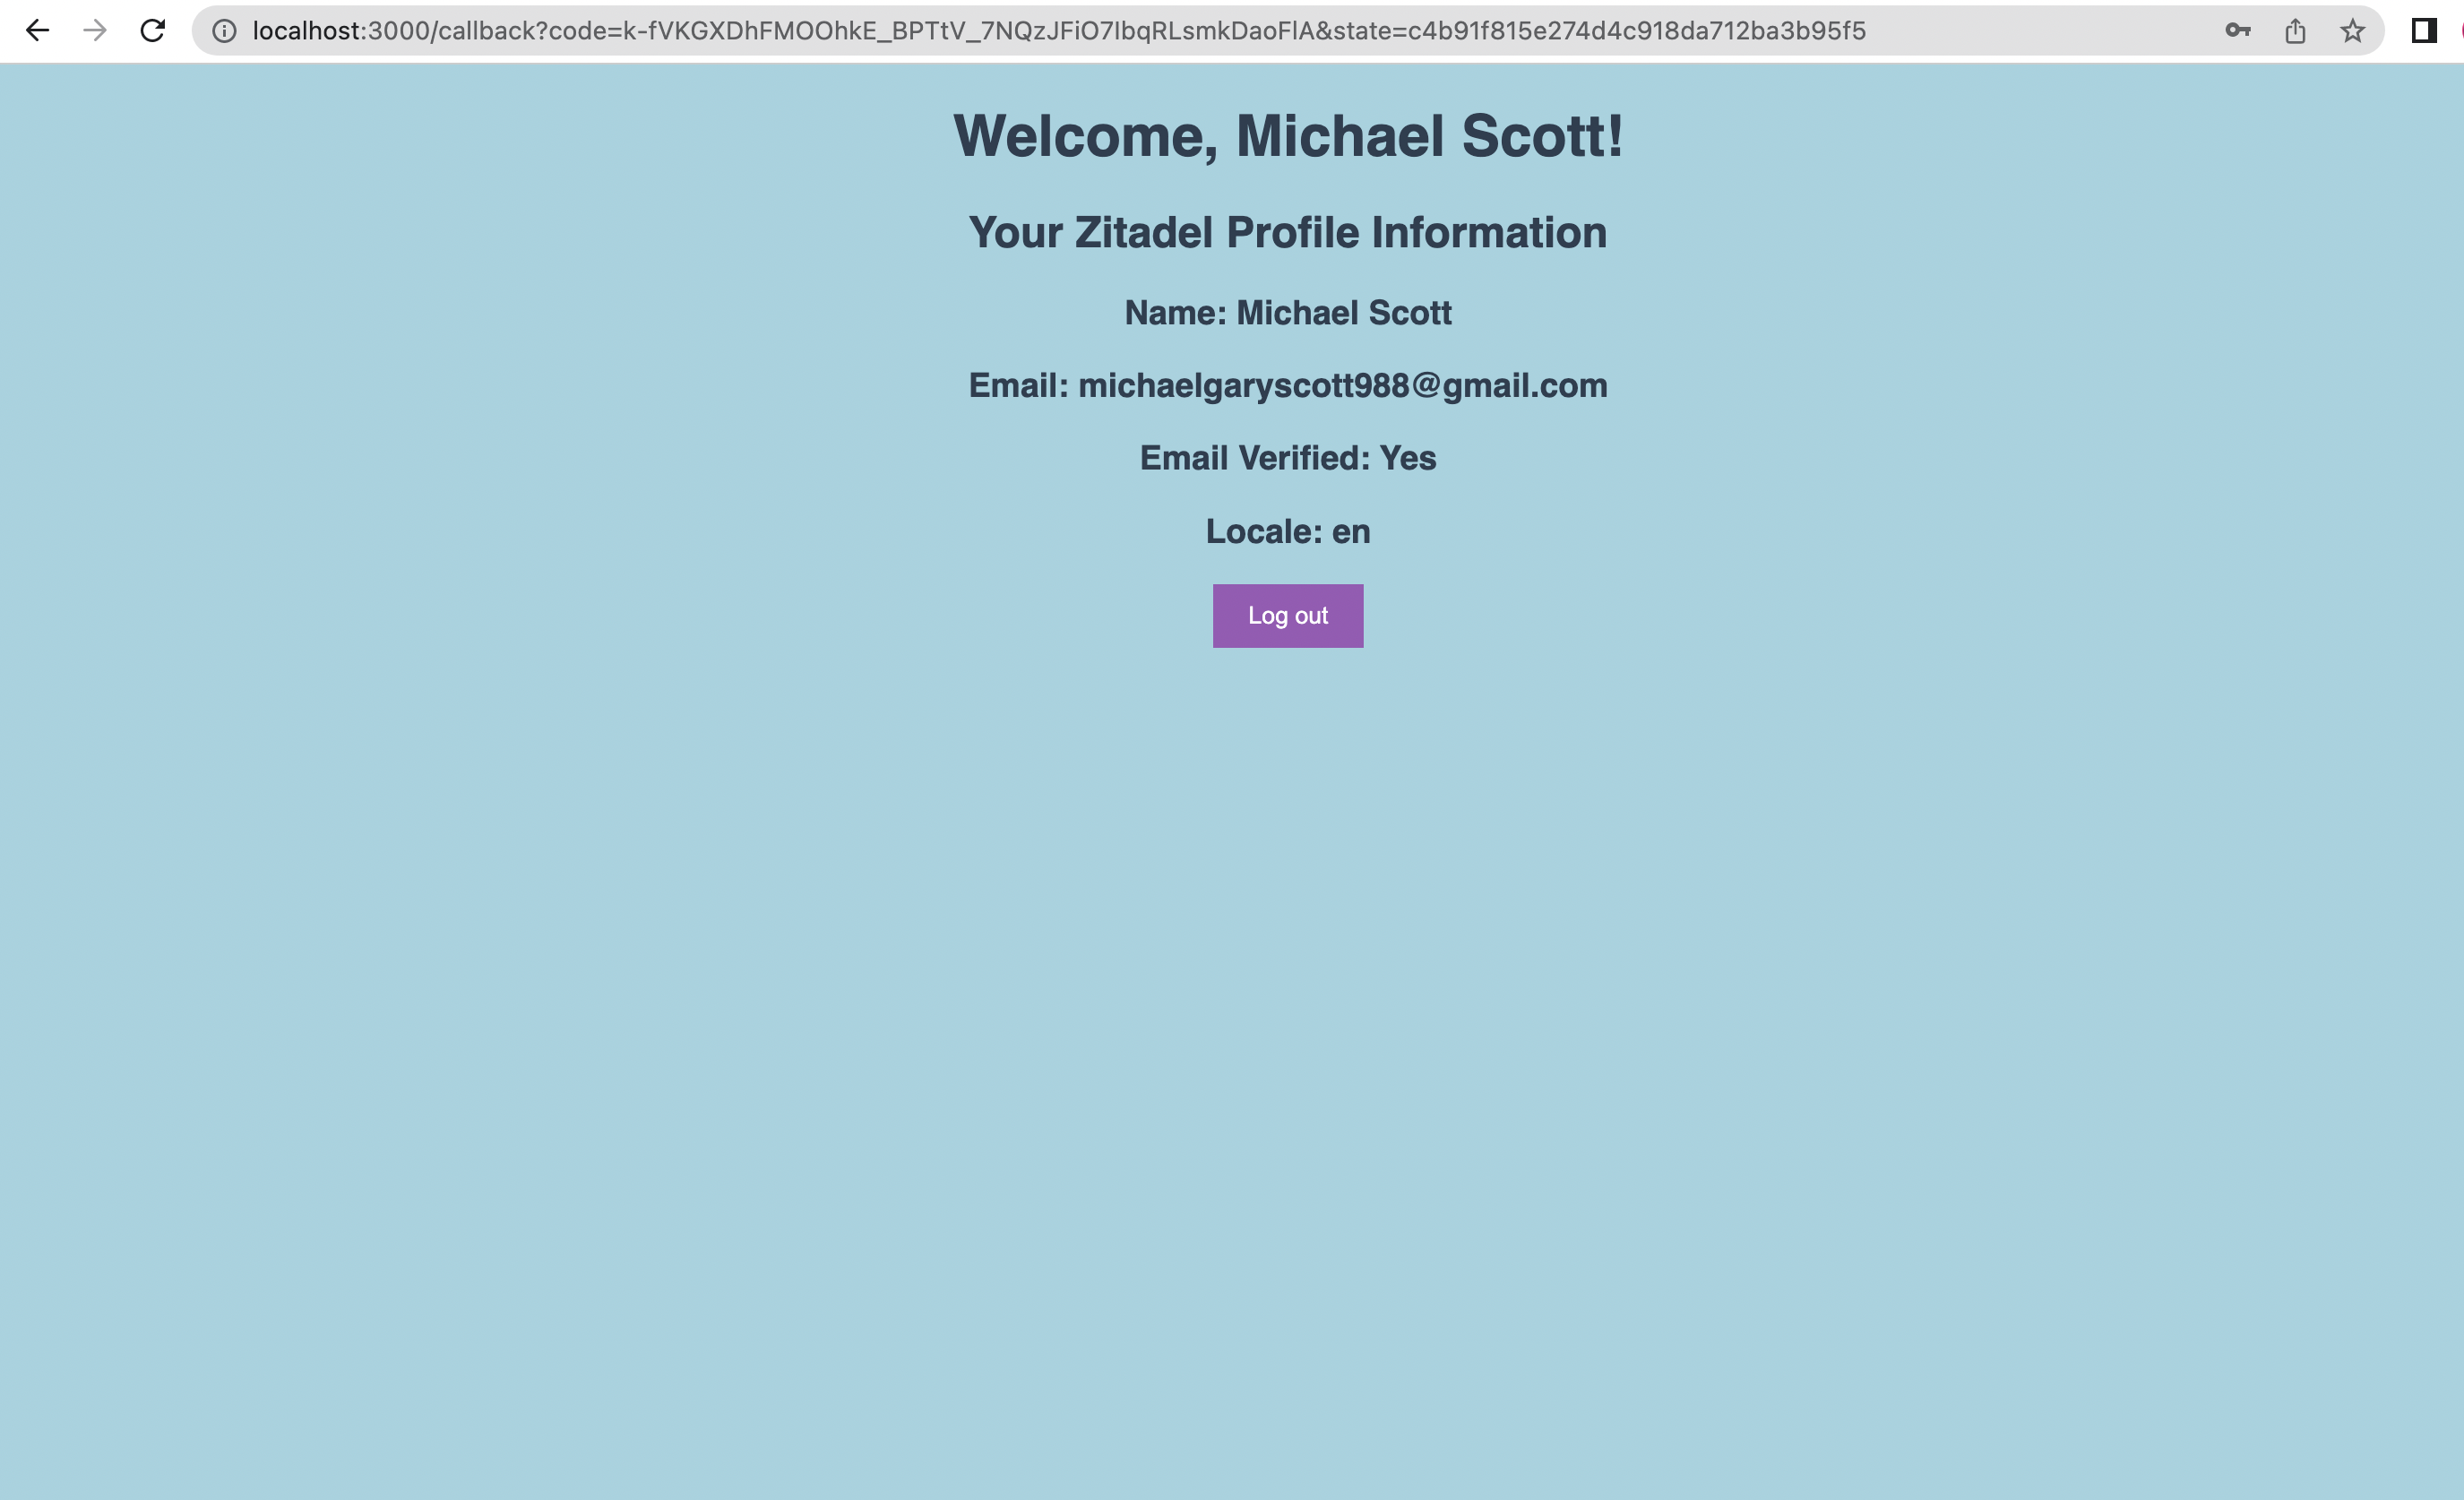
- If you entered the correct login credentials (and if the PKCE parameters generated by the application match), you will be redirected to the callback page, which displays your user information.
- You can click on “Log out” to log out of the application and you will be taken to the landing page.
- To see if the user has been successfully logged out and the user session has been terminated, click on “Please log in”, which brings you to the following page. Select the same user you logged in with earlier.
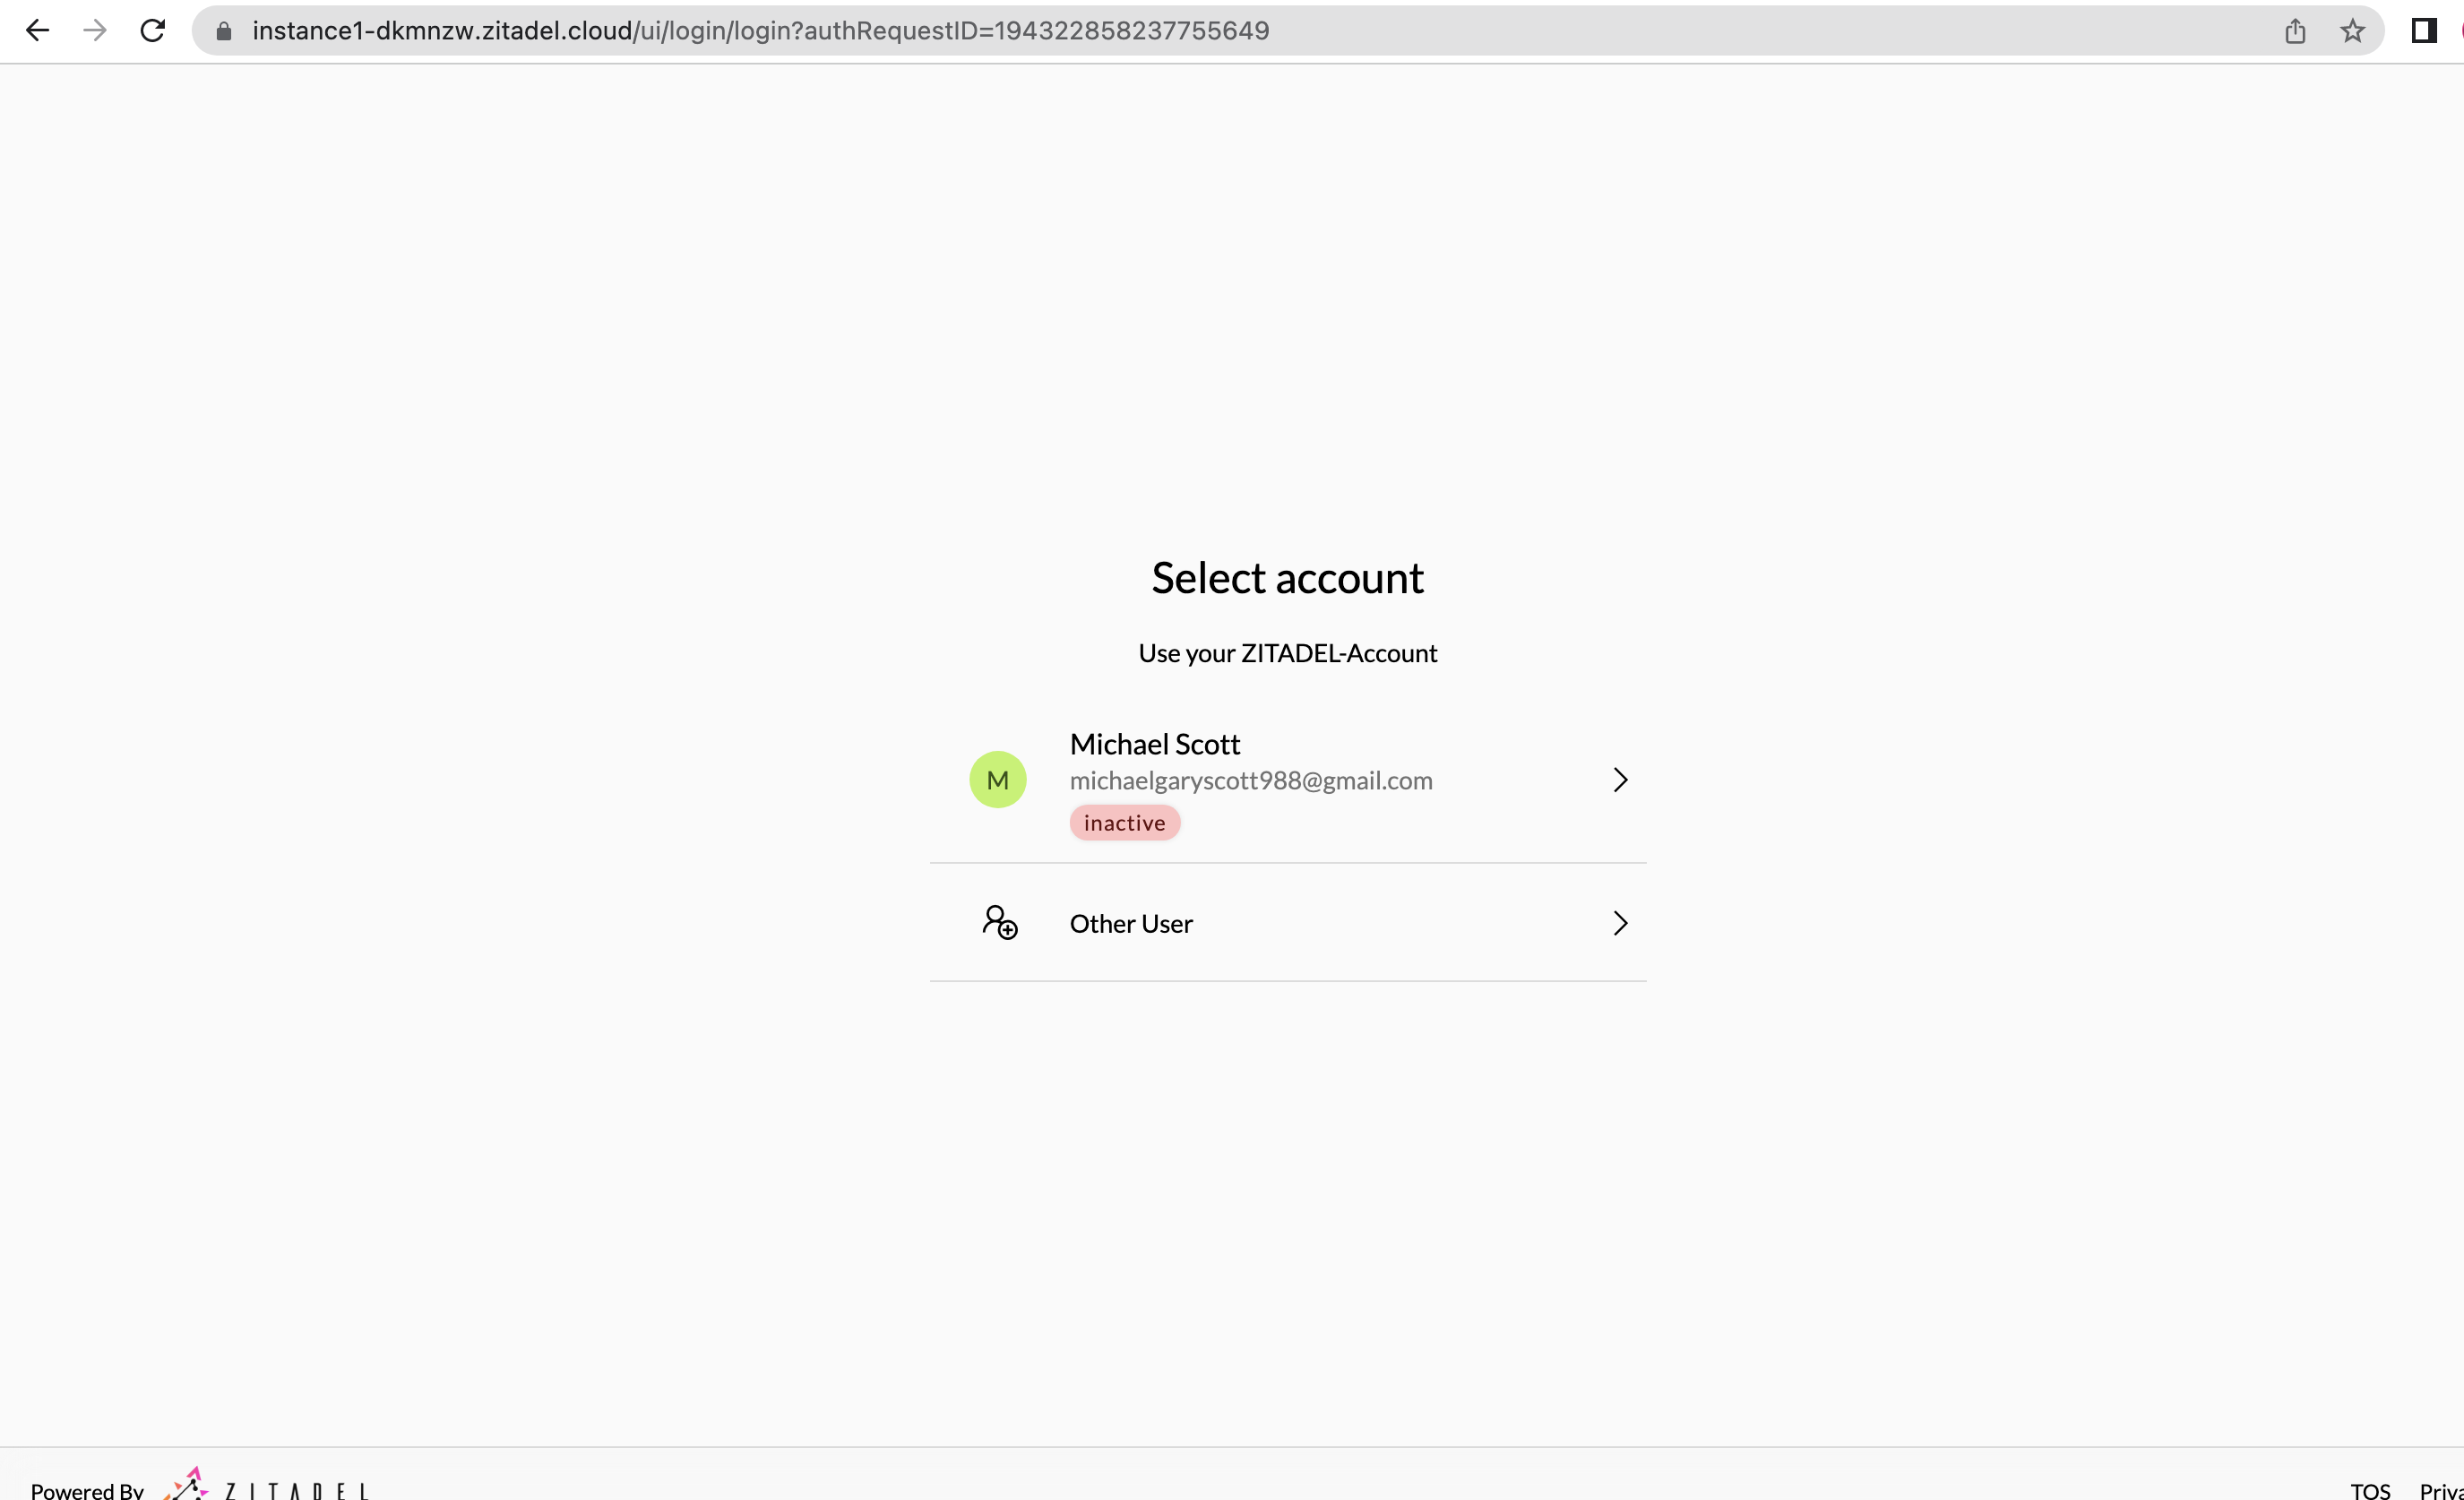
- You will see that since the login session was terminated after logging out, the user has to enter his password again.
And this brings us to the end of this quick start guide!
This tutorial covered how to configure ZITADEL and how to use React to build an app that communicates with ZITADEL to access secured resources.
We hope you enjoyed the tutorial and encourage you to check out the ZITADEL documentation for more information on how to use the ZITADEL platform to its full potential. Thanks for joining us!