Configure Google as Identity Provider
This configuration is based on the generic OIDC configuration. You can use the Google Template instead.
Register an external identity provider
In this step we will add a new Google identity provider to federate identities with ZITADEL.
1. Create new OIDC Client
- Register an OIDC Client in your preferred provider
- Make sure you add the ZITADEL callback redirect uris
- {your-domain}/ui/login/login/externalidp/callback
Information: Make sure the provider is OIDC 1.0 compliant with a proper Discovery Endpoint
Google Example:
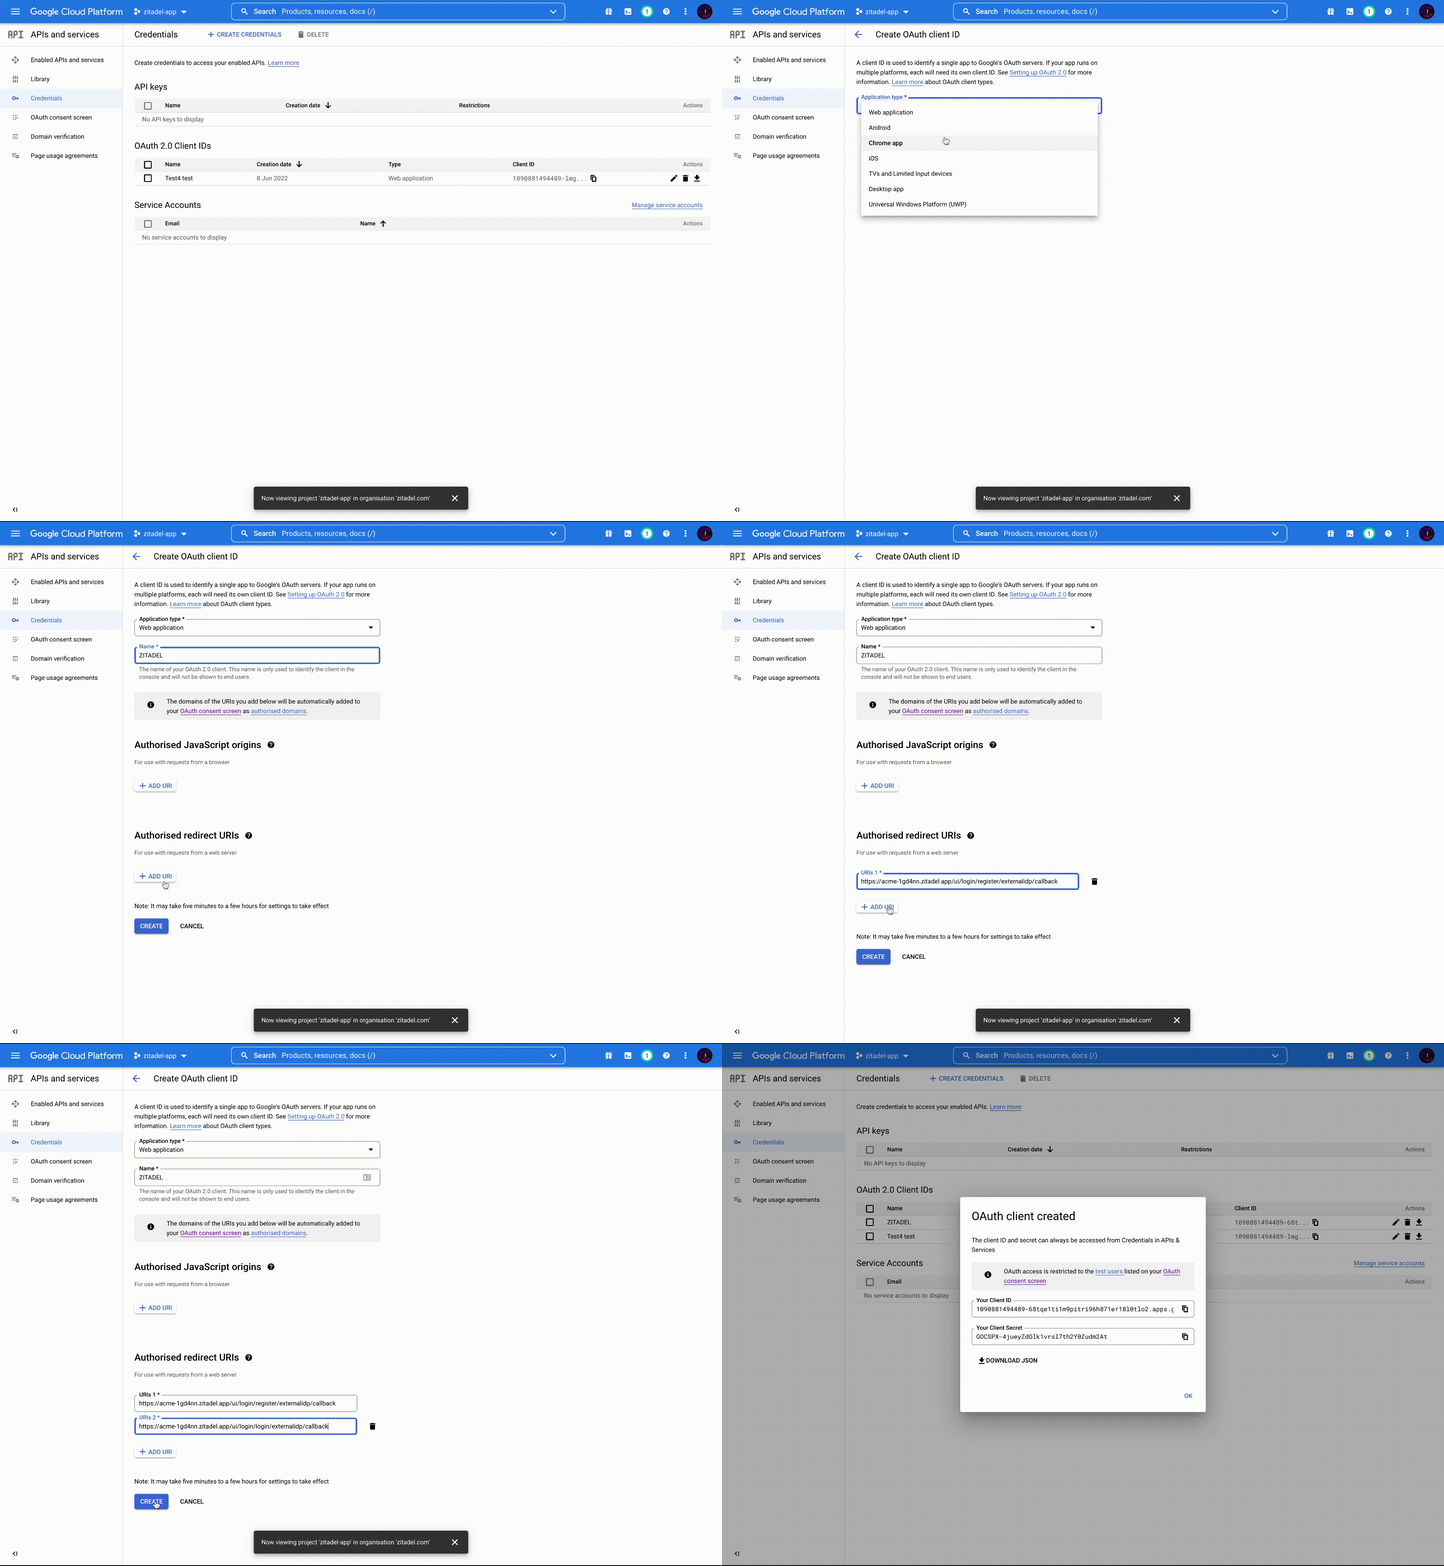
- Go to the Google Cloud Platform and choose your project: https://console.cloud.google.com/apis/credentials
- Click on "+ CREATE CREDENTIALS" and choose "OAuth client ID"
- Choose Web application as Application type and give a name
- Add the redirect uris
- {your-domain}/ui/login/register/externalidp/callback
- {your-domain}/ui/login/login/externalidp/callback
- Save clientid and client secret

2. Add custom login policy
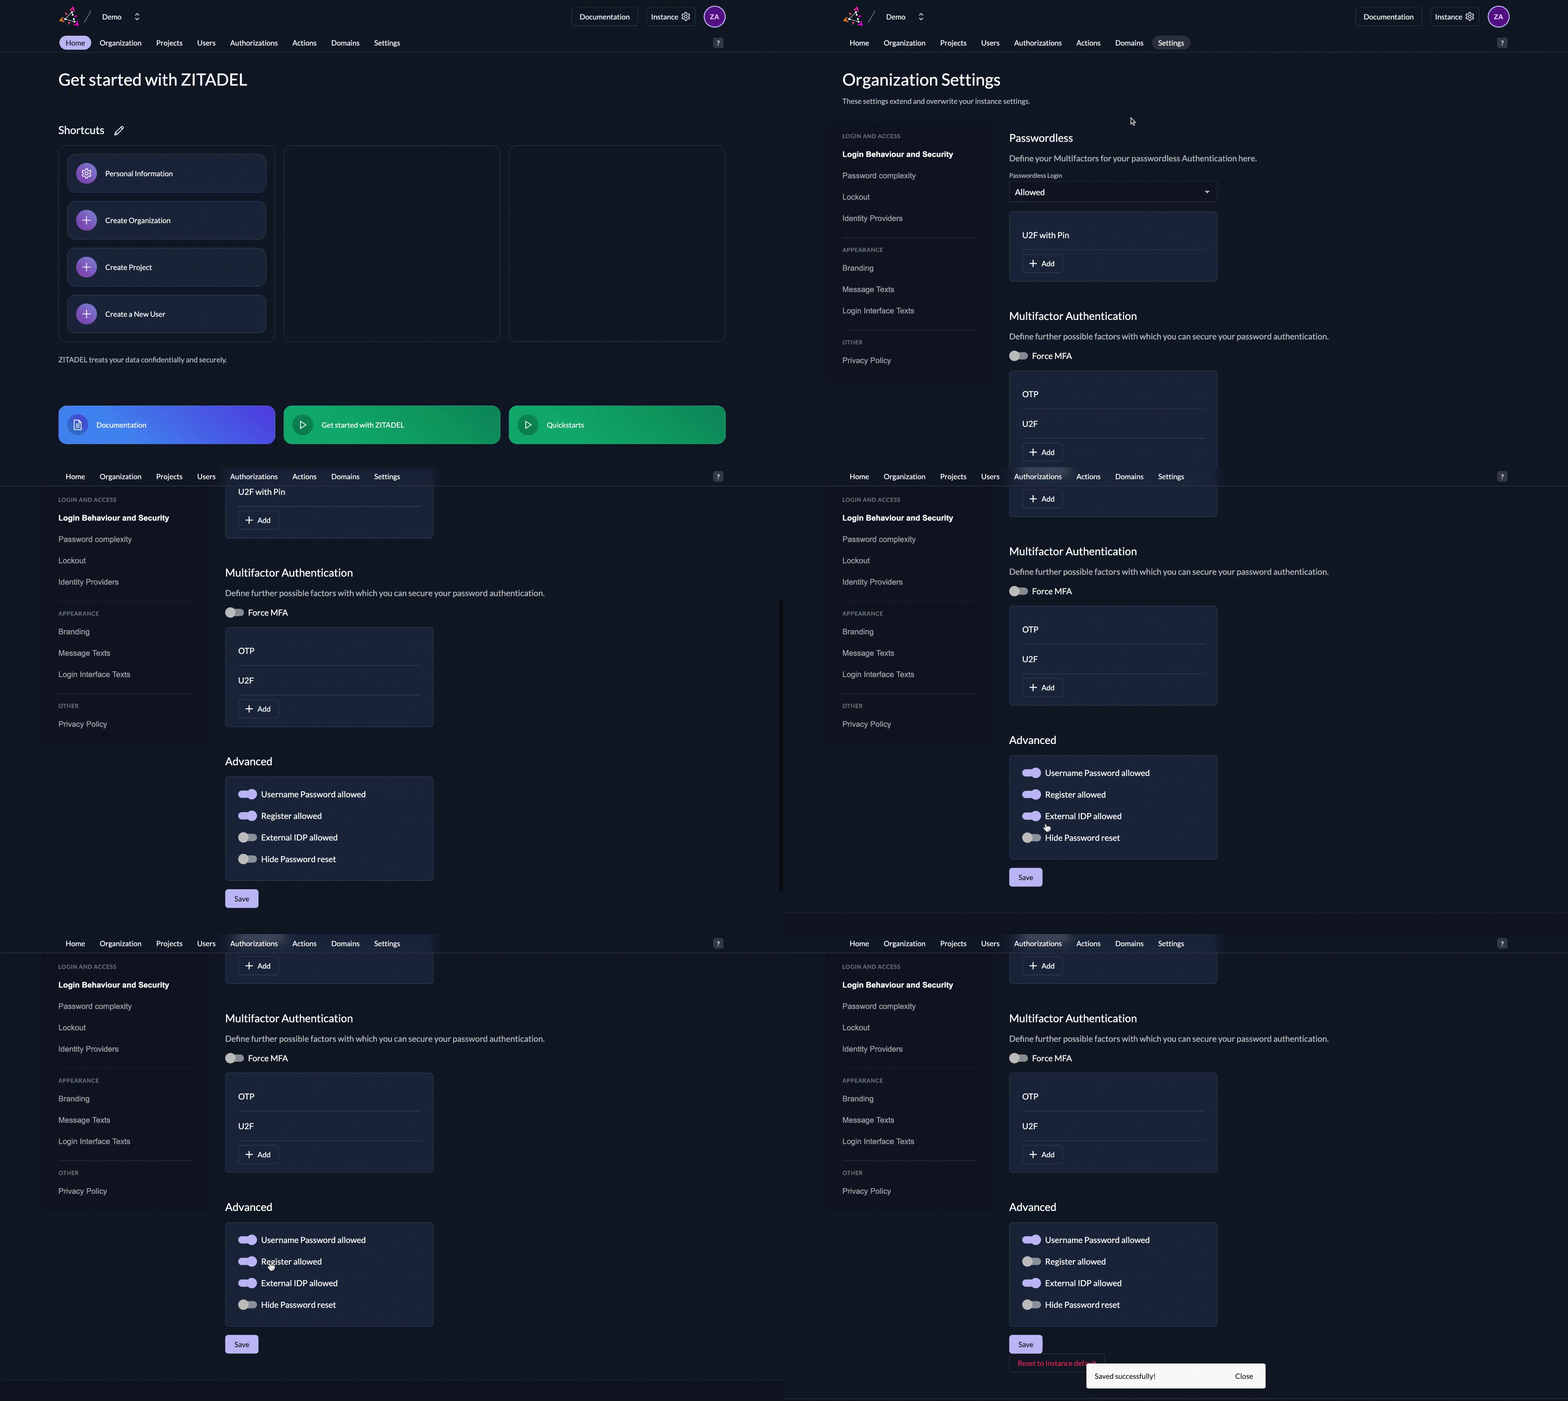
The login policy can be configured on two levels. Once as default on the instance and this can be overwritten for each organization. This case describes how to change it on the organization.
- Go to your organization settings by clicking on "Organization" in the menu
- Modify your login policy in the menu "Login Behavior and Security"

3. Configure new identity provider
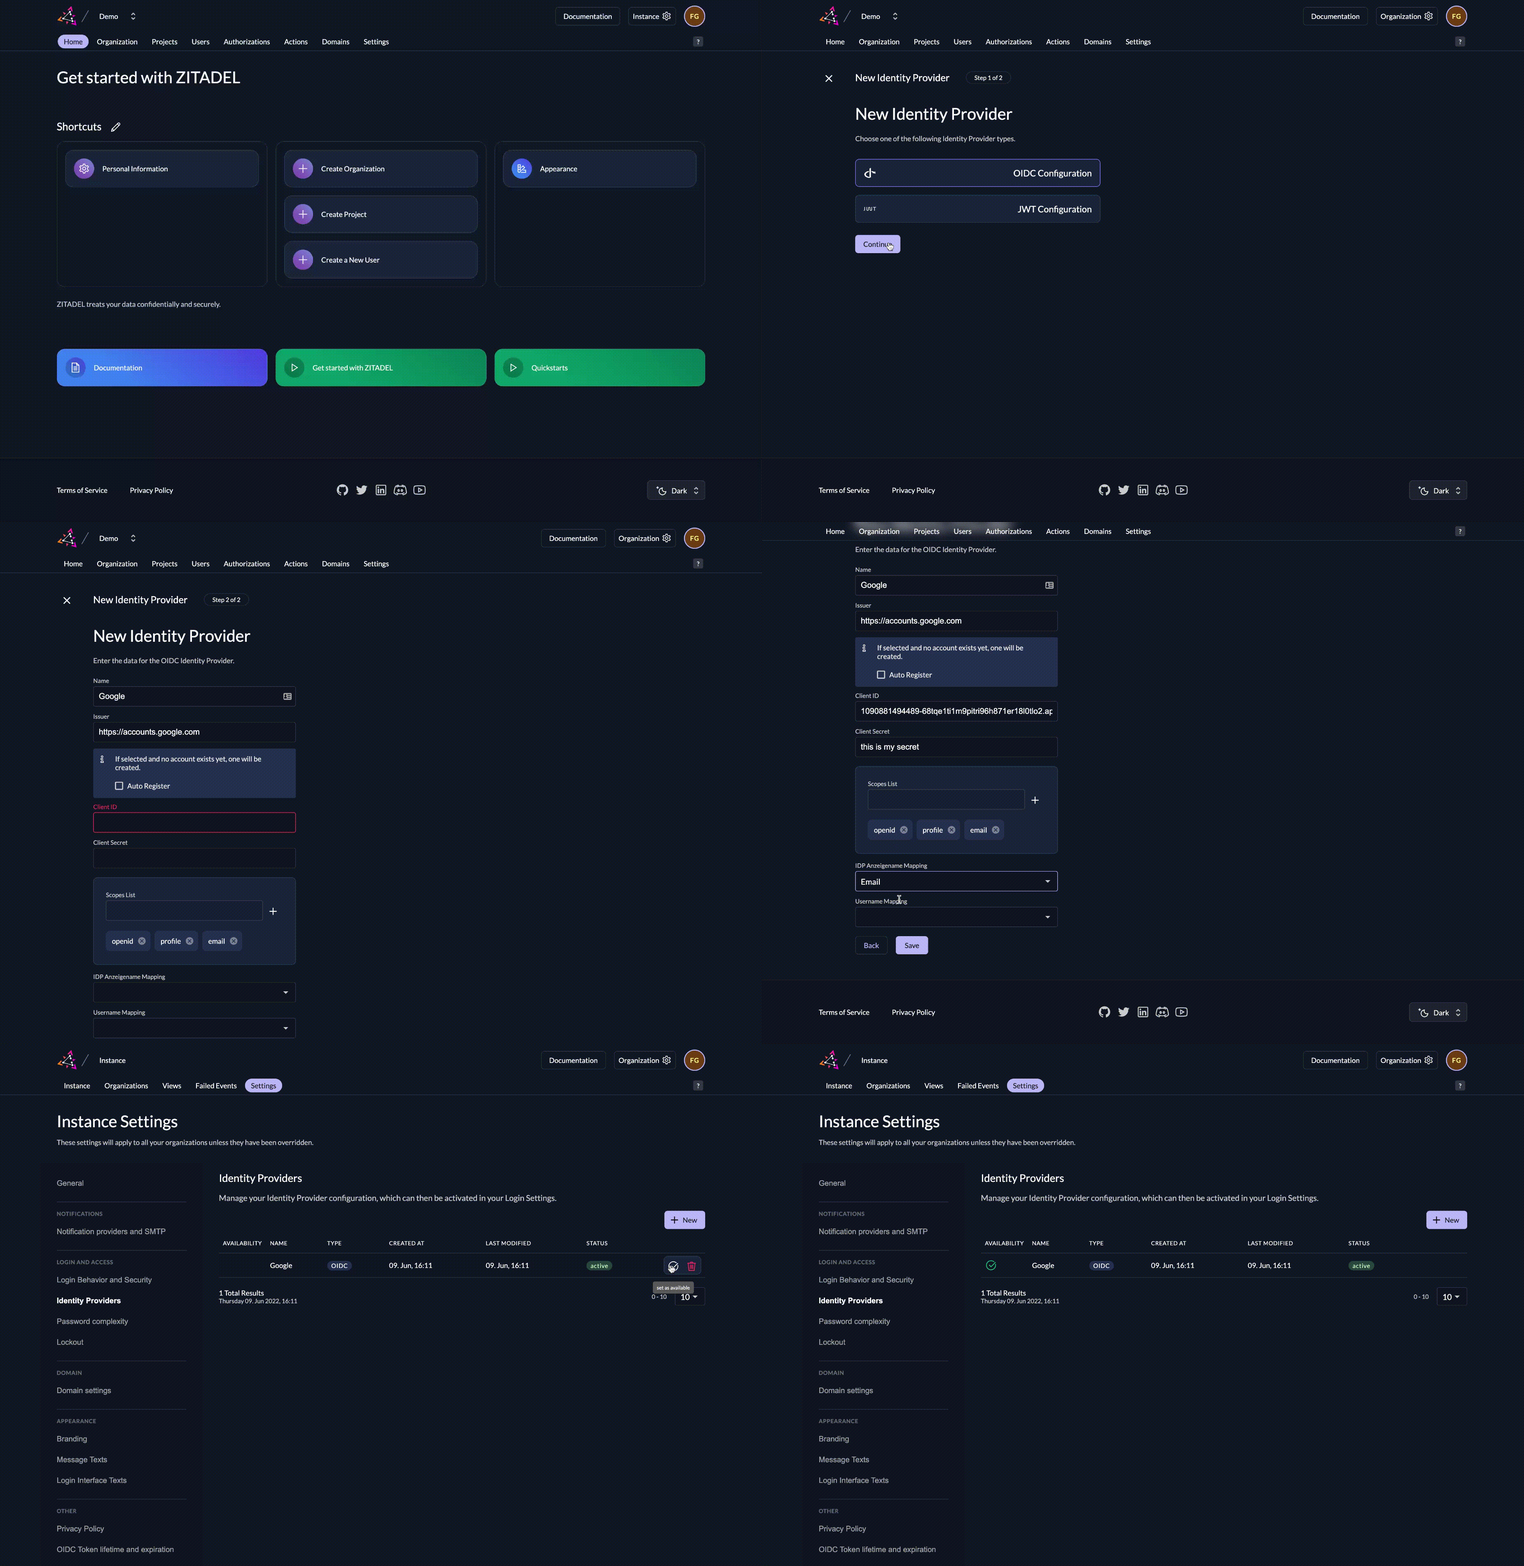
- Go to the settings of your instance or a specific organization (depending on where you need the identity provider)
- Go to the identity providers section and click "New"
- Select "OIDC Configuration" and fill out the form
- Use the issuer, clientid and client secret provided by your provider (Google Issuer: https://accounts.google.com)
- The scopes will be prefilled with openid, profile and email, because this information is relevant for ZITADEL
- You can choose what fields you like to map as the display name and as username. The fields you can choose are preferred_username and email (Example: For Google you should choose email for both fields)
- Save your configuration
- You will now see the created configuration in the list. Click on the activate icon at the end of the row you can see when hovering over the row, to activate it in the login flow.

4. Send the primary domain scope on the authorization request
ZITADEL will show a set of identity providers by default. This configuration can be changed by users with the manager role IAM_OWNER.
An organization's login settings will be shown
- as soon as the user has entered the loginname and ZITADEL can identify to which organization he belongs; or
- by sending a primary domain scope. To get your own configuration you will have to send the primary domain scope in your authorization request . The primary domain scope will restrict the login to your organization, so only users of your own organization will be able to login, also your branding and policies will trigger.
You need to create your own auth request with your applications parameters. Please see the docs to construct an Auth Request.
Your user will now be able to choose Google for login instead of username/password or mfa.