Next.js
This is our Zitadel Next.js template. It shows how to authenticate as a user and retrieve user information from the OIDC endpoint.
The template code is part of our zitadel-nextjs repo. Take a look here.
Getting Started
Install dependencies
To install the dependencies type:
yarn install
then to run the app:
npm run dev
then open http://localhost:3000 with your browser to see the result.
Setup Application and Get Keys
Before we can start building our application, we have to do a few configuration steps in ZITADEL Console.
You will need to provide some information about your app.
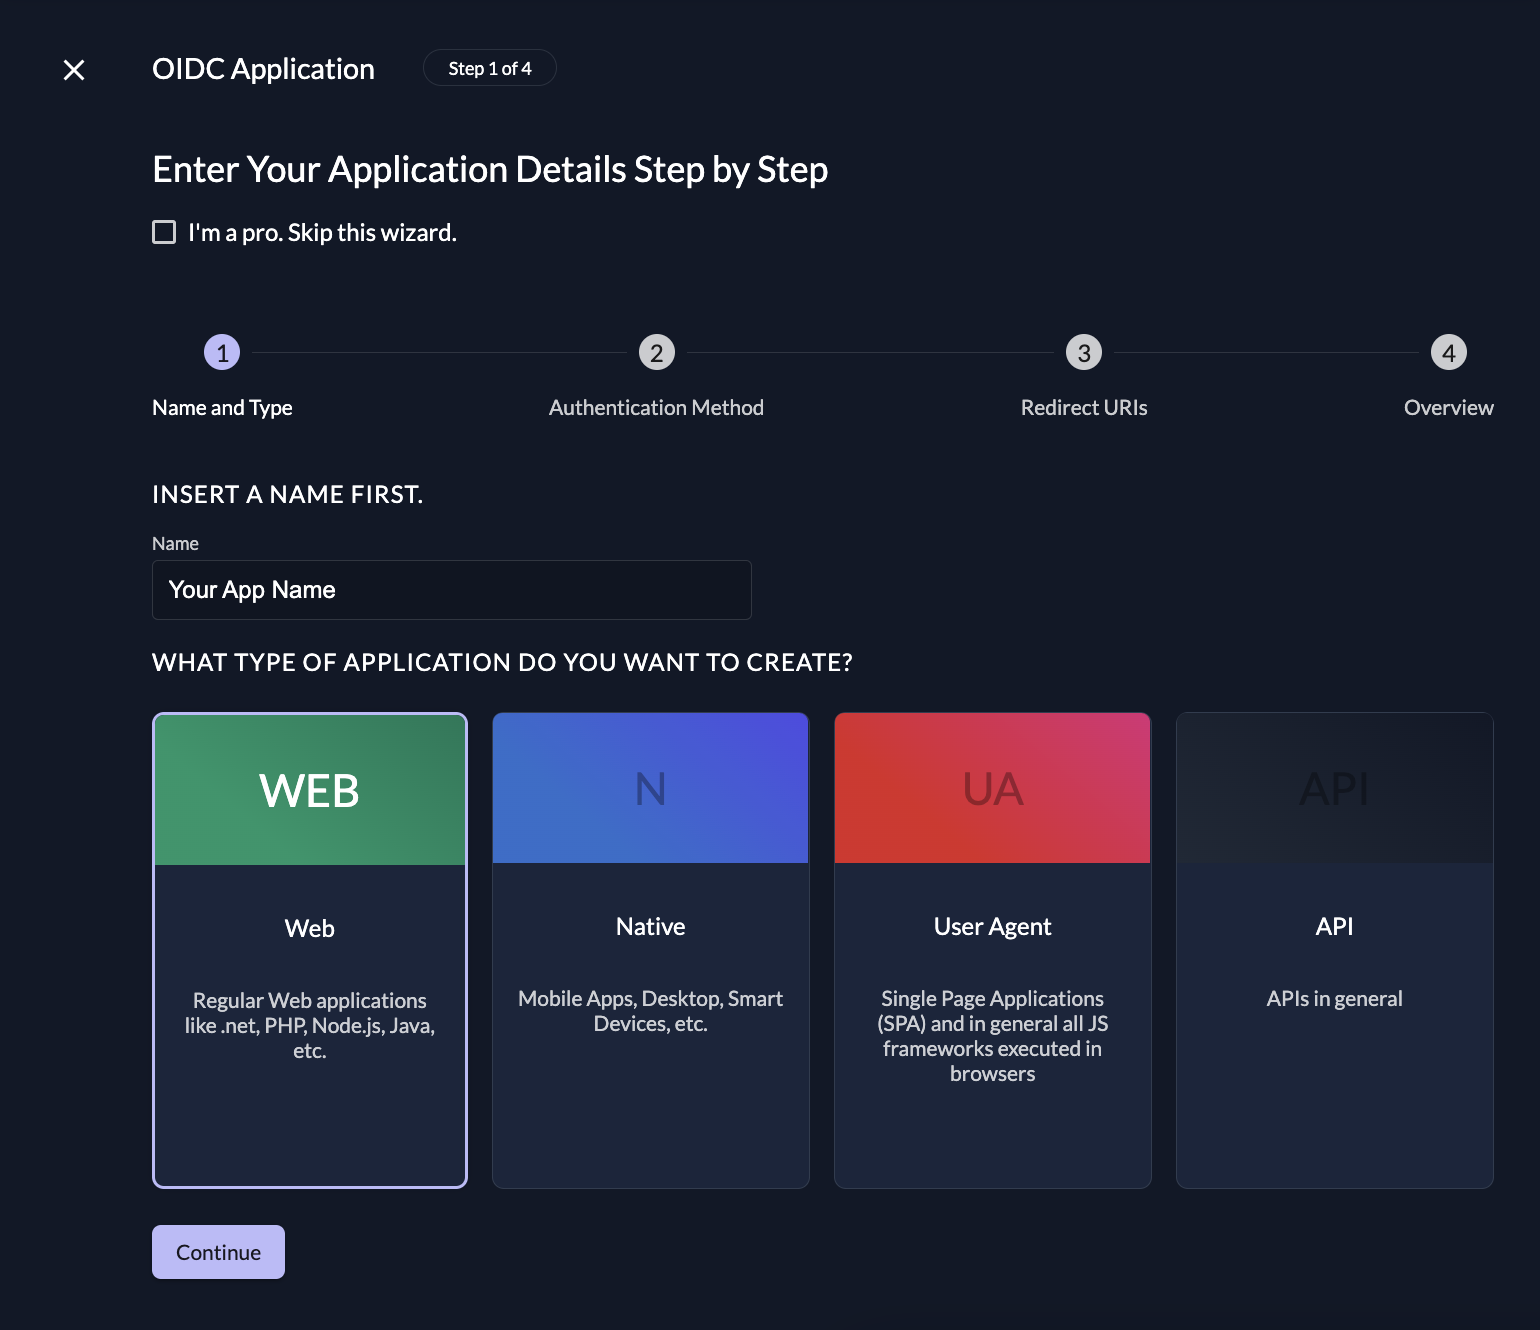
Navigate to your Project, then add a new application at the top of the page.
Select Web application type and continue.
We recommend you use Authorization Code in combination with Proof Key for Code Exchange (PKCE) for all web applications.
As the requests from your application to ZITADEL are made on NextJS serverside, you can select CODE in the next step. This makes sure you still get a secret which is then used in combination with PKCE. Note that the secret never gets exposed on the browser and is therefore kept in a confidential environment.
Redirect URIs
With the Redirect URIs field, you tell ZITADEL where it is allowed to redirect users to after authentication. For development, you can set dev mode to true to enable insecure HTTP and redirect to a localhost URI.
If you are following along with the example, set dev mode to
trueand the Redirect URIs to http://localhost:3000/api/auth/callback/zitadel.
If you want to redirect the users back to a route on your application after they have logged out, add an optional redirect in the Post Logout URIs field.
Continue and create the application.
Client ID
After successful app creation, a pop-up will appear, showing the app's client ID. Copy the client ID, as you will need it to configure your NextJS app.
NextJS Setup
Now that you have your web application configured on the ZITADEL side, you can go ahead and integrate your NextJS app.
Configuration
NextAuth.js exposes a REST API which is used by your client.
To setup your configuration, create a file called [...nextauth].tsx in pages/api/auth.
You can directly import the ZITADEL provider from next-auth.
loading...
You can overwrite the profile callback, just append it to the ZITADEL provider.
...
ZitadelProvider({
    issuer: process.env.ZITADEL_ISSUER,
    clientId: process.env.ZITADEL_CLIENT_ID,
    clientSecret: process.env.ZITADEL_CLIENT_SECRET,
    async profile(profile) {
        return {
          id: profile.sub,
          name: profile.name,
          firstName: profile.given_name,
          lastName: profile.family_name,
          email: profile.email,
          loginName: profile.preferred_username,
          image: profile.picture,
        };
    },
}),
...
If you want to request a refresh token, you can overwrite the JWT callback and add the offline_access scope.
...
async function refreshAccessToken(token: JWT): Promise<JWT> {
  try {
    const issuer = await Issuer.discover(process.env.ZITADEL_ISSUER ?? '');
    const client = new issuer.Client({
      client_id: process.env.ZITADEL_CLIENT_ID || '',
      token_endpoint_auth_method: 'none',
    });

    const { refresh_token, access_token, expires_at } = await client.refresh(token.refreshToken as string);

    return {
      ...token,
      accessToken: access_token,
      expiresAt: (expires_at ?? 0) * 1000,
      refreshToken: refresh_token, // Fall back to old refresh token
    };
  } catch (error) {
    console.error('Error during refreshAccessToken', error);

    return {
      ...token,
      error: 'RefreshAccessTokenError',
    };
  }
}
...
ZitadelProvider({
    issuer: process.env.ZITADEL_ISSUER,
    clientId: process.env.ZITADEL_CLIENT_ID,
    clientSecret: process.env.ZITADEL_CLIENT_SECRET,
    async profile(profile) {
        return {
          id: profile.sub,
          name: profile.name,
          firstName: profile.given_name,
          lastName: profile.family_name,
          email: profile.email,
          loginName: profile.preferred_username,
          image: profile.picture,
        };
    },
}),
...
We recommend using the Authentication Code flow secured by PKCE for the Authentication flow.
To be able to connect to ZITADEL, navigate to your Console Projects, create or select an existing project and add your app selecting WEB, then PKCE, and then add http://localhost:3000/api/auth/callback/zitadel as redirect url to your app.
For simplicity reasons we set the default to the one that next-auth provides us. You'll be able to change the redirect later if you want to.
Hit Create, then in the detail view of your application make sure to enable dev mode. Dev mode ensures that you can start an auth flow from a non https endpoint for testing.
Note that we get a clientId but no clientSecret because it is not needed for our authentication flow.
Now go to Token settings and check the checkbox for User Info inside ID Token to get your users name directly on authentication.
Environment
Create a file .env in the root of the project and add the following keys to it.
You can find your Issuer Url on the application detail page in console.
loading...
next-auth requires a secret for all providers, so just define a random value here.
User interface
Now we can start editing the homepage by modifying pages/index.tsx. On the homepage, your authenticated user or a Signin button is shown.
Add the following component to render the UI elements:
loading...
Note that the signIn method requires the id of our provider which is in our case zitadel.
Userinfo API
To show user information, you can either use the idToken data, or call the userinfo endpoint.
In this example, we call the userinfo endpoint to load user data.
To implement the API, you can create a file under the pages/api folder and call it userinfo.ts.
The file should look like the following.
loading...
Session state
To allow session state to be shared between pages - which improves performance, reduces network traffic and avoids component state changes while rendering - you can use the NextAuth.js Provider in /pages/_app.tsx.
Take a loot at the template _app.tsx.
loading...
Last thing: create a profile.tsx in /pages which renders the callback page.
loading...