Instance Settings
Instance settings work as default or fallback settings for your organizational settings. Most of the time you only have to set instance settings for the cases where you don't need specific behaviour in the organizations themselves or you only have one organization.
To access instance settings, use the instance page at {instanceDomain}/ui/console/settings or click at the instance button on the top-right of the page and then navigate to settings in the navigation.
When you configure your instance, you can set the following:
- General: Default Language for the UI
- Notification settings: Notification and Email Server settings, so initialization-, verification- and other mails are sent from your own domain. For SMS, Twilio is supported as notification provider.
- Login Behaviour and Access: Multifactor Authentication Options and Enforcement, Define whether Passwordless authentication methods are allowed or not, Set Login Lifetimes and advanced behavour for the login interface.
- Identity Providers: Define IDPs which are available for all organizations
- Password Complexity: Requirements for Passwords ex. Symbols, Numbers, min length and more.
- Lockout: Set the maximum attempts a user can try to enter the password. When the number is exceeded, the user gets locked out and has to be unlocked.
- Domain settings: Whether users use their email or the generated username to login. Other Validation, SMTP settings
- Branding: Appearance of the login interface.
- Message Texts: Text and internationalization for emails
- Login Interface Texts: Text and internationalization for the login interface
- Privacy Policy: Links to your own Terms of Service and Privacy Policy regulations. Link to Help Page.
- OIDC Token Lifetimes and Expiration: Token lifetime and expiration settings.
- Secret Appearance: Appearance of the generated codes and secrets used in mails for verification etc.
Branding
We recommend setting your Branding and SMTP settings initially as it will comfort your customers having a familiar UI for login and receiving notifications from your domain and mail addresses.
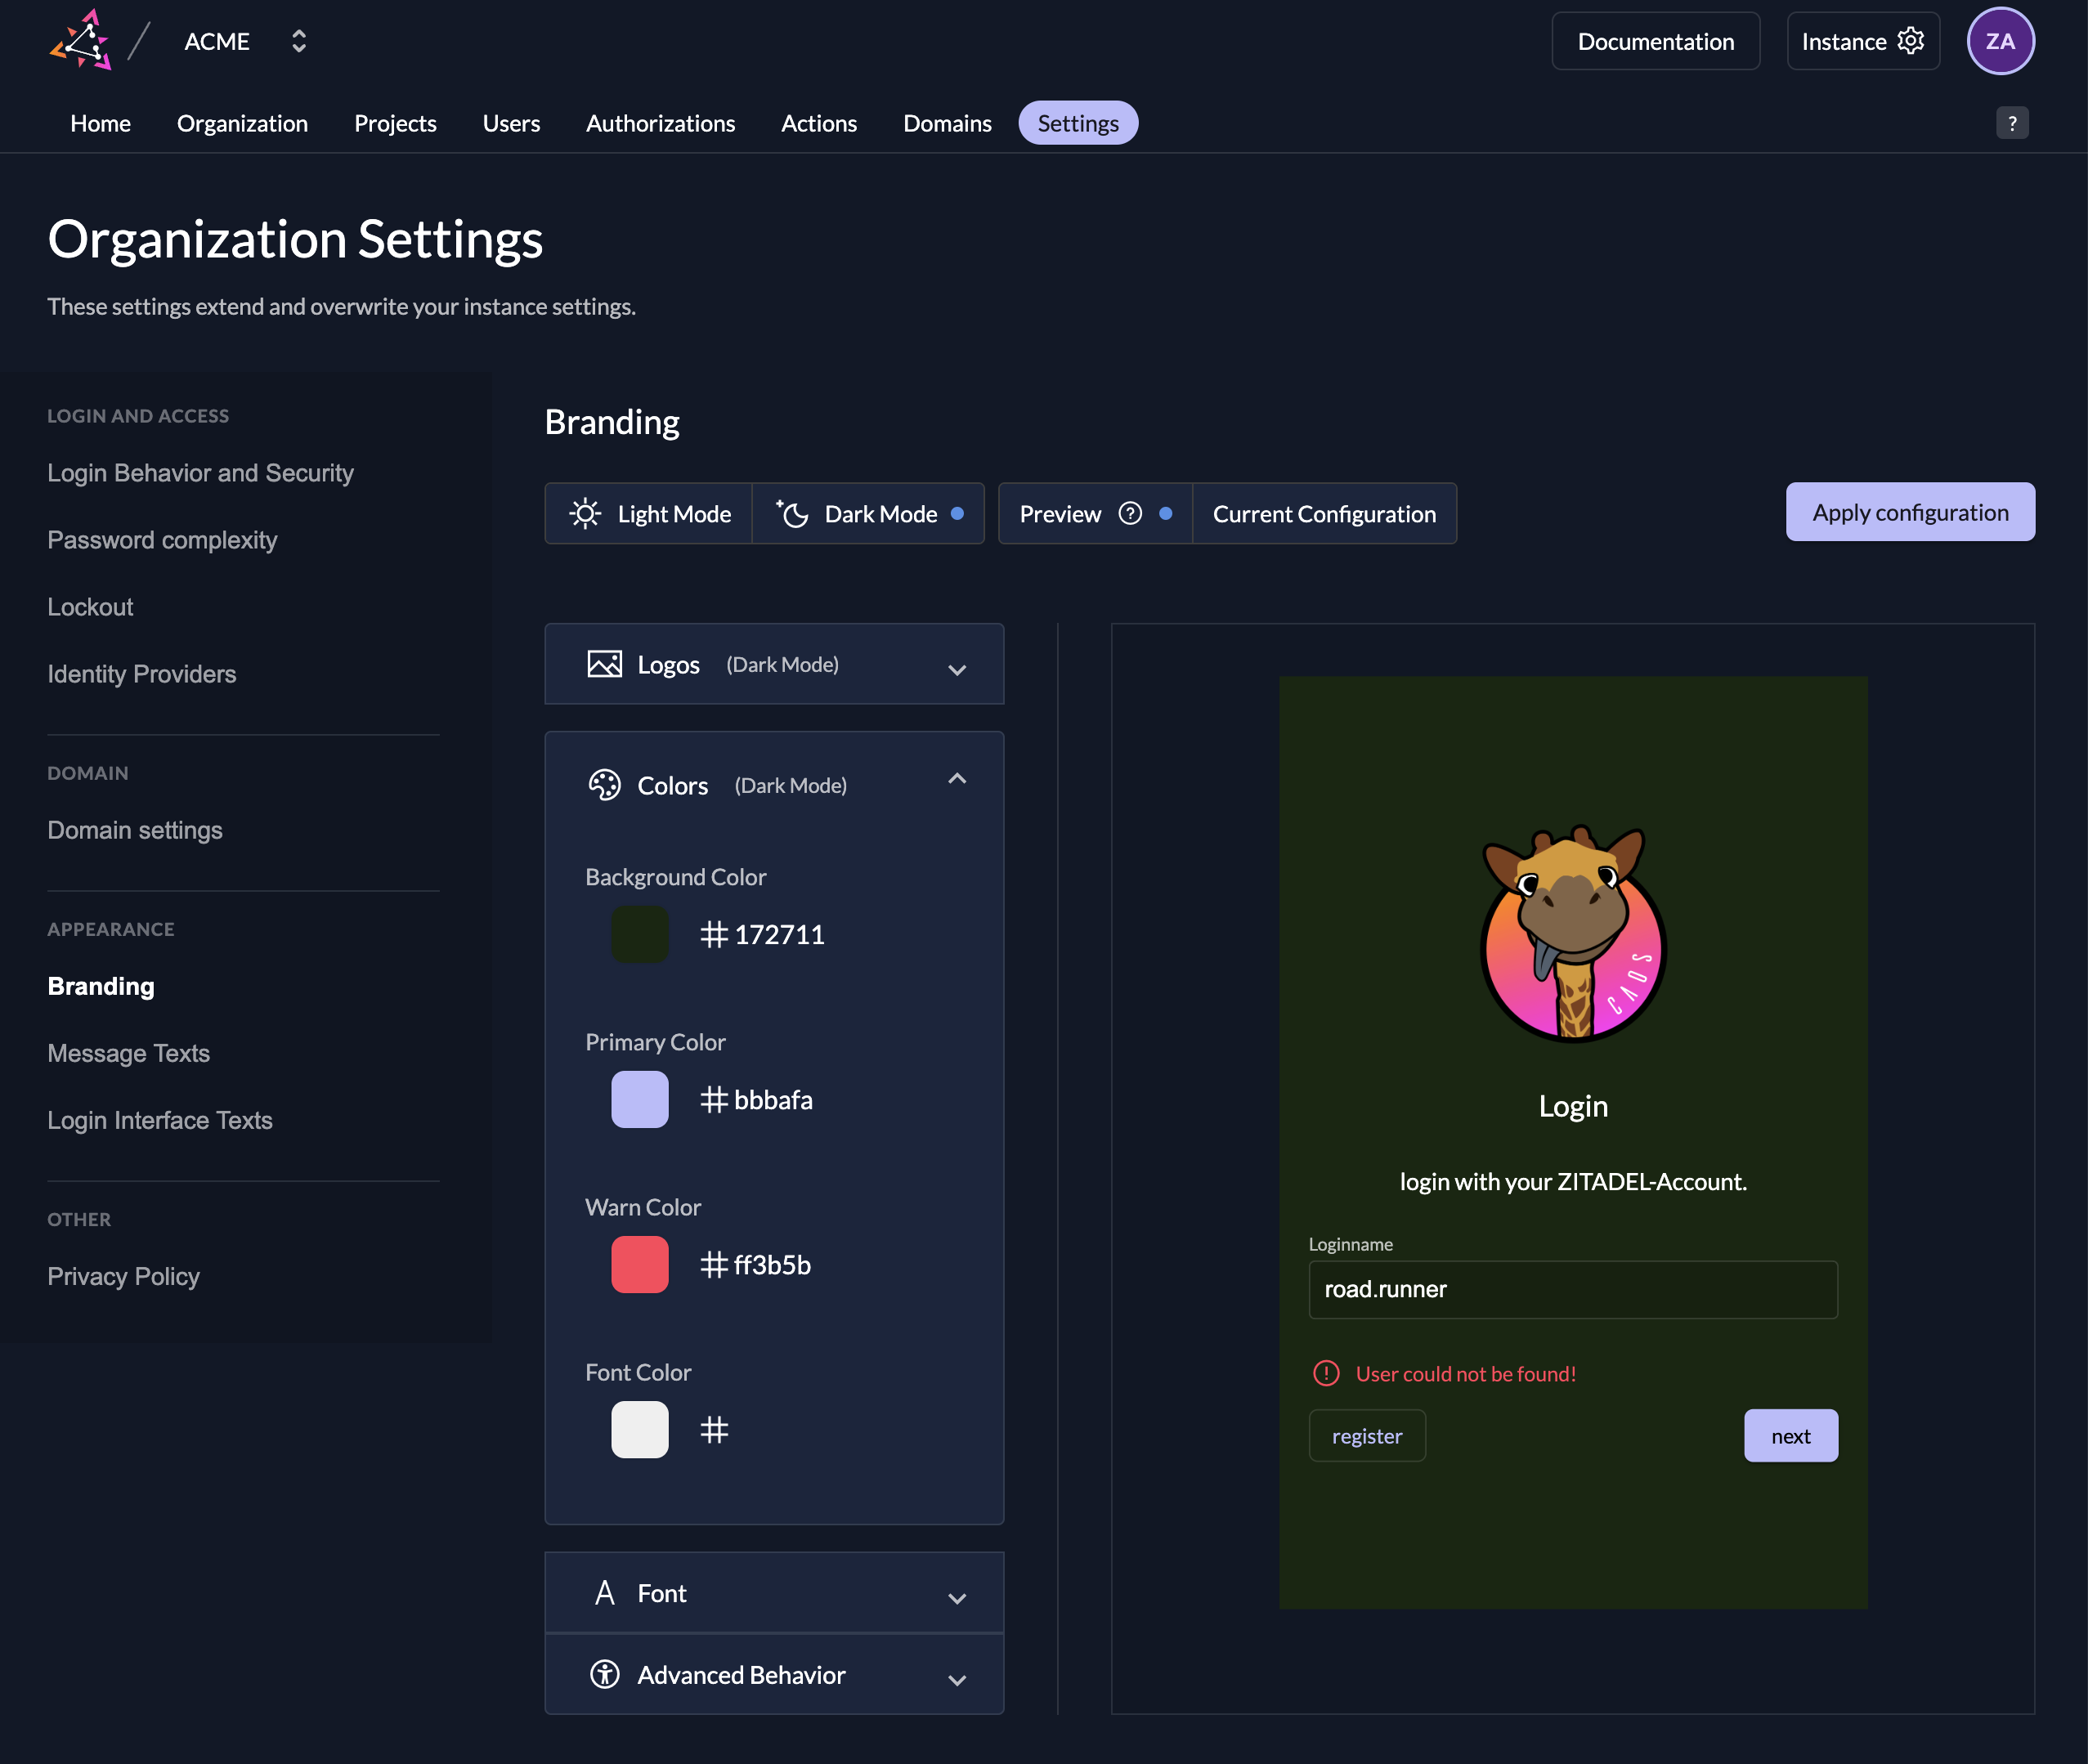
In the Branding settings, you can upload you Logo for the login interface, set your own colors for buttons, background, links, and choose between multiple behavours. You don't need to be an expert as those settings can all be set without any knowledge of CSS.
| Setting | Description |
|---|---|
| Logo | Upload your logo for the light and the dark design. This is used mainly in the login interface. |
| Icon | Upload your icon for the light and the dark design. Icons are used for smaller components. For example in console on the top left as the home button. |
| Colors | You can set four different colors to design your login page and email. (Background-, Primary-, Warn- and Font Color) |
| Font | Upload your custom font |
| Advanced Behaviour | Hide Loginname suffix: If enabled, your loginname suffix (Domain) will not be shown in the login page. Disable Watermark: If you disable the watermark you will not see the "Powered by ZITADEL" in the login page |
Make sure you click the "Apply configuration" button after you finish your configuration. This will ensure your design is visible for your customers.
Branding settings applied on you instance act as a default for all your organizations. If you need custom branding on a organization take a look at our guide under organization settiong.
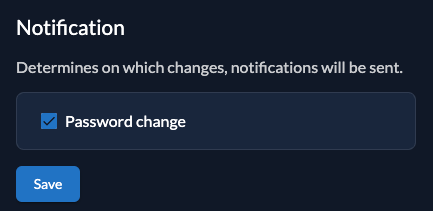
Notification settings
In the notification settings you can configure when to notify users about certain events and you can customize your SMTP Server settings and your SMS Provider. At the moment Twilio is available as SMS provider.
Notification
You can configure on which changes the users will be notified. The text of the message can be changed in the Message texts
SMTP
On each instance we configure our default SMTP provider. To make sure, that you only send some E-Mails from domains you own. You need to add a custom domain on your instance. Go to the ZITADEL customer portal to configure a custom domain.
To configure your custom SMTP please fill the following fields:
- Sender email address
- Sender name
- Enable or Disable Transport Layer Security (TLS)
- Host
- User
- SMTP Password
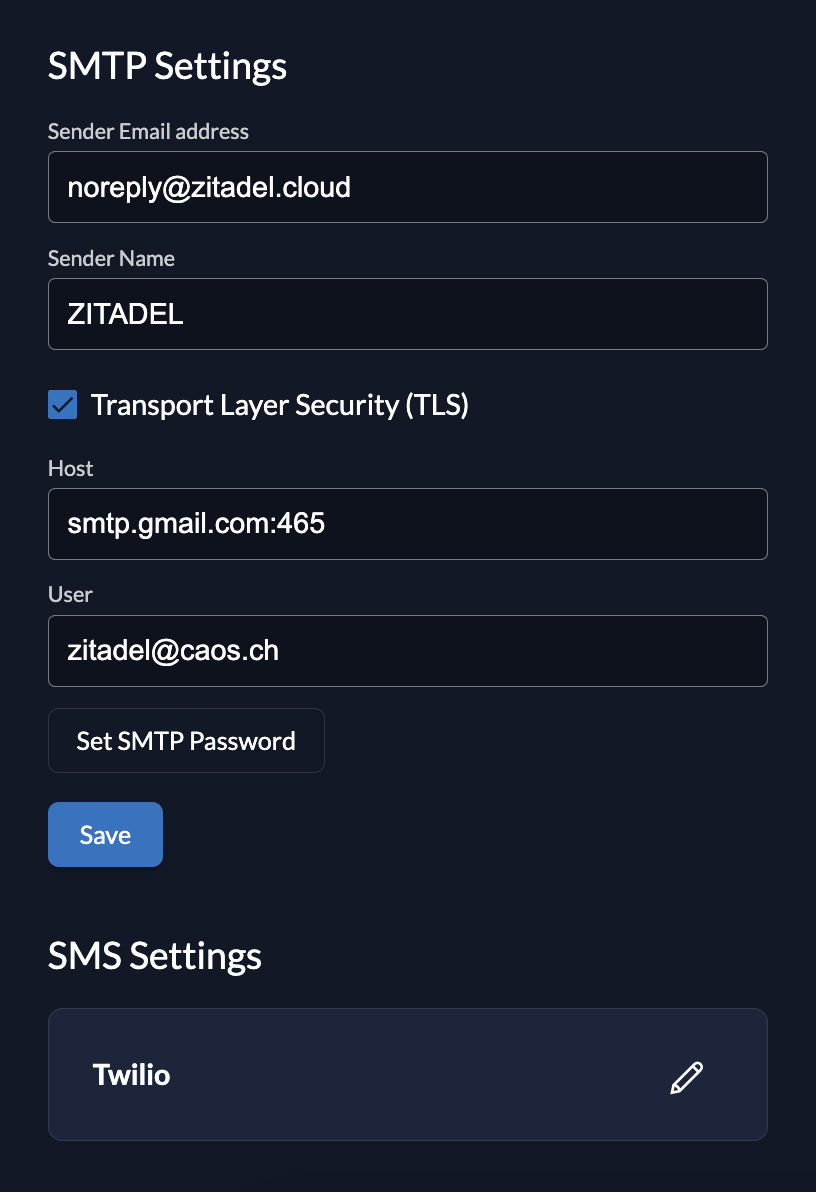
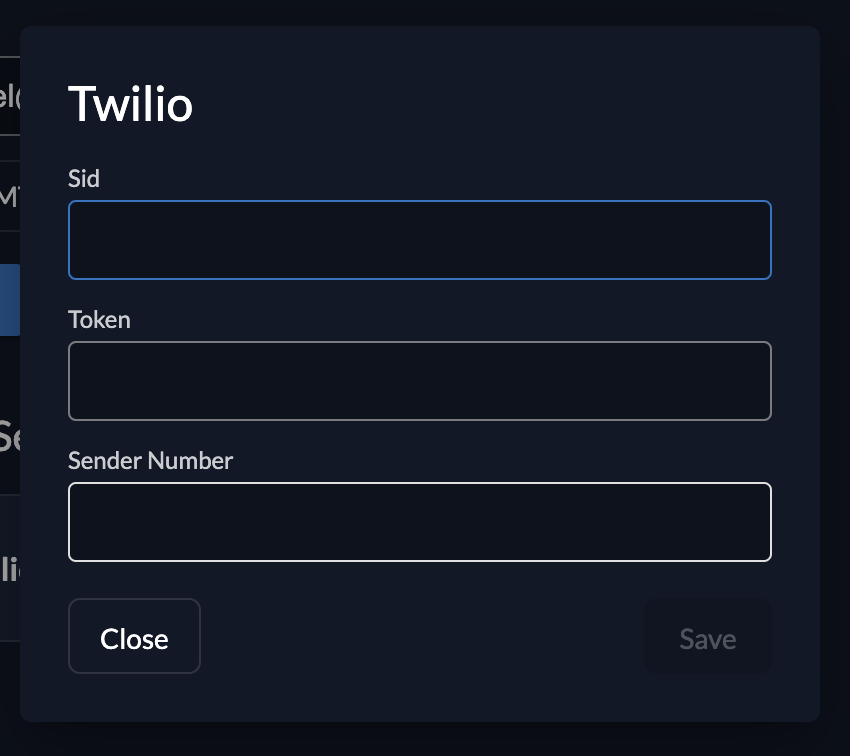
SMS
No default provider is configured to send some SMS to your users. If you like to validate the phone numbers of your users make sure to add your twilio configuration by adding your Sid, Token and Sender Number.
Login Behaviour and Access
The Login Policy defines how the login process should look like and which authentication options a user has to authenticate.
| Setting | Description |
|---|---|
| Username Password allowed | Possibility to login with username and password. If this is disabled only login with external identity providers will be allowed |
| Register allowed | Enable self register possibility in the login ui, this enables username password registration as well as registration with configured external identity providers |
| External IDP allowed | Possibility to login with an external identity (e.g Google, Microsoft, Apple, etc), If you like to allow external Identity providers add them to the providers list |
| Hide password reset | Disable the self-service option for users to reset their password. |
| Domain discovery allowed | If this setting is enabled, the user does't not mandatory have to exist when entering the username. It is required to have verified domains on the organization. Example: ZITADEL is registered as organization with the domain zitadel.com and AzureAD as identity provider. A user enters john@zitadel.com in the login but the user doesn't exist. The domain can be mapped to the organization and therefore the user can be redirected to the AzureAD. |
| Ignore unknown usernames | This setting can be enabled, if no error message should be shown if the user doesn't exist. Example: A user enters the login name john@zitadel.com, the user doesn't exist, but will be redirected to the password screen. After entering a password, the user will get an error that either username or password are wrong. |
| Disable login with email address | By default users can additionally login with the email attribute of their user. Check this option to disable. |
| Disable login with phone number | By default users can additionally login with the phonenumber attribute of their user. Check this option to disable. |
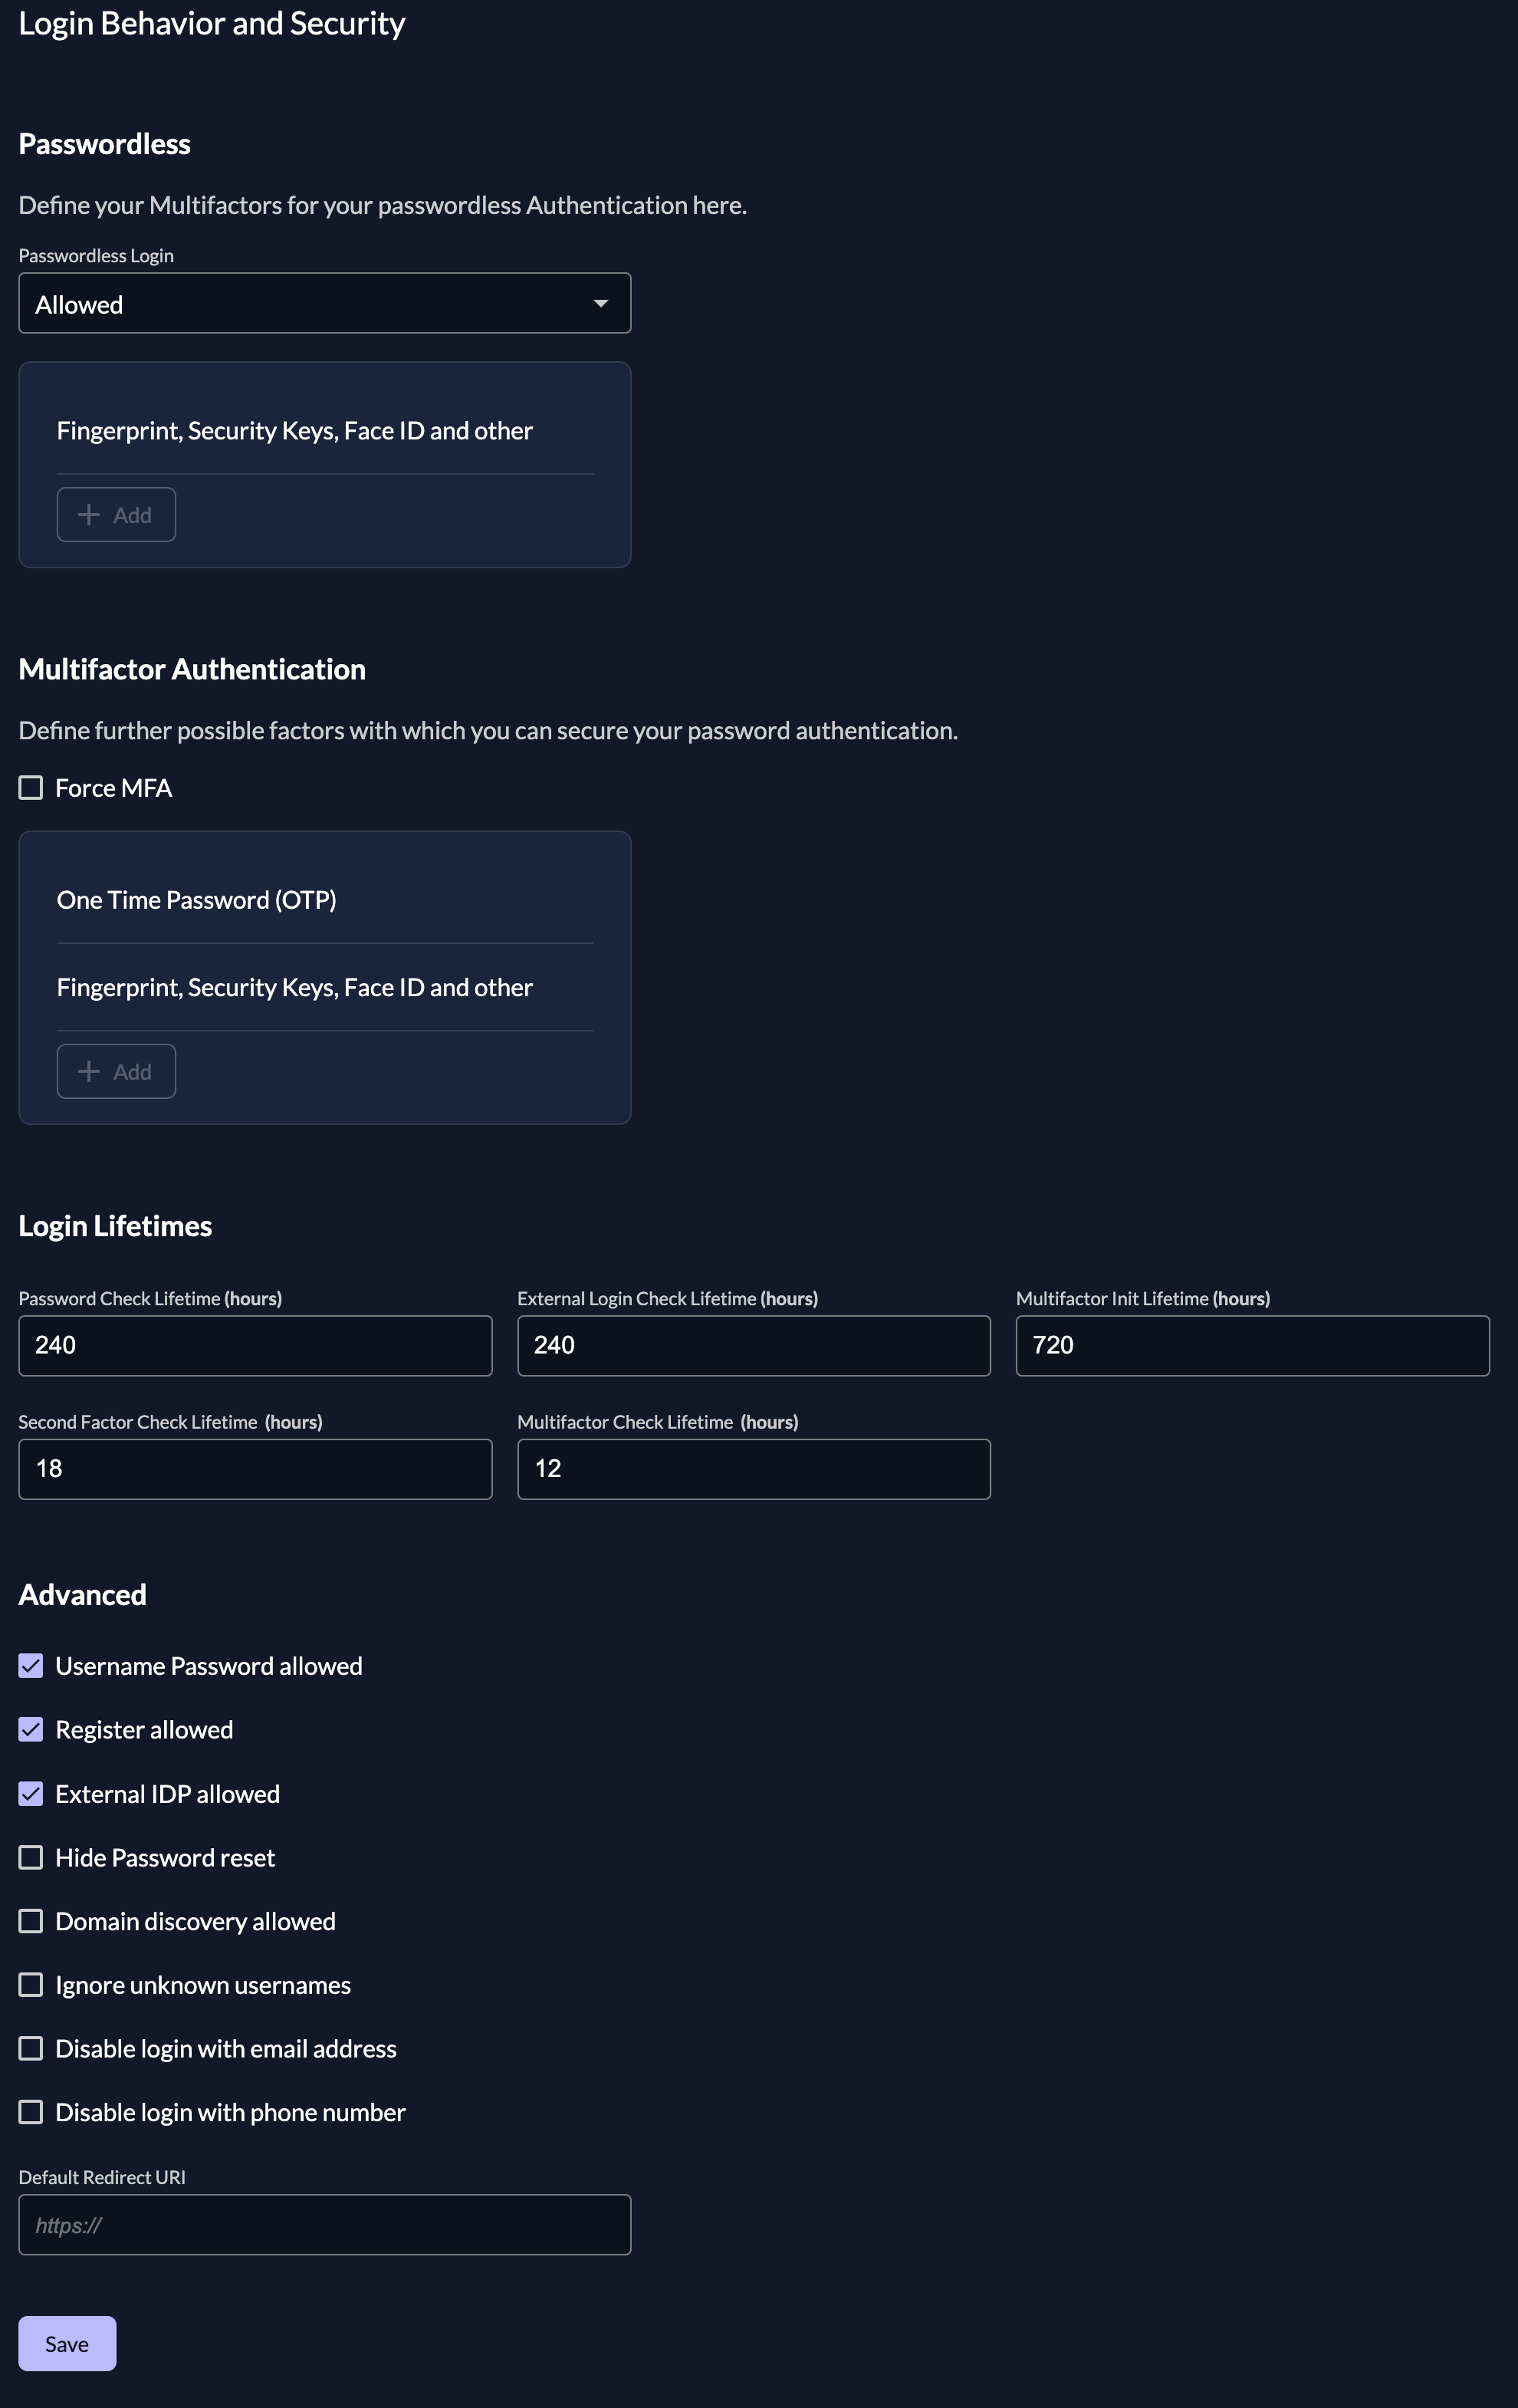
Passwordless
Passwordless authentication means that the user doesn't need to enter a password to login. In our case the user has to enter his loginname and as the next step proof the identity through a registered device or token. There are two different types one is depending on the device (e.g. Fingerprint, Face recognition, WindowsHello) and the other is independent (eg. Yubikey, Solokey).
Multifactor (MFA)
In the multifactors section you can configure what kind of multifactors should be allowed. For passwordless to work, it's required to enable U2F (Universial Second Factor) with PIN. There is no other option at the moment. Multifactors:
- U2F (Universal Second Factor) with PIN, e.g FaceID, WindowsHello, Fingerprint, Hardwaretokens like Yubikey
Secondfactors (2FA):
- OTP (One Time Password), Authenticator Apps like Google/Microsoft Authenticator, Authy, etc.
- U2F (Universal Second Factor), e.g FaceID, WindowsHello, Fingerprint, Hardwaretokens like Yubikey
Force a user to register and use a multifactor authentication, by checking the option "Force MFA". Ensure that you have added the MFA methods you want to allow.
Login Lifetimes
Configure the different lifetimes checks for the login process:
- Password Check Lifetime specifies after which period a user has to reenter his password during the login process
- External Login Check Lifetime specifies after which period a user will be redirected to the IDP during the login process
- Multifactor Init Lifetime specifies after which period a user will be prompted to setup a 2-Factor / Multi Factor during the login process (value 0 will deactivate the prompt)
- Second Factor Check Lifetime specifies after which period a user has to revalidate the 2-Factor during the login process
- External Login Check Lifetime specifies after which period a user has to revalidate the Multi Factor during the login process
Identity Providers
You can configure all kinds of external identity providers for identity brokering, which support OIDC (OpenID Connect). Create a new identity provider configuration and enable it in the list afterwards.
For a detailed guide about how to configure a new identity provider for identity brokering have a look at our identity provider guides.
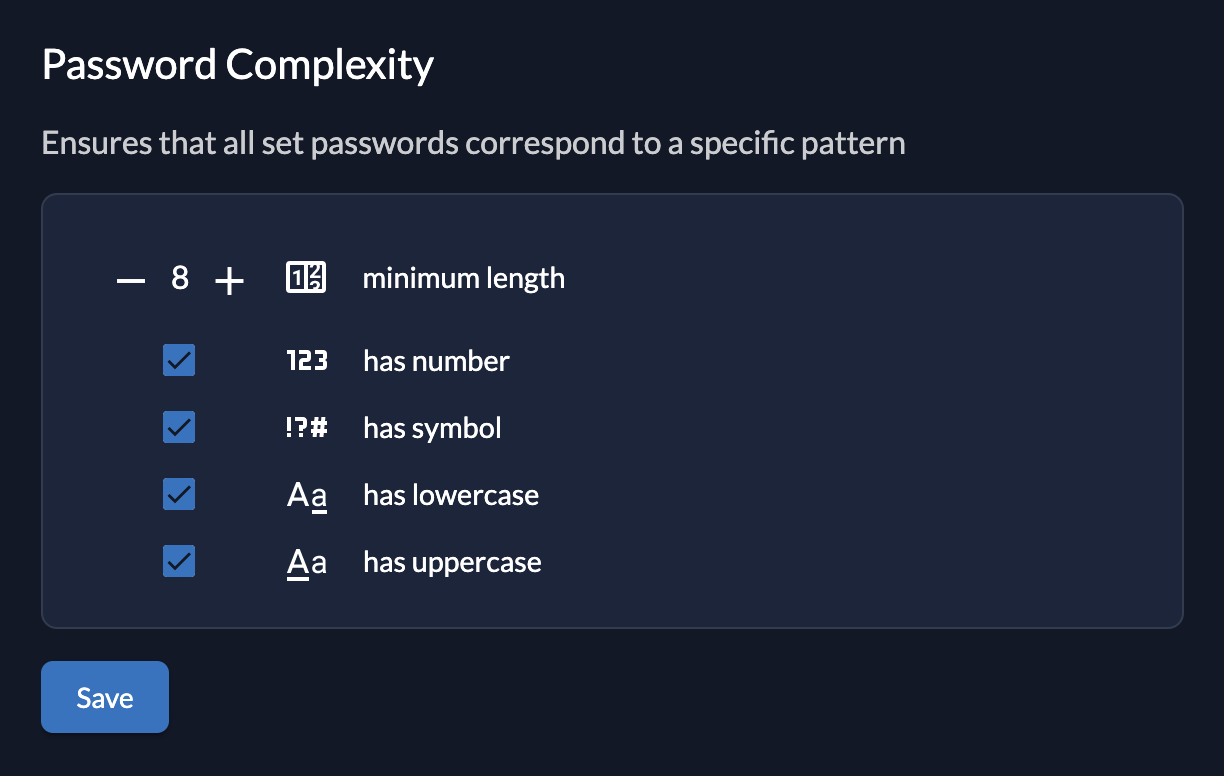
Password Complexity
With the password complexity policy you can define the requirements for a users password.
The following properties can be set:
- Minimum Length
- Has Uppercase
- Has Lowercase
- Has Number
- Has Symbol
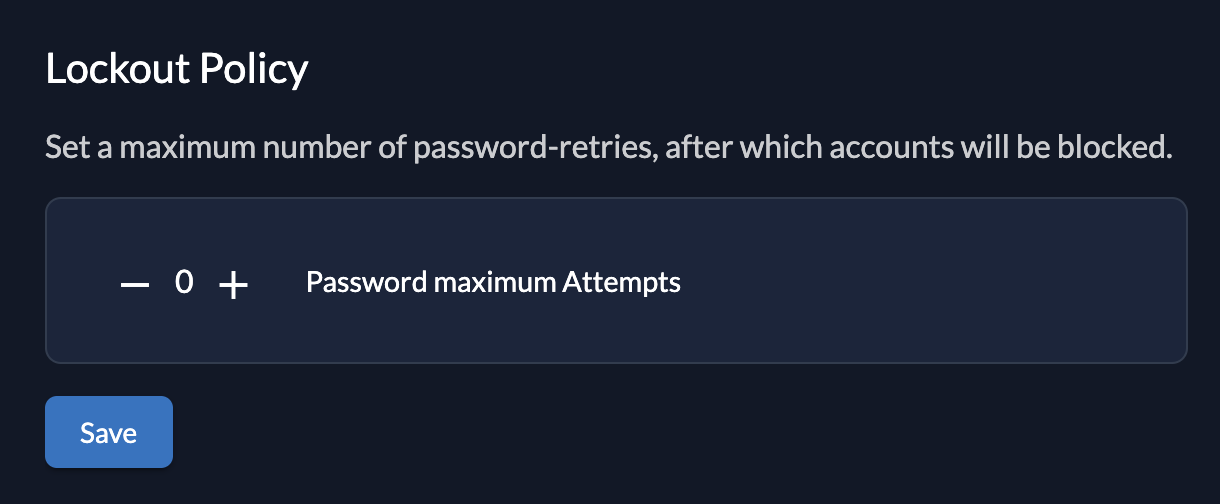
Lockout
Define when an account should be locked.
The following settings are available:
- Maximum Password Attempts: When the user has reached the maximum password attempts the account will be locked, If this is set to 0 the lockout will not trigger.
If an account is locked, the administrator has to unlock it in the ZITADEL console
Domain settings
Add organization domain as suffix to loginnames
If you enable this setting, all loginnames will be suffixed with the organization domain. If this settings is disabled, you have to ensure that usernames are unique over all organizations.
Validate Org domains
If this is enabled all created domains on an organization must be verified per dns/acme challenge.
More about how to verify a domain here. If it is set to false, all registered domain will automatically be created as verified and the users will be able to use the domain for login.
SMTP Sender Address matches Instance Domain
If enabled, the SMTP server address must match the instance's primary domain. With that you can ensure that users receive notifications from the same domain that is used for login.
Use email as username
To be able to use the email as username you have to disable the attribute "User Loginname must contain orgdomain" on your domain settings. This means that all your users will not be suffixed with the domain of your organization and you can enter the email as username. All usernames will then be globally unique within your instance.
You can either set this attribute on your whole ZITADEL instance or just on some specific organizations.
Please refer to the configuration guide for more information.
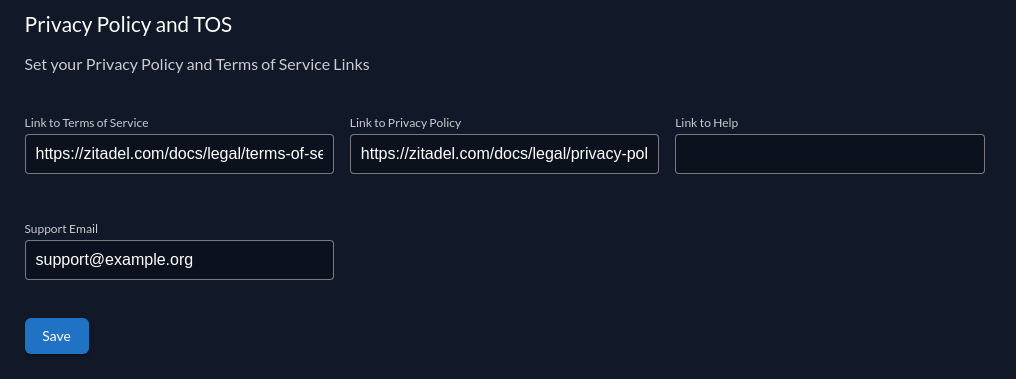
Privacy Policy and TOS
With this setting you are able to configure your privacy policy, terms of service, help links and help/support email address. On register each user has to accept these policies.
This policy can be also be overriden by your organizations.
When focused on an input field you can see the language attribute, which can then be integrated into your link.
Example:
https://demo.com/tos-{{.Lang}}
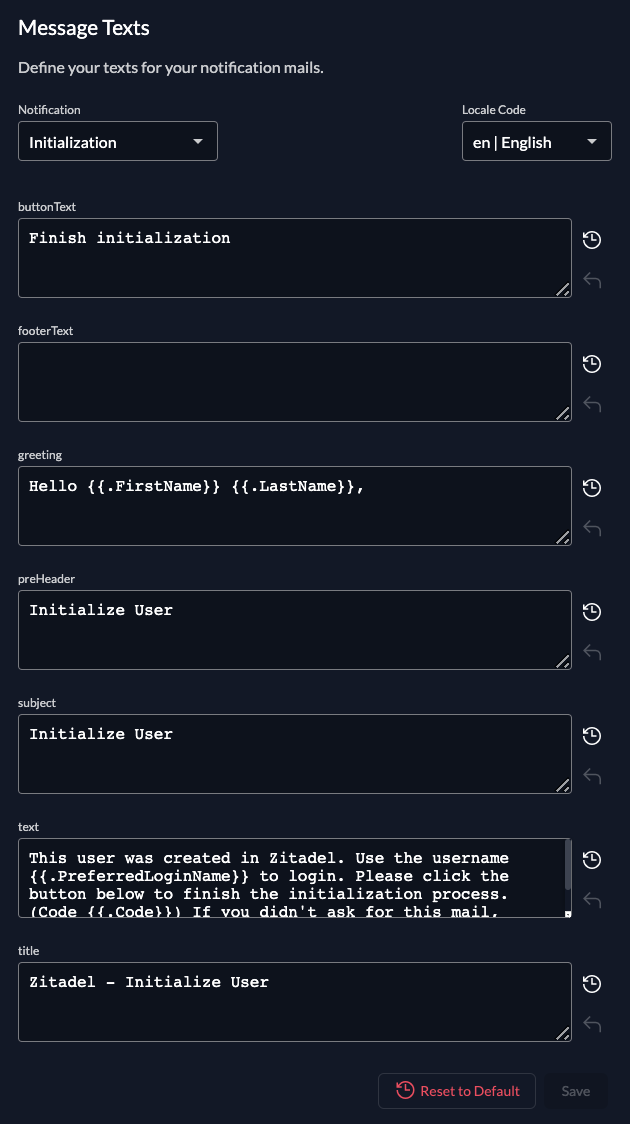
Message texts
These are the texts for your notification mails. Available for change are:
| Message Text | Description |
|---|---|
| Domain Claim | The Mail after an organisation claimed a domain for itself. Users on other organisations with this domain will be notified |
| Initialization | The mail after a user has been created. A code is part of the message which then must be verified on first login |
| Passwordless | The Mail to register an additional passwordless device by a link |
| Password Reset | The Mail to reset the password by a link |
| Verify Email | The mail after the email has been changed. A code is part of the message which then must be verified on the next login |
| Password Change | Notify the user, that the password has been changed. Can be configured in Notification |
You can set the locale of the translations on the right.
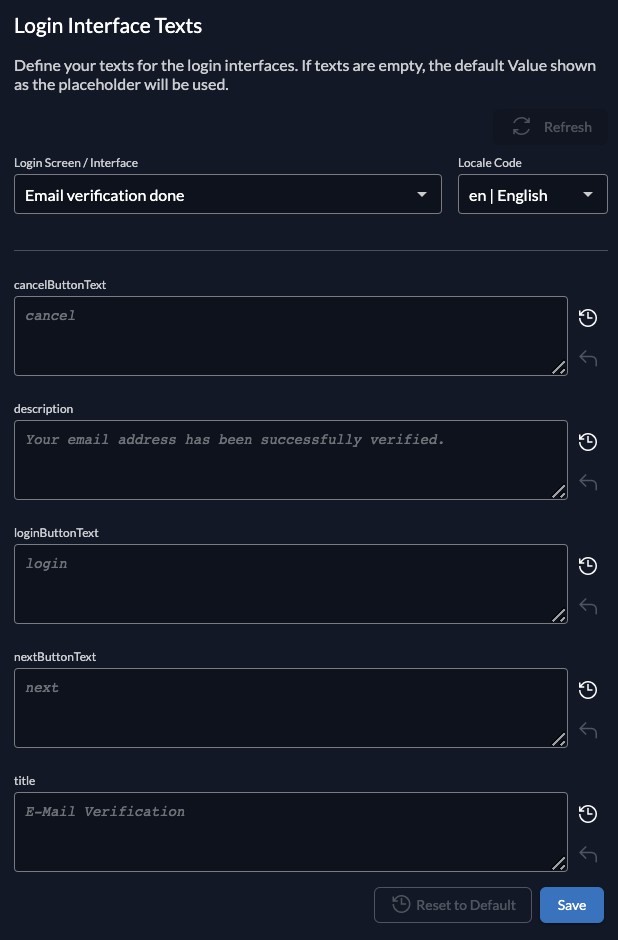
Login interface texts
These are the texts for the login. Just like for message texts, you can select the locale on the right.
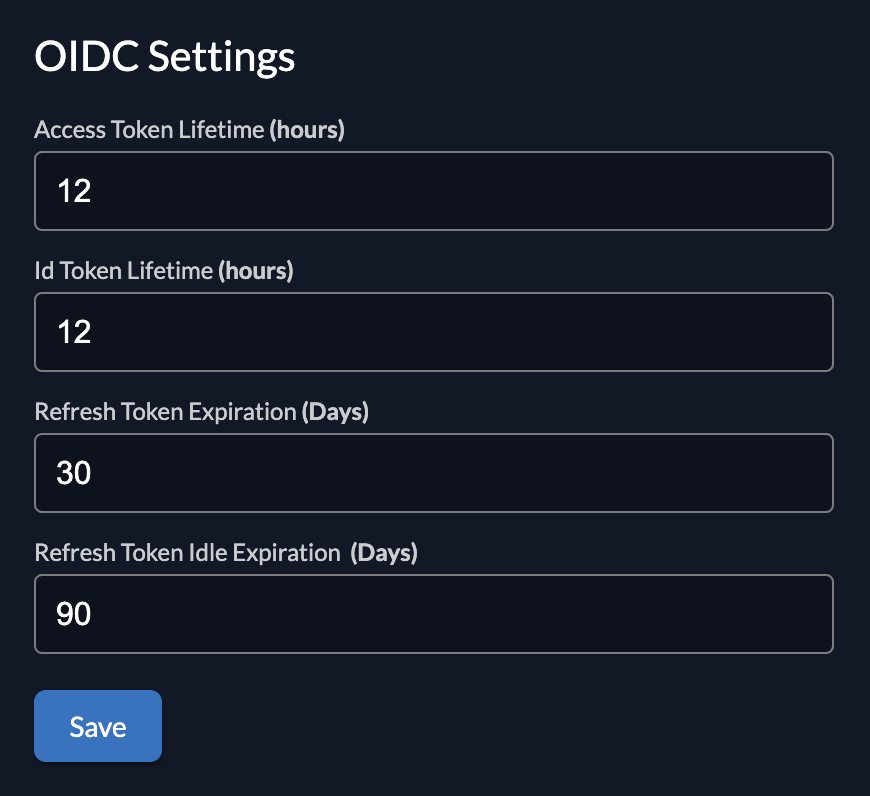
OIDC token lifetimes and expiration
Configure how long the different oidc tokens should life. You can set the following times:
- Access Token Lifetime
- ID Token Lifetime
- Refresh Token Expiration
- Refresh Token Idle Expiration
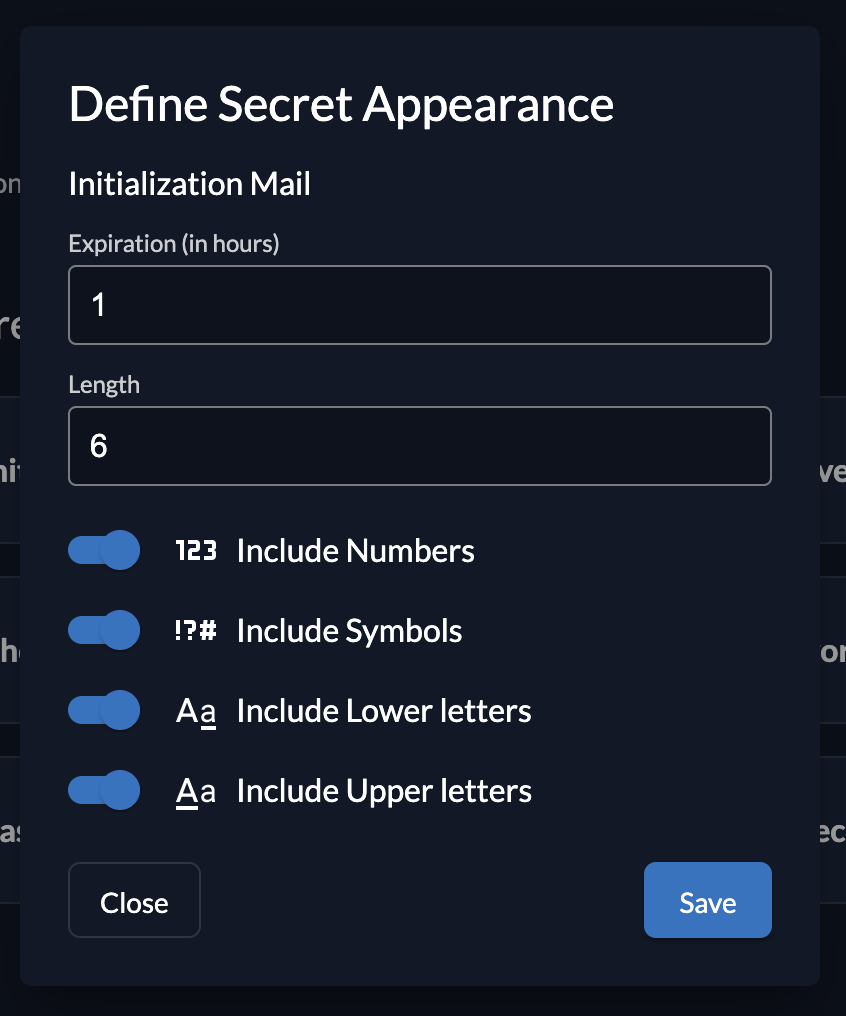
Secret appearance
ZITADEL has some different codes and secrets, that can be specified. You can configure what kind of characters should be included, how long the secret should be and the expiration. The following secrets can be configured:
- Initialization Mail Code
- Email verification code
- Phone verification code
- Password reset code
- Passwordless initialization code
- Application secrets
If your done with your instance settings, you can proceed setting up your organizations. Again, make sure you get an understanding on how your project is structured and then continue.